ESP DODGE JOURNEY 2019 Owners Manual
[x] Cancel search | Manufacturer: DODGE, Model Year: 2019, Model line: JOURNEY, Model: DODGE JOURNEY 2019Pages: 524, PDF Size: 5.29 MB
Page 2 of 524

VEHICLES SOLD IN CANADA
With respect to any Vehicles Sold in Canada, the name
FCA US LLC shall be deemed to be deleted and the name
FCA Canada Inc. used in substitution therefore.
DRIVING AND ALCOHOL
Drunken driving is one of the most frequent causes of
accidents.
Your driving ability can be seriously impaired with blood
alcohol levels far below the legal minimum. If you are
drinking, don’t drive. Ride with a designated non-
drinking driver, call a cab, a friend, or use public trans-
portation.
WARNING!
Driving after drinking can lead to an accident.
Your perceptions are less sharp, your reflexes are
slower, and your judgment is impaired when you
have been drinking. Never drink and then drive.
This manual illustrates and describes the operation of
features and equipment that are either standard or op-
tional on this vehicle. This manual may also include a
description of features and equipment that are no longer
available or were not ordered on this vehicle. Please
disregard any features and equipment described in this
manual that are not on this vehicle.
FCA US LLC reserves the right to make changes in design
and specifications, and/or make additions to or improve-
ments to its products without imposing any obligation
upon itself to install them on products previously manu-
factured.
Copyright © 2018 FCA US LLC
Page 19 of 524
KEYS
Key Fob
Your vehicle uses a keyless ignition system. The ignition
system consists of a key fob with Remote Keyless Entry
(RKE) and a START/STOP push button ignition system.
The Remote Keyless Entry system consists of a key fob and
Keyless Enter-N-Go feature if equipped.
NOTE:The key fob may not be found if it is located next to
a mobile phone, laptop or other electronic device; these
devices may block the key fob’s wireless signal.
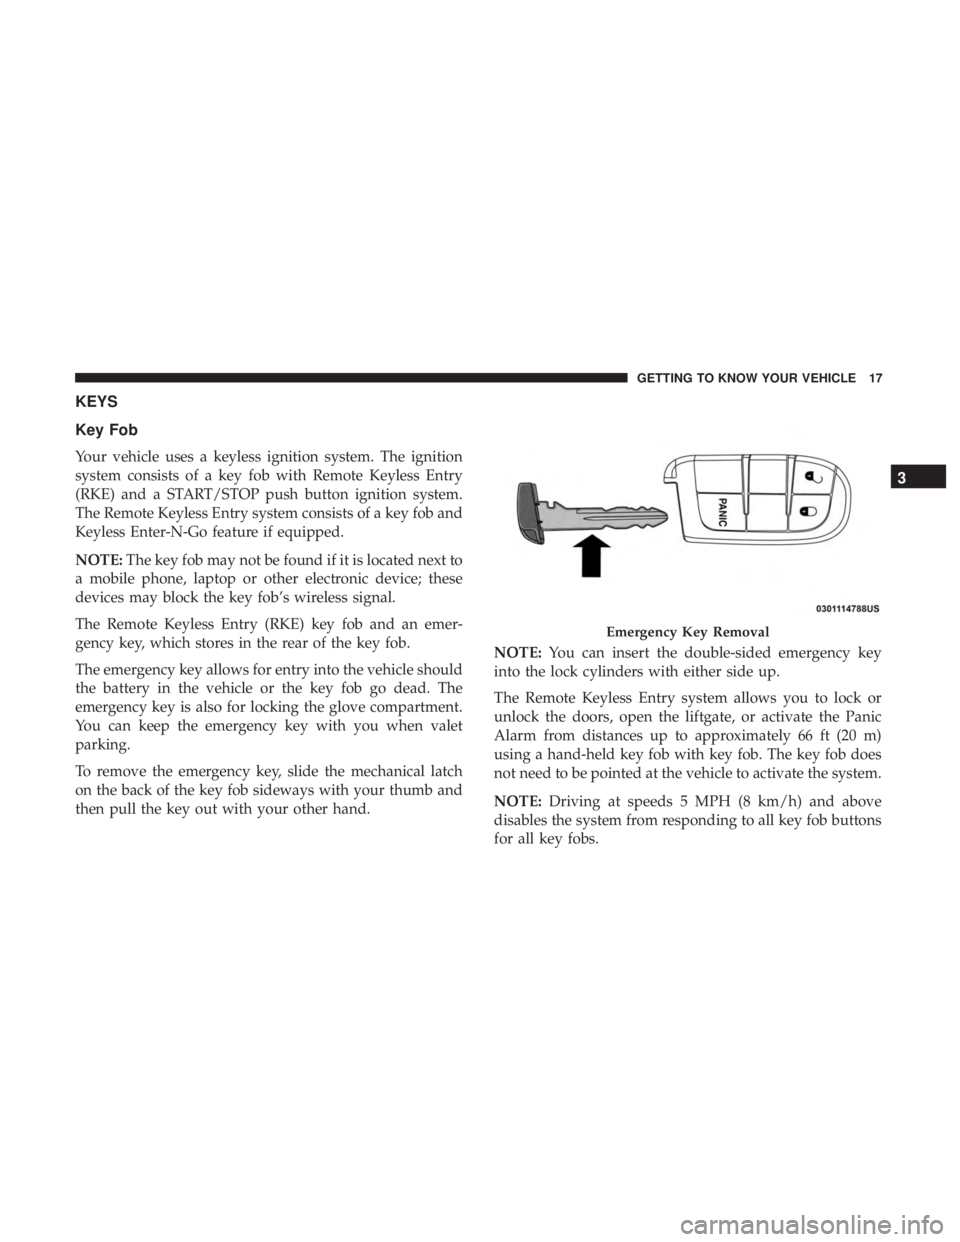
The Remote Keyless Entry (RKE) key fob and an emer-
gency key, which stores in the rear of the key fob.
The emergency key allows for entry into the vehicle should
the battery in the vehicle or the key fob go dead. The
emergency key is also for locking the glove compartment.
You can keep the emergency key with you when valet
parking.
To remove the emergency key, slide the mechanical latch
on the back of the key fob sideways with your thumb and
then pull the key out with your other hand. NOTE:
You can insert the double-sided emergency key
into the lock cylinders with either side up.
The Remote Keyless Entry system allows you to lock or
unlock the doors, open the liftgate, or activate the Panic
Alarm from distances up to approximately 66 ft (20 m)
using a hand-held key fob with key fob. The key fob does
not need to be pointed at the vehicle to activate the system.
NOTE: Driving at speeds 5 MPH (8 km/h) and above
disables the system from responding to all key fob buttons
for all key fobs.
Emergency Key Removal
3
GETTING TO KNOW YOUR VEHICLE 17
Page 23 of 524
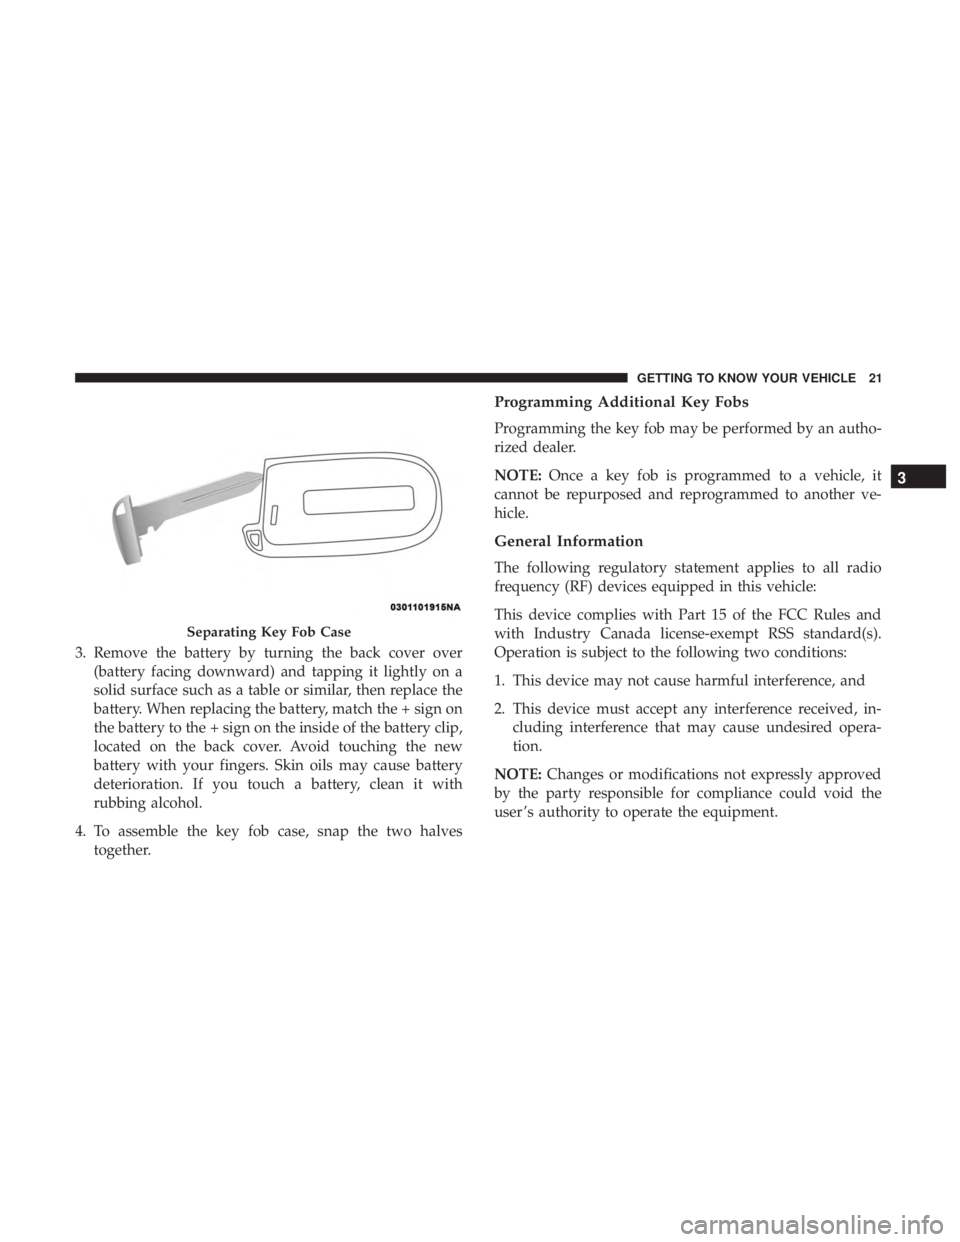
3. Remove the battery by turning the back cover over(battery facing downward) and tapping it lightly on a
solid surface such as a table or similar, then replace the
battery. When replacing the battery, match the + sign on
the battery to the + sign on the inside of the battery clip,
located on the back cover. Avoid touching the new
battery with your fingers. Skin oils may cause battery
deterioration. If you touch a battery, clean it with
rubbing alcohol.
4. To assemble the key fob case, snap the two halves together.
Programming Additional Key Fobs
Programming the key fob may be performed by an autho-
rized dealer.
NOTE: Once a key fob is programmed to a vehicle, it
cannot be repurposed and reprogrammed to another ve-
hicle.
General Information
The following regulatory statement applies to all radio
frequency (RF) devices equipped in this vehicle:
This device complies with Part 15 of the FCC Rules and
with Industry Canada license-exempt RSS standard(s).
Operation is subject to the following two conditions:
1. This device may not cause harmful interference, and
2. This device must accept any interference received, in- cluding interference that may cause undesired opera-
tion.
NOTE: Changes or modifications not expressly approved
by the party responsible for compliance could void the
user ’s authority to operate the equipment.
Separating Key Fob Case
3
GETTING TO KNOW YOUR VEHICLE 21
Page 29 of 524
General Information
The following regulatory statement applies to all radio
frequency (RF) devices equipped in this vehicle:
This device complies with Part 15 of the FCC Rules and
with Industry Canada license-exempt RSS standard(s).
Operation is subject to the following two conditions:
1. This device may not cause harmful interference, and
2. This device must accept any interference received, in-cluding interference that may cause undesired opera-
tion.
NOTE: Changes or modifications not expressly approved
by the party responsible for compliance could void the
user ’s authority to operate the equipment.
SENTRY KEY
The Sentry Key Immobilizer system prevents unauthorized
vehicle operation by disabling the engine. The system does
not need to be armed or activated. Operation is automatic,
regardless of whether the vehicle is locked or unlocked.
The system uses a key fob and a Keyless Push Button
Ignition, and a RF receiver to prevent unauthorized vehicle
operation. Therefore, only key fobs that are programmed to
the vehicle can be used to start and operate the vehicle. If an invalid key fob is used to attempt to start and operate
the vehicle, the system will not allow the engine to crank.
If an invalid key fob is used to start the engine, the system
will shut the engine off in two seconds.
After placing the ignition to the ON/RUN mode, the
vehicle security light will turn on for three seconds for a
bulb check. If the light remains on after the bulb check, it
indicates that there is a problem with the electronics. In
addition, if the light begins to flash after the bulb check, it
indicates that someone used an invalid key fob to start the
engine. Either of these conditions will result in the engine
being shut off after two seconds.
If the vehicle security light turns on during normal vehicle
operation (vehicle running for longer than 10 seconds), it
indicates that there is a fault in the electronics. Should this
occur, have the vehicle serviced as soon as possible by an
authorized dealer.
CAUTION!
The Sentry Key Immobilizer system is not compatible
with some aftermarket remote starting systems. Use of
these systems may result in vehicle starting problems
and loss of security protection.
3
GETTING TO KNOW YOUR VEHICLE 27
Page 30 of 524
All of the key fobs provided with your new vehicle have
been programmed to the vehicle electronics.
Key Programming
Programming key fobs may be performed at an authorized
dealer.
Replacement Keys
NOTE:Only key fobs that are programmed to the vehicle
electronics can be used to start and operate the vehicle.
Once a key fob is programmed to a vehicle, it cannot be
programmed to any other vehicle.
CAUTION!
• Always remove the key fobs from the vehicle and
lock all doors when leaving the vehicle unattended.
• For vehicles equipped with Keyless Enter-N-Go —
Ignition, always remember to place the ignition in
the OFF position.
NOTE: Duplication of key fobs may be performed at an
authorized dealer. This procedure consists of programming
a blank key fob to the vehicle electronics. A blank key fob
is one that has never been programmed. When having the Sentry Key Immobilizer System serviced,
bring all vehicle keys with you to an authorized dealer.
General Information
The following regulatory statement applies to all radio
frequency (RF) devices equipped in this vehicle:
This device complies with Part 15 of the FCC Rules and
with Industry Canada license-exempt RSS standard(s).
Operation is subject to the following two conditions:
1. This device may not cause harmful interference, and
2. This device must accept any interference received, in-
cluding interference that may cause undesired opera-
tion.
NOTE: Changes or modifications not expressly approved
by the party responsible for compliance could void the
user ’s authority to operate the equipment.
28 GETTING TO KNOW YOUR VEHICLE
Page 35 of 524
To change the current setting, refer to “Uconnect Settings”
in “Multimedia” for further information.
NOTE:Use the Automatic Unlock Doors On Exit feature
in accordance with local laws.
Keyless Enter-N-Go — Passive Entry (If Equipped)
The Passive Entry system is an enhancement to the vehi-
cle’s Remote Keyless Entry (RKE) system and a feature of
Keyless Enter-N-Go. This feature allows you to lock and
unlock the vehicle’s door(s) without having to push the key
fob lock or unlock buttons.
NOTE:
• Passive Entry may be programmed ON/OFF; refer to
“Uconnect Settings” in “Multimedia” for further infor-
mation.
• If wearing gloves on your hands, or if it has been
raining/snowing on the Passive Entry door handle, the
unlock sensitivity can be affected, resulting in a slower
response time.
• If the vehicle is unlocked by Passive Entry and no door
is opened within 60 seconds, the vehicle will re-lock and
if equipped will arm the security alarm. •
The key fob may not be detected by the vehicle passive
entry system if it is located next to a mobile phone,
laptop, or other electronic device; these devices may
interfere with the key fob’s wireless signal and prevent
the passive entry system from locking/unlocking the
vehicle.
To Unlock From The Driver’s Side:
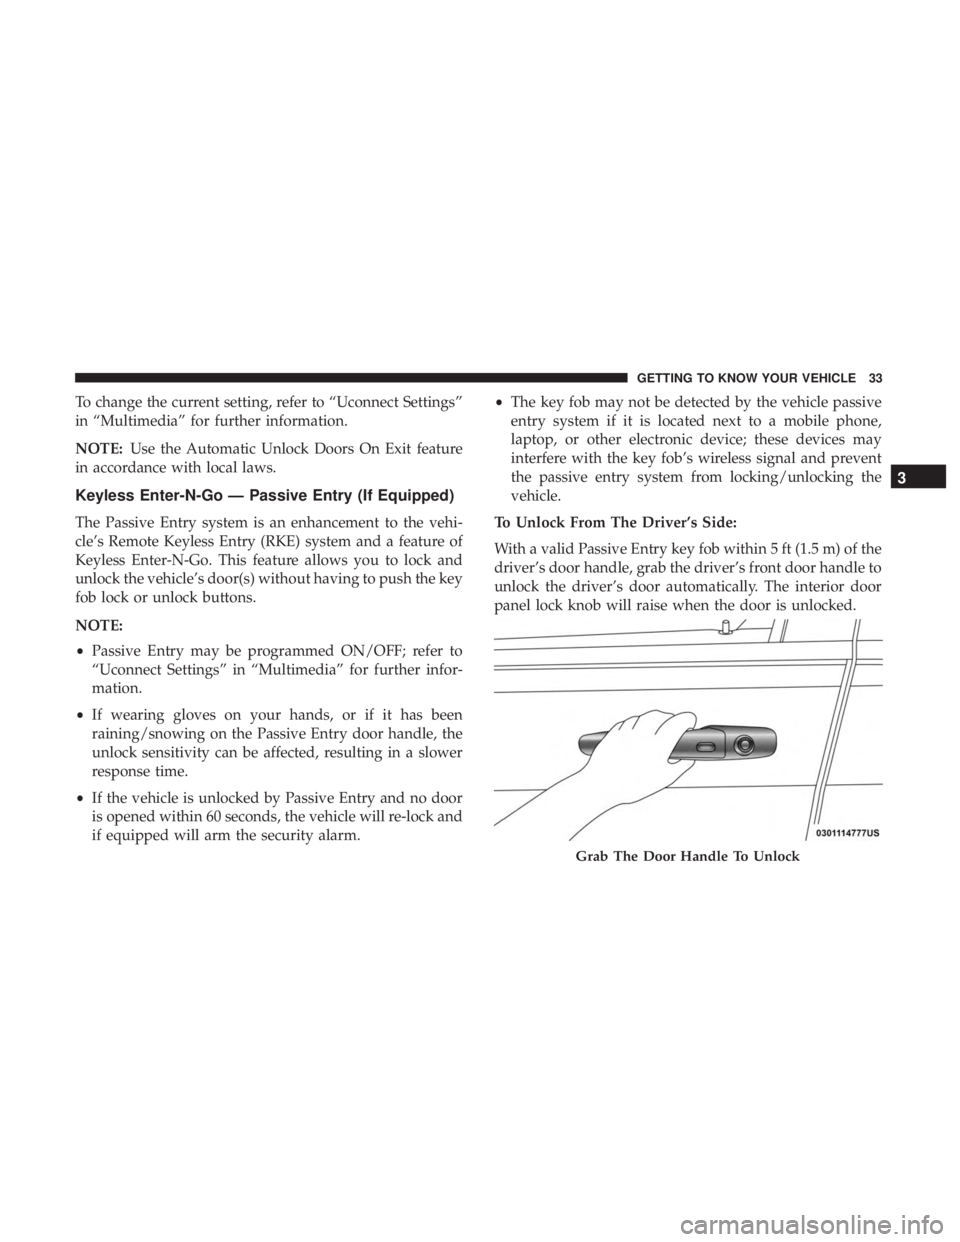
With a valid Passive Entry key fob within 5 ft (1.5 m) of the
driver’s door handle, grab the driver’s front door handle to
unlock the driver’s door automatically. The interior door
panel lock knob will raise when the door is unlocked.
Grab The Door Handle To Unlock
3
GETTING TO KNOW YOUR VEHICLE 33
Page 39 of 524
1. This device may not cause harmful interference, and
2. This device must accept any interference received, in-cluding interference that may cause undesired opera-
tion.
NOTE: Changes or modifications not expressly approved
by the party responsible for compliance could void the
user ’s authority to operate the equipment.
Child-Protection Door Lock System — Rear Doors
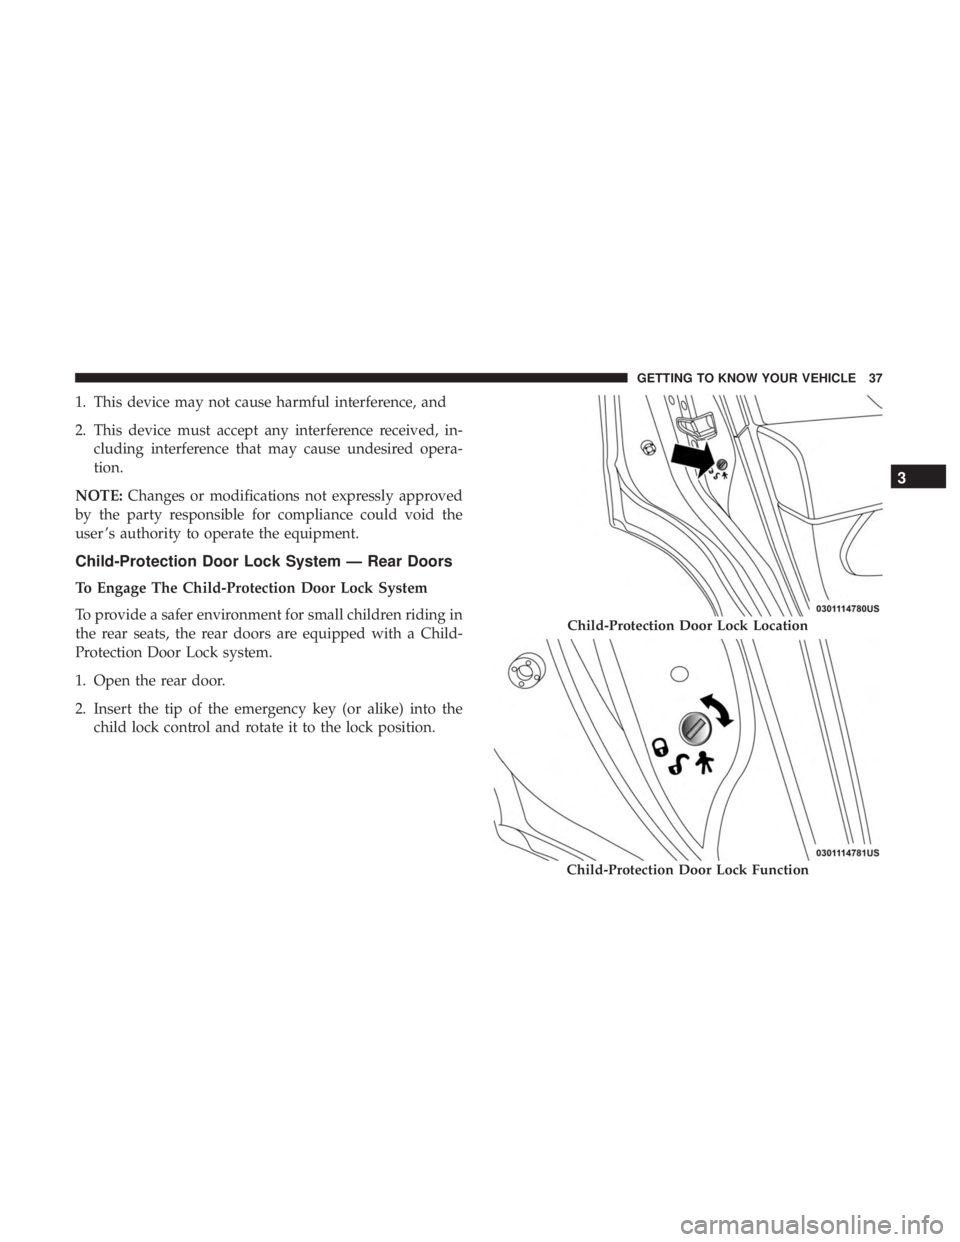
To Engage The Child-Protection Door Lock System
To provide a safer environment for small children riding in
the rear seats, the rear doors are equipped with a Child-
Protection Door Lock system.
1. Open the rear door.
2. Insert the tip of the emergency key (or alike) into the child lock control and rotate it to the lock position.
Child-Protection Door Lock Location
Child-Protection Door Lock Function
3
GETTING TO KNOW YOUR VEHICLE 37
Page 53 of 524
If the HI-level setting is selected, the system will automati-
cally switch to LO-level after approximately 60 minutes of
continuous operation. At that time, the display will change
from HI to LO, indicating the change. The LO-level setting
will turn off automatically after approximately 45 minutes.
NOTE:The engine must be running for the heated seats to
operate.
Vehicles Equipped With Remote Start
On models that are equipped with remote start, the heated
seats can be programmed to come on during a remote start.
This feature can be programmed through the Uconnect
system. Refer to “Uconnect Settings” in “Multimedia” for
further information.
WARNING!
• Persons who are unable to feel pain to the skin
because of advanced age, chronic illness, diabetes,
spinal cord injury, medication, alcohol use, exhaus-
tion or other physical condition must exercise care
when using the seat heater. It may cause burns even
at low temperatures, especially if used for long
periods of time.
(Continued)
WARNING! (Continued)
•Do not place anything on the seat or seatback that
insulates against heat, such as a blanket or cushion.
This may cause the seat heater to overheat. Sitting in
a seat that has been overheated could cause serious
burns due to the increased surface temperature of the
seat.
Seatback/Armrest — Second Row Passenger Seat
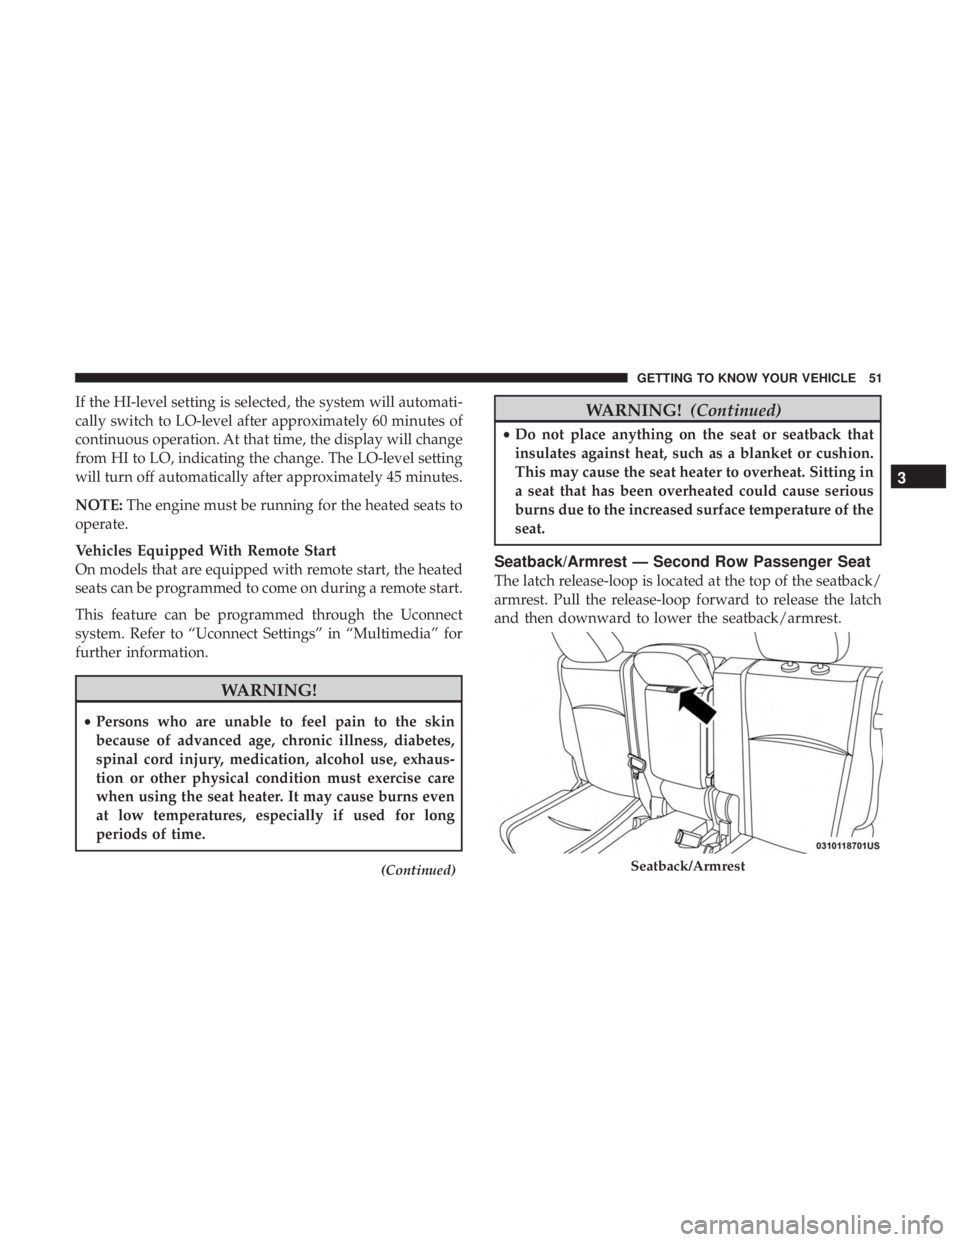
The latch release-loop is located at the top of the seatback/
armrest. Pull the release-loop forward to release the latch
and then downward to lower the seatback/armrest.
Seatback/Armrest
3
GETTING TO KNOW YOUR VEHICLE 51
Page 59 of 524
WARNING!
Do not adjust the steering column while driving.
Adjusting the steering column while driving or driv-
ing with the steering column unlocked, could cause the
driver to lose control of the vehicle. Failure to follow
this warning may result in serious injury or death.
Heated Steering Wheel — If Equipped
The steering wheel contains a heating element that helps
warm your hands in cold weather. The heated steering
wheel has only one temperature setting. Once the heated
steering wheel has been turned on, it will stay on for an
average of 80 minutes before automatically shutting off.
This time will vary based on environmental temperatures.
The heated steering wheel can shut off early or may not
turn on when the steering wheel is already warm.
The heated steering wheel control button is located within
the Uconnect system. You can gain access to the control
button through the climate screen or the controls screen.
•Press the heated steering wheel button
once to turn
the heating element on.
• Press the heated steering wheel buttona second time
to turn the heating element off.
NOTE: The engine must be running for the heated steering
wheel to operate.
Vehicles Equipped With Remote Start
On models that are equipped with remote start, the heated
steering wheel can be programmed to come on during a
remote start through the Uconnect system. Refer to
“Uconnect Settings” in “Multimedia” for further informa-
tion.
WARNING!
• Persons who are unable to feel pain to the skin
because of advanced age, chronic illness, diabetes,
spinal cord injury, medication, alcohol use, exhaus-
tion, or other physical conditions must exercise care
when using the steering wheel heater. It may cause
burns even at low temperatures, especially if used
for long periods.
• Do not place anything on the steering wheel that
insulates against heat, such as a blanket or steering
wheel covers of any type and material. This may
cause the steering wheel heater to overheat.
3
GETTING TO KNOW YOUR VEHICLE 57
Page 61 of 524
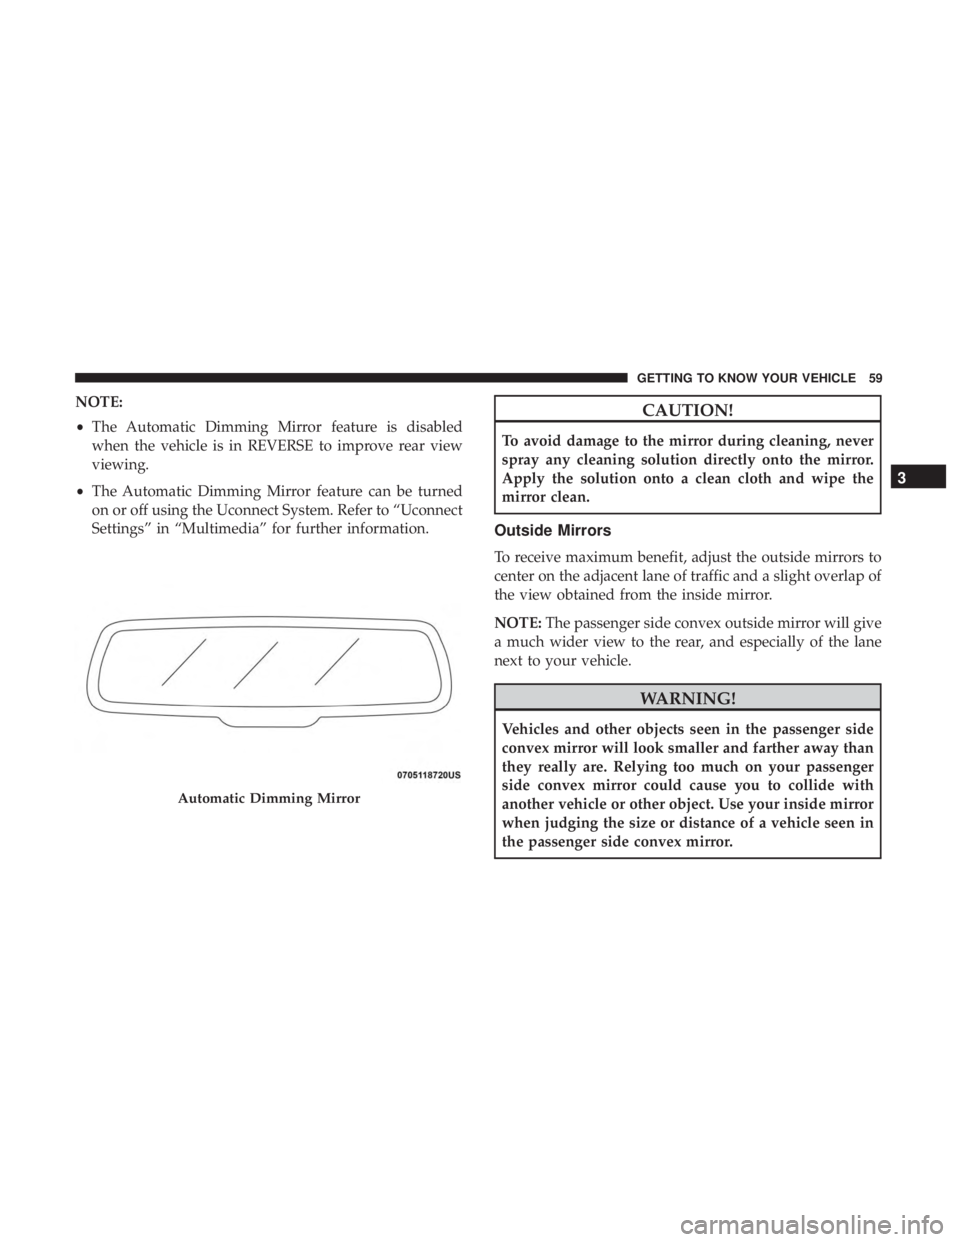
NOTE:
•The Automatic Dimming Mirror feature is disabled
when the vehicle is in REVERSE to improve rear view
viewing.
• The Automatic Dimming Mirror feature can be turned
on or off using the Uconnect System. Refer to “Uconnect
Settings” in “Multimedia” for further information.CAUTION!
To avoid damage to the mirror during cleaning, never
spray any cleaning solution directly onto the mirror.
Apply the solution onto a clean cloth and wipe the
mirror clean.
Outside Mirrors
To receive maximum benefit, adjust the outside mirrors to
center on the adjacent lane of traffic and a slight overlap of
the view obtained from the inside mirror.
NOTE: The passenger side convex outside mirror will give
a much wider view to the rear, and especially of the lane
next to your vehicle.
WARNING!
Vehicles and other objects seen in the passenger side
convex mirror will look smaller and farther away than
they really are. Relying too much on your passenger
side convex mirror could cause you to collide with
another vehicle or other object. Use your inside mirror
when judging the size or distance of a vehicle seen in
the passenger side convex mirror.
Automatic Dimming Mirror
3
GETTING TO KNOW YOUR VEHICLE 59