center console DODGE JOURNEY 2019 Owners Manual
[x] Cancel search | Manufacturer: DODGE, Model Year: 2019, Model line: JOURNEY, Model: DODGE JOURNEY 2019Pages: 524, PDF Size: 5.29 MB
Page 116 of 524
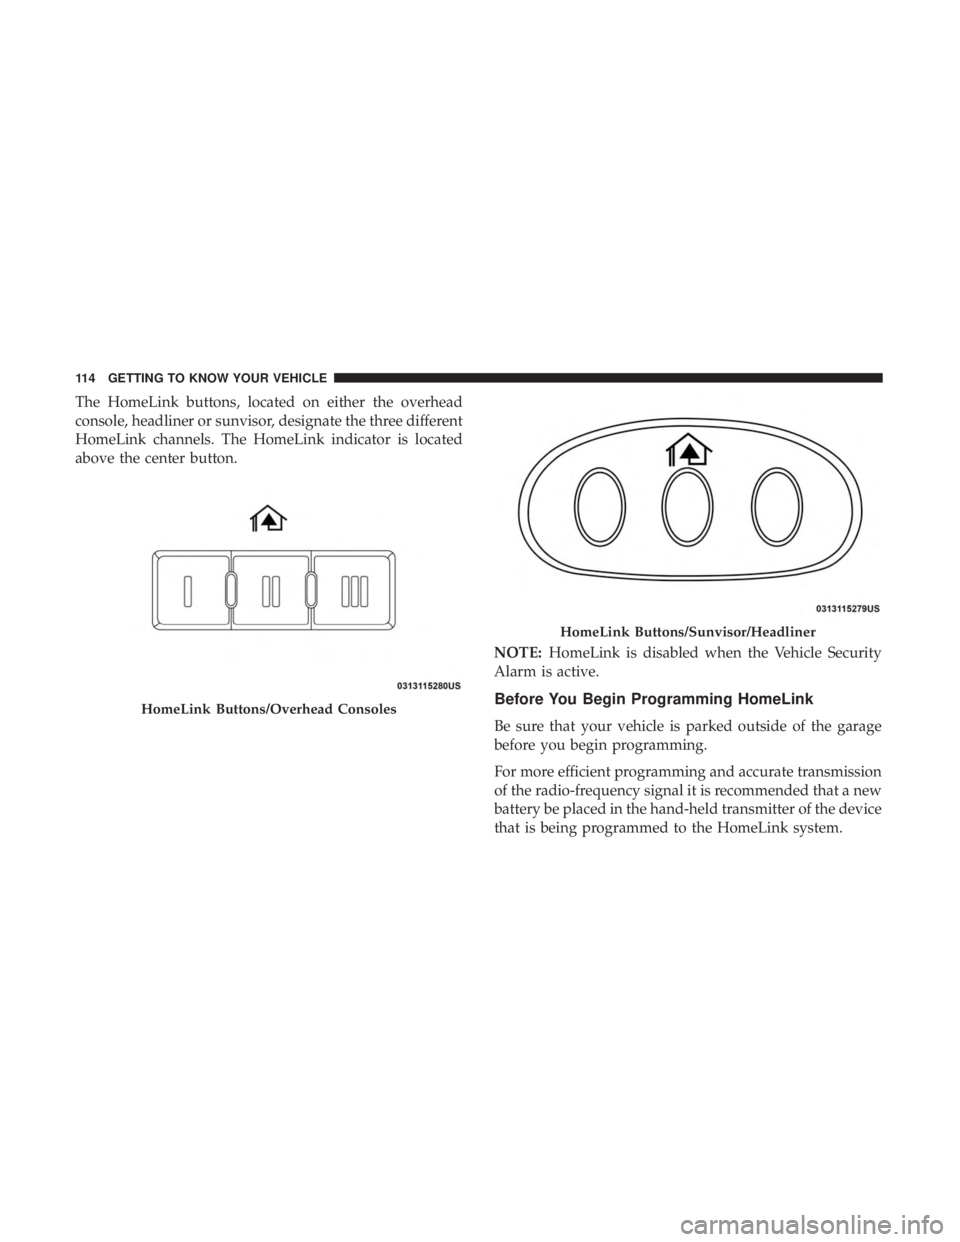
The HomeLink buttons, located on either the overhead
console, headliner or sunvisor, designate the three different
HomeLink channels. The HomeLink indicator is located
above the center button.NOTE:HomeLink is disabled when the Vehicle Security
Alarm is active.
Before You Begin Programming HomeLink
Be sure that your vehicle is parked outside of the garage
before you begin programming.
For more efficient programming and accurate transmission
of the radio-frequency signal it is recommended that a new
battery be placed in the hand-held transmitter of the device
that is being programmed to the HomeLink system.
HomeLink Buttons/Overhead Consoles
HomeLink Buttons/Sunvisor/Headliner
114 GETTING TO KNOW YOUR VEHICLE
Page 124 of 524
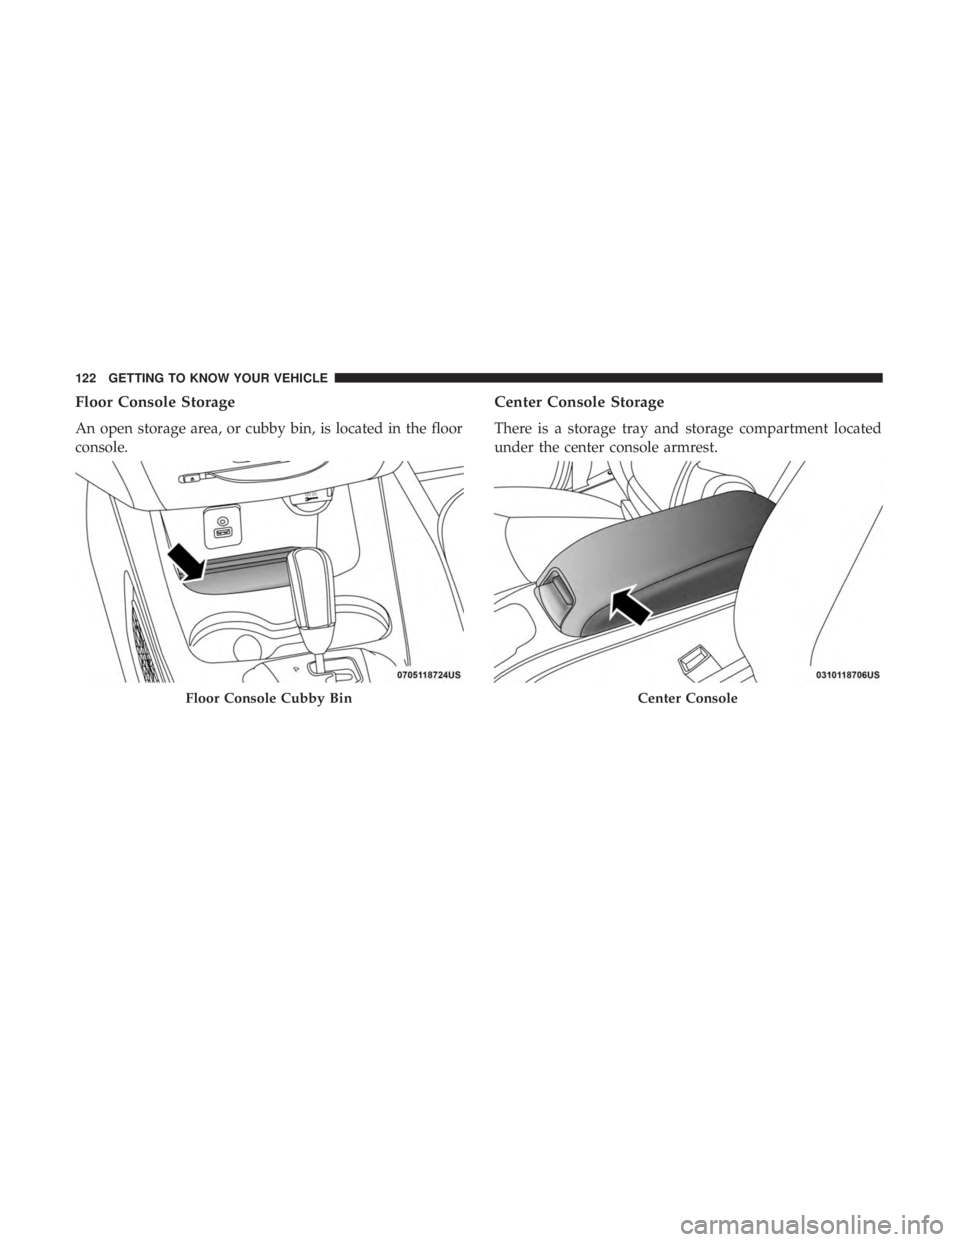
Floor Console Storage
An open storage area, or cubby bin, is located in the floor
console.
Center Console Storage
There is a storage tray and storage compartment located
under the center console armrest.
Floor Console Cubby BinCenter Console
122 GETTING TO KNOW YOUR VEHICLE
Page 125 of 524
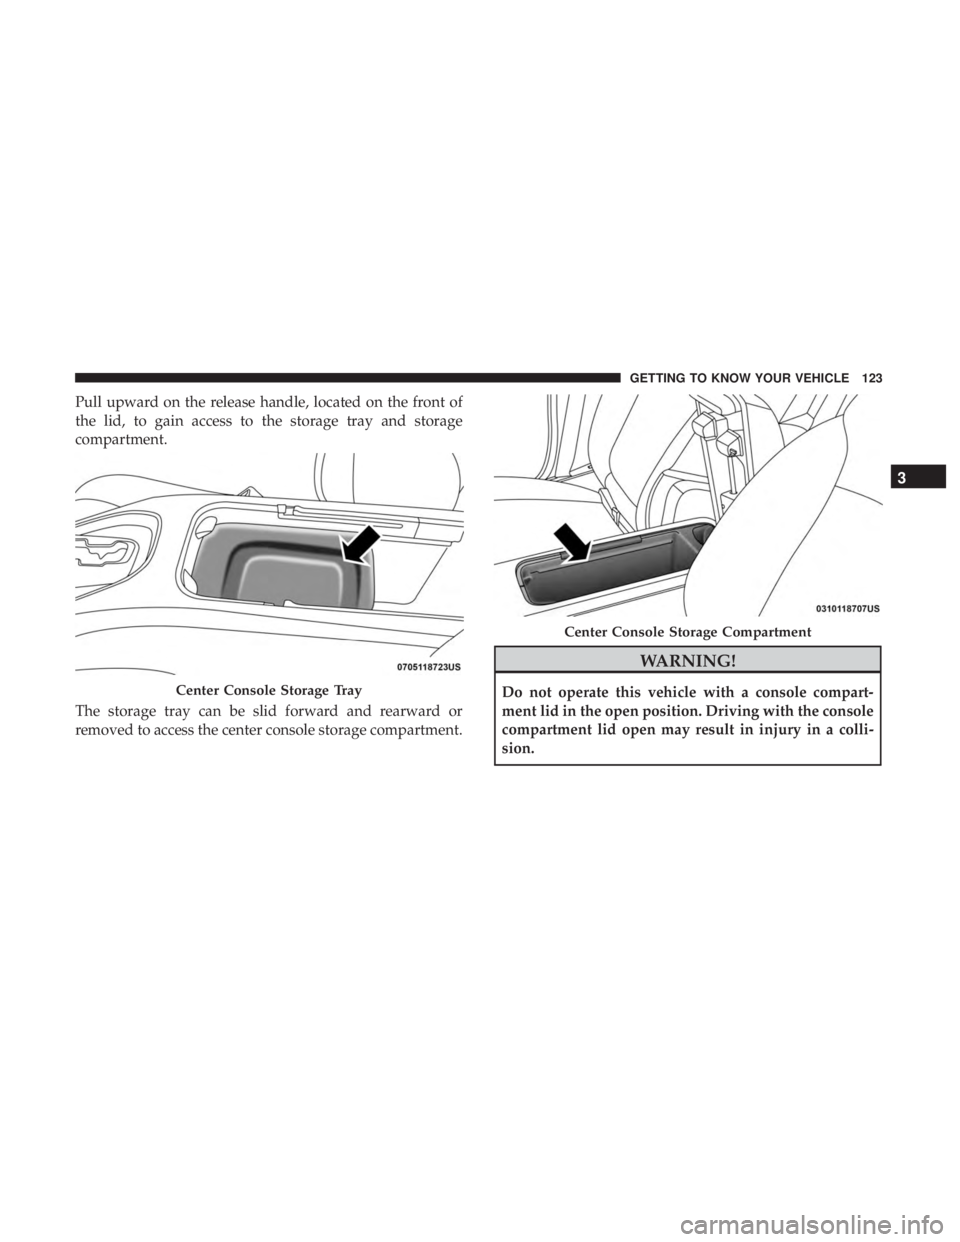
Pull upward on the release handle, located on the front of
the lid, to gain access to the storage tray and storage
compartment.
The storage tray can be slid forward and rearward or
removed to access the center console storage compartment.
WARNING!
Do not operate this vehicle with a console compart-
ment lid in the open position. Driving with the console
compartment lid open may result in injury in a colli-
sion.Center Console Storage Tray
Center Console Storage Compartment
3
GETTING TO KNOW YOUR VEHICLE 123
Page 126 of 524
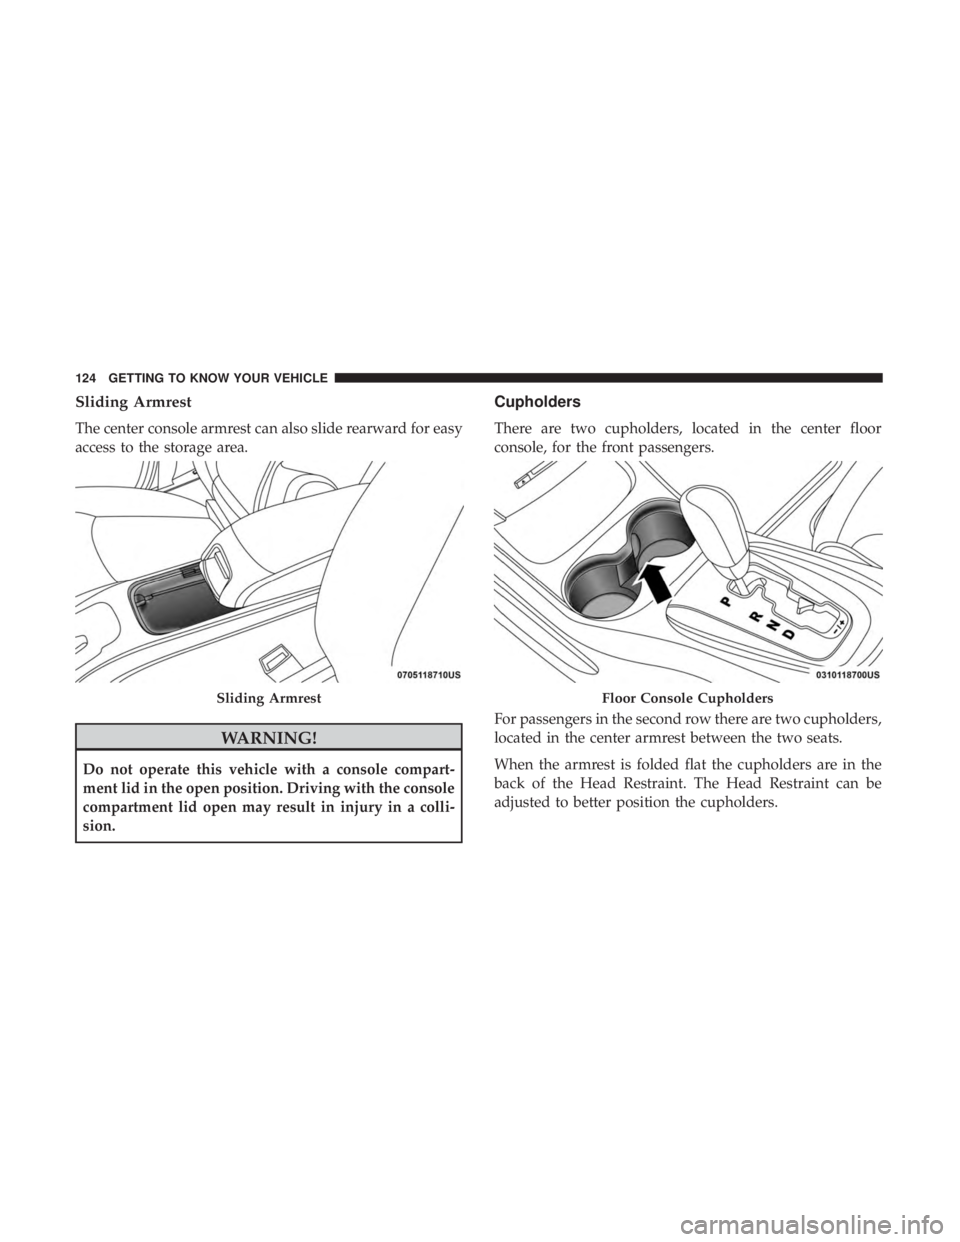
Sliding Armrest
The center console armrest can also slide rearward for easy
access to the storage area.
WARNING!
Do not operate this vehicle with a console compart-
ment lid in the open position. Driving with the console
compartment lid open may result in injury in a colli-
sion.
Cupholders
There are two cupholders, located in the center floor
console, for the front passengers.
For passengers in the second row there are two cupholders,
located in the center armrest between the two seats.
When the armrest is folded flat the cupholders are in the
back of the Head Restraint. The Head Restraint can be
adjusted to better position the cupholders.
Sliding ArmrestFloor Console Cupholders
124 GETTING TO KNOW YOUR VEHICLE
Page 128 of 524
Power Outlets
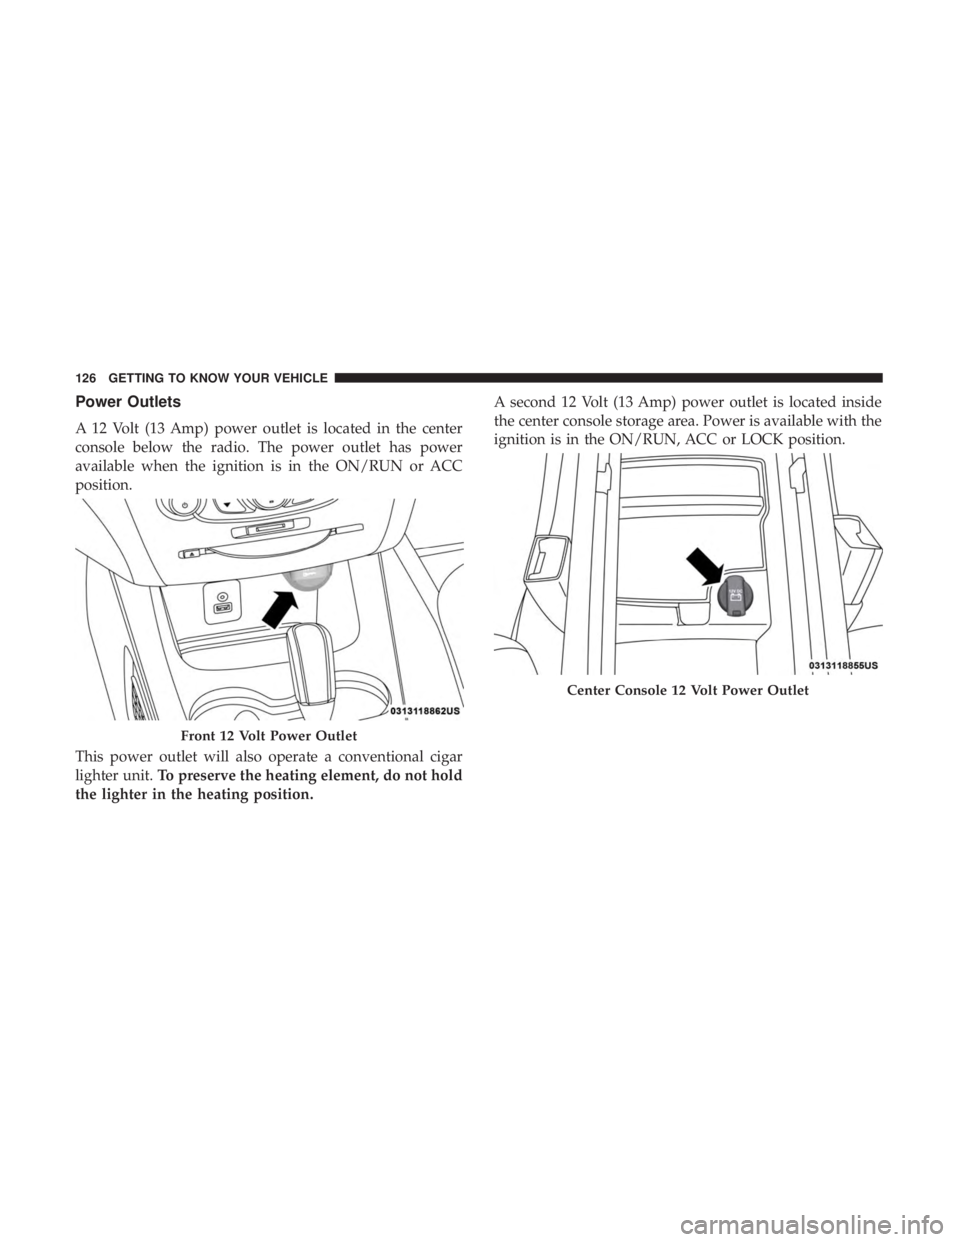
A 12 Volt (13 Amp) power outlet is located in the center
console below the radio. The power outlet has power
available when the ignition is in the ON/RUN or ACC
position.
This power outlet will also operate a conventional cigar
lighter unit.To preserve the heating element, do not hold
the lighter in the heating position. A second 12 Volt (13 Amp) power outlet is located inside
the center console storage area. Power is available with the
ignition is in the ON/RUN, ACC or LOCK position.
Front 12 Volt Power Outlet
Center Console 12 Volt Power Outlet
126 GETTING TO KNOW YOUR VEHICLE
Page 129 of 524
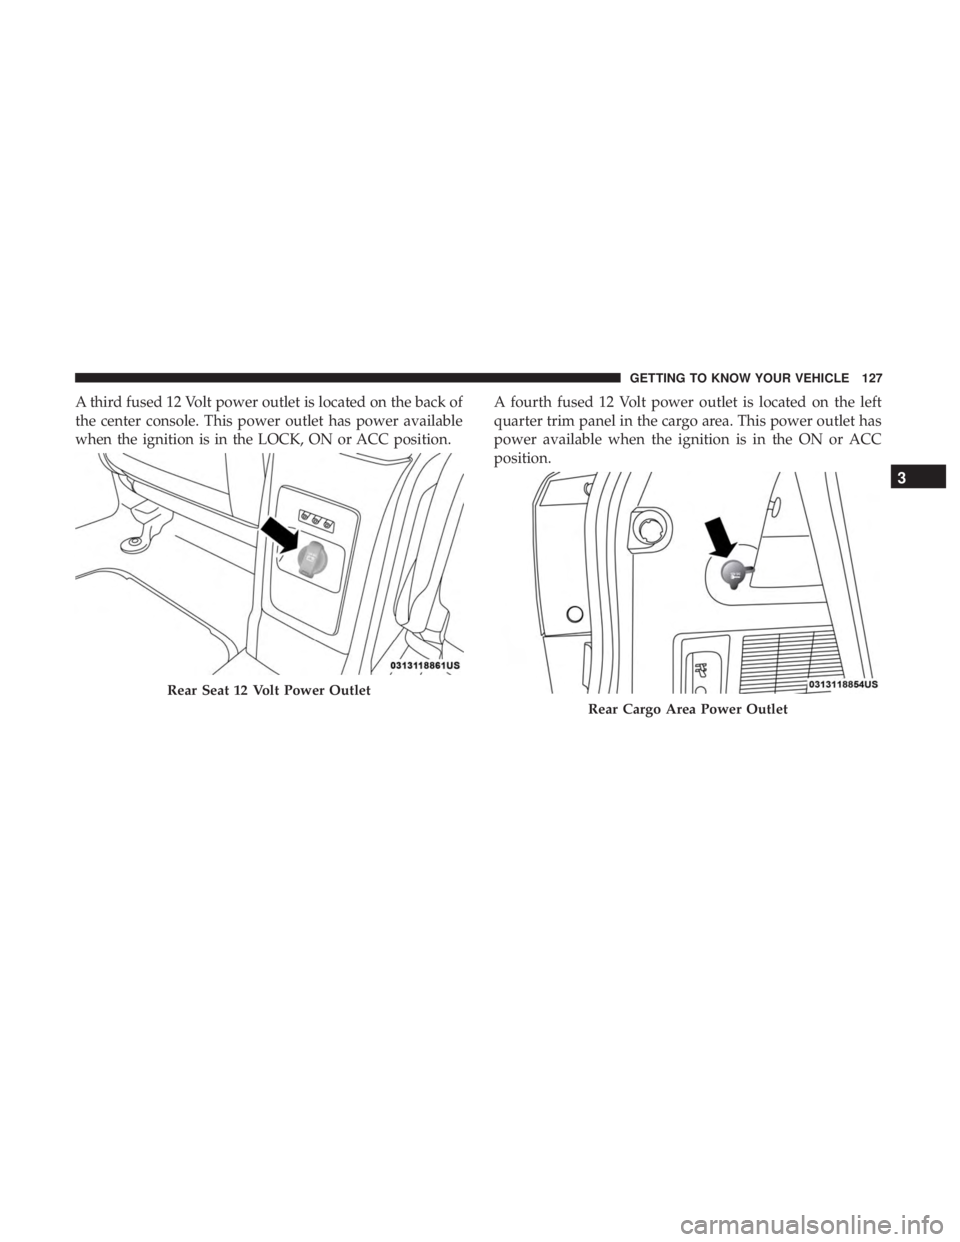
A third fused 12 Volt power outlet is located on the back of
the center console. This power outlet has power available
when the ignition is in the LOCK, ON or ACC position.A fourth fused 12 Volt power outlet is located on the left
quarter trim panel in the cargo area. This power outlet has
power available when the ignition is in the ON or ACC
position.
Rear Seat 12 Volt Power Outlet
Rear Cargo Area Power Outlet
3
GETTING TO KNOW YOUR VEHICLE 127
Page 130 of 524
CAUTION!
•Do not exceed the maximum power of 160 Watts
(13 Amps) at 12 Volts. If the 160 Watt (13 Amp) power
rating is exceeded the fuse protecting the system will
need to be replaced.
• The power outlet on the bottom of the center console
shares the fuse with the power outlet on the back of
the console. The combined usage must not exceed
160 Watts (13 Amps) at 12 Volts.
•
Power outlets are designed for accessory plugs only.
Do not insert any other object in the power outlets as
this will damage the outlet and blow the fuse. Im-
proper use of the power outlet can cause damage not
covered by your New Vehicle Limited Warranty.
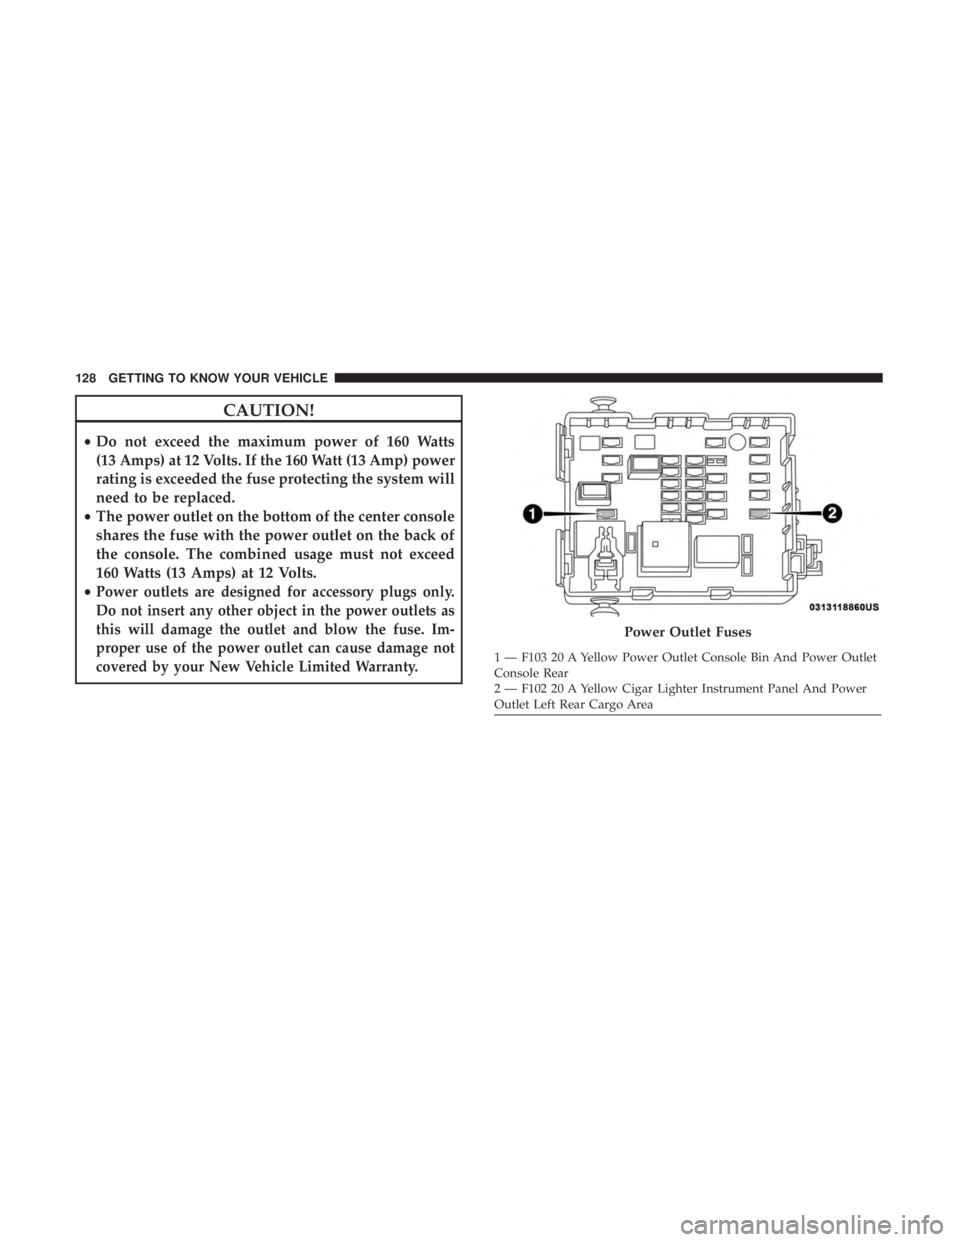
Power Outlet Fuses
1 — F103 20 A Yellow Power Outlet Console Bin And Power Outlet
Console Rear
2 — F102 20 A Yellow Cigar Lighter Instrument Panel And Power
Outlet Left Rear Cargo Area
128 GETTING TO KNOW YOUR VEHICLE
Page 132 of 524
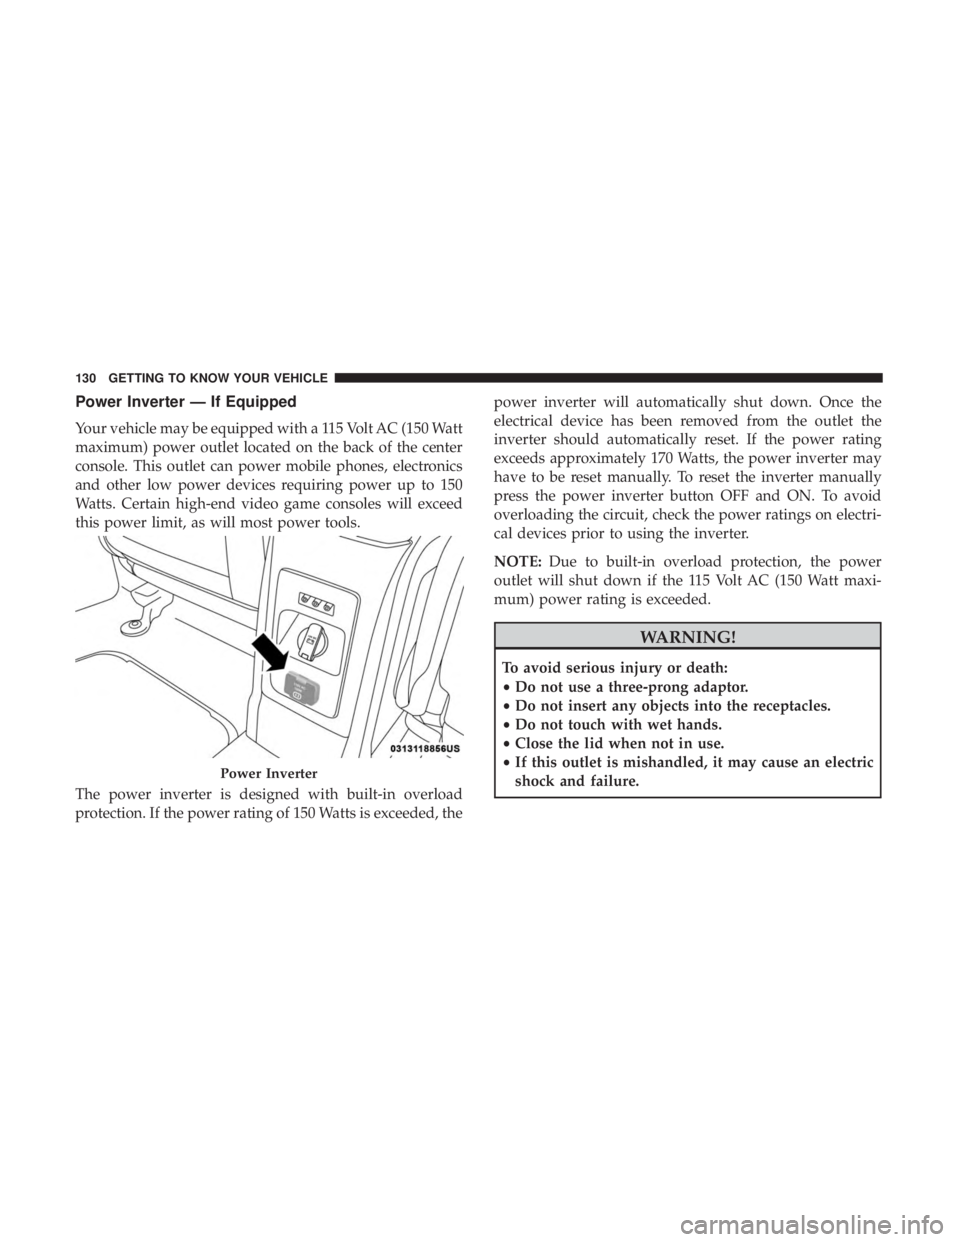
Power Inverter — If Equipped
Your vehicle may be equipped with a 115 Volt AC (150 Watt
maximum) power outlet located on the back of the center
console. This outlet can power mobile phones, electronics
and other low power devices requiring power up to 150
Watts. Certain high-end video game consoles will exceed
this power limit, as will most power tools.
The power inverter is designed with built-in overload
protection. If the power rating of 150 Watts is exceeded, thepower inverter will automatically shut down. Once the
electrical device has been removed from the outlet the
inverter should automatically reset. If the power rating
exceeds approximately 170 Watts, the power inverter may
have to be reset manually. To reset the inverter manually
press the power inverter button OFF and ON. To avoid
overloading the circuit, check the power ratings on electri-
cal devices prior to using the inverter.
NOTE:
Due to built-in overload protection, the power
outlet will shut down if the 115 Volt AC (150 Watt maxi-
mum) power rating is exceeded.
WARNING!
To avoid serious injury or death:
• Do not use a three-prong adaptor.
• Do not insert any objects into the receptacles.
• Do not touch with wet hands.
• Close the lid when not in use.
• If this outlet is mishandled, it may cause an electric
shock and failure.
Power Inverter
130 GETTING TO KNOW YOUR VEHICLE
Page 133 of 524
Power Inverter Operation
The power inverter is turned On and Off using the
Uconnect System.
Vehicles Equipped With Radio 4.3
To turn the power inverter on or off perform the following:
1. Press the “More” button on the faceplate (located next tothe Uconnect display).
2. Press the “Outlet” button on the touchscreen (located on the Uconnect display) to turn the power inverter On or
Off.
Vehicles Equipped With Uconnect 3/3 NAV
To turn the power inverter on or off perform the following:
1. Press the “Controls” button on the touchscreen.
2. Press the “Outlet” button on the touchscreen to turn the power inverter On or Off.
Sunglasses Storage
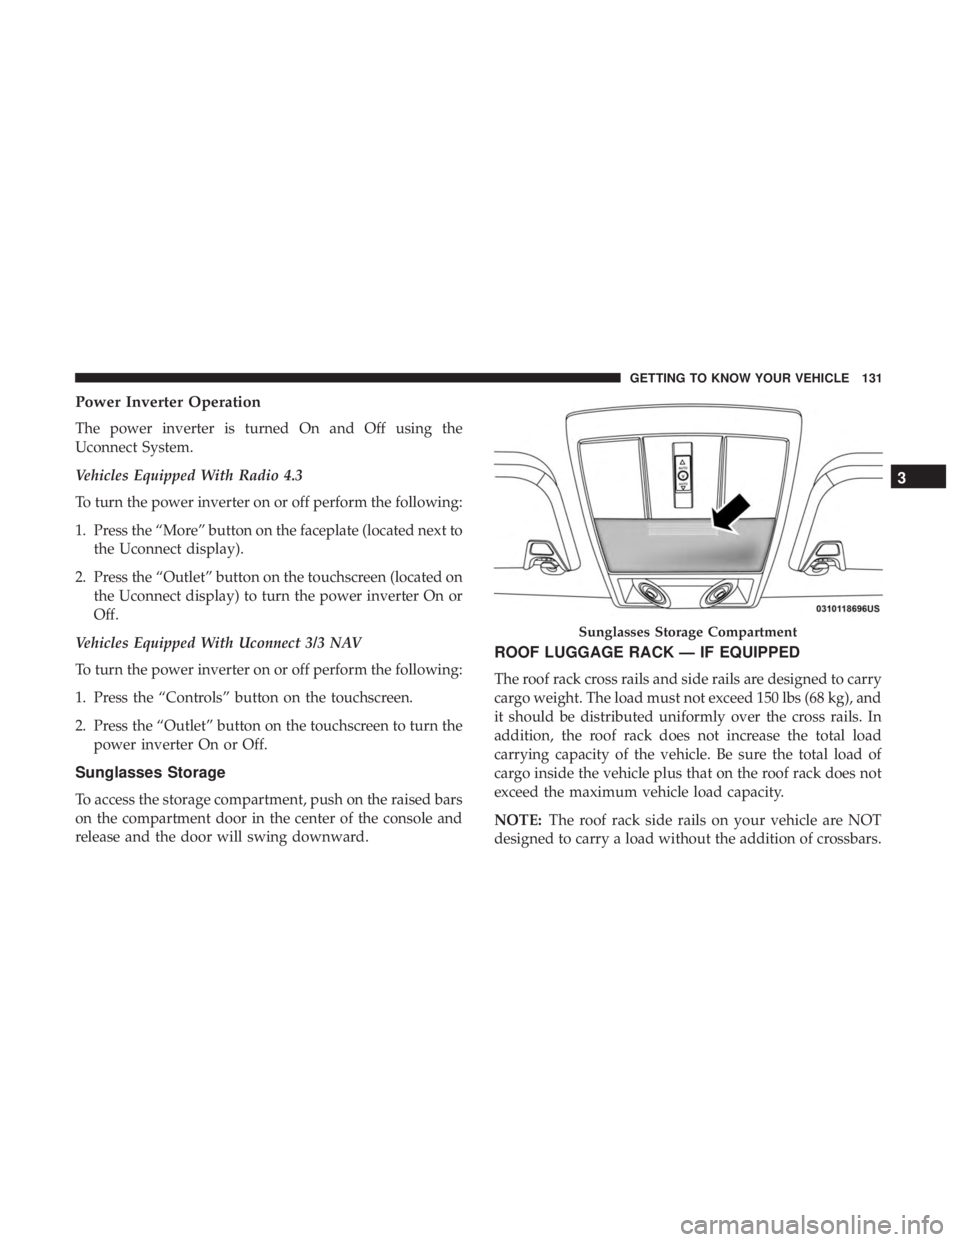
To access the storage compartment, push on the raised bars
on the compartment door in the center of the console and
release and the door will swing downward.
ROOF LUGGAGE RACK — IF EQUIPPED
The roof rack cross rails and side rails are designed to carry
cargo weight. The load must not exceed 150 lbs (68 kg), and
it should be distributed uniformly over the cross rails. In
addition, the roof rack does not increase the total load
carrying capacity of the vehicle. Be sure the total load of
cargo inside the vehicle plus that on the roof rack does not
exceed the maximum vehicle load capacity.
NOTE: The roof rack side rails on your vehicle are NOT
designed to carry a load without the addition of crossbars.
Sunglasses Storage Compartment
3
GETTING TO KNOW YOUR VEHICLE 131
Page 307 of 524
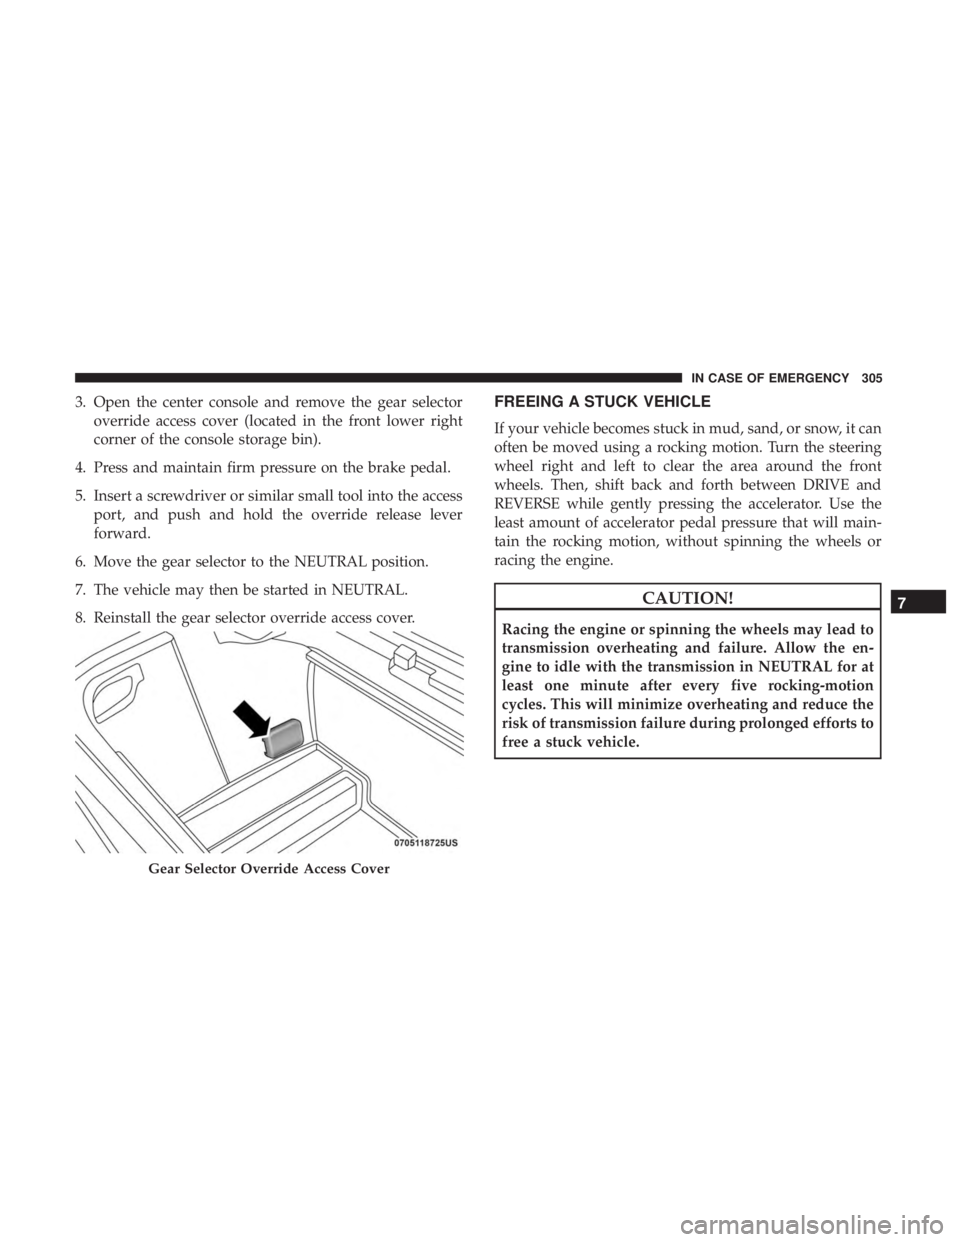
3. Open the center console and remove the gear selectoroverride access cover (located in the front lower right
corner of the console storage bin).
4. Press and maintain firm pressure on the brake pedal.
5. Insert a screwdriver or similar small tool into the access port, and push and hold the override release lever
forward.
6. Move the gear selector to the NEUTRAL position.
7. The vehicle may then be started in NEUTRAL.
8. Reinstall the gear selector override access cover.FREEING A STUCK VEHICLE
If your vehicle becomes stuck in mud, sand, or snow, it can
often be moved using a rocking motion. Turn the steering
wheel right and left to clear the area around the front
wheels. Then, shift back and forth between DRIVE and
REVERSE while gently pressing the accelerator. Use the
least amount of accelerator pedal pressure that will main-
tain the rocking motion, without spinning the wheels or
racing the engine.
CAUTION!
Racing the engine or spinning the wheels may lead to
transmission overheating and failure. Allow the en-
gine to idle with the transmission in NEUTRAL for at
least one minute after every five rocking-motion
cycles. This will minimize overheating and reduce the
risk of transmission failure during prolonged efforts to
free a stuck vehicle.
Gear Selector Override Access Cover
7
IN CASE OF EMERGENCY 305