rear view mirror DODGE JOURNEY 2019 Owners Manual
[x] Cancel search | Manufacturer: DODGE, Model Year: 2019, Model line: JOURNEY, Model: DODGE JOURNEY 2019Pages: 524, PDF Size: 5.29 MB
Page 60 of 524
MIRRORS
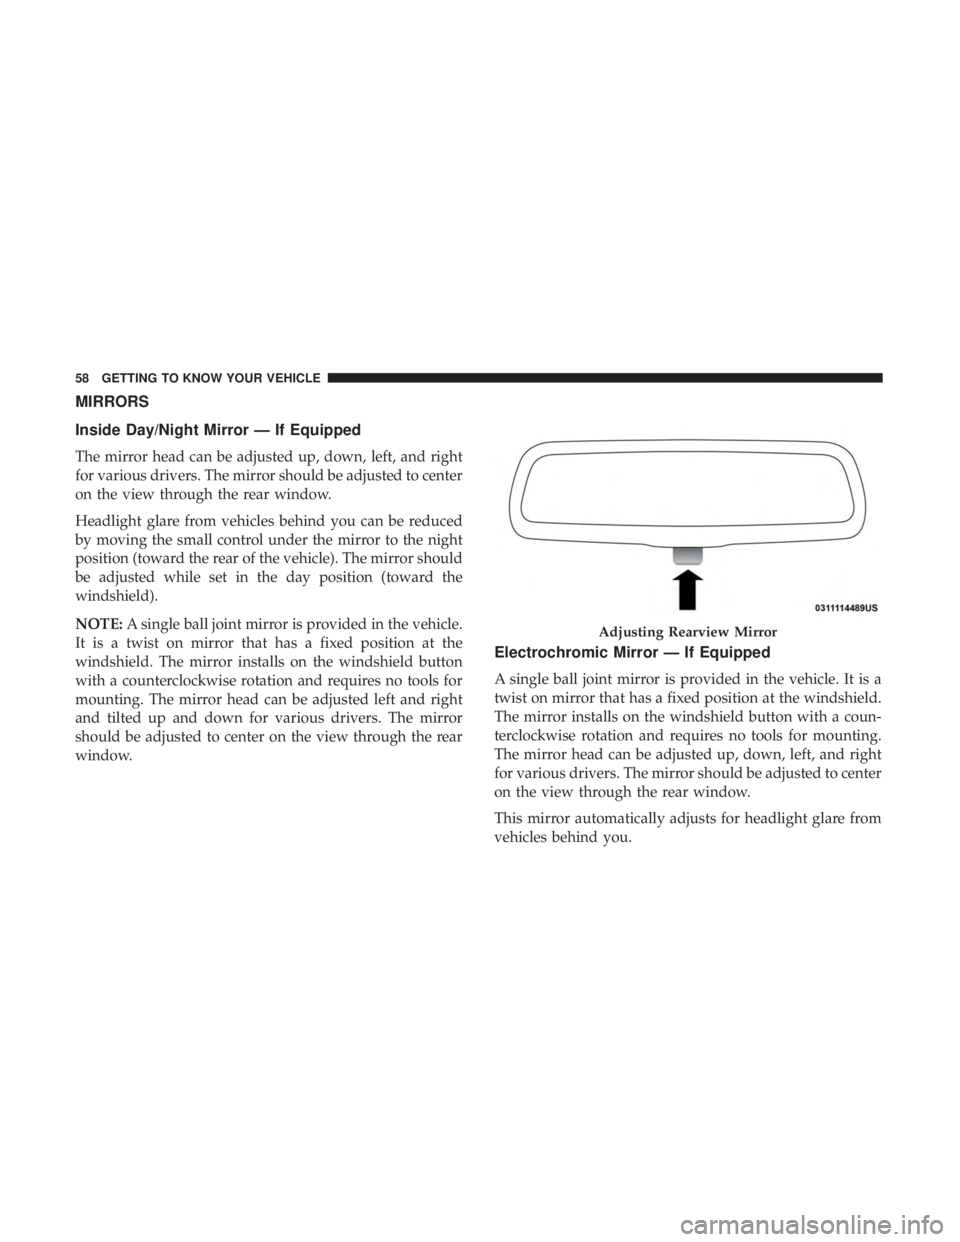
Inside Day/Night Mirror — If Equipped
The mirror head can be adjusted up, down, left, and right
for various drivers. The mirror should be adjusted to center
on the view through the rear window.
Headlight glare from vehicles behind you can be reduced
by moving the small control under the mirror to the night
position (toward the rear of the vehicle). The mirror should
be adjusted while set in the day position (toward the
windshield).
NOTE:A single ball joint mirror is provided in the vehicle.
It is a twist on mirror that has a fixed position at the
windshield. The mirror installs on the windshield button
with a counterclockwise rotation and requires no tools for
mounting. The mirror head can be adjusted left and right
and tilted up and down for various drivers. The mirror
should be adjusted to center on the view through the rear
window.
Electrochromic Mirror — If Equipped
A single ball joint mirror is provided in the vehicle. It is a
twist on mirror that has a fixed position at the windshield.
The mirror installs on the windshield button with a coun-
terclockwise rotation and requires no tools for mounting.
The mirror head can be adjusted up, down, left, and right
for various drivers. The mirror should be adjusted to center
on the view through the rear window.
This mirror automatically adjusts for headlight glare from
vehicles behind you.
Adjusting Rearview Mirror
58 GETTING TO KNOW YOUR VEHICLE
Page 61 of 524
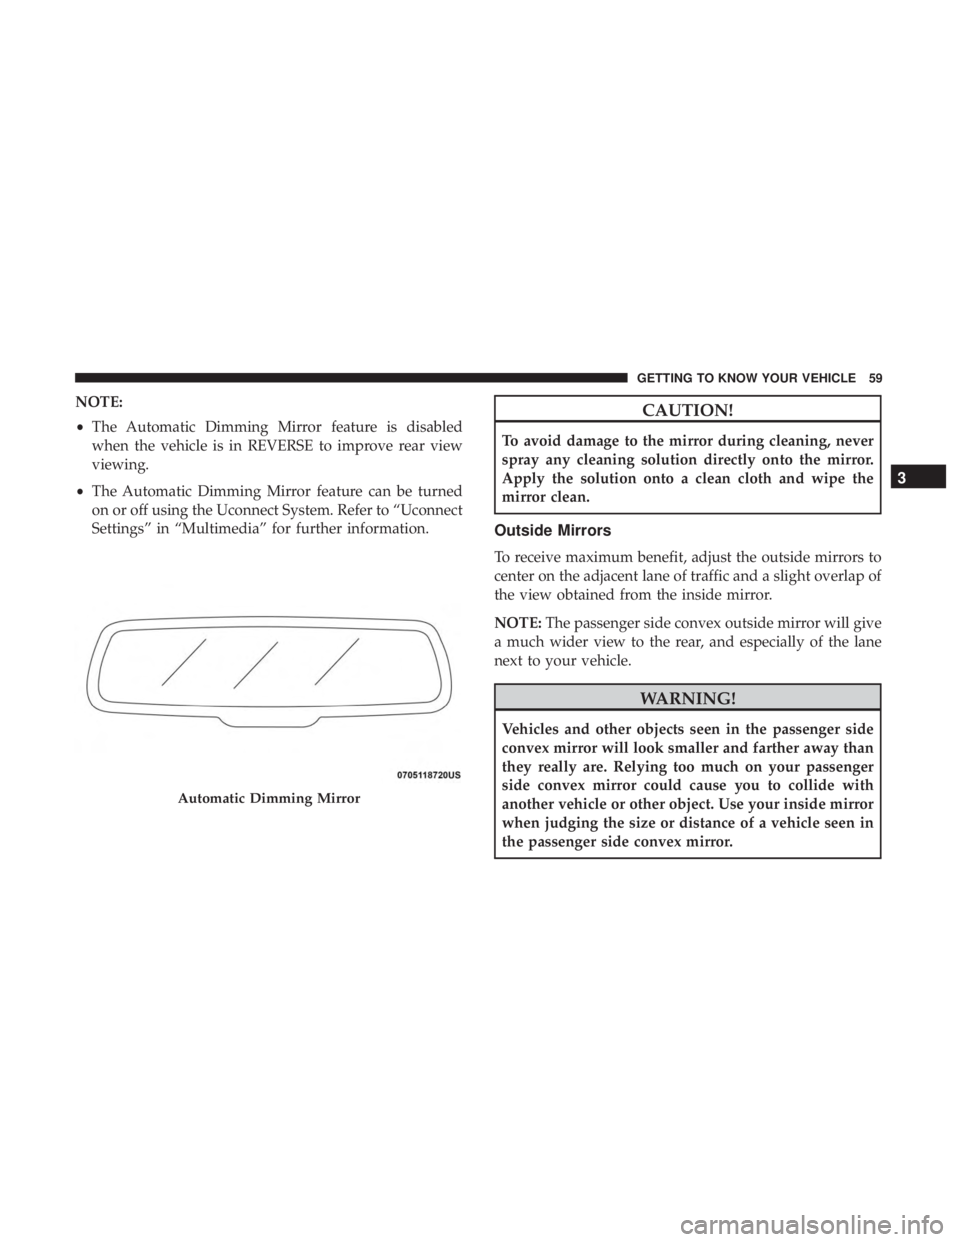
NOTE:
•The Automatic Dimming Mirror feature is disabled
when the vehicle is in REVERSE to improve rear view
viewing.
• The Automatic Dimming Mirror feature can be turned
on or off using the Uconnect System. Refer to “Uconnect
Settings” in “Multimedia” for further information.CAUTION!
To avoid damage to the mirror during cleaning, never
spray any cleaning solution directly onto the mirror.
Apply the solution onto a clean cloth and wipe the
mirror clean.
Outside Mirrors
To receive maximum benefit, adjust the outside mirrors to
center on the adjacent lane of traffic and a slight overlap of
the view obtained from the inside mirror.
NOTE: The passenger side convex outside mirror will give
a much wider view to the rear, and especially of the lane
next to your vehicle.
WARNING!
Vehicles and other objects seen in the passenger side
convex mirror will look smaller and farther away than
they really are. Relying too much on your passenger
side convex mirror could cause you to collide with
another vehicle or other object. Use your inside mirror
when judging the size or distance of a vehicle seen in
the passenger side convex mirror.
Automatic Dimming Mirror
3
GETTING TO KNOW YOUR VEHICLE 59
Page 62 of 524
Outside Mirrors Folding Feature
All outside mirrors are hinged and may be moved either
forward or rearward to resist damage. The hinges have
three detent positions:
•Full forward position
• Full rearward position
• Normal position
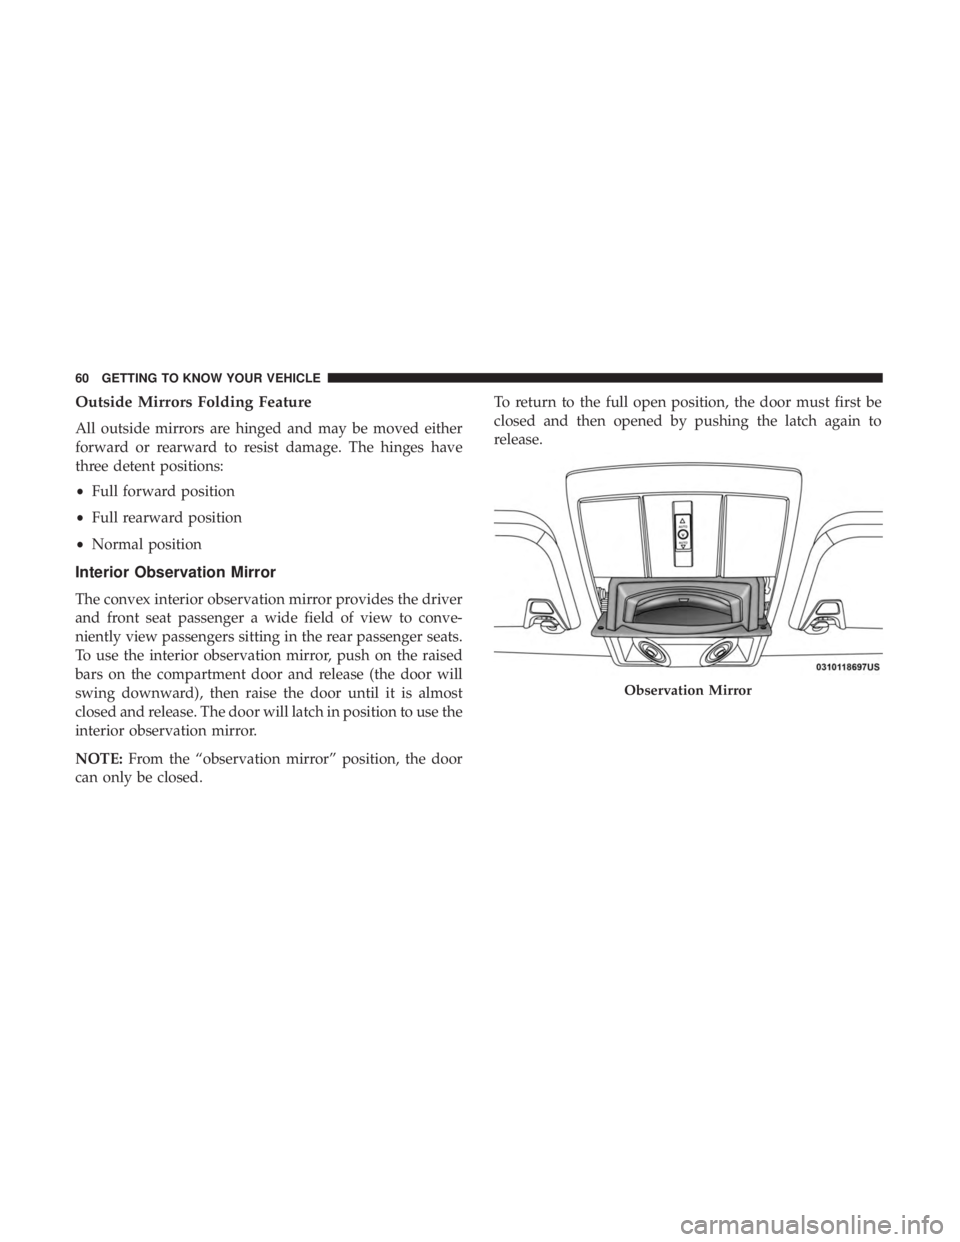
Interior Observation Mirror
The convex interior observation mirror provides the driver
and front seat passenger a wide field of view to conve-
niently view passengers sitting in the rear passenger seats.
To use the interior observation mirror, push on the raised
bars on the compartment door and release (the door will
swing downward), then raise the door until it is almost
closed and release. The door will latch in position to use the
interior observation mirror.
NOTE: From the “observation mirror” position, the door
can only be closed. To return to the full open position, the door must first be
closed and then opened by pushing the latch again to
release.
Observation Mirror
60 GETTING TO KNOW YOUR VEHICLE
Page 65 of 524
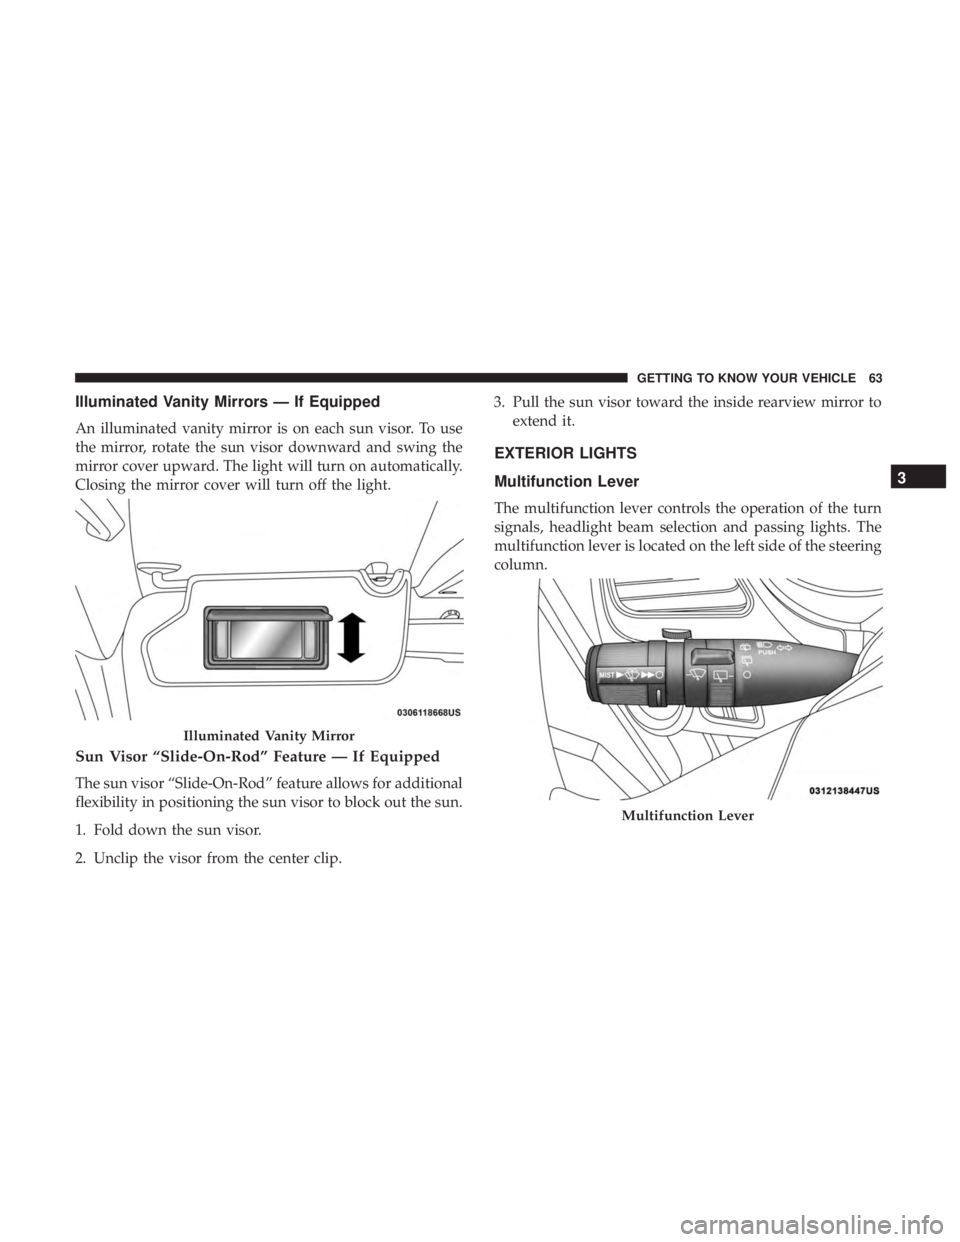
Illuminated Vanity Mirrors — If Equipped
An illuminated vanity mirror is on each sun visor. To use
the mirror, rotate the sun visor downward and swing the
mirror cover upward. The light will turn on automatically.
Closing the mirror cover will turn off the light.
Sun Visor “Slide-On-Rod” Feature — If Equipped
The sun visor “Slide-On-Rod” feature allows for additional
flexibility in positioning the sun visor to block out the sun.
1. Fold down the sun visor.
2. Unclip the visor from the center clip.3. Pull the sun visor toward the inside rearview mirror to
extend it.
EXTERIOR LIGHTS
Multifunction Lever
The multifunction lever controls the operation of the turn
signals, headlight beam selection and passing lights. The
multifunction lever is located on the left side of the steering
column.
Illuminated Vanity Mirror
Multifunction Lever
3
GETTING TO KNOW YOUR VEHICLE 63
Page 258 of 524
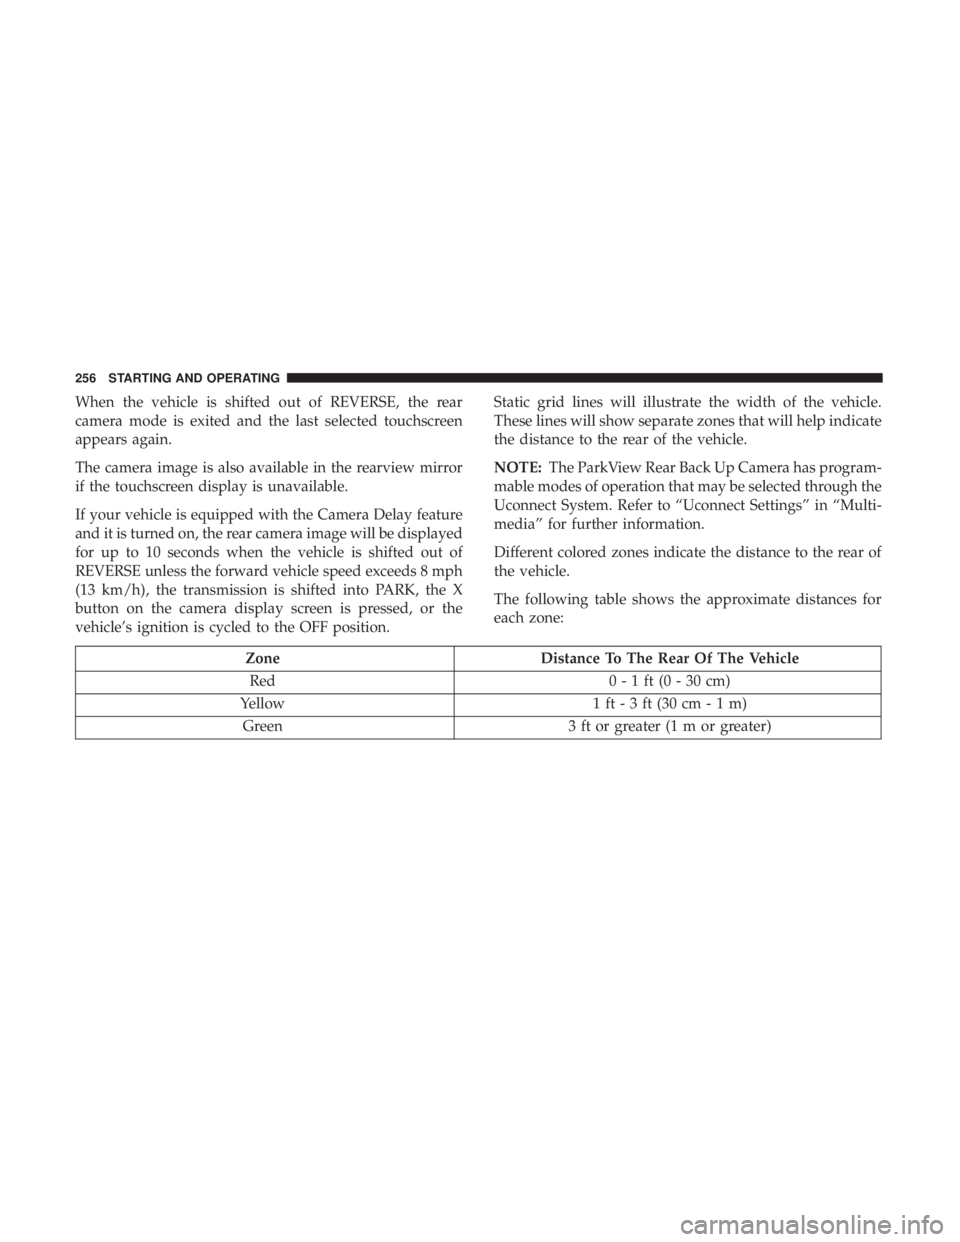
When the vehicle is shifted out of REVERSE, the rear
camera mode is exited and the last selected touchscreen
appears again.
The camera image is also available in the rearview mirror
if the touchscreen display is unavailable.
If your vehicle is equipped with the Camera Delay feature
and it is turned on, the rear camera image will be displayed
for up to 10 seconds when the vehicle is shifted out of
REVERSE unless the forward vehicle speed exceeds 8 mph
(13 km/h), the transmission is shifted into PARK, the X
button on the camera display screen is pressed, or the
vehicle’s ignition is cycled to the OFF position.Static grid lines will illustrate the width of the vehicle.
These lines will show separate zones that will help indicate
the distance to the rear of the vehicle.
NOTE:
The ParkView Rear Back Up Camera has program-
mable modes of operation that may be selected through the
Uconnect System. Refer to “Uconnect Settings” in “Multi-
media” for further information.
Different colored zones indicate the distance to the rear of
the vehicle.
The following table shows the approximate distances for
each zone:
Zone Distance To The Rear Of The Vehicle
Red 0 - 1 ft (0 - 30 cm)
Yellow 1 ft - 3 ft (30 cm - 1 m)
Green 3 ft or greater (1 m or greater)
256 STARTING AND OPERATING
Page 372 of 524
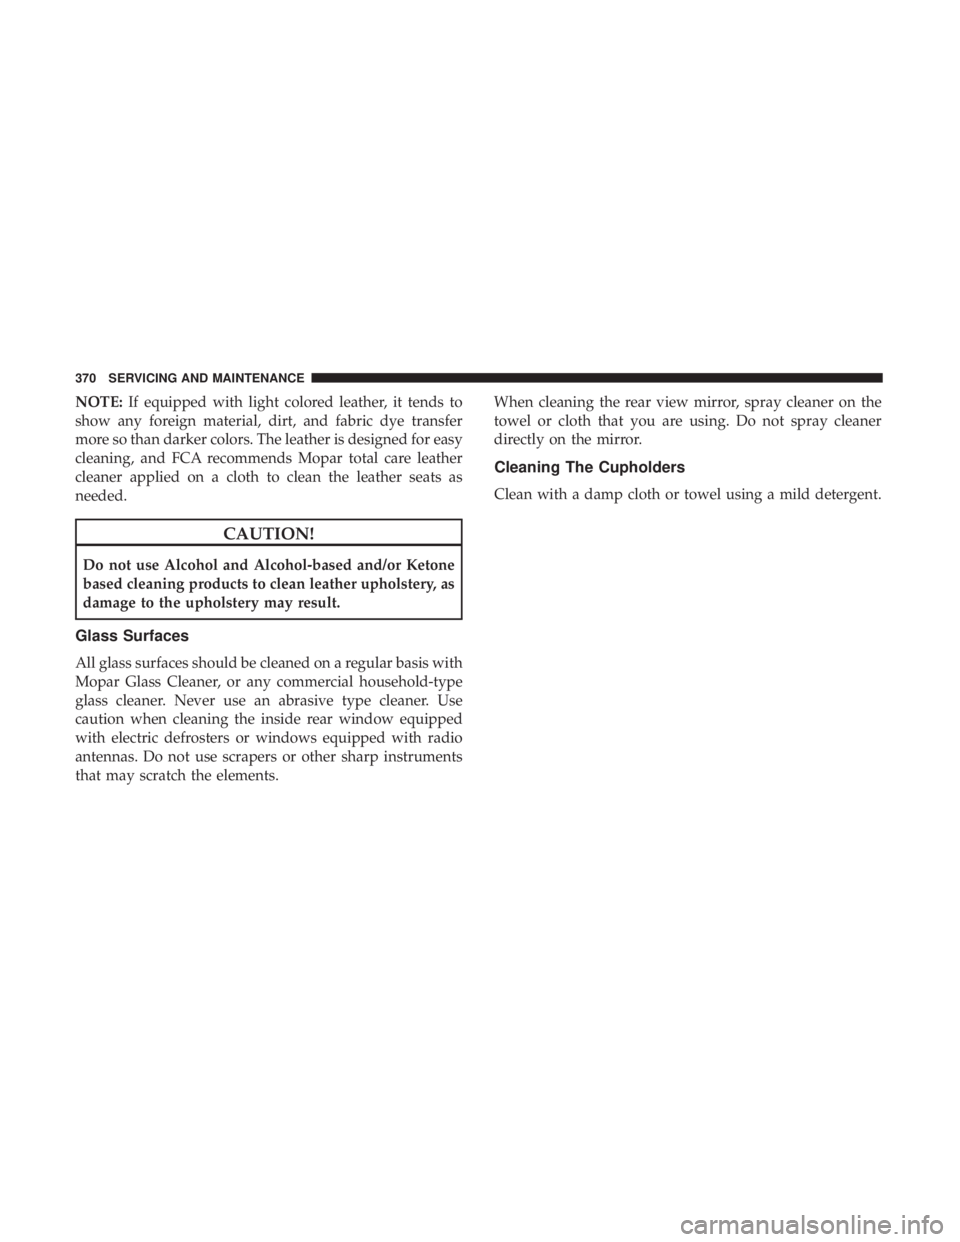
NOTE:If equipped with light colored leather, it tends to
show any foreign material, dirt, and fabric dye transfer
more so than darker colors. The leather is designed for easy
cleaning, and FCA recommends Mopar total care leather
cleaner applied on a cloth to clean the leather seats as
needed.
CAUTION!
Do not use Alcohol and Alcohol-based and/or Ketone
based cleaning products to clean leather upholstery, as
damage to the upholstery may result.
Glass Surfaces
All glass surfaces should be cleaned on a regular basis with
Mopar Glass Cleaner, or any commercial household-type
glass cleaner. Never use an abrasive type cleaner. Use
caution when cleaning the inside rear window equipped
with electric defrosters or windows equipped with radio
antennas. Do not use scrapers or other sharp instruments
that may scratch the elements. When cleaning the rear view mirror, spray cleaner on the
towel or cloth that you are using. Do not spray cleaner
directly on the mirror.
Cleaning The Cupholders
Clean with a damp cloth or towel using a mild detergent.
370 SERVICING AND MAINTENANCE
Page 399 of 524
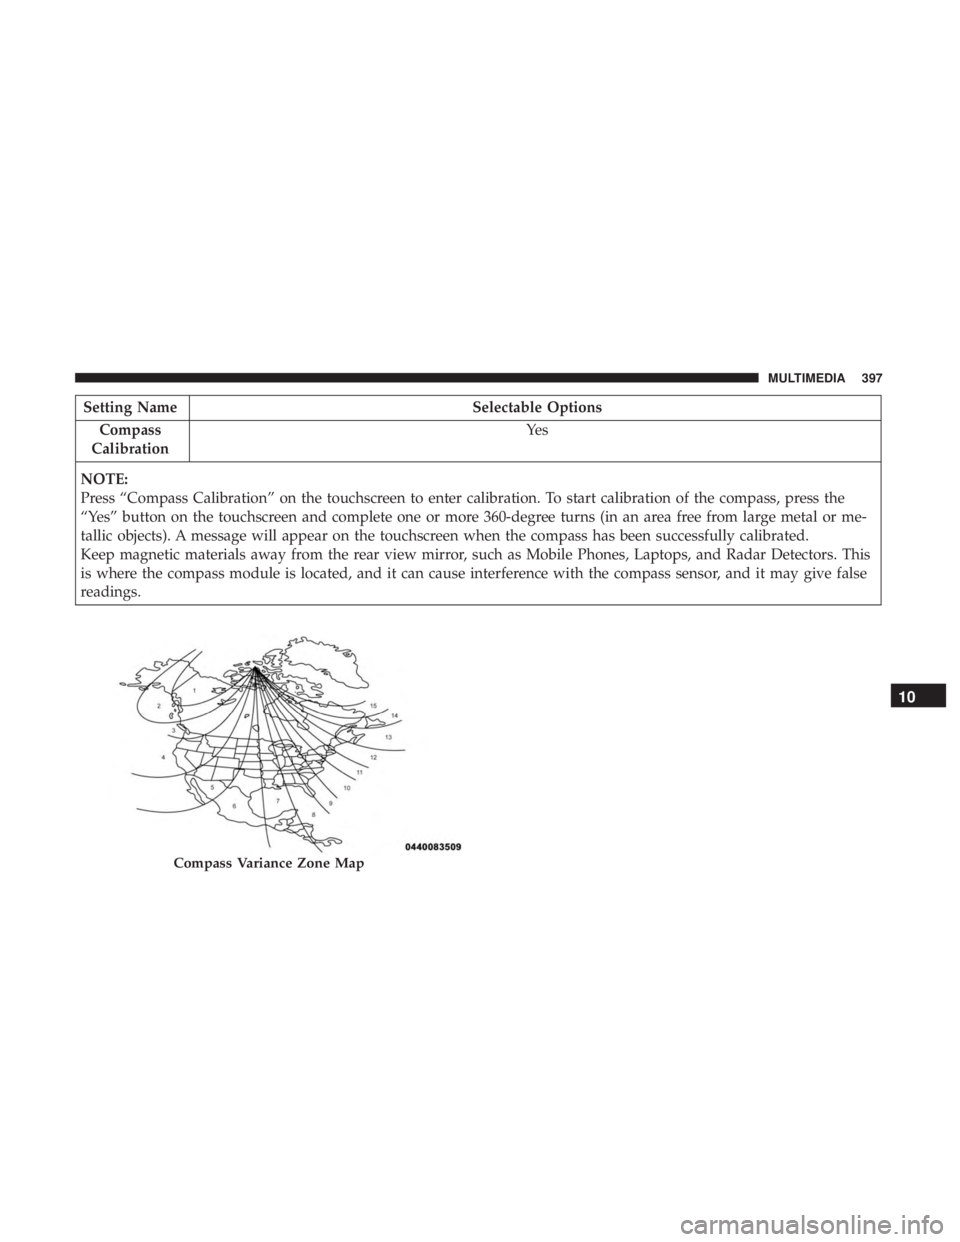
Setting NameSelectable Options
Compass
Calibration Ye s
NOTE:
Press “Compass Calibration” on the touchscreen to enter calibration. To start calibration of the compass, press the
“Yes” button on the touchscreen and complete one or more 360-degree turns (in an area free from large metal or me-
tallic objects). A message will appear on the touchscreen when the compass has been successfully calibrated.
Keep magnetic materials away from the rear view mirror, such as Mobile Phones, Laptops, and Radar Detectors. This
is where the compass module is located, and it can cause interference with the compass sensor, and it may give false
readings.
Compass Variance Zone Map
10
MULTIMEDIA 397
Page 412 of 524
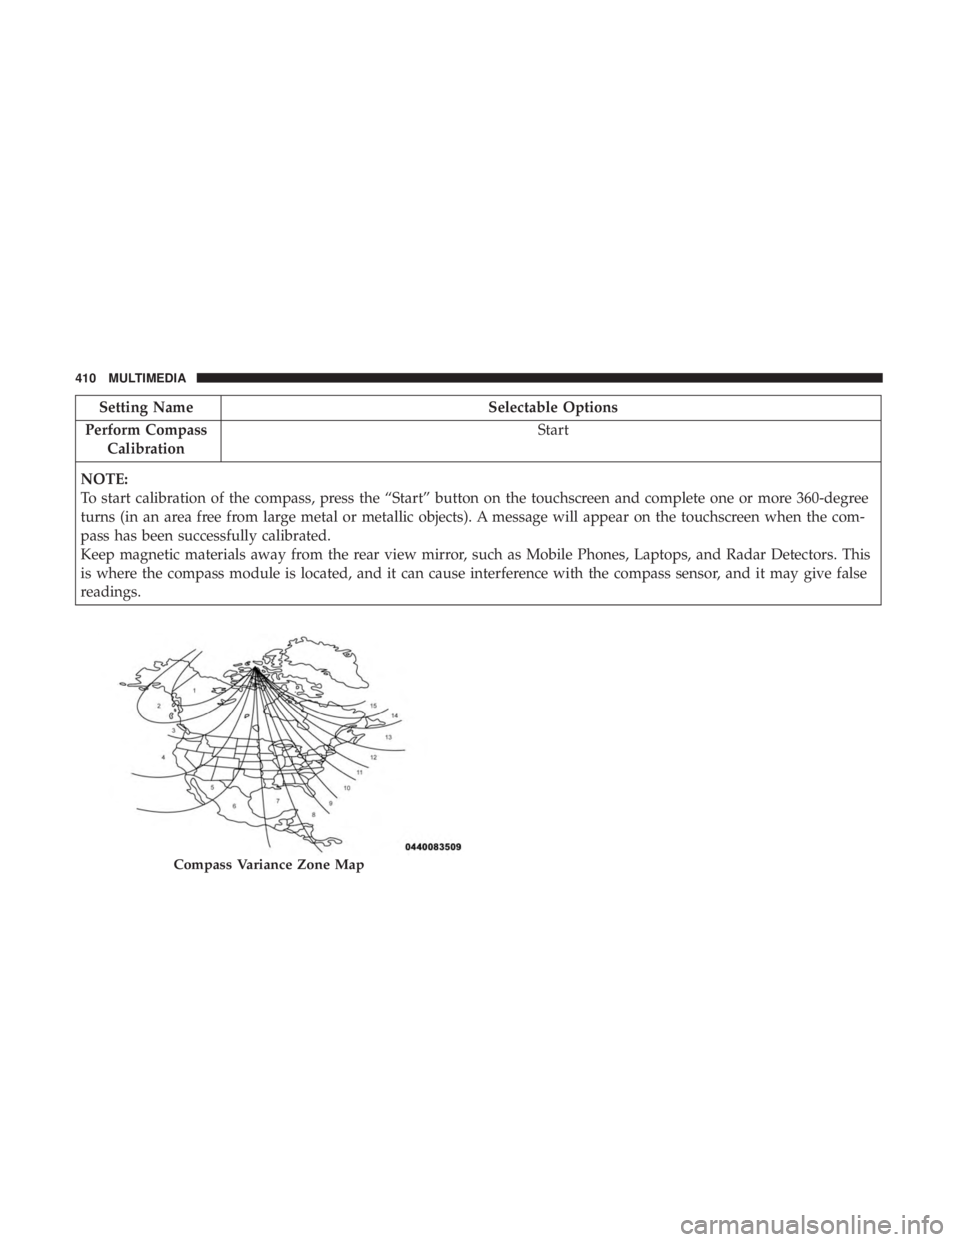
Setting NameSelectable Options
Perform Compass Calibration Start
NOTE:
To start calibration of the compass, press the “Start” button on the touchscreen and complete one or more 360-degree
turns (in an area free from large metal or metallic objects). A message will appear on the touchscreen when the com-
pass has been successfully calibrated.
Keep magnetic materials away from the rear view mirror, such as Mobile Phones, Laptops, and Radar Detectors. This
is where the compass module is located, and it can cause interference with the compass sensor, and it may give false
readings.
Compass Variance Zone Map
410 MULTIMEDIA
Page 447 of 524
Dialing Using The Mobile Phone Keypad
You can dial a phone number with your mobile phone
keypad and still use the Uconnect Phone (while dialing via
the mobile phone keypad, the user must exercise caution
and take precautionary safety measures). By dialing a
number with your connected Bluetooth mobile phone, the
audio will be played through your vehicle’s audio system.
The Uconnect Phone will work the same as if you dial the
number using a voice command.
NOTE:Certain brands of mobile phones do not send the
dial ring to the Uconnect Phone to play it on the vehicle
audio system, so you will not hear it. Under this situation,
after successfully dialing a number the user may feel that
the call did not go through even though the call is in
progress. Once your call is answered, you will hear the
audio.
Mute/Un-Mute (Mute OFF)
When you mute the Uconnect Phone, you will still be able
to hear the conversation coming from the other party, but
the other party will not be able to hear you. To mute the
Uconnect Phone simply press the “Mute” button on the
Phone main screen.
Advanced Phone Connectivity
Transfer Call To And From Mobile Phone
The Uconnect Phone allows ongoing calls to be transferred
from your mobile phone to the Uconnect Phone without
terminating the call. To transfer an ongoing call from your
connected mobile phone to the Uconnect Phone or vice
versa, press the “Transfer” button on the Phone main
screen.
Connect Or Disconnect Link Between the Uconnect
Phone And Mobile Phone
If you would like to connect or disconnect the Bluetooth
connection between a Uconnect Phone paired mobile
phone and the Uconnect Phone, follow the instructions
described in your mobile phone User’s Manual.
Things You Should Know About Your Uconnect
Phone
Voice Command
For best performance:
• Adjust the rearview mirror to provide at least ½ inch
(1 cm) gap between the overhead console (if equipped)
and the mirror.
10
MULTIMEDIA 445
Page 470 of 524
Things You Should Know About Your Uconnect
Phone
Voice Command
For the best performance:
•Adjust the rearview mirror to provide at least ½ inch (1
cm) gap between the overhead console (if equipped) and
the mirror.
• Always wait for the beep before speaking.
• Speak normally, without pausing, just as you would
speak to a person sitting a few feet/meters away from
you.
• Ensure that no one other than you is speaking during a
voice command period. Performance is maximized under:
•
Low-To-Medium Blower Setting
• Low-To-Medium Vehicle Speed
• Low Road Noise
• Smooth Road Surface
• Fully Closed Windows
• Dry Weather Condition
WARNING!
ALWAYS drive safely with your hands on the wheel.
You have full responsibility and assume all risks
related to the use of the Uconnect features and appli-
cations in this vehicle. Only use Uconnect when it is
safe to do so. Failure to do so may result in an accident
involving serious injury or death.
468 MULTIMEDIA