set clock DODGE JOURNEY 2019 Owners Manual
[x] Cancel search | Manufacturer: DODGE, Model Year: 2019, Model line: JOURNEY, Model: DODGE JOURNEY 2019Pages: 524, PDF Size: 5.29 MB
Page 60 of 524
MIRRORS
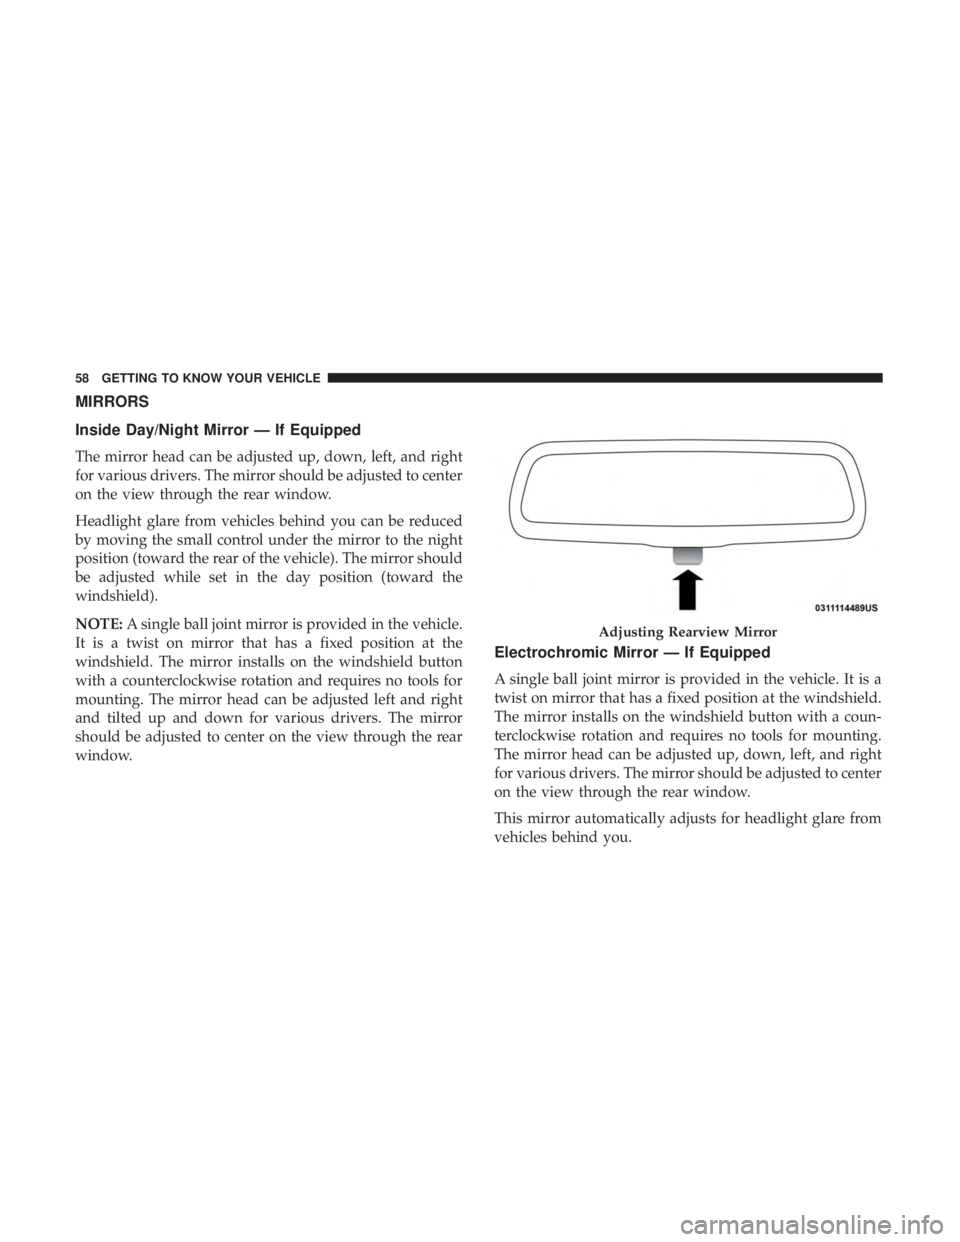
Inside Day/Night Mirror — If Equipped
The mirror head can be adjusted up, down, left, and right
for various drivers. The mirror should be adjusted to center
on the view through the rear window.
Headlight glare from vehicles behind you can be reduced
by moving the small control under the mirror to the night
position (toward the rear of the vehicle). The mirror should
be adjusted while set in the day position (toward the
windshield).
NOTE:A single ball joint mirror is provided in the vehicle.
It is a twist on mirror that has a fixed position at the
windshield. The mirror installs on the windshield button
with a counterclockwise rotation and requires no tools for
mounting. The mirror head can be adjusted left and right
and tilted up and down for various drivers. The mirror
should be adjusted to center on the view through the rear
window.
Electrochromic Mirror — If Equipped
A single ball joint mirror is provided in the vehicle. It is a
twist on mirror that has a fixed position at the windshield.
The mirror installs on the windshield button with a coun-
terclockwise rotation and requires no tools for mounting.
The mirror head can be adjusted up, down, left, and right
for various drivers. The mirror should be adjusted to center
on the view through the rear window.
This mirror automatically adjusts for headlight glare from
vehicles behind you.
Adjusting Rearview Mirror
58 GETTING TO KNOW YOUR VEHICLE
Page 66 of 524
Headlights
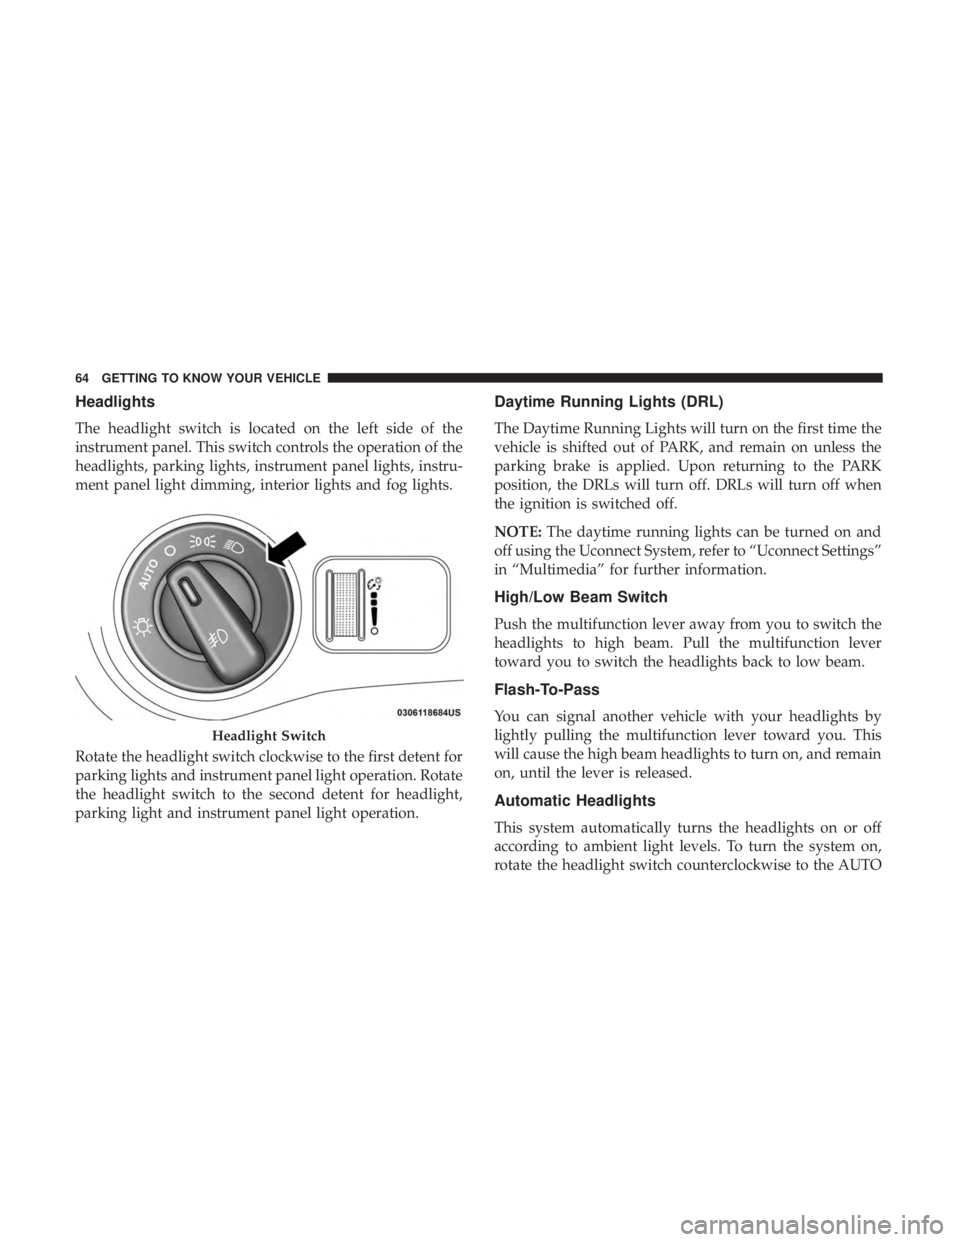
The headlight switch is located on the left side of the
instrument panel. This switch controls the operation of the
headlights, parking lights, instrument panel lights, instru-
ment panel light dimming, interior lights and fog lights.
Rotate the headlight switch clockwise to the first detent for
parking lights and instrument panel light operation. Rotate
the headlight switch to the second detent for headlight,
parking light and instrument panel light operation.
Daytime Running Lights (DRL)
The Daytime Running Lights will turn on the first time the
vehicle is shifted out of PARK, and remain on unless the
parking brake is applied. Upon returning to the PARK
position, the DRLs will turn off. DRLs will turn off when
the ignition is switched off.
NOTE:The daytime running lights can be turned on and
off using the Uconnect System, refer to “Uconnect Settings”
in “Multimedia” for further information.
High/Low Beam Switch
Push the multifunction lever away from you to switch the
headlights to high beam. Pull the multifunction lever
toward you to switch the headlights back to low beam.
Flash-To-Pass
You can signal another vehicle with your headlights by
lightly pulling the multifunction lever toward you. This
will cause the high beam headlights to turn on, and remain
on, until the lever is released.
Automatic Headlights
This system automatically turns the headlights on or off
according to ambient light levels. To turn the system on,
rotate the headlight switch counterclockwise to the AUTO
Headlight Switch
64 GETTING TO KNOW YOUR VEHICLE
Page 77 of 524
Manual Climate Control Descriptions
IconDescription
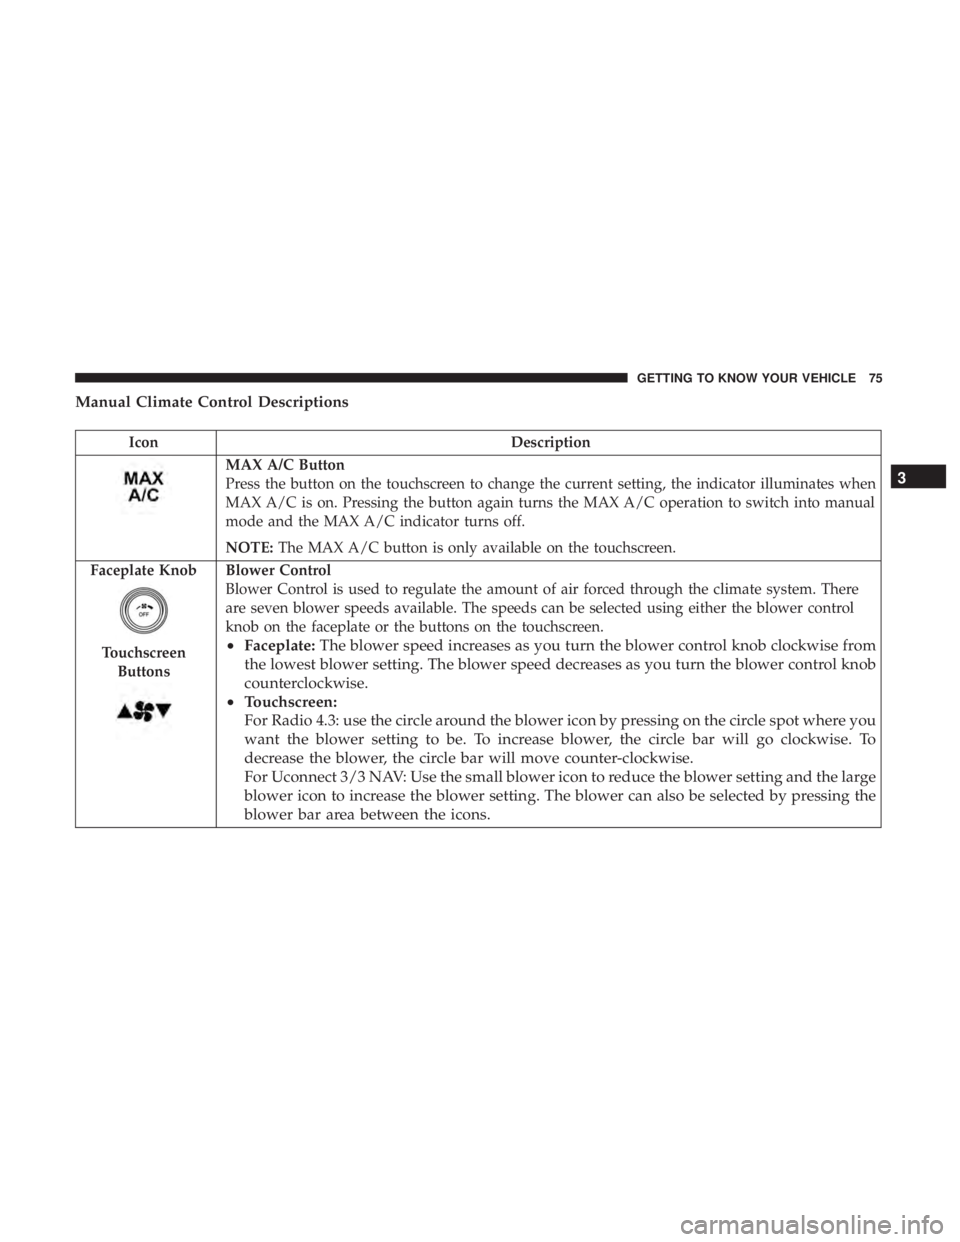
MAX A/C Button
Press the button on the touchscreen to change the current setting, the indicator illuminates when
MAX A/C is on. Pressing the button again turns the MAX A/C operation to switch into manual
mode and the MAX A/C indicator turns off.
NOTE:The MAX A/C button is only available on the touchscreen.
Faceplate Knob
Touchscreen Buttons
Blower Control
Blower Control is used to regulate the amount of air forced through the climate system. There
are seven blower speeds available. The speeds can be selected using either the blower control
knob on the faceplate or the buttons on the touchscreen.
• Faceplate: The blower speed increases as you turn the blower control knob clockwise from
the lowest blower setting. The blower speed decreases as you turn the blower control knob
counterclockwise.
• Touchscreen:
For Radio 4.3: use the circle around the blower icon by pressing on the circle spot where you
want the blower setting to be. To increase blower, the circle bar will go clockwise. To
decrease the blower, the circle bar will move counter-clockwise.
For Uconnect 3/3 NAV: Use the small blower icon to reduce the blower setting and the large
blower icon to increase the blower setting. The blower can also be selected by pressing the
blower bar area between the icons. 3
GETTING TO KNOW YOUR VEHICLE 75
Page 92 of 524
IconDescription
Faceplate Knob
Touchscreen Buttons
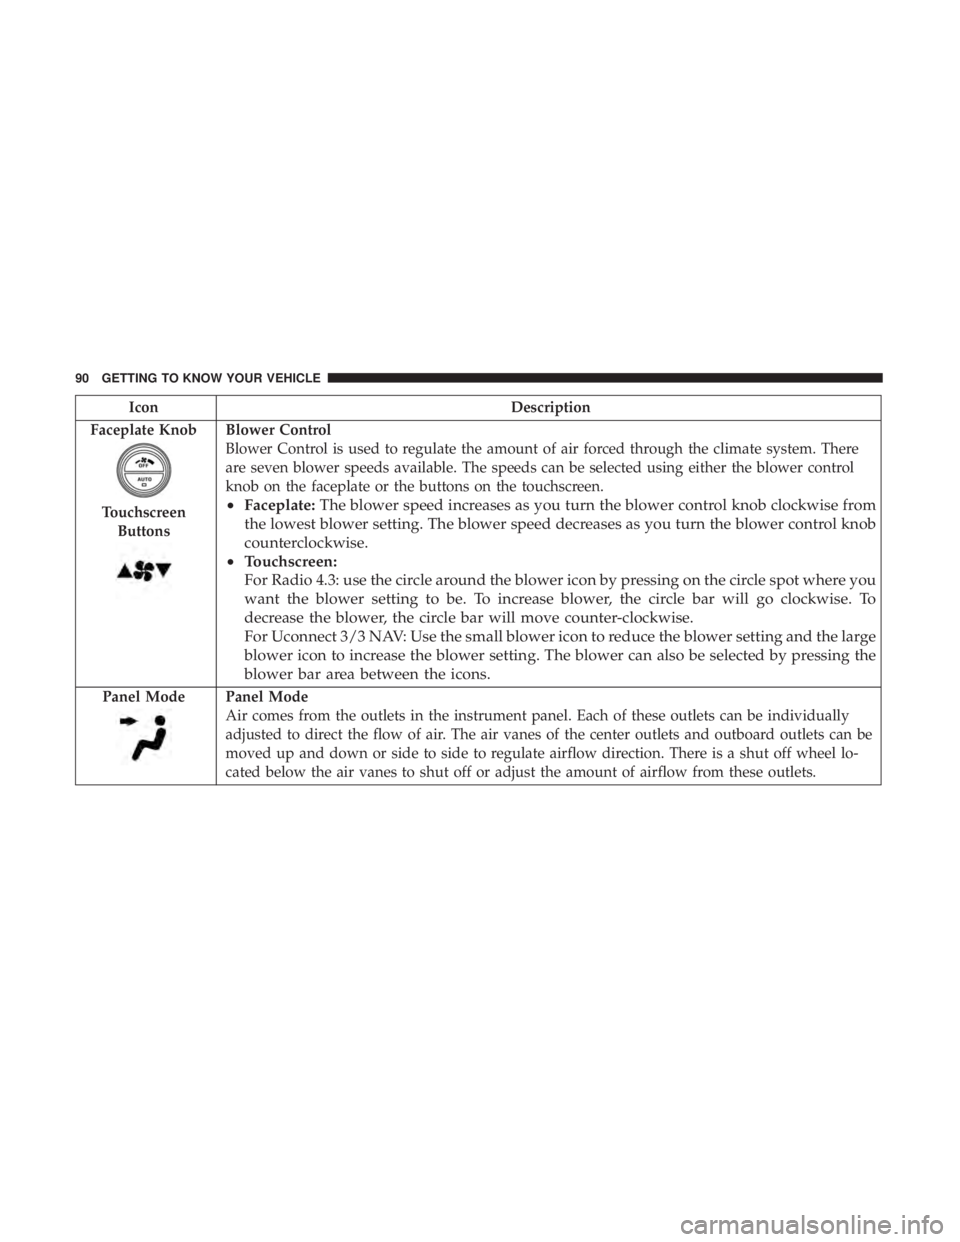
Blower Control
Blower Control is used to regulate the amount of air forced through the climate system. There
are seven blower speeds available. The speeds can be selected using either the blower control
knob on the faceplate or the buttons on the touchscreen.
• Faceplate: The blower speed increases as you turn the blower control knob clockwise from
the lowest blower setting. The blower speed decreases as you turn the blower control knob
counterclockwise.
• Touchscreen:
For Radio 4.3: use the circle around the blower icon by pressing on the circle spot where you
want the blower setting to be. To increase blower, the circle bar will go clockwise. To
decrease the blower, the circle bar will move counter-clockwise.
For Uconnect 3/3 NAV: Use the small blower icon to reduce the blower setting and the large
blower icon to increase the blower setting. The blower can also be selected by pressing the
blower bar area between the icons.
Panel ModePanel Mode
Air comes from the outlets in the instrument panel. Each of these outlets can be individually
adjusted to direct the flow of air. The air vanes of the center outlets and outboard outlets can be
moved up and down or side to side to regulate airflow direction. There is a shut off wheel lo-
cated below the air vanes to shut off or adjust the amount of airflow from these outlets.
90 GETTING TO KNOW YOUR VEHICLE
Page 302 of 524
Spare Tire Stowage
NOTE:Refer to “Spare Tire Location And Removal” for
information on assembling the winch tools.
1. Place the spare tire near the winch cable. Hold the spare upright so that the tire’s tread is on the ground and the
valve stem is at the top of the wheel facing away from
the rear of the vehicle.
2. Tilt the retainer at the end of the winch cable and drop it through the center of the wheel. Then place the spare
tire with the cable and retainer underneath the vehicle.
3. Fit the assembled jack-handle over the winch drive nut. Rotate the jack-handle assembly clockwise to raise the
spare tire into the storage area. Continue to rotate the
jack-handle assembly until you hear the winch mecha-
nism click three times. It cannot be over tightened. Push
against the tire several times to be sure it is held securely
in place.
JUMP STARTING
If your vehicle has a discharged battery, it can be jump
started using a set of jumper cables and a battery in another
vehicle, or by using a portable battery booster pack. Jump starting can be dangerous if done improperly, so please
follow the procedures in this section carefully.
WARNING!
Do not attempt jump starting if the battery is frozen. It
could rupture or explode and cause personal injury.
CAUTION!
Do not use a portable battery booster pack or any other
booster source with a system voltage greater than 12
Volts or damage to the battery, starter motor, alternator
or electrical system may occur.
NOTE: When using a portable battery booster pack, follow
the manufacturer’s operating instructions and precautions.
Preparations For Jump Start
The battery in your vehicle is located between the left front
headlight assembly and the left front wheel splash shield.
To allow jump starting, there are remote battery posts
located on the left side of the engine compartment.
300 IN CASE OF EMERGENCY
Page 390 of 524
NOTE:
•FCA US LLC or your dealer may contact you directly
regarding software updates.
• To help further improve vehicle security and minimize
the potential risk of a security breach, vehicle owners
should:
• Routinely check www.driveuconnect.com/support/
software-update.html (U.S. Residents) or www.driveu-
connect.ca (Canadian Residents) to learn about avail-
able Uconnect software updates.
• Only connect and use trusted media devices (e.g.
personal mobile phones, USBs, CDs).
Privacy of any wireless and wired communications cannot
be assured. Third parties may unlawfully intercept infor-
mation and private communications without your consent.
For further information, refer to “Onboard Diagnostic
System (OBD II) Cybersecurity” in “Getting To Know Your
Instrument Panel”.
UCONNECT SETTINGS
The Uconnect system uses a combination of buttons on the
touchscreen and buttons on the faceplate located on the
center of the instrument panel that allows you to access
and change the customer programmable features.
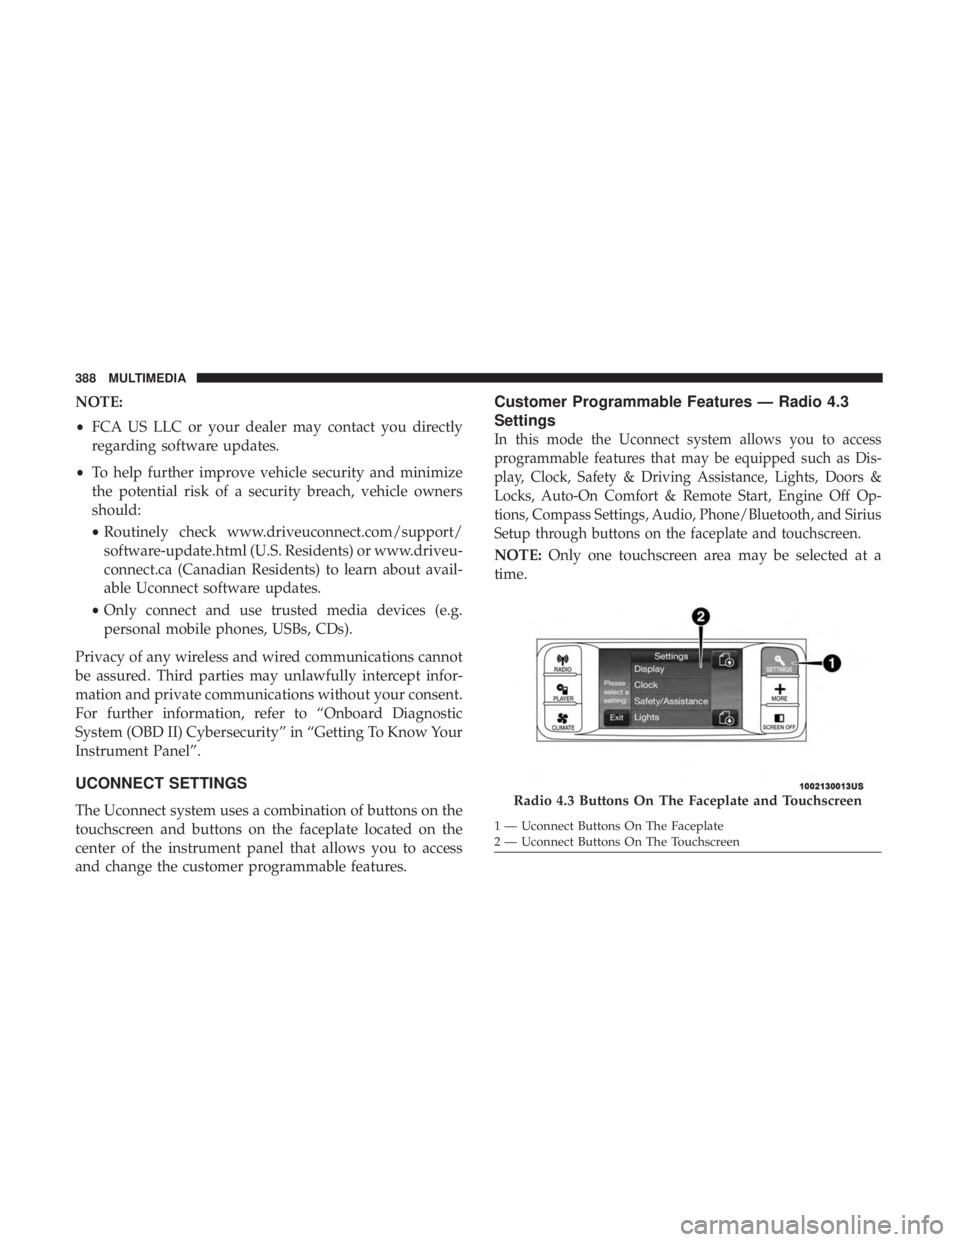
Customer Programmable Features — Radio 4.3
Settings
In this mode the Uconnect system allows you to access
programmable features that may be equipped such as Dis-
play, Clock, Safety & Driving Assistance, Lights, Doors &
Locks, Auto-On Comfort & Remote Start, Engine Off Op-
tions, Compass Settings, Audio, Phone/Bluetooth, and Sirius
Setup through buttons on the faceplate and touchscreen.
NOTE: Only one touchscreen area may be selected at a
time.
Radio 4.3 Buttons On The Faceplate and Touchscreen
1 — Uconnect Buttons On The Faceplate
2 — Uconnect Buttons On The Touchscreen
388 MULTIMEDIA
Page 392 of 524
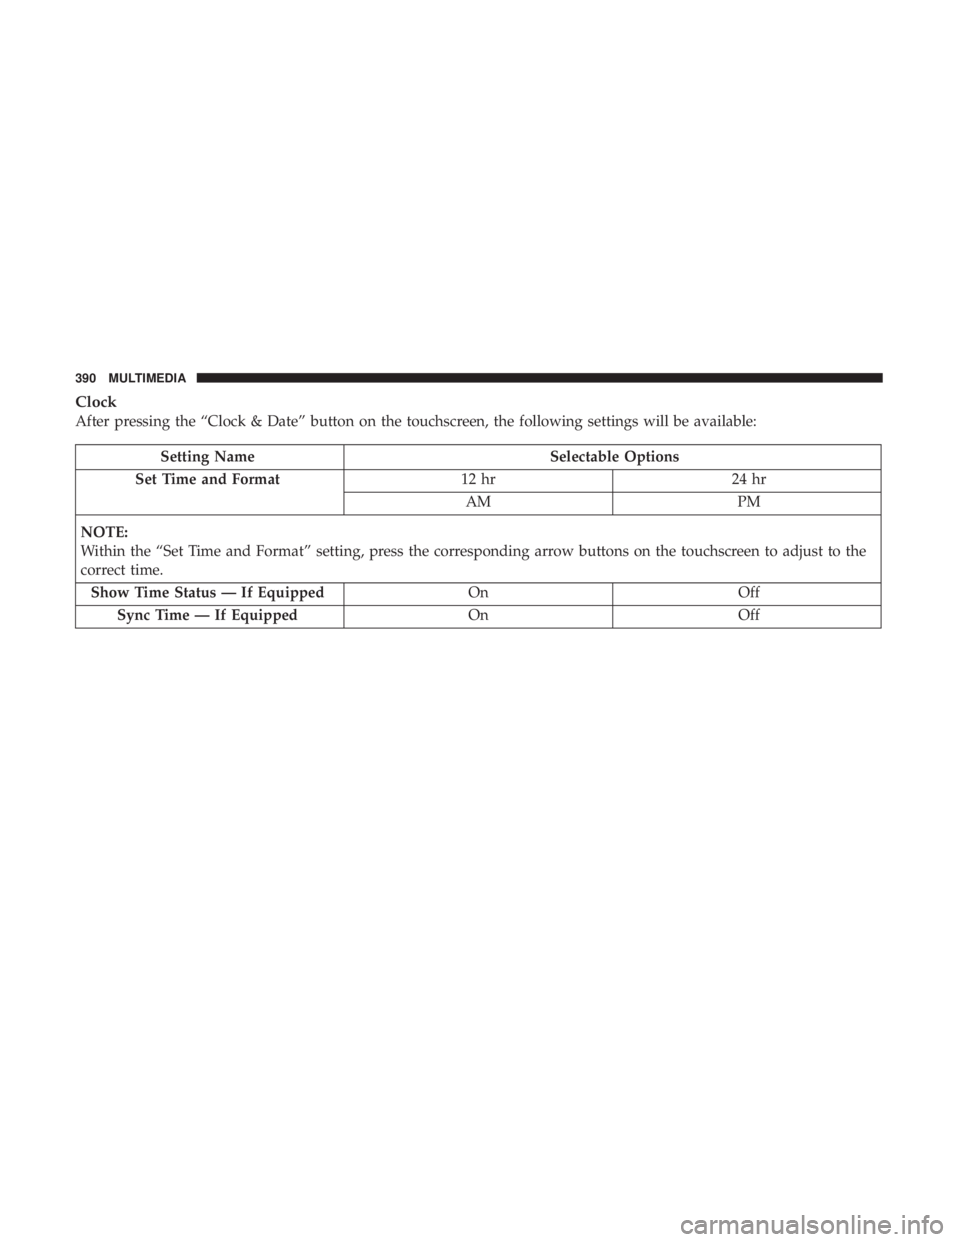
Clock
After pressing the “Clock & Date” button on the touchscreen, the following settings will be available:
Setting NameSelectable Options
Set Time and Format 12 hr24 hr
AM PM
NOTE:
Within the “Set Time and Format” setting, press the corresponding arrow buttons on the touchscreen to adjust to the
correct time. Show Time Status — If Equipped OnOff
Sync Time — If Equipped OnOff
390 MULTIMEDIA
Page 402 of 524
Setting NameSelectable Options
Subscription Info Sirius ID
NOTE:
New vehicle purchasers or lessees will receive a free limited time subscription to SiriusXM Satellite Radio with your
radio. Following the expiration of the free services, it will be necessary to access the information on the Subscription
Information screen to re-subscribe.
1. Press the “Subscription Info” button on the touchscreen to access the Subscription Information screen.
2. Write down the Sirius ID numbers for your receiver. To reactivate your service, either call the number listed on the screen or visit the provider online.
Customer Programmable Features — Uconnect 3/3
NAV Settings
Press the “More” button on the touchscreen, then press the
“Settings” button on the touchscreen to display the menu
setting screen. In this mode the Uconnect system allows
you to access programmable features that may be
equipped such as Display, Clock, Safety & Driving Assis-
tance, Lights, Doors & Locks, Auto-On Comfort & Remote
Start, Engine Off Options, Compass Settings, Audio,
Phone/Bluetooth, SiriusXM Setup, and Accessibility.
NOTE: Only one touchscreen area may be selected at a
time. When making a selection, press the button on the touch-
screen to enter the desired mode. Once in the desired
mode, press and release the preferred setting until a
check-mark appears next to the setting, showing that
setting has been selected.
Once the setting is complete press the Back Arrow button
on the touchscreen to return to the previous menu or press
the “X” button on the touchscreen to close out of the
settings screen. Pressing the Up or Down Arrow buttons on
the touchscreen on the right side of the screen will allow
you to toggle up or down through the available settings.
400 MULTIMEDIA
Page 405 of 524
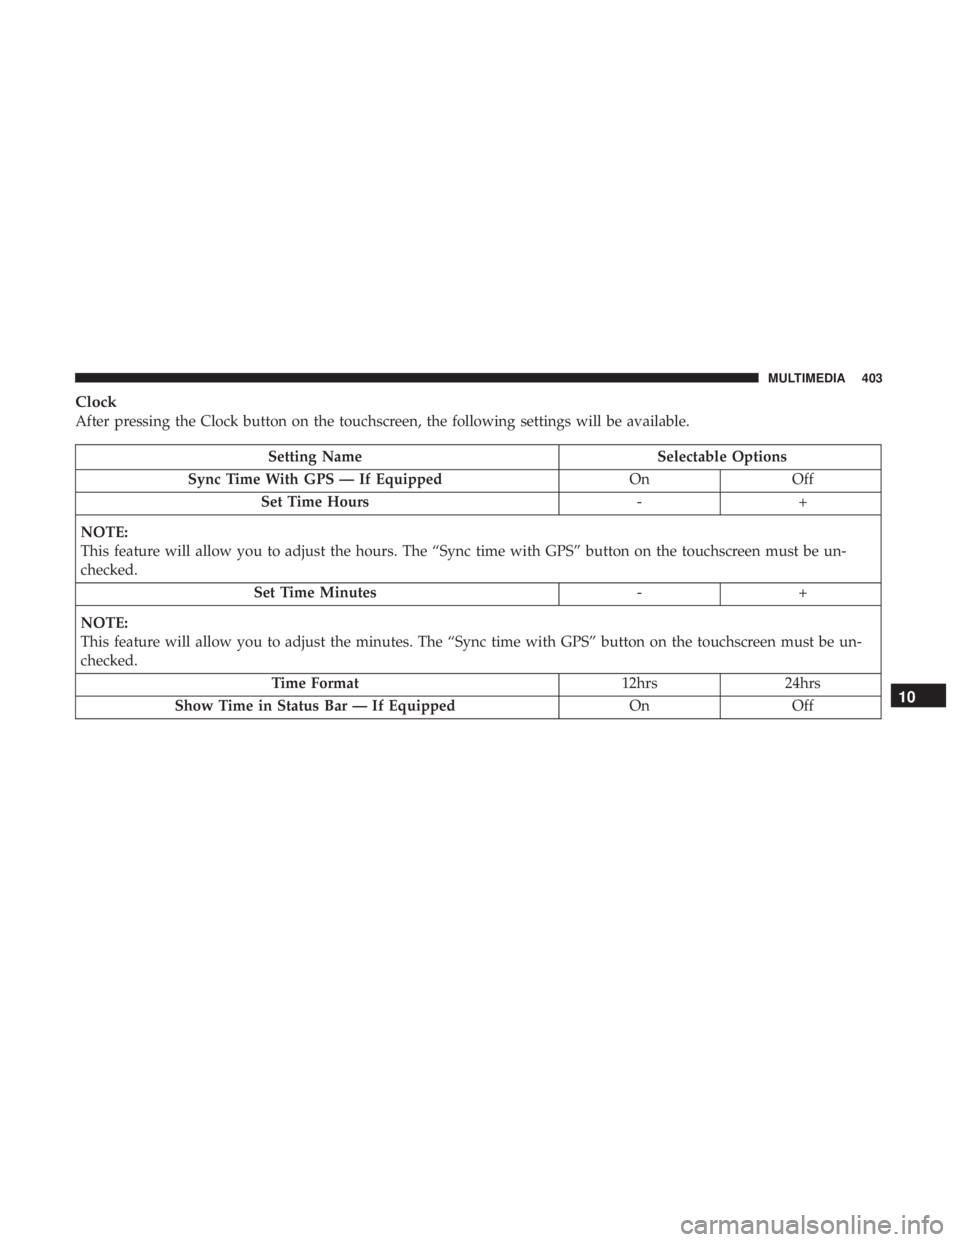
Clock
After pressing the Clock button on the touchscreen, the following settings will be available.
Setting NameSelectable Options
Sync Time With GPS — If Equipped OnOff
Set Time Hours -+
NOTE:
This feature will allow you to adjust the hours. The “Sync time with GPS” button on the touchscreen must be un-
checked. Set Time Minutes -+
NOTE:
This feature will allow you to adjust the minutes. The “Sync time with GPS” button on the touchscreen must be un-
checked. Time Format 12hrs24hrs
Show Time in Status Bar — If Equipped OnOff
10
MULTIMEDIA 403