brake sensor DODGE JOURNEY 2020 Owners Manual
[x] Cancel search | Manufacturer: DODGE, Model Year: 2020, Model line: JOURNEY, Model: DODGE JOURNEY 2020Pages: 396, PDF Size: 25.53 MB
Page 6 of 396
4
SAFETY TIPS ...................................................... 154
Transporting Passengers .. ........................154
Exhaust Gas . . .............................................154
Safety Checks You Should Make Inside
The Vehicle . .
..............................................155
Periodic Safety Checks You Should
Make Outside The Vehicle . .
...................... 156
STARTING AND OPERATING
STARTING THE ENGINE .................................... 157
Automatic Transmission .. .........................157
Normal Starting . . .......................................158
Keyless Enter-N-Go — Ignition . . .................158
Cold Weather Operation
(Below –22°F Or −30°C) . .
.......................159
If Engine Fails To Start . . ............................ 159
After Starting . . ............................................159
ENGINE BLOCK HEATER — IF EQUIPPED . . ...... 159
ENGINE BREAK-IN RECOMMENDATIONS .. .... 160
PARKING BRAKE .. ............................................ 160
AUTOMATIC TRANSMISSION.. .......................... 161
Ignition Park Interlock .. .............................162
Brake/Transmission Shift Interlock
System . ......................................................162
F
our-Speed Automatic Transmission . . .....163
Gear Ranges . . ...........................................163
POWER STEERING . . ........................................... 168
Power Steering Fluid Check .. ....................168SPEED CONTROL — IF EQUIPPED .
.
................. 168
To Activate.................................................. 169
T o Set A Desired Speed. . ........................... 169
To Vary The Speed Setting . . ...................... 169
To Accelerate For Passing . . ....................... 170
To Resume Speed . . ................................... 170
To Deactivate . . ........................................... 171
PARKSENSE REAR PARK ASSIST . . ................. 171
ParkSense Sensors .. ................................. 171
ParkSense Display . . ................................... 172
ParkSense Warning Display . . .................... 173
Enabling And Disabling ParkSense . . ........ 173
Service The ParkSense Rear Park
Assist System . .
........................................... 173
Cleaning The ParkSense System. . ............ 174
ParkSense System Usage Precautions . . .. 174
PARKVIEW REAR BACK UP CAMERA. . ............175
REFUELING THE VEHICLE .. ................................ 176
Loose Fuel Filler Cap Message .. ............... 177
VEHICLE LOADING . . ..........................................177
Vehicle Certification Label .. ...................... 177
Gross Vehicle Weight Rating (GVWR) . . ..... 178
Gross Axle Weight Rating (GAWR) . . ......... 178
Overloading . . .............................................. 178
Loading . ..................................................... 178 T RAILER TOWING .
.
............................................ 178
Common Towing Definitions .. ................... 178
Trailer Hitch Classification . . ...................... 180
Trailer Towing Weights (Maximum Trailer
Weight Ratings) . .
....................................... 181
Trailer And Tongue Weight . . ..................... 181
Towing Requirements . . ............................ 182
Towing Tips . . ............................................. 184
RECREATIONAL TOWING (BEHIND
MOTORHOME, ETC.) . .
....................................... 186
Towing This Vehicle Behind Another
Vehicle . ....................................................... 186
D
RIVING TIPS . . ................................................... 187
Driving On Slippery Surfaces .. ................. 187
Driving Through Water . . ........................... 187
IN CASE OF EMERGENCY
HAZARD WARNING FLASHERS ...................... 189
BULB REPLACEMENT ........................................ 189
Replacement Bulbs .. ................................ 189
Replacing Exterior Bulbs . . ......................... 191
FUSES . ................................................................. 193
I nterior Fuses .. .......................................... 193
Underhood Fuses (Power Distribution
Center) . ...................................................... 196
Page 107 of 396
GETTING TO KNOW YOUR INSTRUMENT PANEL 105
As an added safety feature, your vehicle has
been equipped with a Tire Pressure Monitoring
System (TPMS) that illuminates a low tire
pressure telltale when one or more of your tires is
significantly under-inflated. Accordingly, when
the low tire pressure telltale illuminates, you
should stop and check your tires as soon as
possible, and inflate them to the proper pressure.
Driving on a significantly under-inflated tire
causes the tire to overheat and can lead to tire
failure. Under-inflation also reduces fuel
efficiency and tire tread life, and may affect the
vehicle’s handling and stopping ability.
Please note that the TPMS is not a substitute for
pr
oper tire maintenance, and it is the driver’s
responsibility to maintain correct tire pressure,
even if under-inflation has not reached the level
to trigger illumination of the TPMS low tire
pressure telltale.
Your vehicle has also been equipped with a TPMS
m a
lfunction indicator to indicate when the system is
not operating properly. The TPMS malfunction
indicator is combined with the low tire pressure
telltale. When the system detects a malfunction, the
telltale will flash for approximately one minute and
then remain continuously illuminated. This
sequence will continue upon subsequent vehicle start-ups as long as the malfunction exists. When
the malfunction indicator is illuminated, the system
may not be able to detect or signal low tire pressure
as intended. TPMS malfunctions may occur for a
variety of reasons, including the installation of
replacement or alternate tires or wheels on the
vehicle that prevent the TPMS from functioning
properly. Always check the TPMS malfunction
telltale after replacing one or more tires or wheels
on your vehicle to ensure that the replacement or
alternate tires and wheels allow the TPMS to
continue to function properly.
Anti-Lock Brake System (ABS) Warning
Light
This warning light monitors the
Anti-Lock Brake System (ABS).
The light will turn on when the
ignition is placed in the ON/RUN or
A C
C/ON/RUN position and may stay on for as
long as four seconds.
If the ABS light remains on or turns on while
d r
iving, then the Anti-Lock portion of the brake
system is not functioning and service is
required as soon as possible. However, the
conventional brake system will continue to
operate normally, assuming the Brake Warning
Light is not also on.
If the ABS light does not turn on when the
i g
nition is placed in the ON/RUN or ACC/ON/
RUN position, have the brake system inspected
by an authorized dealer.
Low Fuel Warning Light
When the fuel level reaches
approximately 2 gal (7.5 L), this light
w i
ll turn on and a chime will sound. The
light will remain on until fuel is added.
CAUTION!
The TPMS has been optimized for the original
equipment tires and wheels. TPMS pressures and
warning have been established for the tire size
equipped on your vehicle. Undesirable system
operation or sensor damage may result when
using replacement equipment that is not of the
same size, type, and/or style. Aftermarket wheels
can cause sensor damage. Using aftermarket tire
sealants may cause the Tire Pressure Monitoring
System (TPMS) sensor to become inoperable.
After using an aftermarket tire sealant it is
recommended that you take your vehicle to an
authorized dealer to have your sensor function
checked.
3
Page 113 of 396
SAFETY 111
If the “Brake System Warning Light” remains on
or comes on while driving, it indicates that the
brake system is not functioning properly and
that immediate service is required. If the “Brake
System Warning Light” does not come on when
the ignition is placed in the ON/RUN mode,
have the light repaired as soon as possible.
Electronic Brake Force Distribution (EBD)
The Electronic Brake Force Distribution (EBD)
function manages the distribution of the braking
torque between the front and rear axles by
limiting braking pressure to the rear axle. This is
done to prevent overslip of the rear wheels to
avoid vehicle instability, and to prevent the rear
axle from entering the Anti-Lock Brake System
(ABS) before the front axle.
Electronic Roll Mitigation (ERM)
The Electronic Roll Mitigation (ERM) system
anticipates the potential for wheel lift by
monitoring the driver’s steering wheel input and
the speed of the vehicle. When ERM determines
that the rate of change of the steering wheel
angle and vehicle’s speed are sufficient to
potentially cause wheel lift, it then applies the
appropriate brake and may also reduce engine
power to lessen the chance that wheel lift will
occur. ERM can only reduce the chance of wheel lift occurring during severe or evasive driving
maneuvers; it cannot prevent wheel lift due to
other factors, such as road conditions, leaving
the roadway, or striking objects or other vehicles.
Electronic Stability Control (ESC)
The Electronic Stability Control (ESC) system
enhances directional control and stability of the
vehicle under various driving conditions. ESC
corrects for oversteering or understeering of the
vehicle by applying the brake of the appropriate
wheel(s) to assist in counteracting the oversteer
or understeer condition. Engine power may also
be reduced to help the vehicle maintain the
desired path.
ESC uses sensors in the vehicle to determine
t
h
e vehicle path intended by the driver and
compares it to the actual path of the vehicle.
When the actual path does not match the
intended path, ESC applies the brake of the
appropriate wheel to assist in counteracting the
oversteer or understeer condition.
Oversteer — when the vehicle is turning more
than appropriate for the steering wheel position.
Understeer — when the vehicle is turning less
than appropriate for the steering wheel position.
The ESC Activation/Malfunction Indicator Light
l o
cated in the instrument cluster will start to flash
as soon as the ESC system becomes active.
The ESC Activation/Malfunction Indicator Light
a l
so flashes when the TCS is active. If the ESC
Activation/Malfunction Indicator Light begins to
flash during acceleration, ease up on the
accelerator and apply as little throttle as
possible. Be sure to adapt your speed and driving
to the prevailing road conditions.
WARNING!
Many factors, such as vehicle loading, road
conditions and driving conditions, influence
the chance that wheel lift or rollover may occur.
ERM cannot prevent all wheel lift or roll overs,
especially those that involve leaving the
roadway or striking objects or other vehicles.
The capabilities of an ERM-equipped vehicle
must never be exploited in a reckless or
dangerous manner which could jeopardize the
user's safety or the safety of others.
4
Page 117 of 396
SAFETY 115
Disabling And Enabling HSA
This feature can be turned on or turned off. To
change the current setting, proceed as follows:
If disabling HSA using your instrument cluster
display, refer to “Instrument Cluster Display”
in “Getting To Know Your Instrument Panel”
for further information.
If disabling HSA using Uconnect Settings,
refer to “Uconnect Settings” in “Multimedia”
for further information.
For vehicles not equipped with an instrument
c lu
ster display, perform the following steps:
1. C enter the steering wheel (front wheels
p
ointing straight forward).
2. S hift the transmission into PARK.
3
. A pply the parking brake.
4
. S tart the engine.
5
. R otate the steering wheel slightly more than
o
ne-half turn to the left.
6. P ush the “ESC OFF” button located in the
l
ower switch bank below the climate control
four times within 20 seconds. The “ESC OFF
Indicator Light” should turn on and turn off
two times. 7. R
otate the steering wheel back to center
a
nd then an additional slightly more than
one-half turn to the right.
8. P lace the ignition in the OFF mode and then
b
ack to ON. If the sequence was completed
properly, the “ESC OFF Indicator Light” will blink
several times to confirm HSA is disabled.
9. Repeat these steps if you want to return this f
eature to its previous setting.
Traction Control System (TCS)
The Traction Control System (TCS) monitors the
amount of wheel spin of each of the driven
wheels. If wheel spin is detected, the TCS may
apply brake pressure to the spinning wheel(s)
and/or reduce engine power to provide
enhanced acceleration and stability. A feature
of the TCS, Brake Limited Differential (BLD),
functions similarly to a limited slip differential
and controls the wheel spin across a driven
axle. If one wheel on a driven axle is spinning
faster than the other, the system will apply the
brake of the spinning wheel. This will allow more
engine power to be applied to the wheel that is
not spinning. BLD may remain enabled even if
TCS and Electronic Stability Control (ESC) are in
reduced modes.
Trailer Sway Control (TSC)
TSC uses sensors in the vehicle to recognize an
excessively swaying trailer and will take the
appropriate actions to attempt to stop the sway.
TSC will become active automatically once an
excessively swaying trailer is recognized.
Note that TSC cannot stop all trailers from
s w
aying. Always use caution when towing a
trailer and follow the trailer tongue weight
r e
commendations. Refer to “Trailer Towing” in
“Starting And Operating” for further information.
When TSC is functioning, the ESC Activation/
M a
lfunction Indicator Light will flash, the engine
power may be reduced and you may feel the
brakes being applied to individual wheels to
attempt to stop the trailer from swaying. TSC is
disabled when the ESC system is in the “Partial
Off” mode.
WARNING!
If TSC activates while driving, slow the vehicle
down, stop at the nearest safe location, and
adjust the trailer load to eliminate trailer sway.
4
Page 173 of 396
STARTING AND OPERATING 171
TO DEACTIVATE
A soft tap on the brake pedal, pushing the
CANCEL button, or normal brake pressure while
slowing the vehicle will deactivate the Speed
Control without erasing the set speed from
memory.
Pushing the ON/OFF button, or returning the
ig
nition to the OFF position, erases the set
speed from memory.
The following conditions will also deactivate the
S p
eed Control without erasing the set speed
from memory:
Vehicle parking brake is applied
Stability event occurs
Gear selector is moved out of DRIVE
Engine overspeed occurs
PARKSENSE REAR PARK ASSIST
The ParkSense Rear Park Assist system
provides visual and audible indications of
the distance between the rear fascia and a
d e
tected obstacle when backing up (e.g. during
a parking maneuver).
Refer to “ParkSense System Usage
P r
ecautions” in this section for limitations of
this system and recommendations.
ParkSense will retain the last system state
( e
nabled or disabled) from the last ignition cycle
when the ignition is changed to the ON/RUN
position.
ParkSense can be active only when the gear
s e
lector is in REVERSE. If ParkSense is enabled
at this gear selector position, the system will
remain active until the vehicle speed is
increased to approximately 7 mph (11 km/h) or
a b
ove. The system will become active again if
the vehicle speed is decreased to speeds less
than approximately 6 mph (9 km/h).
PARKSENSE SENSORS
The four ParkSense sensors, located in the rear
fascia/bumper, monitor the area behind the
vehicle that is within the sensors’ field of view.
The sensors can detect obstacles from
approximately 12
inches (30 cm) up to
7 9
inches (200 cm) from the rear fascia/
b u
mper in the horizontal direction, depending
on the location, type and orientation of the
obstacle.
5
Page 200 of 396
198 IN CASE OF EMERGENCY
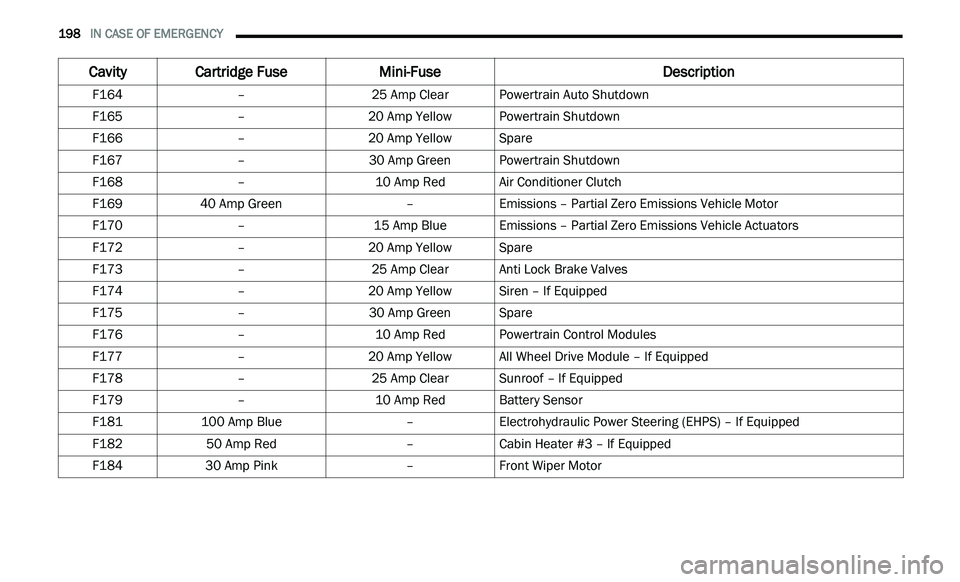
F164 –25 Amp ClearPowertrain Auto Shutdown
F165 –20 Amp Yellow Powertrain Shutdown
F166 –20 Amp Yellow Spare
F167 –30 Amp GreenPowertrain Shutdown
F168 –10 Amp RedAir Conditioner Clutch
F169 40 Amp Green –Emissions – Partial Zero Emissions Vehicle Motor
F170 –15 Amp BlueEmissions – Partial Zero Emissions Vehicle Actuators
F172 –20 Amp Yellow Spare
F173 –25 Amp ClearAnti Lock Brake Valves
F174 –20 Amp Yellow Siren – If Equipped
F175 –30 Amp GreenSpare
F176 –10 Amp RedPowertrain Control Modules
F177 –20 Amp Yellow All Wheel Drive Module – If Equipped
F178 –25 Amp ClearSunroof – If Equipped
F179 –10 Amp RedBattery Sensor
F181 100 Amp Blue –Electrohydraulic Power Steering (EHPS) – If Equipped
F182 50 Amp Red –Cabin Heater #3 – If Equipped
F184 30 Amp Pink –Front Wiper Motor
Cavity Cartridge Fuse Mini-FuseDescription
Page 390 of 396
388
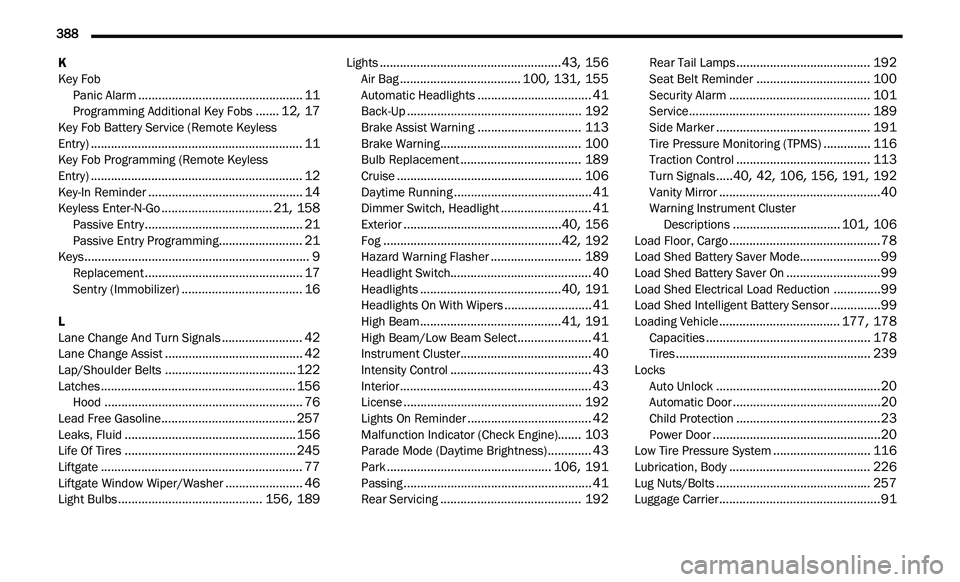
K
Key Fob
Panic Alarm
.................................................11Programming Additional Key Fobs.......12, 17Key Fob Battery Service (Remote Keyless
Entry)...............................................................11Key Fob Programming (Remote Keyless
Entry)...............................................................12Key-In Reminder..............................................14Keyless Enter-N-Go.................................21, 158Passive Entry...............................................21Passive Entry Programming.........................21Keys...................................................................9Replacement...............................................17Sentry (Immobilizer)....................................16
L
Lane Change And Turn Signals........................42Lane Change Assist.........................................42Lap/Shoulder Belts.......................................122Latches..........................................................156Hood...........................................................76Lead Free Gasoline........................................257Leaks, Fluid...................................................156Life Of Tires...................................................245Liftgate............................................................77Liftgate Window Wiper/Washer.......................46Light Bulbs...........................................156, 189
Lights......................................................43, 156Air Bag....................................100, 131, 155Automatic Headlights..................................41Back-Up....................................................192Brake Assist Warning...............................113Brake Warning..........................................100Bulb Replacement....................................189Cruise.......................................................106Daytime Running.........................................41Dimmer Switch, Headlight...........................41Exterior...............................................40, 156Fog.....................................................42, 192Hazard Warning Flasher...........................189Headlight Switch..........................................40Headlights..........................................40, 191Headlights On With Wipers..........................41High Beam..........................................41, 191High Beam/Low Beam Select......................41Instrument Cluster.......................................40Intensity Control..........................................43Interior.........................................................43License.....................................................192Lights On Reminder.....................................42Malfunction Indicator (Check Engine).......103Parade Mode (Daytime Brightness).............43Park.................................................106, 191Passing........................................................41Rear Servicing..........................................192
Rear Tail Lamps........................................192Seat Belt Reminder..................................100Security Alarm..........................................101Service......................................................189Side Marker..............................................191Tire Pressure Monitoring (TPMS)..............116Traction Control........................................113Turn Signals.....40, 42, 106, 156, 191, 192Vanity Mirror................................................40Warning Instrument Cluster
Descriptions................................101, 106Load Floor, Cargo.............................................78Load Shed Battery Saver Mode........................99Load Shed Battery Saver On............................99Load Shed Electrical Load Reduction..............99Load Shed Intelligent Battery Sensor...............99Loading Vehicle....................................177, 178Capacities.................................................178Tires..........................................................239Locks Auto Unlock.................................................20Automatic Door............................................20Child Protection...........................................23Power Door..................................................20Low Tire Pressure System.............................116Lubrication, Body..........................................226Lug Nuts/Bolts..............................................257Luggage Carrier................................................91