alarm DODGE MAGNUM SRT 2007 1.G Owners Manual
[x] Cancel search | Manufacturer: DODGE, Model Year: 2007, Model line: MAGNUM SRT, Model: DODGE MAGNUM SRT 2007 1.GPages: 380, PDF Size: 6.63 MB
Page 10 of 380
THINGS TO KNOW BEFORE STARTING YOUR VEHICLE
CONTENTS
mA Word About Your Keys.................11
NIgnition Key Removal...................11
NKey-In-Ignition Reminder................12
mSentry Key............................12
NReplacement Keys......................13
NCustomer Key Programming..............14
NGeneral Information....................15
mSecurity Alarm System Ð If Equipped.......15
NRearming Of The System.................15
NTo Arm The System.....................15
NTo Disarm The System...................16
mIlluminated Entry System.................17
mRemote Keyless Entry....................17
NTo Unlock The Doors...................18
NTo Lock The Doors.....................18
NUsing The Panic Alarm..................19
NProgramming Additional Transmitters........19
NBattery Replacement....................19
NGeneral Information....................20
mDoor Locks...........................21
NManual Door Locks.....................21
NPower Door Locks.....................22
2
Page 14 of 380
NOTE:A key, which has not been programmed, is also
considered an invalid key even if it is cut to fit the
ignition lock cylinder for that vehicle.
During normal operation, after turning on the ignition
switch, the Vehicle Security Alarm Indicator Light will
turn on for three (3) seconds for a bulb check. If the light
remains on after the bulb check, it indicates that there is
a problem with the electronics. In addition, if the light
begins to flash after the bulb check, it indicates that
someone used an invalid key to start the engine. Either of
these conditions will result in the engine being shut off
after two (2) seconds.
If the Vehicle Security Alarm Indicator Light turns on
during normal vehicle operation (vehicle running for
longer than 10 seconds), it indicates that there is a fault in
the electronics. Should this occur, have the vehicle ser-
viced as soon as possible.
NOTE:
²
The Sentry Key Immobilizer System is not compatible
with remote starting systems. Use of these systems
may result in vehicle starting problems and loss of
security protection.
²Exxon/Mobil Speed Pass,Ÿ additional Sentry Keys, or
any other transponder-equipped components on the
same key chain willnot
cause a key-related (tran-
sponder) fault unless the additional part isphysi-
cally held against the ignition keybeing used
when starting the vehicle. Cell phones, pagers, or
other RF electronics will not cause interference with
this system.
All of the keys provided with your new vehicle have
been programmed to the vehicle electronics.
Replacement Keys
NOTE:
Only keys that are programmed to the vehicle
electronics can be used to start and operate the vehicle.
Once a Sentry Key is programmed to a vehicle, it cannot
be programmed to any other vehicle.
At the time of purchase, the original owner is provided
with a four-digit PIN number. This number is required
for dealer replacement of keys. Duplication of keys may
be performed at an authorized dealer or by using the
Customer Key Programming procedure. This procedure
THINGS TO KNOW BEFORE STARTING YOUR VEHICLE 13
2
Page 15 of 380
consists of programming a blank key to the vehicle
electronics. A blank key is one, which has never been
programmed.
NOTE:When having the Sentry Key Immobilizer
System serviced, bring all vehicle keys with you to the
dealer.
Customer Key Programming
If you have two valid sentry keys, you can program new
sentry keys to the system by performing the following
procedure:
1. Cut the additional Sentry Key Transponder blank(s) to
match the ignition switch lock cylinder key code.
2. Insert the first valid key into the ignition switch and
turn the ignition switch ON for at least 3 seconds but no
longer than 15 seconds. Turn the ignition switch OFF and
remove the first key.
3. Insert the second valid key and turn the ignition
switch ON within 15 seconds. After ten seconds, a chime
will sound and the Vehicle Security Alarm Indicator
Light will begin to flash. Turn the ignition switch OFF
and remove the second key.4. Insert a blank Sentry Key into the ignition switch and
turn the ignition switch ON within 60 seconds. After 10
seconds, a single chime will sound and the Vehicle
Security Alarm Indicator Light will stop flashing, turn on
again for 3 seconds, and then turn off.
The new Sentry Key is programmed.The Keyless Entry
Transmitter will also be programmed during this pro-
cedure.
Repeat this procedure to program up to 8 keys. If you do
not have a programmed sentry key, contact your dealer
for details.
NOTE:If a programmed key is lost, see your dealer to
have all remaining keys erased from the systems
memory. This will prevent the lost key from starting your
vehicle. The remaining keys must then be repro-
grammed. All vehicle keys must be taken to the dealer at
the time of service to be reprogrammed.
14 THINGS TO KNOW BEFORE STARTING YOUR VEHICLE
Page 16 of 380
General Information
The Sentry Key system complies with FCC rules part 15
and with RSS-210 of Industry Canada. Operation is
subject to the following conditions:
²This device may not cause harmful interference.
²This device must accept any interference that may be
received, including interference that may cause undes-
ired operation.
SECURITY ALARM SYSTEM Ð IF EQUIPPED
The Vehicle Security Alarm system monitors the vehicle
doors for unauthorized entry and the ignition switch for
unauthorized operation. If something triggers the alarm,
the system will prevent the vehicle from starting and
provide the following audible and visual signals: the
horn will pulse; the headlights will flash; the park lights
will flash; and the Vehicle Security Alarm Indicator light
in the instrument cluster will flash.
Rearming of the System:
If something triggers the alarm, and no action is taken to
disarm it, the system will turn off the horn after 29
seconds, turn off all of the visual signals after 31 seconds,
and then the system will rearm itself.
To Arm the System:
Remove the key from the ignition switch and either press
a power door lock switch while the driver or passenger
door is open or press the LOCK button on the keyless
entry transmitter. After the last door is closed, or if all
doors are closed, the system will arm itself in about 16
seconds. During that time, the Vehicle Security Alarm
Indicator light will flash. If it does not illuminate, the
system is not arming. In addition, if you open a door
during the arming period, the system will cancel the
arming process. If you wish to rearm the system after
closing the door, you must repeat one of the previously
described arming sequences.
THINGS TO KNOW BEFORE STARTING YOUR VEHICLE 15
2
Page 17 of 380
To Disarm the System:
Either press the UNLOCK button on the remote keyless
entry transmitter or insert a valid sentry key into the
ignition lock cylinder and turn the key to the ON/START
position.
If you open the liftgate after disarming the system, you
must use one of the previously described arming se-
quences if you wish to rearm the system after closing the
liftgate.
NOTE:
²
The driver's door key cylinder cannot arm or disarm
the system.
²Once the alarm is set, you have a 30-second one-time
access into the liftgate area. If the liftgate is not opened
within 30 seconds, the liftgate will automatically re-
lock within 10 seconds.
²The system remains armed during liftgate entry. If
someone enters the vehicle through the liftgate, and
opens any door, the alarm will sound.
²When the system is armed, the interior power door
lock switches will not unlock the doors.The Vehicle Security Alarm system is designed to protect
your vehicle; however, you can create conditions where
the system will give you a false alarm. If one of the
previously described arming sequences has occurred, the
system will arm regardless of whether you are in the
vehicle or not. If you remain in the vehicle and open a
door, the alarm will sound. If this occurs, disarm the
system.
The alarm system will be activated when the battery is
connected if the system was previously armed. The
exterior lights will flash, the horn will sound, and the
ignition will not start the vehicle. If this occurs, disarm
the system.
Tamper Alert
If something has triggered the system in your absence,
the horn will sound three times when you disarm the
system. Check the vehicle for tampering.
16 THINGS TO KNOW BEFORE STARTING YOUR VEHICLE
Page 18 of 380
ILLUMINATED ENTRY SYSTEM
The courtesy lights will turn on when you use the keyless
entry transmitter or open the doors or liftgate.
The lights will fade to off after about 30 seconds or they
will immediately fade to off once the ignition switch is
turned ON from the LOCK position.
NOTE:
²
None of the courtesy lights will operate if the dimmer
control is in the ªdefeatº position (extreme downward
position), unless the overhead map/reading lights are
turned on manually.
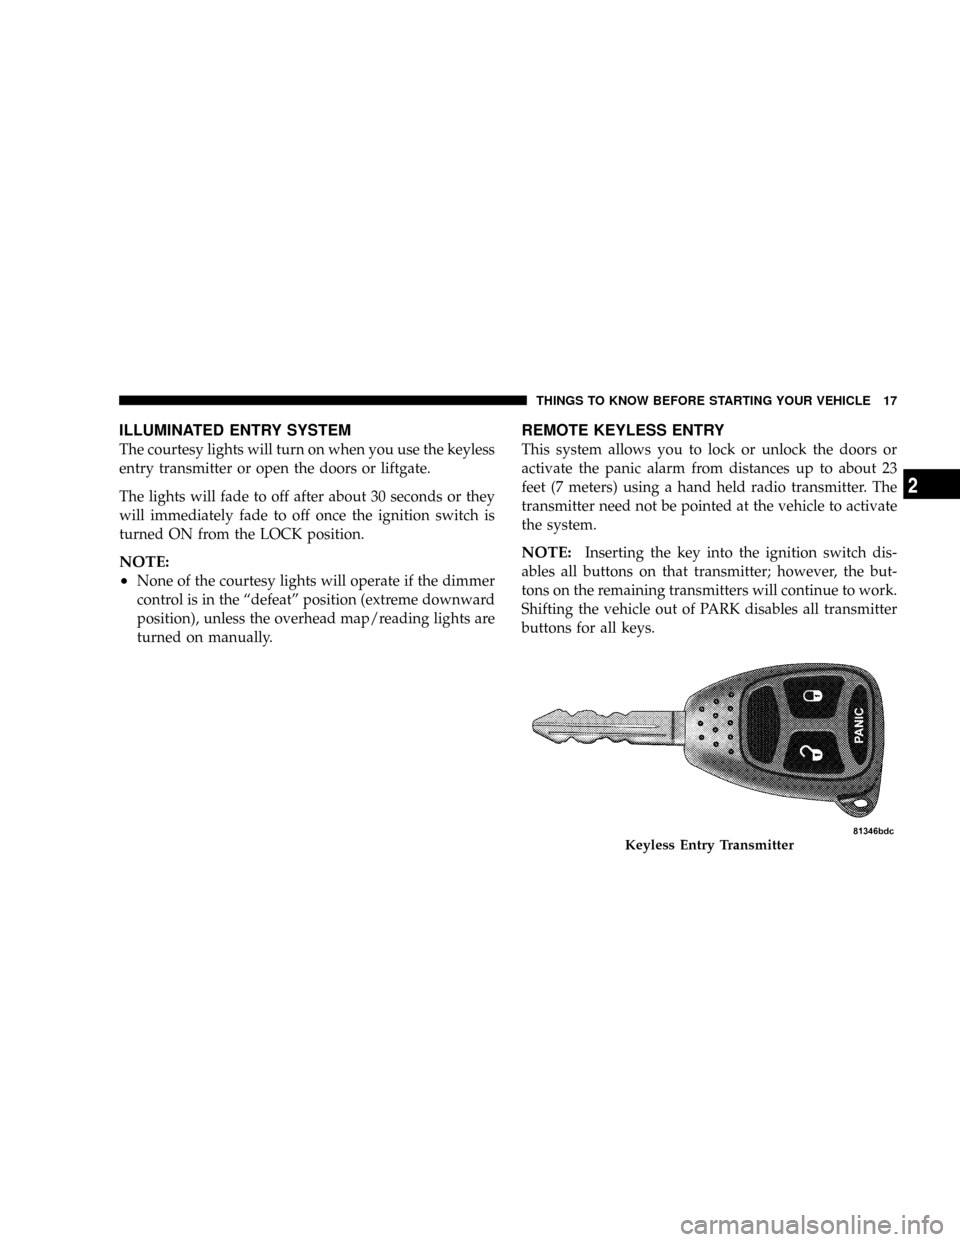
REMOTE KEYLESS ENTRY
This system allows you to lock or unlock the doors or
activate the panic alarm from distances up to about 23
feet (7 meters) using a hand held radio transmitter. The
transmitter need not be pointed at the vehicle to activate
the system.
NOTE:Inserting the key into the ignition switch dis-
ables all buttons on that transmitter; however, the but-
tons on the remaining transmitters will continue to work.
Shifting the vehicle out of PARK disables all transmitter
buttons for all keys.
Keyless Entry Transmitter
THINGS TO KNOW BEFORE STARTING YOUR VEHICLE 17
2
Page 20 of 380
Sound Horn with Remote Key Lock
This feature will cause the horn to chirp when the doors
are locked with the transmitter. This feature can be
enabled or disabled. For details on how to change the
current setting, refer to ªSound Horn with Remote Key
Lock,º under ªPersonal Settings (Customer Program-
mable Features),º under ªElectronic Vehicle Information
Center (EVIC)º in Section 4 of this manual.
Using The Panic Alarm:
To turn the panic alarm feature ON or OFF, press and
hold the PANIC button on the transmitter for at least one
second and release. When the panic alarm is on, the
headlights and park lights will flash, the horn will pulse
on and off, and the interior lights will turn on.
The panic alarm will stay on for 3 minutes unless you
turn it off by either pressing the PANIC button a second
time or drive the vehicle at a speed of 15 mph (24 km/h)
or greater.
NOTE:
²
The interior lights will turn off if you turn the ignitionswitch to the ACC or ON position while the panic
alarm is activated. However, the exterior lights and
horn will remain on.
²You may need to be less than 23 feet (7 meters) from
the vehicle when using the transmitter to turn off the
panic alarm due to the radio frequency noises emitted
by the system.
Programming Additional Transmitters
Refer to SENTRY KEY ªCustomer Key Programming.º
(See page 14 for more information.)
If you do not have a programmed transmitter, contact
your dealer for details.
Battery Replacement
The recommended replacement battery is CR2032.
NOTE:Do not touch the battery terminals that are on
the back housing or the printed circuit board.
1. With the transmitter buttons facing downward, re-
move the small screw (if equipped).
THINGS TO KNOW BEFORE STARTING YOUR VEHICLE 19
2
Page 41 of 380
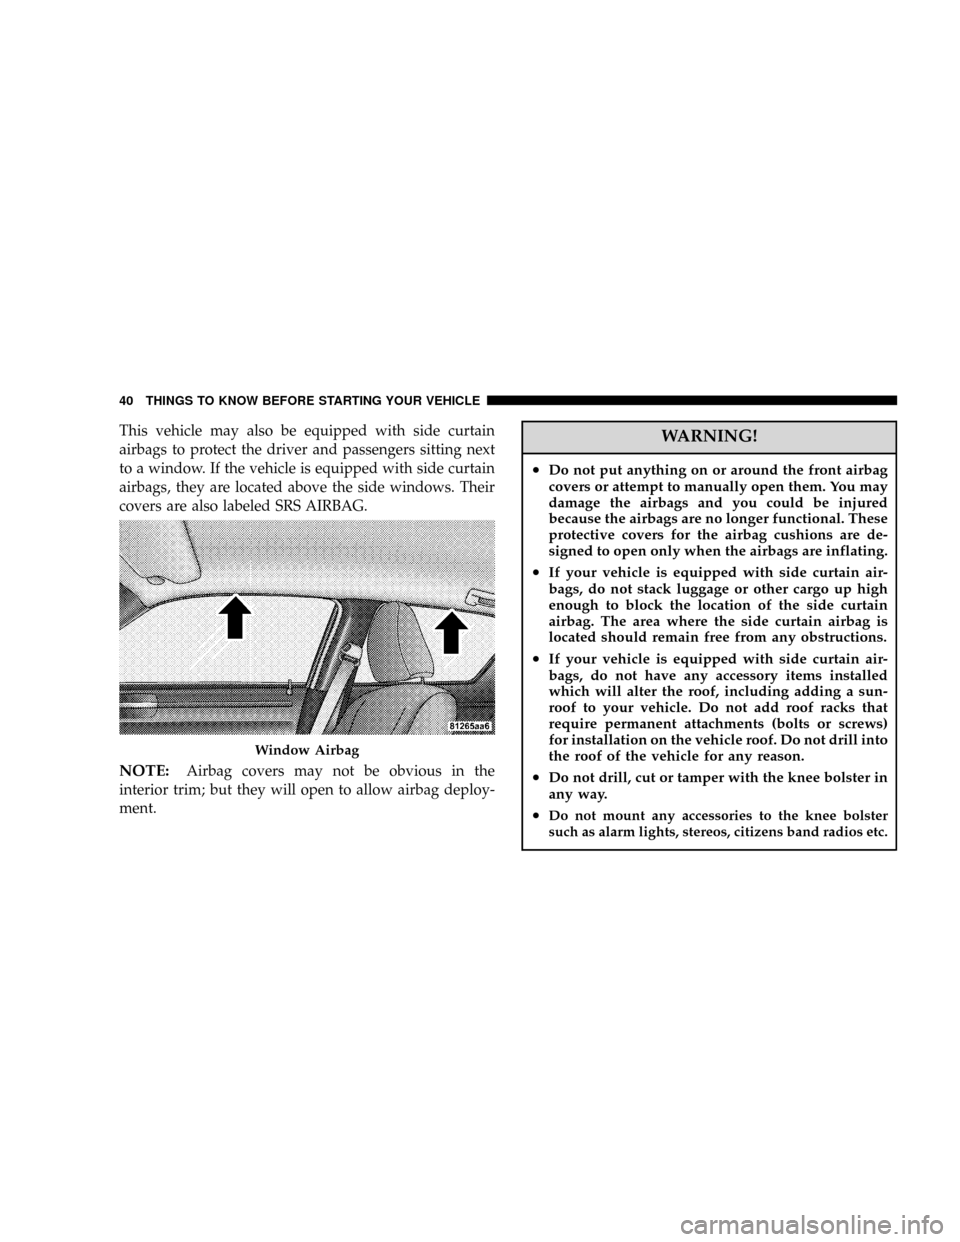
This vehicle may also be equipped with side curtain
airbags to protect the driver and passengers sitting next
to a window. If the vehicle is equipped with side curtain
airbags, they are located above the side windows. Their
covers are also labeled SRS AIRBAG.
NOTE:Airbag covers may not be obvious in the
interior trim; but they will open to allow airbag deploy-
ment.
WARNING!
²Do not put anything on or around the front airbag
covers or attempt to manually open them. You may
damage the airbags and you could be injured
because the airbags are no longer functional. These
protective covers for the airbag cushions are de-
signed to open only when the airbags are inflating.
²If your vehicle is equipped with side curtain air-
bags, do not stack luggage or other cargo up high
enough to block the location of the side curtain
airbag. The area where the side curtain airbag is
located should remain free from any obstructions.
²If your vehicle is equipped with side curtain air-
bags, do not have any accessory items installed
which will alter the roof, including adding a sun-
roof to your vehicle. Do not add roof racks that
require permanent attachments (bolts or screws)
for installation on the vehicle roof. Do not drill into
the roof of the vehicle for any reason.
²Do not drill, cut or tamper with the knee bolster in
any way.
²Do not mount any accessories to the knee bolster
such as alarm lights, stereos, citizens band radios etc.
Window Airbag
40 THINGS TO KNOW BEFORE STARTING YOUR VEHICLE
Page 108 of 380
GARAGE DOOR OPENER (HomeLinkT)ÐIF
EQUIPPED
The HomeLinktUniversal Transceiver replaces up to
three remote controls (hand held transmitters) that oper-
ate devices such as garage door openers, motorized
gates, or home lighting. It triggers these devices at the
push of a button. The Universal Transceiver operates off
your vehicle's battery and charging system; no batteries
are needed.
NOTE:The HomeLinktUniversal Transceiver is dis-
abled when the Vehicle Security Alarm is active.
For additional information on HomeLinkt, call 1±800±
355±3515, or on the internet at www.homelink.com.
WARNING!
²A moving garage door can cause injury to people
and pets in the path of the door. People or pets
could be seriously or fatally injured. Only use this
transceiver with a garage door opener that has a
ªstop and reverseº feature as required by federal
safety standards. This includes most garage door
opener models manufactured after 1982. Do not
use a garage door opener without these safety
features it could cause injury or death. Call toll-
free 1±800±355±3515 or, on the Internet at
www.homelink.com for safety information or as-
sistance.
²Vehicle exhaust contains carbon monoxide, a dan-
gerous gas. Do not run the vehicle's exhaust while
training the transceiver. Exhaust gas can cause
serious injury or death.
²Your motorized door or gate will open and close
while you are training the Universal Transceiver.
Do not train the transceiver if people or pets are in
the path of the door or gate. A moving door or gate
can cause serious injury or death to people and
pets or damage to objects.
UNDERSTANDING THE FEATURES OF YOUR VEHICLE 107
3
Page 141 of 380
turn on in the event of an EBD failure. Immediate repair
of the ABS system is required in the event of an EBD
failure.
The operation of the Brake Warning Light can be checked
by turning the ignition switch from the OFF position to
the ON position. The light should turn on for approxi-
mately two seconds and then turn off. The light will
remain on if the parking brake is applied or if a brake
fault is detected. If the parking brake is not applied and
the light remains on, or if the light does not turn on, have
the light inspected by an authorized dealer.
NOTE:The light will turn on when the ignition switch
in the ON position and the parking brake is applied. This
light shows only that the parking brake is applied. It does
not show the degree of brake application. (See page 219
for more information.)
21. Vehicle Security Alarm (VSA) Indicator Light Ð
If Equipped
The VSA indicator Light flashes rapidly when the VSA is
arming, and slowly when the VSA is armed. (See page 15
for more information.)
22. Tire Pressure Monitoring Telltale Light Ð If
Equipped
Each tire, including the spare (if provided),
should be checked monthly when cold and
inflated to the inflation pressure recom-
mended by the vehicle manufacturer on the
vehicle placard or tire inflation pressure label. (If your
vehicle has tires of a different size than the size
indicated on the vehicle placard or tire inflation pres-
sure label, you should determine the proper tire
inflation pressure for those tires.)
As an added safety feature, your vehicle has been
equipped with a tire pressure monitoring system (TPMS)
that illuminates a low tire pressure telltale when one or
more of your tires are significantly under-inflated. Ac-
cordingly, when the low tire pressure telltale illuminates,
you should stop and check your tires as soon as possible,
and inflate them to the proper pressure. Driving on a
significantly under-inflated tire causes the tire to over-
heat and can lead to tire failure. Under-inflation also
reduces fuel efficiency and tire tread life, and may affect
the vehicle's handling and stopping ability.
140 UNDERSTANDING YOUR INSTRUMENT PANEL