audio DODGE MAGNUM SRT 2007 1.G Owners Manual
[x] Cancel search | Manufacturer: DODGE, Model Year: 2007, Model line: MAGNUM SRT, Model: DODGE MAGNUM SRT 2007 1.GPages: 380, PDF Size: 6.63 MB
Page 68 of 380
HANDS±FREE COMMUNICATION (UConnectŸ) Ð
IF EQUIPPED
UConnectŸ is a voice-activated, hands-free, in- vehicle
communications system. UConnectŸ allows you to dial
a phone number with your cellular phone using simple
voice commands (e.g.,9Callº{ªMikeº{ºWork9or9Dialº
{ª248-555-12129). Your cellular phone's audio is trans-
mitted through your vehicle's audio system; the system
will automatically mute your radio when using the
UConnectŸ system.
NOTE:The UConnectŸ system use requires a cellular
phone equipped with the Bluetooth9Hands-Free Profile,9
version 0.96 or higher. See www.chrysler.com/uconnect
for supported phones.
UConnectŸ allows you to transfer calls between the
system and your cellular phone as you enter or exit your
vehicle, and enables you to mute the system's micro-
phone for private conversation.The UConnectŸ phonebook enables you to store up to 32
names and four numbers per name. Each language has a
separate 32-name phonebook accessible only in that
language. This system is driven through your Blue-
toothŸ Hands-Free profile cellular phone. UConnectŸ
features BluetoothŸ technology - the global standard
that enables different electronic devices to connect to
each other without wires or a docking station, so UCon-
nect works no matter where you stow your cellular
phone (be it your purse, pocket, or briefcase), as long as
your phone is turned on and has been paired to the
vehicle's UConnectŸ system. The UConnectŸ system
allows up to seven cellular phones to be linked to system.
Only one linked (or paired) cellular phone can be used
with the system at a time. The system is available in
English, Spanish, or French languages (as equipped).
UNDERSTANDING THE FEATURES OF YOUR VEHICLE 67
3
Page 69 of 380
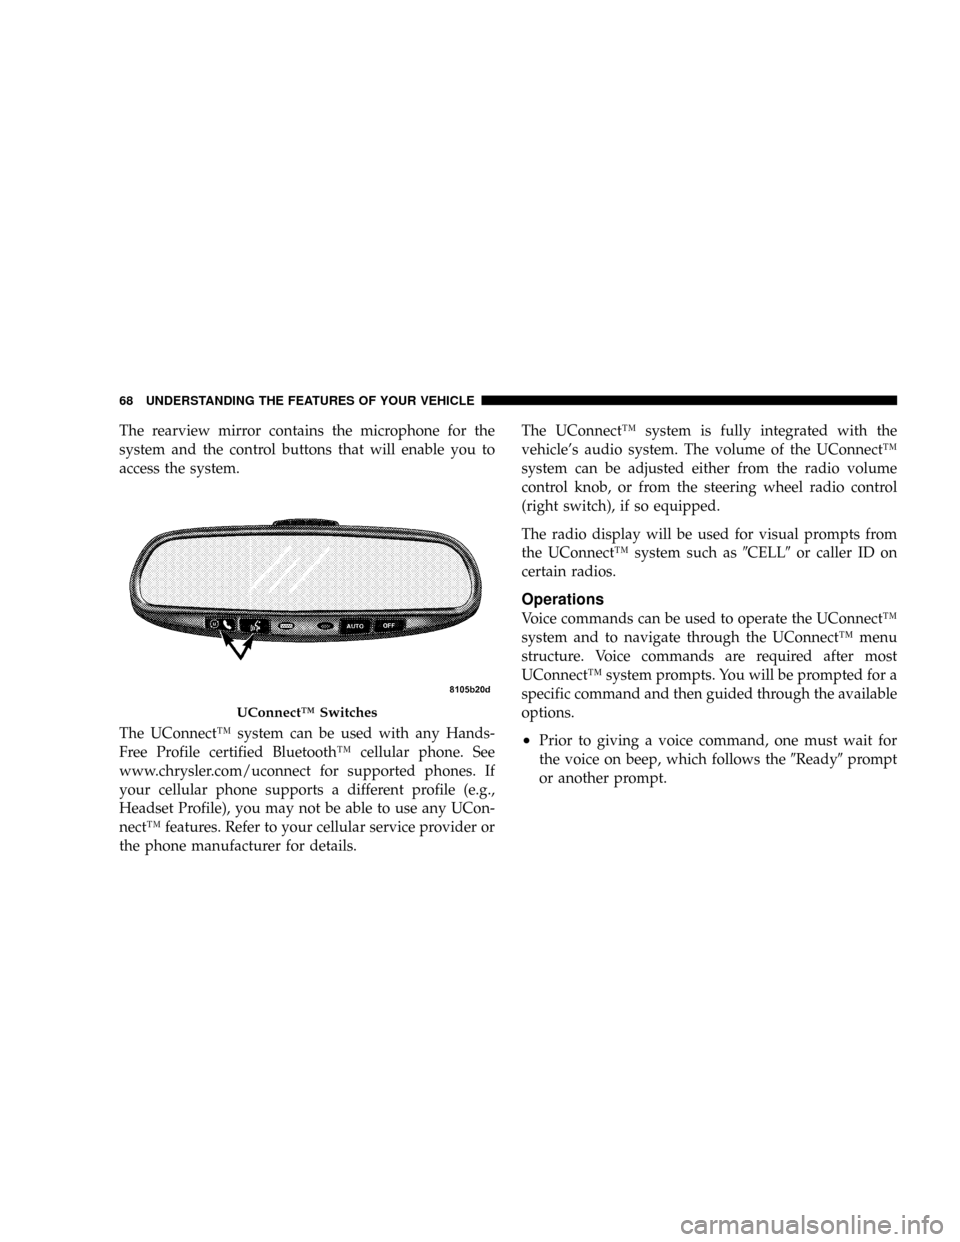
The rearview mirror contains the microphone for the
system and the control buttons that will enable you to
access the system.
The UConnectŸ system can be used with any Hands-
Free Profile certified BluetoothŸ cellular phone. See
www.chrysler.com/uconnect for supported phones. If
your cellular phone supports a different profile (e.g.,
Headset Profile), you may not be able to use any UCon-
nectŸ features. Refer to your cellular service provider or
the phone manufacturer for details.The UConnectŸ system is fully integrated with the
vehicle's audio system. The volume of the UConnectŸ
system can be adjusted either from the radio volume
control knob, or from the steering wheel radio control
(right switch), if so equipped.
The radio display will be used for visual prompts from
the UConnectŸ system such as9CELL9or caller ID on
certain radios.
Operations
Voice commands can be used to operate the UConnectŸ
system and to navigate through the UConnectŸ menu
structure. Voice commands are required after most
UConnectŸ system prompts. You will be prompted for a
specific command and then guided through the available
options.
²Prior to giving a voice command, one must wait for
the voice on beep, which follows the9Ready9prompt
or another prompt.
UConnectŸ Switches
68 UNDERSTANDING THE FEATURES OF YOUR VEHICLE
Page 75 of 380
²The UConnectŸ system will then prompt you as to
number designation you wish to call.
²The selected number will be dialed.
Phone Call Features
The following features can be accessed through the
UConnectŸ system if the feature(s) are available on your
cellular service plan. For example, if your cellular service
plan provides three-way calling, this feature can be
accessed through the UConnectŸ system. Check with
your cellular service provider for the features that you
have.
Answer or Reject an Incoming Call - No Call
Currently in Progress
When you receive a call on your cellular phone, the
UConnectŸ system will interrupt the vehicle audio
system, if on, and will ask if you would like to answer the
call. To reject the call, press and hold the 'Phone' button
until you hear a single beep indicating that the incoming
call was rejected.
Answer or Reject an Incoming Call - Call
Currently in Progress
If a call is currently in progress and you have another
incoming call, you will hear the same network tones for
call waiting that you normally hear when using your cell
phone. Press the 'Phone' button to place the current call
on hold and answer the incoming call. NOTE: The
UConnectŸ system compatible phones in market today
do not support rejecting an incoming call when another
call is in progress. Therefore, the user can only either
answer an incoming call or ignore it.
Making a Second Call while Current Call in
Progress
To make a second call while you are currently in a call,
press the 'Voice Recognition' button and say9Dial9or
9Call9followed by the phone number or phonebook entry
you wish to call. The first call will be on hold while the
second call is in progress. To go back to the first call, refer
to9Toggling Between Calls.9To combine two calls, refer
to9Conference Call.9
74 UNDERSTANDING THE FEATURES OF YOUR VEHICLE
Page 80 of 380
your cell phone, the UConnectŸ system will provide
notification to inform you of your phone and network
status when you are attempting to make a phone call
using UConnectŸ. The status is given for roaming net-
work signal strength, phone battery strength, etc.
Dialing Using the Cellular Phone Keypad
You can dial a phone number with your cellular phone
keypad and still use the UConnectŸ system (while
dialing via the cell phone keypad, the user must exercise
caution and take precautionary safety measures). By
dialing a number with your paired BluetoothŸ cellular
phone, the audio will be played through your vehicle's
audio system. The UConnectŸ system will work the
same as if you dial the number using voice recognition.
NOTE:Certain brands of mobile phones do not send
the dial ring to the UConnectŸ system to play it on the
vehicle audio system, so you will not hear it. Under this
situation, after successfully dialing a number, the user
may feel that the call did not go through even though the
call is in progress. Once your call is answered, you will
hear the audio.
Mute/Un-mute (Mute off)
When you mute the UConnectŸ system, you will still be
able to hear the conversation coming from the other
party, but the other party will not be able to hear you. In
order to mute the UConnectŸ system:
²Press the 'Voice Recognition' button.
²After the9Ready9prompt and the following beep, say
9Mute.9
In order to un-mute the UConnectŸ system:
²Press the 'Voice Recognition' button.
²After the9Ready9prompt and the following beep, say
9Mute-off.9
Information Service
When using AT&T Wireless Service, dialing to phone
number9#121,9you can access voice activated automated
system to receive news, weather, stocks, traffic, etc.
related information.
UNDERSTANDING THE FEATURES OF YOUR VEHICLE 79
3
Page 83 of 380
²Even though the system is designed for users speaking
in North American English, French, and Spanish ac-
cents, the system may not always work for some.
²When navigating through an automated system, such
as voice mail, or when sending a page at the end of
speaking the digit string, make sure to say9send.9
²Storing names in phonebook when vehicle is not in
motion is recommended.
²It is not recommended to store similar sounding
names in the UConnectŸ phonebook.
²UConnectŸ phonebook nametag recognition rate is
optimized for the voice of the person who stored the
name in the phonebook.
²You can say9O9(letter9O9) for909(zero).98009must be
spoken9eight-zero-zero.9
²Even though international dialing for most number
combinations is supported, some shortcut dialing
number combinations may not be supported.
Far End Audio Performance
²
Audio quality is maximized under:
²low-to-medium blower setting,
²low-to-medium vehicle speed,
²low road noise,
²smooth road surface,
²fully closed windows, and
²dry weather condition.
²Operation from driver seat.
²Performance, such as audio clarity, echo, and loudness
to a large degree rely on the phone and network, and
not the UConnectŸ system.
²Echo at far end can sometime be reduced by lowering
the in-vehicle audio volume.
82 UNDERSTANDING THE FEATURES OF YOUR VEHICLE
Page 131 of 380
NOperating Instructions - Radio Mode.......156
NOperation Instructions - CD Mode.........159
NOperation Instructions - Auxiliary Mode.....160
NOperating Instructions - Hands Free Phone Ð If
Equipped...........................161
NOperating Instructions - Satellite Radio Ð If
Equipped...........................161
mSales Code RAK ± AM/FM/Cassette/CD (6-Disc)
Radio With Optional Satellite Radio, Hands Free
Phone, Video, MP3, And WMA Capabilities
. . 162
NOperating Instructions - Radio Mode.......162
NOperating Instructions Ð Tape Player.......165
NSeek Button.........................166
NFast Forward (FF).....................166
NRewind (RW)........................166
NTape Eject...........................166
NScan Button.........................166NChanging Tape Direction................166
NMetal Tape Selection...................166
NPinch Roller Release...................166
NNoise Reduction......................167
NOperation Instructions - (CD Mode For CD
Audio Play).........................167
NLoad/Eject Button (CD Mode For CD
Audio Play).........................168
NNotes On Playing MP3 Files.............169
NOperation Instructions - (CD Mode For MP3
And WMA Audio Play).................171
NLoad/Eject Button (CD Mode For MP3 And
WMA Play).........................171
mSales Code REC Ð AM/FM/CD (6±Disc) Radio
With Navigation System
.................173
NOperating Instructions Ð Satellite Radio (If
Equipped)..........................174
NREC Setting The Clock.................174
130 UNDERSTANDING YOUR INSTRUMENT PANEL
Page 132 of 380
NAudio Clock Display...................176
mVideo Entertainment System (Sales Code XRV) Ð
If Equipped
..........................177
NKicker Mobile Surround (Kms1)...........179
mSatellite Radio Ð If Equipped.............179
NSystem Activation.....................179
NElectronic Serial Number/Sirius Identification
Number (ESN/SID)....................180
NSelecting Satellite Mode In REF, RAQ, And
RAK Radios.........................180
NSelecting a Channel....................181
NStoring And Selecting Pre-Set Channels......181
NUsing The PTY (Program Type) Button (If
Equipped)..........................181
NPTY Button9Scan9.....................181
NPTY Button9Seek9.....................182
NSatellite Antenna......................182NReception Quality.....................182
mRemote Sound System Controls...........183
NRadio Operation......................184
NTape Player Operation..................184
NCD Player Operation...................184
NSatellite Radio Operation................185
mCassette Tape And Player Maintenance......185
mCD/DVD Disc Maintenance..............186
mRadio Operation And Cellular Phones.......186
mClimate Controls......................186
NManual Air Conditioning And Heating
System.............................187
NAutomatic Temperature Control Ð If
Equipped...........................189
NOperating Tips.......................194
mRear Window Features..................197
UNDERSTANDING YOUR INSTRUMENT PANEL 131
4
Page 144 of 380
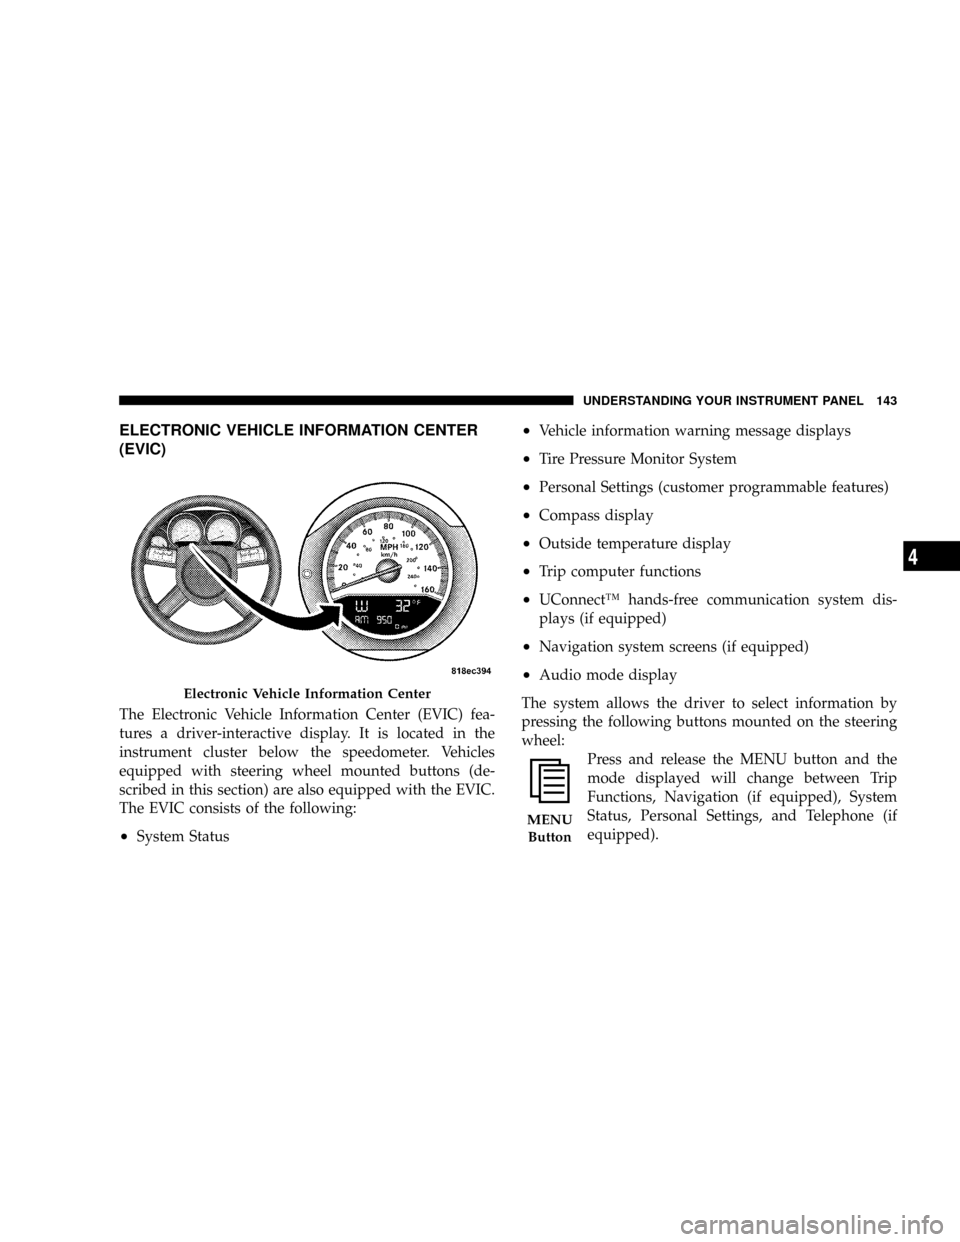
ELECTRONIC VEHICLE INFORMATION CENTER
(EVIC)
The Electronic Vehicle Information Center (EVIC) fea-
tures a driver-interactive display. It is located in the
instrument cluster below the speedometer. Vehicles
equipped with steering wheel mounted buttons (de-
scribed in this section) are also equipped with the EVIC.
The EVIC consists of the following:
²System Status
²Vehicle information warning message displays
²Tire Pressure Monitor System
²Personal Settings (customer programmable features)
²Compass display
²Outside temperature display
²Trip computer functions
²UConnectŸ hands-free communication system dis-
plays (if equipped)
²Navigation system screens (if equipped)
²Audio mode display
The system allows the driver to select information by
pressing the following buttons mounted on the steering
wheel:
Press and release the MENU button and the
mode displayed will change between Trip
Functions, Navigation (if equipped), System
Status, Personal Settings, and Telephone (if
equipped).
Electronic Vehicle Information Center
MENU
Button
UNDERSTANDING YOUR INSTRUMENT PANEL 143
4
Page 145 of 380
Press the FUNCTION SELECT button to accept
a selection. The FUNCTION SELECT button
also advances the radio to the next preset
station, changes the side of the tape being
played (if so equipped), or changes the current
CD track being played (if so equipped) when
the EVIC is in the Compass/Temp/Audio
screen.
Press the SCROLL button to scroll through Trip
Functions, Navigation (if equipped), System
Status Messages, and Personal Settings (Cus-
tomer Programmable Features). The SCROLL
button also seeks up and down the radio
stations, CD track numbers (if so equipped), or
satellite radio channels (if so equipped) when the EVIC is
in the Compass/Temp/Audio screen.
Press the AUDIO MODE button to select the
Compass/Temp/Audio screen. This screen
displays radio station frequencies, any one of
twelve radio station preset frequencies, CD
disc number, CD track number, tape, or any
one of 200 Satellite radio channels depending
on which radio is in the vehicle.If Compass/Temp/Audio is already displayed when the
AUDIO MODE button is pressed, then the radio mode
will change from AM to FM, to Tape, to CD, or to Satellite
(SAT) accordingly.
Electronic Vehicle Information Center (EVIC)
Displays
When the appropriate conditions exist, the Electronic
Vehicle Information Center (EVIC) displays the following
messages:
²Turn Signal On (with a continuous warning chime if
the vehicle is driven more than 1 mile [1.6 km] with
either turn signal on)
²Left Front Turn Signal Light Out (with a single chime)
²Left Rear Turn Signal Light Out (with a single chime)
²Right Front Turn Signal Light Out (with a single
chime)
²Right Rear Turn Signal Light Out (with a single chime)
²RKE Battery Low (with a single chime)
²Personal Settings Not Available ± Vehicle Not in Park
FUNC-
TION
SELECT
Button
SCROLL
Button
AUDIO
MODE
Button
144 UNDERSTANDING YOUR INSTRUMENT PANEL
Page 152 of 380
Navigation Ð If Equipped
Navigation Display Control
Press and release the MENU button until Navigation
displays in the EVIC. When the Navigation System is On,
the steering wheel buttons can be used to select the Map
or Menu display on the Navigation Unit. When the Menu
display is active, the SCROLL button can be used to scroll
through the list, the FUNCTION SELECT button can be
used to select an item, and the AUDIO MODE button can
be used to return to the previous menu. When the Map
display is active, pressing the FUNCTION SELECT but-
ton will change the Navigation Unit Display to the Menu.
Turn By Turn Directions
The EVIC displays turn-by-turn directions to a pro-
grammed destination when Turn by Turn Navigation is
enabled through Personal Settings. When enabled, the
EVIC displays the name of the approaching road at the
top of the screen, followed by an arrow to indicate the
direction to turn the vehicle, and a count down to
indicate the distance to the turn.
NOTE:Refer to your ªNavigation User's Manualº for
detailed operating instructions.
System Warnings (Customer Information
Features)
Press and release the MENU button until ªSYSTEM
WARNINGSº displays in the EVIC. Then, press the
SCROLL button to display anyone of the following
choices:
²Oil Temperature
Shows the actual oil temperature.
²Oil Pressure
Shows the actual oil pressure.
²Tire Pressure
Shows the actual tire pressure for each tire (EXCLUDING
THE SPARE TIRE).
Personal Settings (Customer Programmable
Features)
Personal Settings allows the driver to set and recall
features when the transmission is in PARK.
Press and release the MENU button until Personal Set-
tings displays in the EVIC.
UNDERSTANDING YOUR INSTRUMENT PANEL 151
4