tire pressure DODGE MAGNUM SRT 2007 1.G Owners Manual
[x] Cancel search | Manufacturer: DODGE, Model Year: 2007, Model line: MAGNUM SRT, Model: DODGE MAGNUM SRT 2007 1.GPages: 380, PDF Size: 6.63 MB
Page 60 of 380
Front seat belt assemblies must be replaced after a
collision. Rear seat belt assemblies must be replaced after
a collision if they have been damaged (bent retractor, torn
webbing, etc. If there is any question regarding belt or
retractor condition, replace the belt.
Airbag Warning Light
The light should come on and remain on for 6 to 8
seconds as a bulb check when the ignition switch is first
turned ON. If the light is not lit during starting, see you
authorized dealer. If the light stays on, flickers, or comes
on while driving, have the system checked by an autho-
rized dealer.
Defroster
Check operation by selecting the defrost mode and place
the blower control on high speed. You should be able to
feel the air directed against the windshield.
Periodic Safety Checks You Should Make Outside
The Vehicle
Tires
Examine tires for excessive tread wear and uneven wear
patterns. Check for stones, nails, glass, or other objects
lodged in the tread. Inspect tread and sidewall for cuts
and cracks. Check the wheel nuts for tightness. Check the
tires (including spare) for proper pressure.
Lights
Have someone observe the operation of exterior lights
while you work the controls. Check turn signal and high
beam indicator lights on the instrument panel.
Door Latches
Check for positive closing, latching, and locking.
Fluid Leaks
Check area under vehicle after overnight parking for fuel,
engine coolant, oil, or other fluid leaks. Also, if gasoline
fumes are detected or if fuel, power steering fluid, or
brake fluid leaks are suspected, the cause should be
located and corrected immediately.
THINGS TO KNOW BEFORE STARTING YOUR VEHICLE 59
2
Page 141 of 380
turn on in the event of an EBD failure. Immediate repair
of the ABS system is required in the event of an EBD
failure.
The operation of the Brake Warning Light can be checked
by turning the ignition switch from the OFF position to
the ON position. The light should turn on for approxi-
mately two seconds and then turn off. The light will
remain on if the parking brake is applied or if a brake
fault is detected. If the parking brake is not applied and
the light remains on, or if the light does not turn on, have
the light inspected by an authorized dealer.
NOTE:The light will turn on when the ignition switch
in the ON position and the parking brake is applied. This
light shows only that the parking brake is applied. It does
not show the degree of brake application. (See page 219
for more information.)
21. Vehicle Security Alarm (VSA) Indicator Light Ð
If Equipped
The VSA indicator Light flashes rapidly when the VSA is
arming, and slowly when the VSA is armed. (See page 15
for more information.)
22. Tire Pressure Monitoring Telltale Light Ð If
Equipped
Each tire, including the spare (if provided),
should be checked monthly when cold and
inflated to the inflation pressure recom-
mended by the vehicle manufacturer on the
vehicle placard or tire inflation pressure label. (If your
vehicle has tires of a different size than the size
indicated on the vehicle placard or tire inflation pres-
sure label, you should determine the proper tire
inflation pressure for those tires.)
As an added safety feature, your vehicle has been
equipped with a tire pressure monitoring system (TPMS)
that illuminates a low tire pressure telltale when one or
more of your tires are significantly under-inflated. Ac-
cordingly, when the low tire pressure telltale illuminates,
you should stop and check your tires as soon as possible,
and inflate them to the proper pressure. Driving on a
significantly under-inflated tire causes the tire to over-
heat and can lead to tire failure. Under-inflation also
reduces fuel efficiency and tire tread life, and may affect
the vehicle's handling and stopping ability.
140 UNDERSTANDING YOUR INSTRUMENT PANEL
Page 142 of 380
Please note that the TPMS is not a substitute for proper
tire maintenance, and it is the driver 's responsibility to
maintain correct tire pressure, even if under-inflation has
not reached the level to trigger illumination of the TPMS
low tire pressure telltale.
The Tire Pressure Monitoring Telltale Light will illumi-
nate in the instrument cluster, and an audible chime will
be activated when one or more tire pressures is low. The
Tire Pressure Monitoring Telltale Light will flash on and
off for 60 seconds when a system fault is detected. The
flash cycle will repeat every ten minutes or until the fault
condition is removed and reset. (See page 246 for more
information.)CAUTION!
The TPMS has been optimized for the original
equipment tires and wheels. TPMS pressures and
warning have been established for the tire size
equipped on your vehicle. Undesirable system op-
eration or sensor damage may result when using
replacement equipment that is not of the same size,
type, and/or style. After-market wheels can cause
sensor damage. Do not use tire sealant from a can, or
balance beads if your vehicle is equipped with a
TPMS, as damage to the sensors may result.
UNDERSTANDING YOUR INSTRUMENT PANEL 141
4
Page 144 of 380
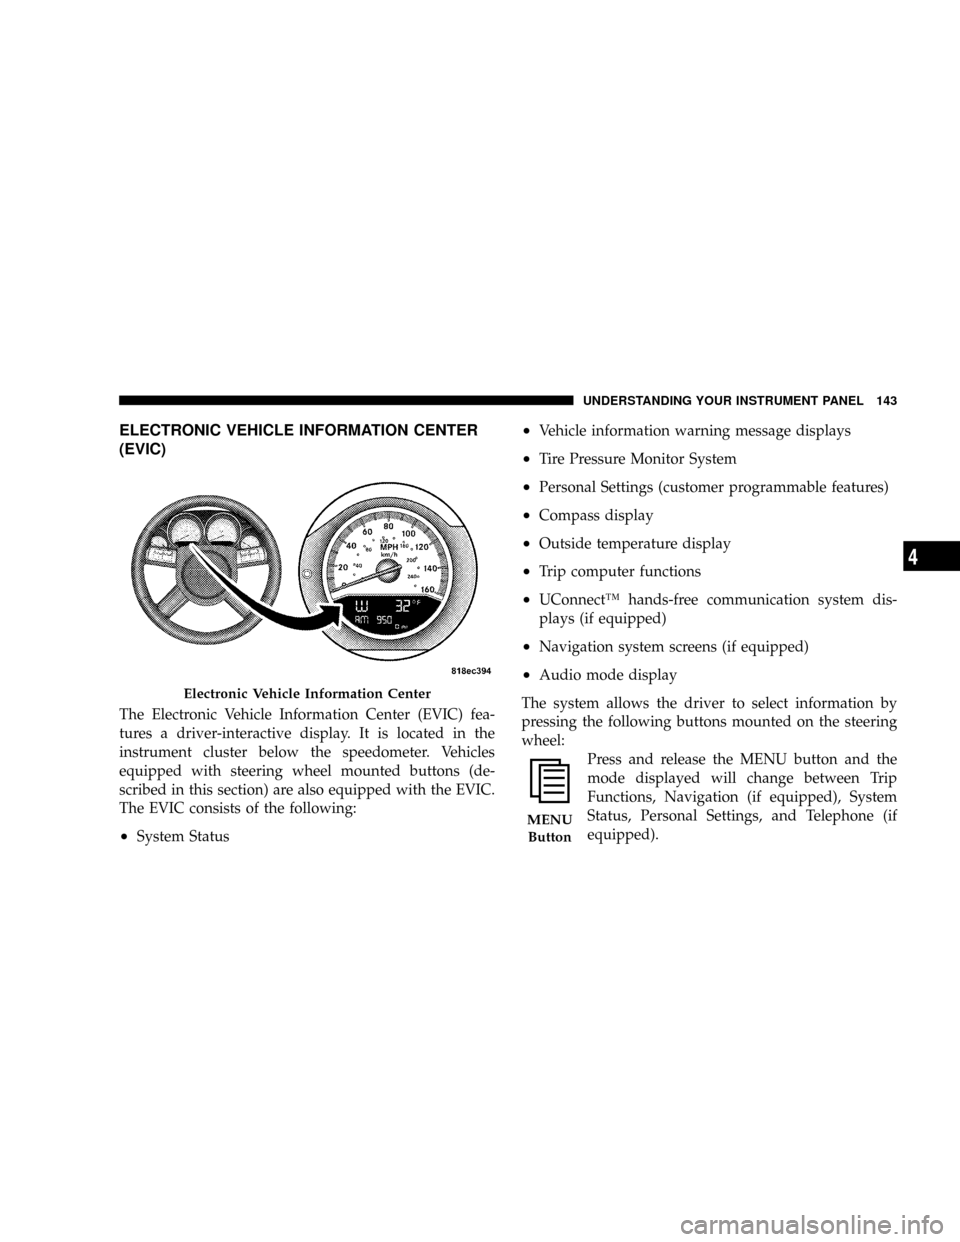
ELECTRONIC VEHICLE INFORMATION CENTER
(EVIC)
The Electronic Vehicle Information Center (EVIC) fea-
tures a driver-interactive display. It is located in the
instrument cluster below the speedometer. Vehicles
equipped with steering wheel mounted buttons (de-
scribed in this section) are also equipped with the EVIC.
The EVIC consists of the following:
²System Status
²Vehicle information warning message displays
²Tire Pressure Monitor System
²Personal Settings (customer programmable features)
²Compass display
²Outside temperature display
²Trip computer functions
²UConnectŸ hands-free communication system dis-
plays (if equipped)
²Navigation system screens (if equipped)
²Audio mode display
The system allows the driver to select information by
pressing the following buttons mounted on the steering
wheel:
Press and release the MENU button and the
mode displayed will change between Trip
Functions, Navigation (if equipped), System
Status, Personal Settings, and Telephone (if
equipped).
Electronic Vehicle Information Center
MENU
Button
UNDERSTANDING YOUR INSTRUMENT PANEL 143
4
Page 146 of 380
![DODGE MAGNUM SRT 2007 1.G Owners Manual ²Left/Right Front Door Ajar (one or more, with a single
chime if speed is above 1 mph [1.6 km])
²Left/Right Rear Door Ajar (one or more, with a single
chime if speed is above 1 mph [1.6 km])
²Door( DODGE MAGNUM SRT 2007 1.G Owners Manual ²Left/Right Front Door Ajar (one or more, with a single
chime if speed is above 1 mph [1.6 km])
²Left/Right Rear Door Ajar (one or more, with a single
chime if speed is above 1 mph [1.6 km])
²Door(](/img/12/5658/w960_5658-145.png)
²Left/Right Front Door Ajar (one or more, with a single
chime if speed is above 1 mph [1.6 km])
²Left/Right Rear Door Ajar (one or more, with a single
chime if speed is above 1 mph [1.6 km])
²Door(s) Ajar (with a single chime if vehicle is in
motion)
²Trunk Ajar (with a single chime)
²Low Washer Fluid (with a single chime)
²Channel 1, 2, OR 3 Transmit
²Channel 1, 2, OR 3 Training
²Channel 1, 2, OR 3 Trained
²Clearing Channels
²Channels Cleared
²Channels Defaulted
²Did Not Train
²Left Front Low Pressure (with a single chime). Refer to
ªStarting And Operating, Tire Sectionº
²Left Rear Low Pressure (with a single chime). Refer to
ªStarting And Operating, Tire Sectionº
²Right Front Low Pressure (with a single chime). Refer
to ªStarting And Operating, Tire Sectionº
²Right Rear Low Pressure (with a single chime). Refer
to ªStarting And Operating, Tire Sectionº
²Check TPM System (with a single chime). Refer to
ªStarting And Operating, Tire Sectionº
²Check Gascap (refer to ªAdding Fuelº in Section 5 of
this manual for more details)
²Upshift
Trip Functions
Press and release the MENU button until one of the
following Trip Functions displays in the EVIC:
²Average Fuel Economy
²Distance To Empty
²Trip A
²Trip B
UNDERSTANDING YOUR INSTRUMENT PANEL 145
4
Page 152 of 380
Navigation Ð If Equipped
Navigation Display Control
Press and release the MENU button until Navigation
displays in the EVIC. When the Navigation System is On,
the steering wheel buttons can be used to select the Map
or Menu display on the Navigation Unit. When the Menu
display is active, the SCROLL button can be used to scroll
through the list, the FUNCTION SELECT button can be
used to select an item, and the AUDIO MODE button can
be used to return to the previous menu. When the Map
display is active, pressing the FUNCTION SELECT but-
ton will change the Navigation Unit Display to the Menu.
Turn By Turn Directions
The EVIC displays turn-by-turn directions to a pro-
grammed destination when Turn by Turn Navigation is
enabled through Personal Settings. When enabled, the
EVIC displays the name of the approaching road at the
top of the screen, followed by an arrow to indicate the
direction to turn the vehicle, and a count down to
indicate the distance to the turn.
NOTE:Refer to your ªNavigation User's Manualº for
detailed operating instructions.
System Warnings (Customer Information
Features)
Press and release the MENU button until ªSYSTEM
WARNINGSº displays in the EVIC. Then, press the
SCROLL button to display anyone of the following
choices:
²Oil Temperature
Shows the actual oil temperature.
²Oil Pressure
Shows the actual oil pressure.
²Tire Pressure
Shows the actual tire pressure for each tire (EXCLUDING
THE SPARE TIRE).
Personal Settings (Customer Programmable
Features)
Personal Settings allows the driver to set and recall
features when the transmission is in PARK.
Press and release the MENU button until Personal Set-
tings displays in the EVIC.
UNDERSTANDING YOUR INSTRUMENT PANEL 151
4
Page 203 of 380
mElectronic Brake Control System...........222
NABS (Anti-Lock Brake System)............222
NTCS (Traction Control System)............223
NBAS (Brake Assist System)...............223
NESP (Electronic Stability Program).........224
NSynchronizing ESP....................227
NESP/BAS Malfunction Indicator Light And
ESP/TCS Indicator Light................227
mTire Safety Information..................228
NTire Markings........................228
NTire Identification Number (TIN)..........232
NTire Loading And Tire Pressure...........233
mTires Ð General Information..............237
NTire Pressure.........................237
NTire Inflation Pressures.................238
NRadial-Ply Tires......................240NTire Spinning........................240
NTread Wear Indicators..................241
NLife Of Tire.........................241
NReplacement Tires.....................242
NAlignment And Balance.................243
mTire Chains...........................243
mSnow Tires...........................244
mTire Rotation Recommendations...........245
NTire Rotation Ð Standard Tires............245
NTire Rotation Ð All Season Tires..........246
mTire Pressure Monitor System (TPMS) Ð If
Equipped
............................246
NBase System Ð If Equipped..............249
NPremium System Ð If Equipped..........250
NGeneral Information...................253
mFuel Requirements.....................253
202 STARTING AND OPERATING
Page 230 of 380
NOTE:
²
P (Passenger)-Metric tire sizing is based on U.S. design
standards. P-Metric tires have the letter ªPº molded
into the sidewall preceding the size designation. Ex-
ample: P215/65R15 95H.
²European Metric tire sizing is based on European
design standards. Tires designed to this standard have
the tire size molded into the sidewall beginning with
the section width. The letter9P9is absent from this tire
size designation. Example: 215/65R15 96H
²LT (Light Truck)-Metric tire sizing is based on U.S.
design standards. The size designation for LT-Metric
tires is the same as for P-Metric tires except for the
letters ªLTº that are molded into the sidewall preced-
ing the size designation. Example: LT235/85R16.
²Temporary Spare tires are high-pressure compact
spares designed for temporary emergency use only.
Tires designed to this standard have the letter ªTº
molded into the sidewall preceding the size designa-
tion. Example: T145/80D18 103M.
²High Flotation tire sizing is based on U.S. design
standards and it begins with the tire diameter molded
into the sidewall. Example: 31x10.5 R15 LT.
STARTING AND OPERATING 229
5
Page 232 of 380
EXAMPLE:
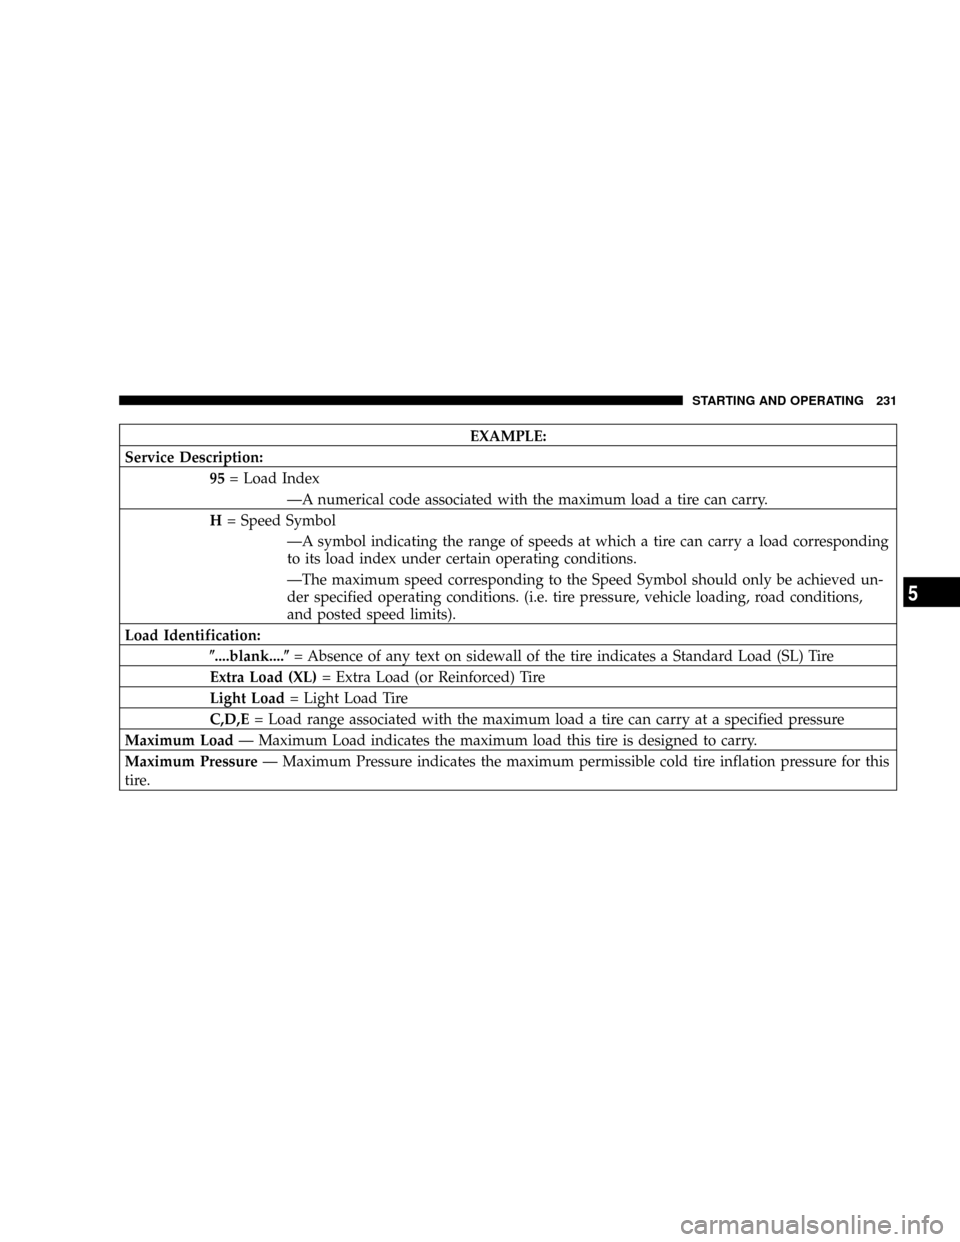
Service Description:
95= Load Index
ÐA numerical code associated with the maximum load a tire can carry.
H= Speed Symbol
ÐA symbol indicating the range of speeds at which a tire can carry a load corresponding
to its load index under certain operating conditions.
ÐThe maximum speed corresponding to the Speed Symbol should only be achieved un-
der specified operating conditions. (i.e. tire pressure, vehicle loading, road conditions,
and posted speed limits).
Load Identification:
(....blank....(= Absence of any text on sidewall of the tire indicates a Standard Load (SL) Tire
Extra Load (XL)= Extra Load (or Reinforced) Tire
Light Load= Light Load Tire
C,D,E= Load range associated with the maximum load a tire can carry at a specified pressure
Maximum LoadÐ Maximum Load indicates the maximum load this tire is designed to carry.
Maximum PressureÐ Maximum Pressure indicates the maximum permissible cold tire inflation pressure for this
tire.
STARTING AND OPERATING 231
5
Page 234 of 380
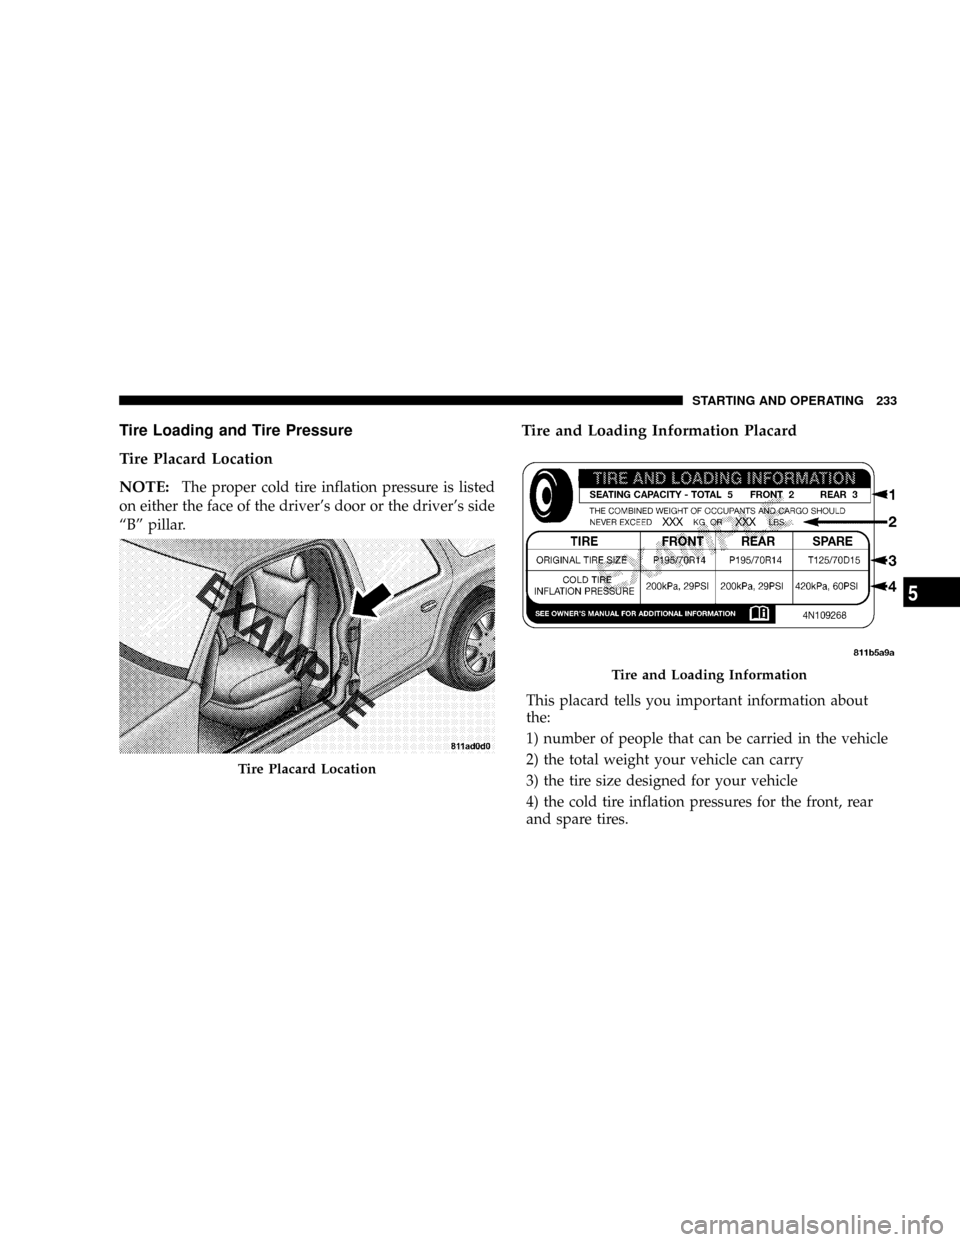
Tire Loading and Tire Pressure
Tire Placard Location
NOTE:
The proper cold tire inflation pressure is listed
on either the face of the driver's door or the driver's side
ªBº pillar.
Tire and Loading Information Placard
This placard tells you important information about
the:
1) number of people that can be carried in the vehicle
2) the total weight your vehicle can carry
3) the tire size designed for your vehicle
4) the cold tire inflation pressures for the front, rear
and spare tires.
Tire Placard Location
Tire and Loading Information
STARTING AND OPERATING 233
5