window DODGE NEON SRT 2004 2.G Owners Manual
[x] Cancel search | Manufacturer: DODGE, Model Year: 2004, Model line: NEON SRT, Model: DODGE NEON SRT 2004 2.GPages: 200, PDF Size: 3.23 MB
Page 8 of 200

NTo Unlock The Trunk....................17
NUsing The Panic Alarm..................17
NProgramming Additional Transmitters........17
NGeneral Information....................18
NTransmitter Battery Service...............18
mPower Windows........................19
mOccupant Restraints.....................19
NLap/Shoulder Belts.....................20
NAdjustable Upper Shoulder Belt Anchorage....24
NLap/Shoulder Belt Untwisting Procedure.....25
NSeat Belts And Pregnant Women............26NSeat Belt Extender......................27
NDriver And Front Passenger Supplemental
Restraint System (SRS) - Airbags...........27
NChild Restraint........................35
NTransporting Pets......................42
mEngine Break-In Recommendations..........42
mSafety Tips............................43
NExhaust Gas..........................43
NSafety Checks You Should Make Inside The
Vehicle..............................43
NPeriodic Safety Checks You Should Make
Outside The Vehicle....................44
8 THINGS TO KNOW BEFORE STARTING YOUR VEHICLE
Page 14 of 200

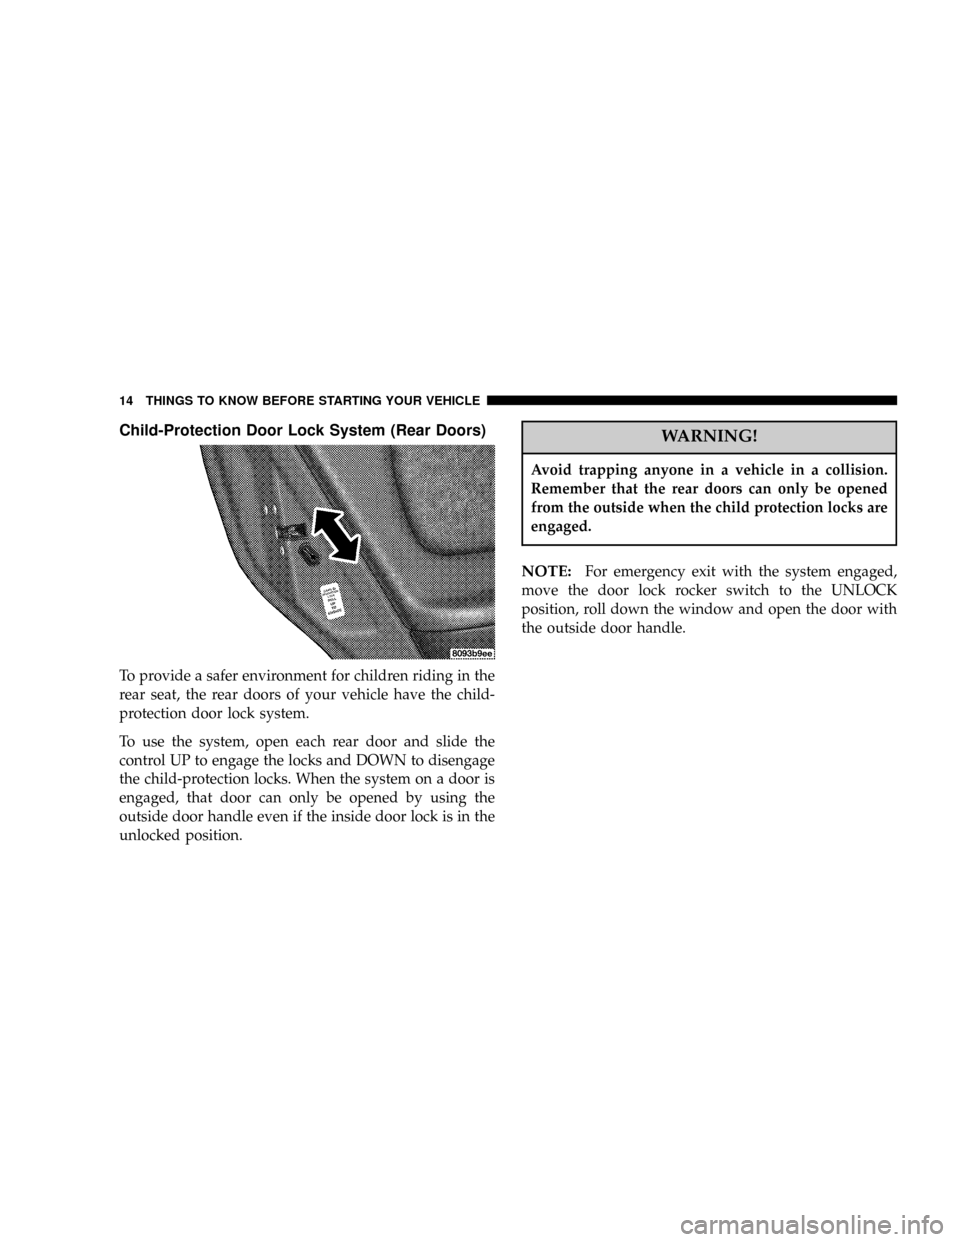
Child-Protection Door Lock System (Rear Doors)
To provide a safer environment for children riding in the
rear seat, the rear doors of your vehicle have the child-
protection door lock system.
To use the system, open each rear door and slide the
control UP to engage the locks and DOWN to disengage
the child-protection locks. When the system on a door is
engaged, that door can only be opened by using the
outside door handle even if the inside door lock is in the
unlocked position.
WARNING!
Avoid trapping anyone in a vehicle in a collision.
Remember that the rear doors can only be opened
from the outside when the child protection locks are
engaged.
NOTE:For emergency exit with the system engaged,
move the door lock rocker switch to the UNLOCK
position, roll down the window and open the door with
the outside door handle.
14 THINGS TO KNOW BEFORE STARTING YOUR VEHICLE
Page 19 of 200

POWER WINDOWS
The window switches on the driver's door panel control
both front windows. The switch on the passenger's door
panel controls the passenger's window.
OCCUPANT RESTRAINTS
Some of the most important safety features in your
vehicle are the restraint systems. These include the front
and rear seat belts for the driver and all passengers, front
airbags for both the driver and front passenger and side
airbags for both the driver and front passenger. If you
will be carrying children too small for adult-size belts,
your seat belts also can be used to hold infant and child
restraint systems.
Please pay close attention to the information in this
section. It tells you how to use your restraint system
properly to keep you and your passengers as safe as
possible.
THINGS TO KNOW BEFORE STARTING YOUR VEHICLE 19
2
Page 39 of 200

the rear seat to install the child restraint. You will easily
feel them if you run your finger along the intersection of
the surfaces. The lower strap hooks are passed over the
top of each bar, pushing aside the seat cover material.
In addition, there are tether strap anchorages
behind each rear seating position located in the
panel between the rear seat back and the rear
window Ð under a hinged plastic cover with
this symbol on it. (Shown to the left) In recent years, only
the tether anchorage has been provided in new vehicles.To attach a child restraint tether strap:
1. Lift the cover over the anchor directly behind the seat
where you are placing the child restraint.
2. Route the tether strap to provide the most direct path
for the strap between the anchor and the child seat. If
your vehicle is equipped with adjustable rear head
restraints, raise the head restraint and, where possible,
route the tether strap under the head restraint and
between the two posts. If not possible, lower the head
restraint and pass the tether strap around the outboard
side of the head restraint.
THINGS TO KNOW BEFORE STARTING YOUR VEHICLE 39
2
Page 43 of 200

A new engine may consume some oil during its first few
thousand miles of operation. This is a normal part of the
break-in and not an indication of a problem.
SAFETY TIPS
Exhaust Gas
WARNING!
Exhaust gases can injure or kill. They contain carbon
monoxide (CO) which is colorless and odorless.
Breathing it can make you unconscious and can
eventually poison you. To avoid breathing (CO)
follow the safety tips below.
Do not run the engine in a closed garage or in confined
areas any longer than needed to move your vehicle in or
out of the area.If it is necessary to sit in a parked vehicle with the engine
running, adjust your heating or cooling controls to force
outside air into the vehicle. Set the blower at high speed.
To avoid drawing exhaust gases into the vehicle, close the
trunk while driving. However, if for some reason it must
remain open, close all windows. Adjust the heating or
cooling system to force outside air into the vehicle. Set
the blower at high speed.
Safety Checks You Should Make Inside The
Vehicle
Seat Belts
Inspect the belt system periodically, checking for cuts,
frays and loose parts. Damaged parts must be replaced
immediately. Do not disassemble or modify the system.
Front seat belt assemblies must be replaced after a
collision. Rear seat belt assemblies must be replaced after
a collision if they have been damaged (bent retractor, torn
webbing, etc.). If there is any question regarding belt or
retractor condition, replace the belt.
THINGS TO KNOW BEFORE STARTING YOUR VEHICLE 43
2
Page 47 of 200

MIRRORS
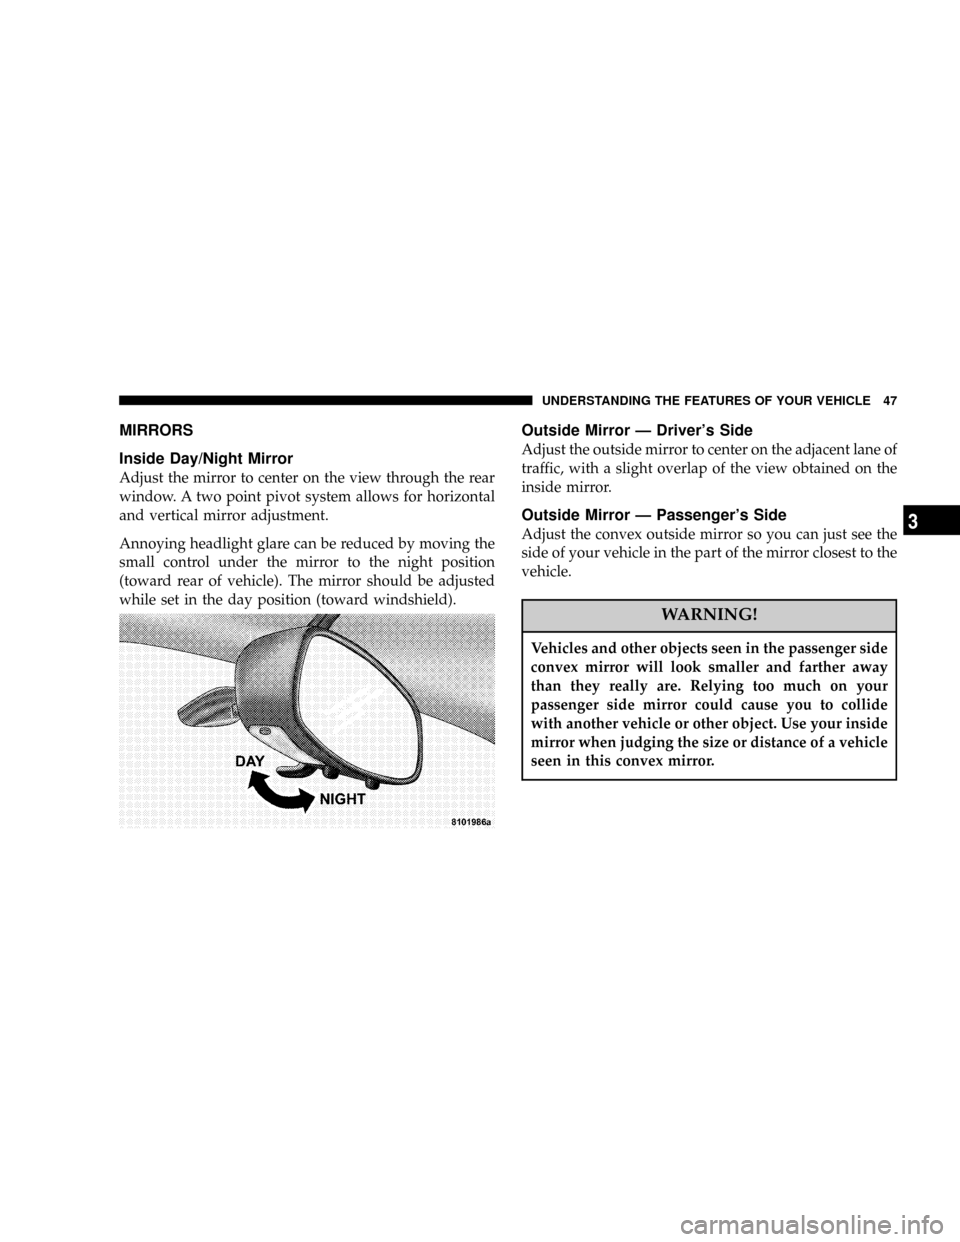
Inside Day/Night Mirror
Adjust the mirror to center on the view through the rear
window. A two point pivot system allows for horizontal
and vertical mirror adjustment.
Annoying headlight glare can be reduced by moving the
small control under the mirror to the night position
(toward rear of vehicle). The mirror should be adjusted
while set in the day position (toward windshield).
Outside Mirror Ð Driver's Side
Adjust the outside mirror to center on the adjacent lane of
traffic, with a slight overlap of the view obtained on the
inside mirror.
Outside Mirror Ð Passenger's Side
Adjust the convex outside mirror so you can just see the
side of your vehicle in the part of the mirror closest to the
vehicle.
WARNING!
Vehicles and other objects seen in the passenger side
convex mirror will look smaller and farther away
than they really are. Relying too much on your
passenger side mirror could cause you to collide
with another vehicle or other object. Use your inside
mirror when judging the size or distance of a vehicle
seen in this convex mirror.
UNDERSTANDING THE FEATURES OF YOUR VEHICLE 47
3
Page 60 of 200

NSelecting Satellite Mode In RBP, RBU, RAZ,
And RBQ Radios......................75
NSelecting a Channel.....................75
NStoring And Selecting Pre-Set Channels.......76
NUsing The PTY (Program Type) Button (If
Equipped)...........................76
NPTY Button9Scan9......................76
NPTY Button9Seek9......................76
NSatellite Antenna.......................76NReception Quality......................76
mCompact Disc Maintenance................77
mRadio Operation And Cellular Phones........77
mClimate Controls.......................78
NAir Conditioning......................78
NOperating Tips........................81
mElectric Rear Window Defroster............83
mTurbo Boost Gauge......................83
60 UNDERSTANDING YOUR INSTRUMENT PANEL
Page 70 of 200

Seek
Press and release the SEEK button to search for the next
station in either the AM or FM mode. Press the top of the
button to seek up and the bottom to seek down. The
radio will remain tuned to the new station until you
make another selection. Holding the button in will by-
pass stations without stopping until you release it.
Tune
Press the TUNE control up or down to increase or
decrease the frequency. If you press and hold the button,
the radio will continue to tune until you release the
button. The frequency will be displayed and continu-
ously updated while the button is pressed.
Balance
The Balance control adjusts the left-to-right speaker bal-
ance. Press the BAL button in and it will pop out. Adjust
the balance and push the button back in.
Fade
The Fade control provides for balance between the front
and rear speakers. Press the FADE button in and it will
pop out. Adjust the balance and push the button back in.
Bass and Treble Tone Control
The tone controls consist of 2 separate bands. The bass
band is on the left, and the treble band is on the right.
Each band is adjusted by a slider control with a detent at
the mid-position. Moving the control up or down in-
creases or decreases amplification of that band. The mid
position provides a flat frequency response.
AM/FM Selection
Press the AM/FM button to change from AM to FM. The
operating mode will be displayed next to the station
frequency. The display will show ST when a stereo
station is received.
To Set The Radio Push-Button Memory
When you are receiving a station that you wish to
commit to push-button memory, press the SET button.
SET 1 will show in the display window. Select the ª1±5º
button you wish to lock onto this station and press and
release that button. If a button is not selected within 5
seconds after pressing the SET button, the station will
continue to play but will not be locked into push-button
memory.
70 UNDERSTANDING YOUR INSTRUMENT PANEL
Page 71 of 200

You may add a second station to each push-button by
repeating the above procedure with this exception: Press
the SET button twice and SET 2 will show in the display
window. Each button can be set for SET 1 and SET 2 in
both AM and FM. This allows a total of 10 AM and 10 FM
stations to be locked into push-button memory. The
stations stored in SET 2 memory can be selected by
pressing the push-button twice. Every time a preset
button is used a corresponding button number will be
displayed.
Time
Press the TIME button to change the display between
radio frequency and time.
General Information
This radio complies with Part 15 of FCC rules and with
RSS-210 of Industry Canada. Operation is subject to the
following conditions:
1. This device may not cause harmful interference,
2. This device must accept any interference received,
including interference that may cause undesired opera-
tion.
NOTE:Changes or modifications not expressively ap-
proved by the party responsible for compliance could
void the user's authority to operate the equipment.
CD Player Operation
NOTE:
The ignition switch must be in the ON or ACC
position and the volume control ON before the CD player
will operate.
Inserting The Compact Disc
CAUTION!
This CD player will accept only 4.75 inch (12 cm)
discs only. The use of other sized discs may damage
the CD player mechanism.
You may either insert or eject a disc with the radio OFF.
If you insert a disc with the ignition ON and the radio
OFF, the display will show the time of day.
If the power is ON, the unit will switch from radio to CD
mode and begin to play when you insert the disc. The
UNDERSTANDING YOUR INSTRUMENT PANEL 71
4
Page 79 of 200

Bi-Level
Air is directed through the panel and floor out-
lets.
NOTE:
There is a difference in temperature between the
upper and lower outlets for added comfort. The warmer
air goes to the floor outlets. This feature gives improved
comfort during sunny but cool conditions.
NOTE:If you choose either the Mix or Defrost modes
while the Circulation control is in the Recirculation
Mode, the system will automatically switch to the Out-
side Air mode and the knob will move to that position.
Floor
Air is directed through the floor outlets and side
window demist outlets with a small amount
through the defrost outlet.
Mix
Air is directed through the floor, defrost and side
window demist outlets. This setting works best
in cold or snowy conditions that require extra
heat at the windshield. This setting is good for main-
taining comfort while reducing moisture on the wind-
shield.Defrost
Air is directed through the windshield and side
window demist outlets. Use this mode with
maximum fan and temperature settings for best wind-
shield and side window defrosting.
NOTE:
The air conditioning compressor operates in
both Mix and Defrost or a blend of these modes even if
the fan switch is not in the A/C position. This dehumidi-
fies the air to help dry the windshield. To improve fuel
economy, use these modes only when necessary.
Temperature Control
Use this control to regulate
the temperature of the air in-
side the passenger compart-
ment. The blue area of the
scale indicates cooler tem-
peratures while the red area
indicates warmer tempera-
tures.
UNDERSTANDING YOUR INSTRUMENT PANEL 79
4