DODGE NITRO 2010 1.G Owners Manual
Manufacturer: DODGE, Model Year: 2010, Model line: NITRO, Model: DODGE NITRO 2010 1.GPages: 498, PDF Size: 6.94 MB
Page 131 of 498
NOTE:If you do not say a command within a few
seconds, the system will present you with a list of
options.
If you ever wish to interrupt the system while it lists
options, press the Voice Command
button, listen
for the beep, and say your command.
Pressing the Voice Command
button while the
system is speaking is known as “barging in.” The system
will be interrupted, and after the beep, you can add or
change commands. This will become helpful once you
start to learn the options.
NOTE: At any time, you can say the words “Cancel”,
“Help” or “Main Menu”.
These commands are universal and can be used from any
menu. All other commands can be used depending upon
the active application. For example, if you are in the disc menu and you are
listening to FM radio, you can speak commands from the
disc menu or from the FM radio menu.
When using this system, you should speak clearly and at
a normal speaking volume.
The system will best recognize your speech if the win-
dows are closed, and the heater/air conditioning fan is
set to low.
At any point, if the system does not recognize one of your
commands, you will be prompted to repeat it.
To hear the first available Menu, press the Voice
Command
button and say “Help” or “Main
Menu”.
130 UNDERSTANDING THE FEATURES OF YOUR VEHICLE
Page 132 of 498
Commands
The Voice Command system understands two types of
commands. Universal commands are available at all
times. Local commands are available if the supported
radio mode is active.
Changing the Volume
1. Start a dialogue by pressing the Voice Command
button.
2. Say a command (e.g., “Help”).
3. Use the ON/OFF VOLUME rotary knob to adjust the
volume to a comfortable level while the Voice Command
system is speaking. Please note the volume setting for
Voice Command is different than the audio system.
Main Menu
Start a dialogue by pressing the Voice Command
button. You may say “Main Menu” to switch to the main
menu. In this mode, you can say the following commands:
•“Radio” (to switch to the radio mode)
•“Disc” (to switch to the disc mode)
•“Memo” (to switch to the memo recorder)
•“System Setup” (to switch to system setup)
Radio AM (or Radio Long Wave or Radio Medium
Wave — If Equipped)
To switch to the AM band, say “AM” or “Radio AM”. In
this mode, you may say the following commands:
•“Frequency” (to change the frequency)
•“Next Station” (to select the next station)
•“Previous Station” (to select the previous station)
•“Radio Menu” (to switch to the radio menu)
•“Main Menu” (to switch to the main menu)
3
UNDERSTANDING THE FEATURES OF YOUR VEHICLE 131
Page 133 of 498
Radio FM
To switch to the FM band, say “FM” or “Radio FM”. In
this mode, you may say the following commands:
•“Frequency” (to change the frequency)
•“Next Station” (to select the next station)
•“Previous Station” (to select the previous station)
•“Radio Menu” (to switch to the radio menu)
•“Main Menu” (to switch to the main menu)
Satellite Radio
To switch to satellite radio mode, say “Sat” or “Satellite
Radio”. In this mode, you may say the following com-
mands:
•“Channel Number” (to change the channel by its
spoken number)
•“Next Channel” (to select the next channel)
•“Previous Channel” (to select the previous channel)
•“List Channel” (to hear a list of available channels)
•“Select Name” (to say the name of a channel)
•“Radio Menu” (to switch to the radio menu)
•“Main Menu” (to switch to the main menu)
Disc
To switch to the disc mode, say “Disc”. In this mode, you
may say the following commands:
•“Track” (#) (to change the track)
•“Next Track” (to play the next track)
•“Previous Track” (to play the previous track)
•“Main Menu” (to switch to the main menu)
132 UNDERSTANDING THE FEATURES OF YOUR VEHICLE
Page 134 of 498
Memo
To switch to the voice recorder mode, say “Memo”. In
this mode, you may say the following commands:
•“New Memo” (to record a new memo) — During the
recording, you may press the Voice Command
button to stop recording. You proceed by saying one of
the following commands:
�“Save” (to save the memo)
�“Continue” (to continue recording)
�“Delete” (to delete the recording)
•“Play Memos” (to play previously recorded memos)
— During the playback you may press the Voice
Command
button to stop playing memos. You
proceed by saying one of the following commands:
�“Repeat” (to repeat a memo)
�“Next” (to play the next memo)
�“Previous” (to play the previous memo)
�“Delete” (to delete a memo)
•“Delete All” (to delete all memos)
System Setup
To switch to system setup, say “Setup”. In this mode, you
may say the following commands:
•“Language German”
•“Language Dutch”
•“Language Italian”
•“Language English”
•“Language French”
•“Language Spanish”
•“Tutorial”
•“Voice Training”
3
UNDERSTANDING THE FEATURES OF YOUR VEHICLE 133
Page 135 of 498
NOTE:Keep in mind that you have to press the Voice
Command
button first and wait for the beep
before speaking the “Barge In” commands.
Voice Training
For users experiencing difficulty with the system recog-
nizing their voice commands or numbers the Uconnect™
Voice “Voice Training” feature may be used.
1. Press the Voice Command
button, say “System
Setup” and once you are in that menu then say “Voice
Training.” This will train your own voice to the system
and will improve recognition.
2. Repeat the words and phrases when prompted by
Uconnect™ Voice. For best results, the “Voice Training”
session should be completed when the vehicle is parked,
engine running, all windows closed, and the blower fan switched off. This procedure may be repeated with a new
user. The system will adapt to the last trained voice only.
SEATS
Seats are a primary part of the Occupant Restraint System
of the vehicle. They need to be used properly for safe
operation of the vehicle.
WARNING!
•Do not allow people to ride in any area of your
vehicle that is not equipped with seats and seat
belts. In a collision, people riding in these areas
are more likely to be seriously injured or killed.
•Be sure everyone in your vehicle is in a seat and
using a seat belt properly.
134 UNDERSTANDING THE FEATURES OF YOUR VEHICLE
Page 136 of 498
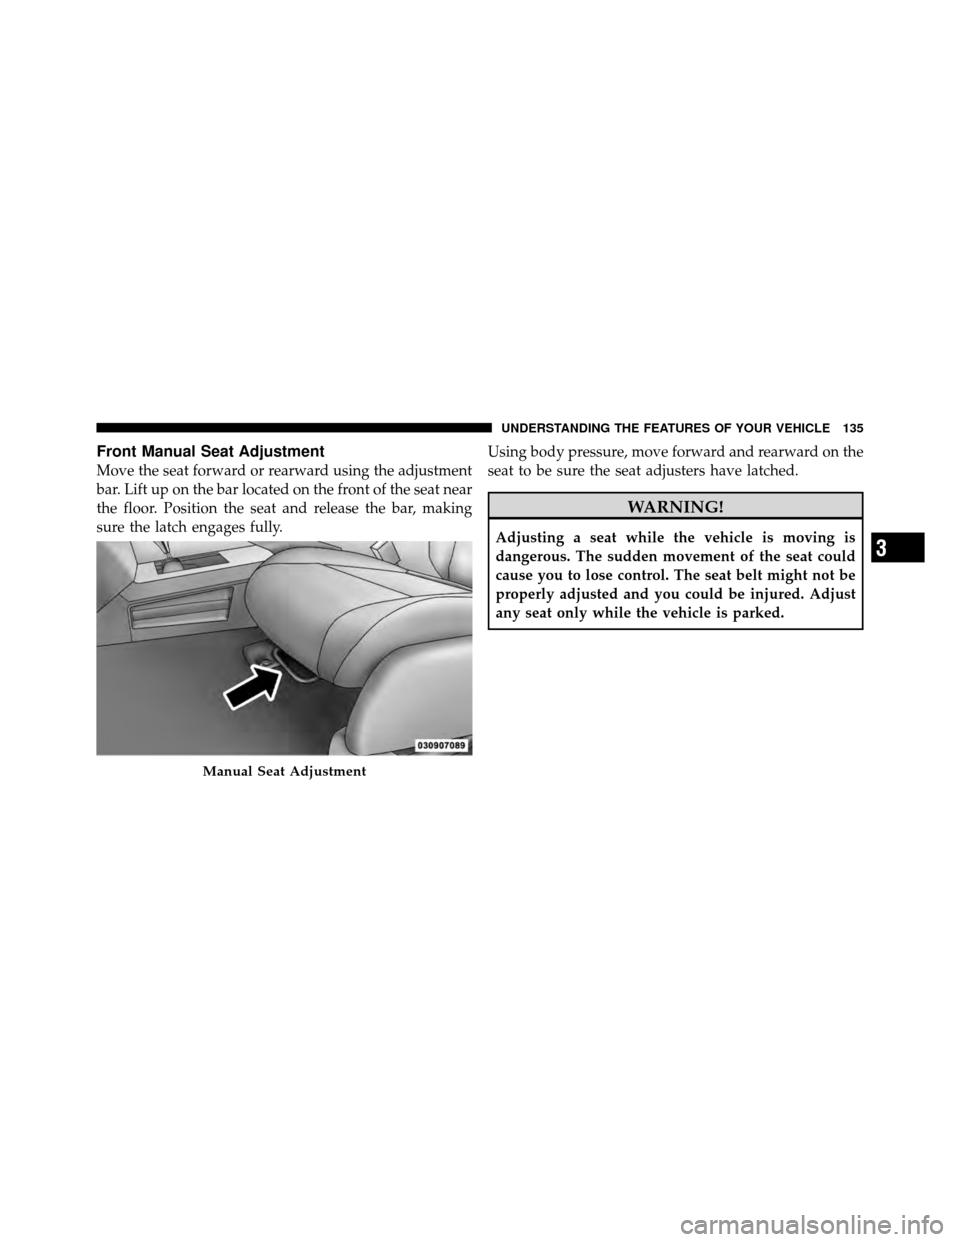
Front Manual Seat Adjustment
Move the seat forward or rearward using the adjustment
bar. Lift up on the bar located on the front of the seat near
the floor. Position the seat and release the bar, making
sure the latch engages fully.Using body pressure, move forward and rearward on the
seat to be sure the seat adjusters have latched.
WARNING!
Adjusting a seat while the vehicle is moving is
dangerous. The sudden movement of the seat could
cause you to lose control. The seat belt might not be
properly adjusted and you could be injured. Adjust
any seat only while the vehicle is parked.
Manual Seat Adjustment
3
UNDERSTANDING THE FEATURES OF YOUR VEHICLE 135
Page 137 of 498
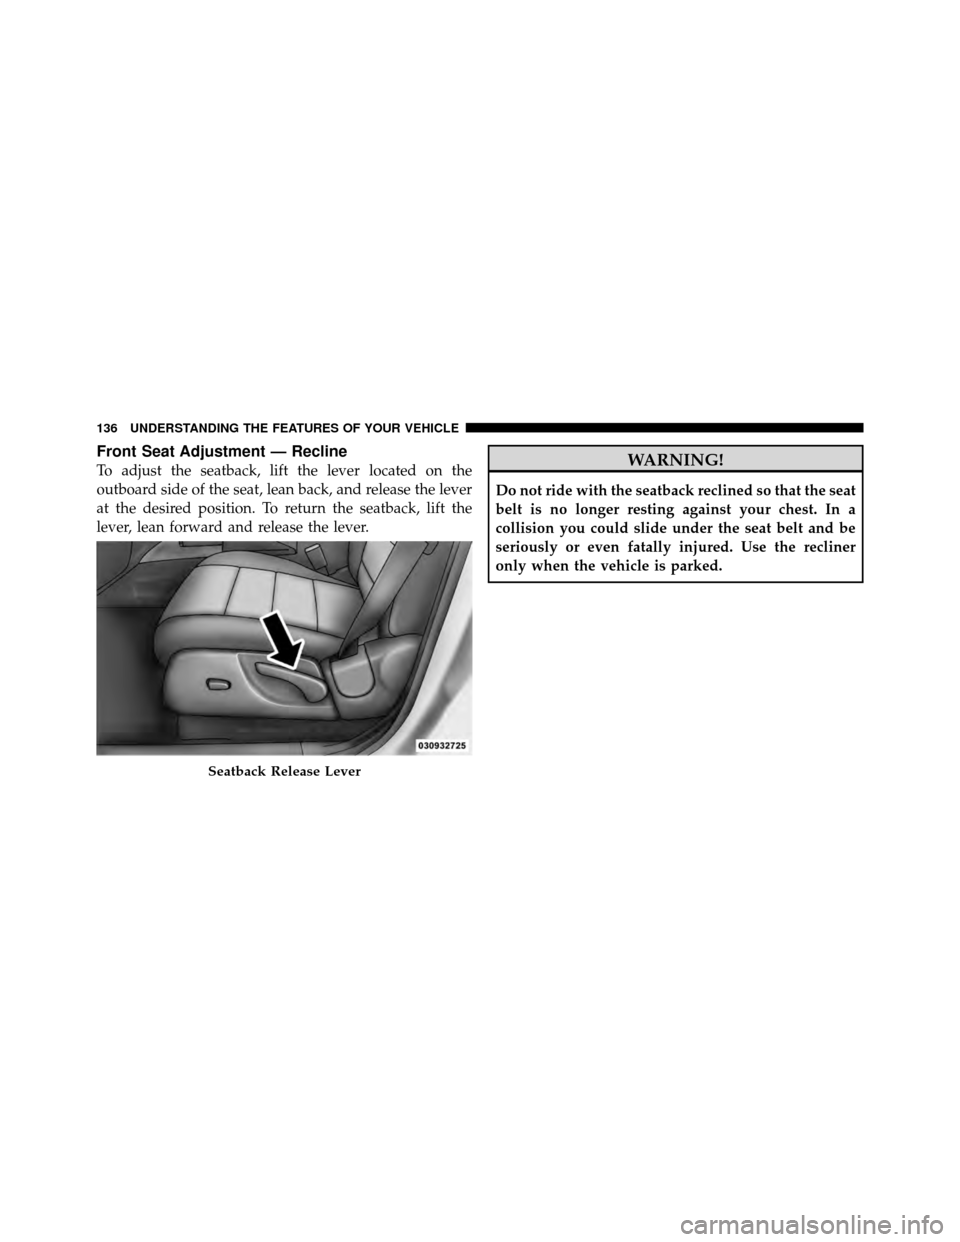
Front Seat Adjustment — Recline
To adjust the seatback, lift the lever located on the
outboard side of the seat, lean back, and release the lever
at the desired position. To return the seatback, lift the
lever, lean forward and release the lever.WARNING!
Do not ride with the seatback reclined so that the seat
belt is no longer resting against your chest. In a
collision you could slide under the seat belt and be
seriously or even fatally injured. Use the recliner
only when the vehicle is parked.
Seatback Release Lever
136 UNDERSTANDING THE FEATURES OF YOUR VEHICLE
Page 138 of 498
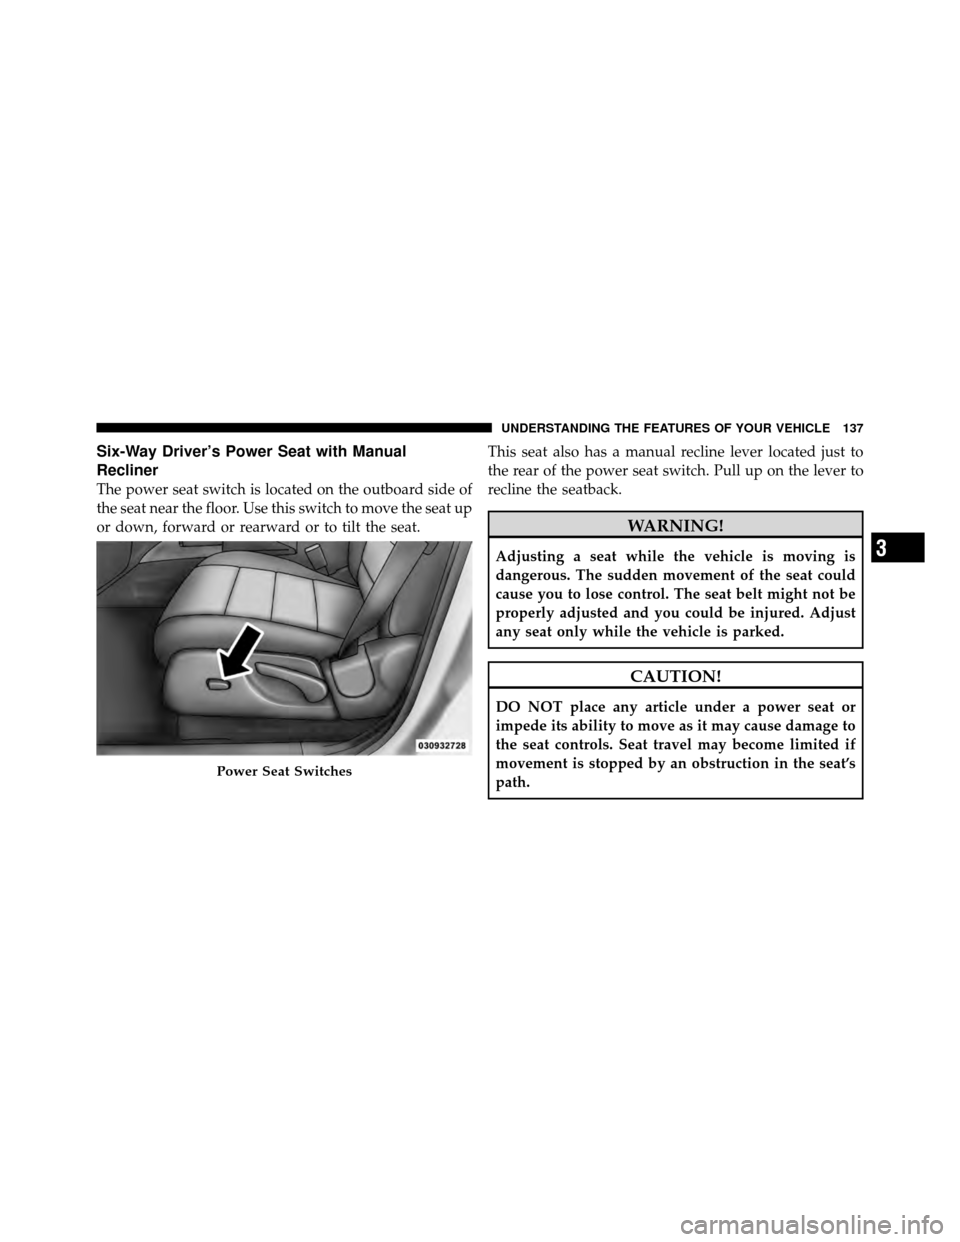
Six-Way Driver’s Power Seat with Manual
Recliner
The power seat switch is located on the outboard side of
the seat near the floor. Use this switch to move the seat up
or down, forward or rearward or to tilt the seat.This seat also has a manual recline lever located just to
the rear of the power seat switch. Pull up on the lever to
recline the seatback.
WARNING!
Adjusting a seat while the vehicle is moving is
dangerous. The sudden movement of the seat could
cause you to lose control. The seat belt might not be
properly adjusted and you could be injured. Adjust
any seat only while the vehicle is parked.
CAUTION!
DO NOT place any article under a power seat or
impede its ability to move as it may cause damage to
the seat controls. Seat travel may become limited if
movement is stopped by an obstruction in the seat’s
path.
Power Seat Switches
3
UNDERSTANDING THE FEATURES OF YOUR VEHICLE 137
Page 139 of 498
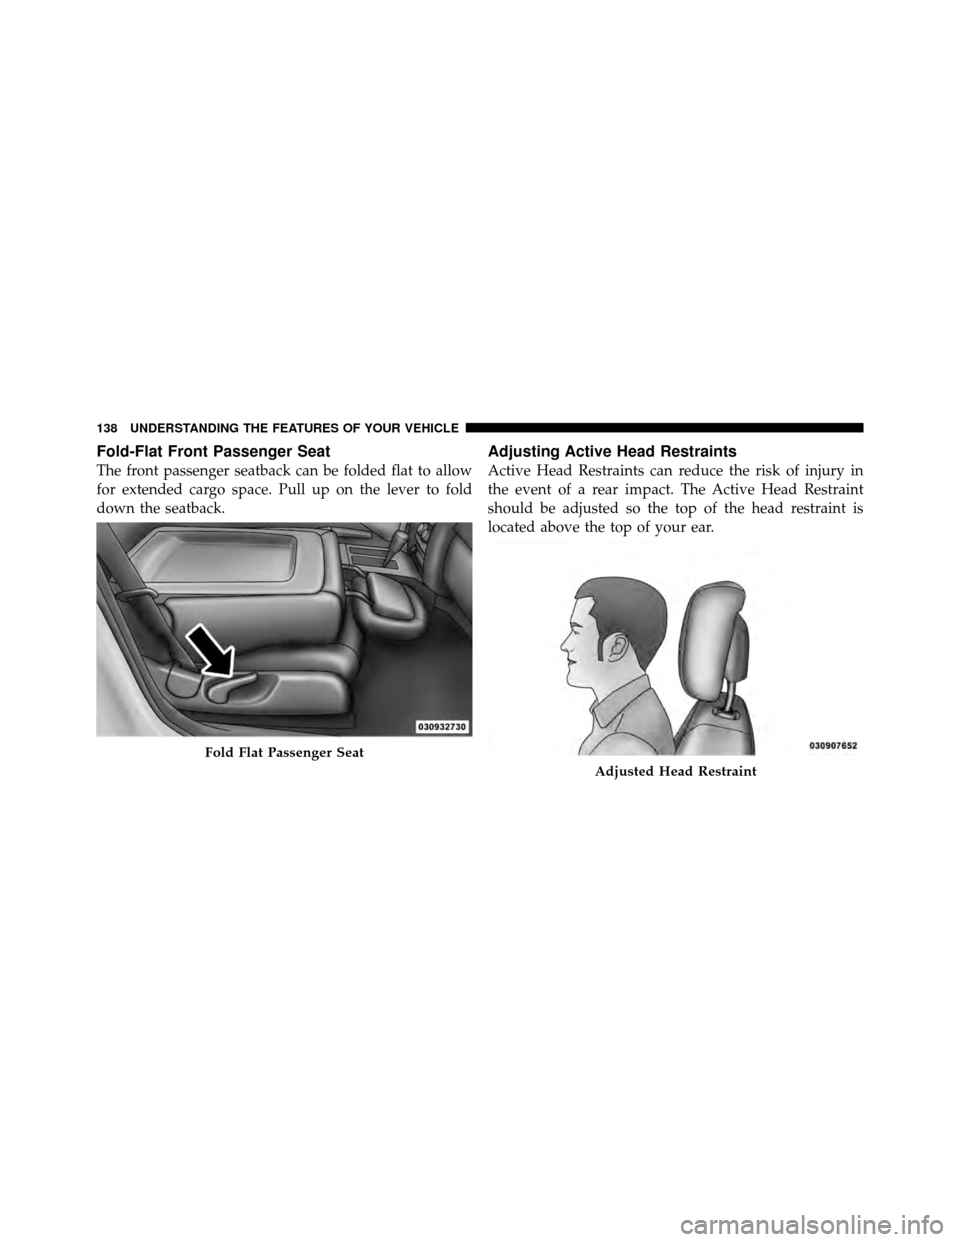
Fold-Flat Front Passenger Seat
The front passenger seatback can be folded flat to allow
for extended cargo space. Pull up on the lever to fold
down the seatback.
Adjusting Active Head Restraints
Active Head Restraints can reduce the risk of injury in
the event of a rear impact. The Active Head Restraint
should be adjusted so the top of the head restraint is
located above the top of your ear.
Fold Flat Passenger Seat
Adjusted Head Restraint
138 UNDERSTANDING THE FEATURES OF YOUR VEHICLE
Page 140 of 498
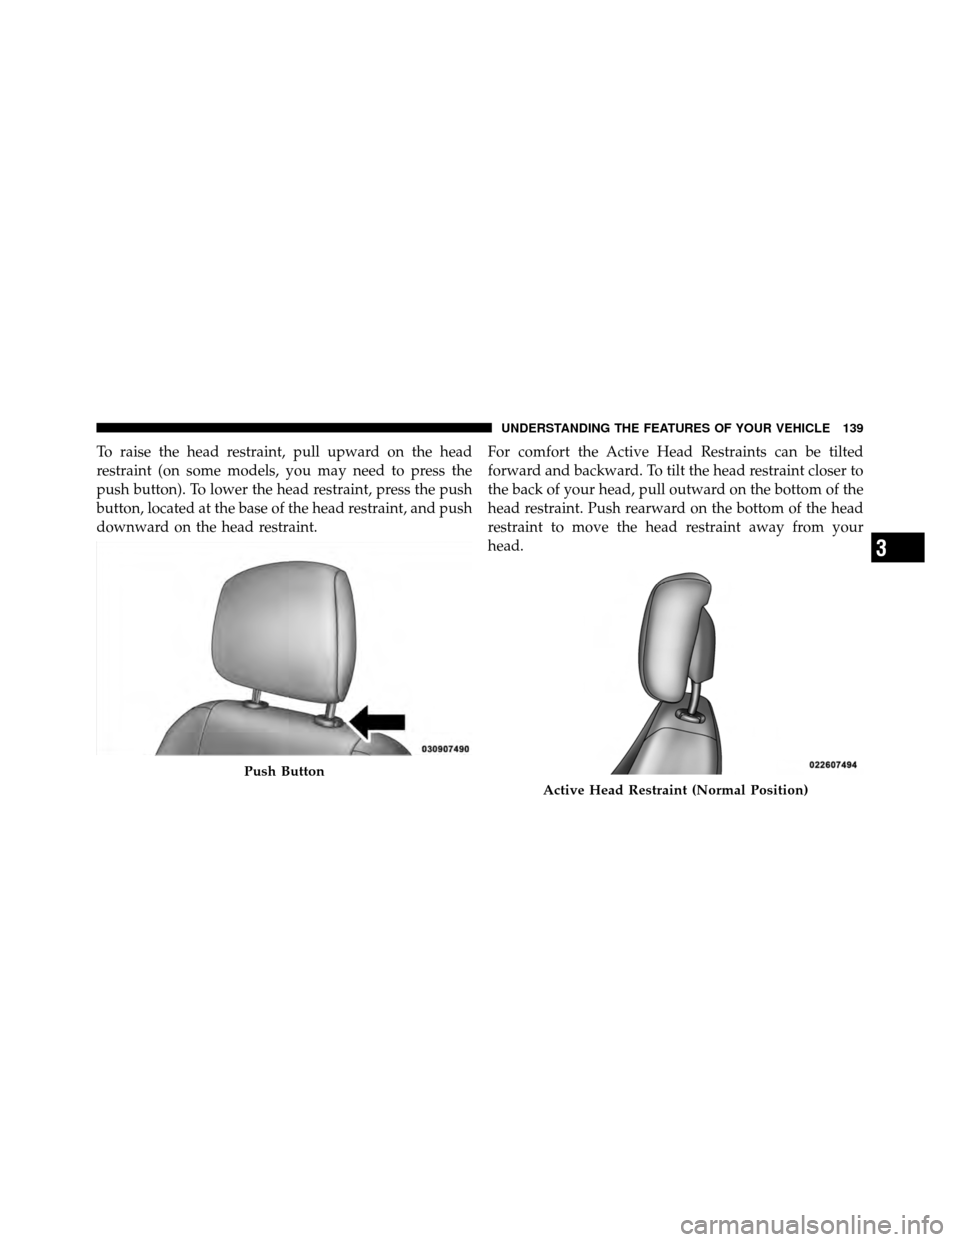
To raise the head restraint, pull upward on the head
restraint (on some models, you may need to press the
push button). To lower the head restraint, press the push
button, located at the base of the head restraint, and push
downward on the head restraint.For comfort the Active Head Restraints can be tilted
forward and backward. To tilt the head restraint closer to
the back of your head, pull outward on the bottom of the
head restraint. Push rearward on the bottom of the head
restraint to move the head restraint away from your
head.
Push Button
Active Head Restraint (Normal Position)
3
UNDERSTANDING THE FEATURES OF YOUR VEHICLE 139