warning light DODGE NITRO 2010 1.G Owner's Manual
[x] Cancel search | Manufacturer: DODGE, Model Year: 2010, Model line: NITRO, Model: DODGE NITRO 2010 1.GPages: 498, PDF Size: 6.94 MB
Page 195 of 498
normal, turn the engine off immediately and call for
service. Refer to “If Your Engine Overheats” in “What To
Do In Emergencies” for further information.
7. Speedometer
Shows the vehicles speed.
8. High Beam IndicatorThis indicator shows that the high beam head-
lights are on. Push the multifunction lever forward
to switch the headlights to high beam, and pull toward
yourself (normal position) to return to low beam.
9. Vehicle Security Light — If Equipped This light will flash at a fast rate for approxi-
mately 15 seconds, when the vehicle security
alarm is arming, and then will flash slowly
until the vehicle is disarmed. 10. Electronic Stability Program (ESP) Warning Light /
Brake Assist System (BAS) Warning Light – If
Equipped
The malfunction light for the Electronic Stabil-
ity Program (ESP) is combined with Brake
Assist System (BAS). The yellow “ESP/BAS
Warning Light” comes on when the ignition
switch is turned to the “ON” position. They should go
out with the engine running. If the “ESP/BAS Warning
Light” comes on continuously with the engine running, a
malfunction has been detected in either the ESP or the
BAS system. If this light remains on after several ignition
cycles, and the vehicle has been driven several miles
(kilometers) at speeds greater than 30 mph (48 km/h), see
an authorized dealer as soon as possible.
NOTE: The ESP Control System will make buzzing or
clicking sounds when it is actively operating.
194 UNDERSTANDING YOUR INSTRUMENT PANEL
Page 196 of 498
WARNING!
If a warning light remains on the system may not be
working and you will not have the benefit of ESP or
BAS. Under certain driving conditions, where ESP or
BAS would be beneficial, you - if you have not
adjusted your driving speeds and stopping in or to
account for the lack of the feature, may be in acci-
dent.
11. TOW/HAUL Indicator — If Equipped The TOW/HAUL button is located on the gear
shift bezel. This light will illuminate when the
TOW/HAUL button has been selected.
12. Turn Signal Indicators The arrow will flash with the exterior turn signal
when the turn signal lever is operated. If the vehicle electronics sense that the vehicle has
traveled about 1 mile (1.6 km) with the turn signals on, a
continuous chime will sound to alert you to turn the
signals off. If either indicator flashes at a rapid rate, check
for a defective outside light bulb.
13. Transmission Temperature Warning Light — If
Equipped
This light indicates that there is excessive trans-
mission fluid temperature that might occur
with severe usage such as trailer towing. If this
light comes on, stop the vehicle and run the
engine at idle or faster, with the transmission in NEU-
TRAL until the light goes off.
CAUTION!
Continuous driving with the Transmission Tempera-
ture Warning Light illuminated will eventually cause
severe transmission damage or transmission failure.
4
UNDERSTANDING YOUR INSTRUMENT PANEL 195
Page 197 of 498
WARNING!
Continued operation with the Transmission Tem-
perature Warning Light illuminated could cause the
fluid to boil over, come in contact with hot engine or
exhaust components causing a fire that may result in
personal injury.
14. Brake Warning Light This light monitors various brake functions,
including brake fluid level and parking brake
application. If the brake light turns on, it may
indicate that the parking brake is applied, that
the brake fluid level is low, or that there is a problem with
the anti-lock brake system reservoir.
If the light remains on when the parking brake has been
disengaged, and the fluid level is at the full mark on the
master cylinder reservoir, it indicates a possible brake
hydraulic system malfunction or that a problem with the Brake Booster has been detected by the Anti-Lock Brake
System (ABS) / Electronic Stability Program (ESP) sys-
tem. In this case, the light will remain on until the
condition has been corrected. If the problem is related to
the brake booster, the ABS pump will run when applying
the brake and a brake pedal pulsation may be felt during
each stop.
The dual brake system provides a reserve braking capac-
ity in the event of a failure to a portion of the hydraulic
system. A leak in either half of the dual brake system is
indicated by the Brake Warning Light, which will turn on
when the brake fluid level in the master cylinder has
dropped below a specified level.
The light will remain on until the cause is corrected.
NOTE:
The light may flash momentarily during sharp
cornering maneuvers, which change fluid level condi-
tions. The vehicle should have service performed, and
the brake fluid level checked.
196 UNDERSTANDING YOUR INSTRUMENT PANEL
Page 198 of 498
If brake failure is indicated, immediate repair is neces-
sary.
WARNING!
Driving a vehicle with the red brake light on is
dangerous. Part of the brake system may have failed.
It will take longer to stop the vehicle. You could have
an accident. Have the vehicle checked immediately.
Vehicles equipped with the Anti-Lock Brake System
(ABS), are also equipped with Electronic Brake Force
Distribution (EBD). In the event of an EBD failure, the
Brake Warning Light will turn on along with the ABS
Light. Immediate repair to the ABS system is required.
Operation of the Brake Warning Light can be checked by
turning the ignition switch from the OFF position to the
ON position. The light should illuminate for approxi-
mately two seconds. The light should then turn off unless the parking brake is applied or a brake fault is detected.
If the light does not illuminate, have the light inspected
by an authorized dealer.
The light also will turn on when the parking brake is
applied with the ignition switch in the ON position.
NOTE:
This light shows only that the parking brake is
applied. It does not show the degree of brake application.
15. Electronic Throttle Control (ETC) Light This light informs you of a problem with the
Electronic Throttle Control (ETC) system. If a
problem is detected, the light will come on
while the engine is running. Cycle the ignition
key when the vehicle has completely stopped and the
shift lever is placed in the PARK position. The light
should turn off. If the light remains lit with the engine
running, your vehicle will usually be drivable; however,
see an authorized dealer for service as soon as possible. If
4
UNDERSTANDING YOUR INSTRUMENT PANEL 197
Page 200 of 498
If jump starting is required, refer to “Jump Starting
Procedures” in “What To Do In Emergencies”.
18. SERV (Service) 4WD Indicator — If EquippedThe “SERV 4WD Indicator Light” will come on
when the ignition key is turned to the ON
position and will stay on for two seconds. If the
light stays on or comes on during driving, it
means that the 4WD system is not functioning properly
and that service is required.
19. Anti-Lock Brake (ABS) Light This light monitors the Anti-Lock Brake System
(ABS). The light will turn on when the ignition
switch is turned to the ON position and may
stay on for as long as four seconds.
If the ABS light remains on or turns on while driving, it
indicates that the Anti-Lock portion of the brake system
is not functioning and that service is required. However, the conventional brake system will continue to operate
normally if the BRAKE warning light is not on.
If the ABS light is on, the brake system should be serviced
as soon as possible to restore the benefits of Anti-Lock
brakes. If the ABS light does not turn on when the
Ignition switch is turned to the ON position, have the
light inspected by an authorized dealer.
20. Front Fog Light Indicator — If Equipped
This indicator will illuminate when the fog lights
are On.
21. Oil Pressure Warning Light This light indicates low engine oil pressure. The
light should turn on momentarily when the engine
is started. If the light turns on while driving, stop the
vehicle and shut off the engine as soon as possible. A
chime will sound for four minutes when this light turns
on.
4
UNDERSTANDING YOUR INSTRUMENT PANEL 199
Page 201 of 498
Do not operate the vehicle until the cause is corrected.
This light does not indicate how much oil is in the engine.
The engine oil level must be checked under the hood.
22. Airbag Warning LightThis light will turn on for four to eight seconds
as a bulb check when the ignition switch is first
turned ON. If the light is either not on during
starting, stays on, or turns on while driving,
then have the system inspected at an authorized dealer as
soon as possible. Refer to “Occupant Restraints” in
“Things To Know Before Starting Your Vehicle” for
further information.
23. Tachometer
This gauge measures engine revolutions-per-minute
(RPM x 1000). Before the pointer reaches the red area,
ease up on the accelerator to prevent engine damage. 24. Shift Lever Indicator
The Shift Lever Indicator is self-contained within the
instrument cluster. It displays the gear position of the
automatic transmission.
25. Tire Pressure Monitoring Telltale Light
Each tire, including the spare (if provided),
should be checked monthly, when cold and
inflated to the inflation pressure recommended
by the vehicle manufacturer on the vehicle
placard or tire inflation pressure label. (If your vehicle
has tires of a different size than the size indicated on the
vehicle placard or tire inflation pressure label, you should
determine the proper tire inflation pressure for those
tires.)
As an added safety feature, your vehicle has been
equipped with a Tire Pressure Monitoring System
(TPMS) that illuminates a low tire pressure telltale when
one or more of your tires is significantly under-inflated.
200 UNDERSTANDING YOUR INSTRUMENT PANEL
Page 206 of 498
27. Malfunction Indicator Light (MIL)The Malfunction Indicator Light (MIL) is part of
an onboard diagnostic system, called OBD, that
monitors engine and automatic transmission con-
trol systems. The light will illuminate when the key is in
the ON position, before engine start. If the bulb does not
come on when turning the key from OFF to ON, have the
condition checked promptly.
Certain conditions such as a loose or missing gas cap,
poor fuel quality, etc., may illuminate the MIL after
engine start. The vehicle should be serviced if the light
stays on through several of your typical driving cycles. In
most situations, the vehicle will drive normally and will
not require towing.CAUTION!
Prolonged driving with the MIL on could cause
damage to the engine control system. It also could
affect fuel economy and drivability. If the MIL is
flashing, severe catalytic converter damage and
power loss will soon occur. Immediate service is
required.
WARNING!
A malfunctioning catalytic converter, as referenced
above, can reach higher temperatures than in normal
operating conditions. This can cause a fire if you
drive slowly or park over flammable substances such
as dry plants or wood or cardboard, etc. This could
result in death or serious injury to the driver, occu-
pants or others.
4
UNDERSTANDING YOUR INSTRUMENT PANEL 205
Page 214 of 498
Press and release the COMPASS/
TEMPERATURE button to display one of eight
compass readings and the outside temperature.
Electronic Vehicle Information Center (EVIC)
Displays
When the appropriate conditions exist, the EVIC displays
the following messages.
•Turn signal on (with a continuous warning chime)
•Left front turn signal light out (with a single chime)
•Left rear turn signal light out (with a single chime)
•Right front turn signal light out (with a single chime)
•Right rear turn signal light out (with a single chime)
•RKE Battery Low (with a single chime)
•Personal settings not available – vehicle not in PARK
•Left/right front door ajar (one or more, with a single
chime if speed is above 1 mph/1.6 km/h)
•Left/right rear door ajar (one or more, with a single
chime if speed is above 1 mph/1.6 km/h)
•Door(s) ajar (with a single chime if vehicle is in
motion)
•Liftgate ajar (with a single chime)
•Left front low pressure (with a single chime). Refer to
“Tire Pressure Monitoring System” in “Starting And
Operating”.
•Left rear low pressure (with a single chime). Refer to
“Tire Pressure Monitoring System” in “Starting And
Operating”.
•Right front low pressure (with a single chime). Refer to
“Tire Pressure Monitoring System” in “Starting And
Operating”.
4
UNDERSTANDING YOUR INSTRUMENT PANEL 213
Page 314 of 498
lower gear than necessary to maintain headway. Over-
revving the engine can spin the wheels and traction will
be lost.
Avoid abrupt downshifts on icy or slippery roads, be-
cause engine braking may cause skidding and loss of
control.
Hill Climbing
NOTE:Before attempting to climb a hill, determine the
conditions at the crest and/or on the other side.
Before climbing a steep hill, shift the transmission to a
lower gear and shift the transfer case to 4L or 4LO. Use
first gear and 4L or 4LO for very steep hills.
If you stall or begin to lose headway while climbing a
steep hill, allow your vehicle to come to a stop and
immediately apply the brakes. Restart the engine and shift
to REVERSE. Back slowly down the hill allowing the
compression braking of the engine to help regulate your speed. If the brakes are required to control vehicle speed,
apply them lightly and avoid locking or skidding the tires.
WARNING!
If the engine stalls or you lose headway or cannot
make it to the top of a steep hill or grade, never
attempt to turn around. To do so may result in
tipping and rolling the vehicle. Always back straight
down a hill in REVERSE gear carefully. Never back
down a hill in NEUTRAL using only the brake.
Remember, never drive diagonally across a hill; always
drive straight up or down.
If the wheels start to slip as you approach the crest of a
hill, ease off the accelerator and maintain headway by
turning the front wheels slowly left and right. This may
provide a fresh “bite” into the surface and will usually
provide traction to complete the climb.
5
STARTING AND OPERATING 313
Page 318 of 498
If necessary, add fluid to restore to the proper indicated
level. With a clean cloth, wipe any spilled fluid from all
surfaces. Refer to “Fluids, Lubricants, and Genuine
Parts” in “Maintaining Your Vehicle” for further
information.
PARKING BRAKE
Before leaving the vehicle, make sure that the parking
brake is fully applied. Also, be certain to leave the
transmission in PARK.
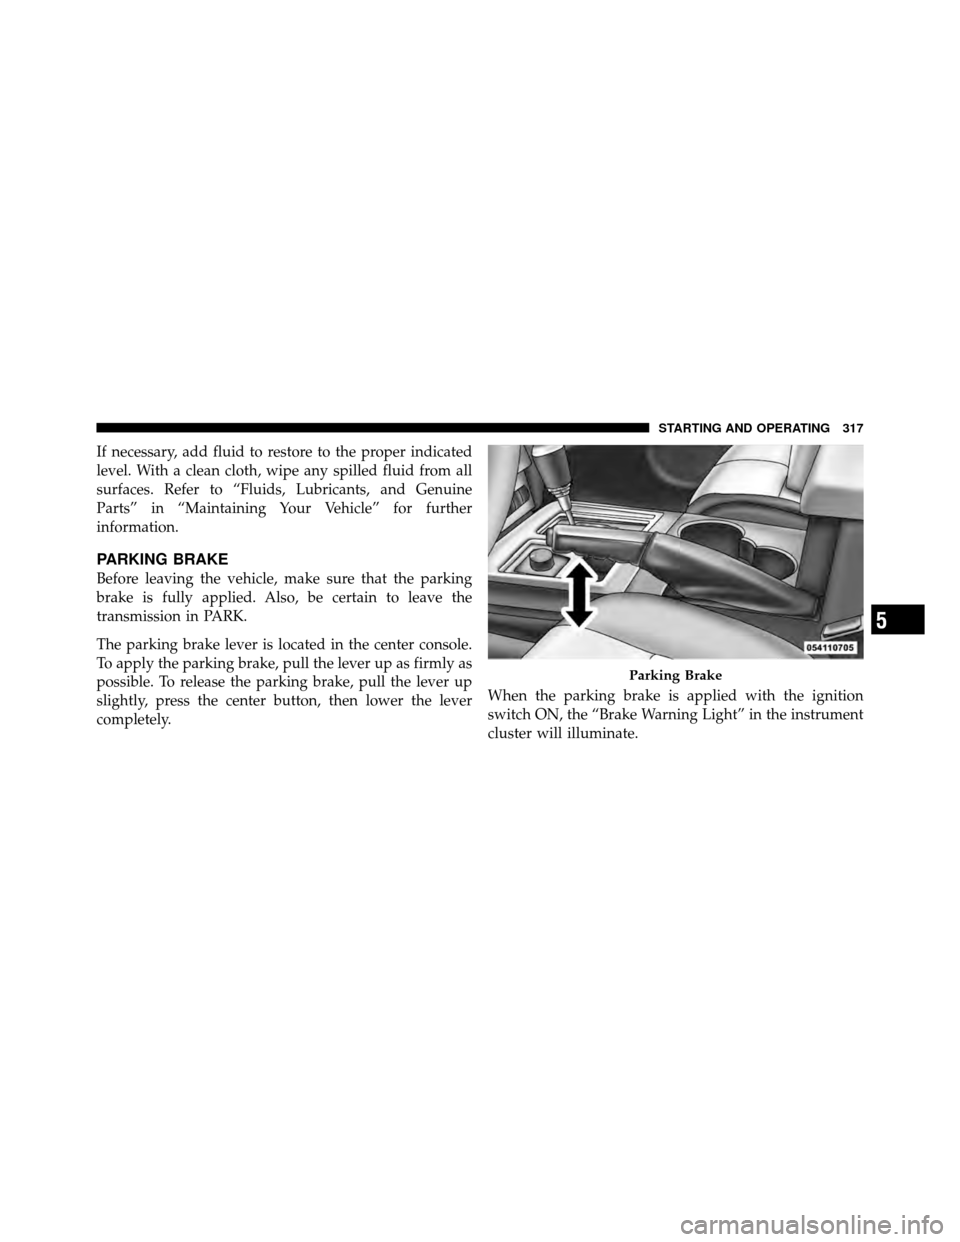
The parking brake lever is located in the center console.
To apply the parking brake, pull the lever up as firmly as
possible. To release the parking brake, pull the lever up
slightly, press the center button, then lower the lever
completely.When the parking brake is applied with the ignition
switch ON, the “Brake Warning Light” in the instrument
cluster will illuminate.
Parking Brake
5
STARTING AND OPERATING 317