center console DODGE NITRO 2010 1.G Owners Manual
[x] Cancel search | Manufacturer: DODGE, Model Year: 2010, Model line: NITRO, Model: DODGE NITRO 2010 1.GPages: 498, PDF Size: 6.94 MB
Page 68 of 498
not properly classify the occupant. Objects lodged under
the seat or between the seat and the center console can
prevent the occupant’s weight from being measured
properly and may result in the occupant being improp-
erly classified. Ensure that the front passenger seatback
does not touch anything placed on the second row of
seats because this can also affect occupant classification.
Also, if you fold down the seats in the second row check
to be sure they don’t touch the front passenger seat.
If the front passenger seat is damaged in any way, it
should only be serviced by an authorized dealer. If the
seat is removed (or even if the seat attachment bolts are
loosened or tightened in any way), take the vehicle to an
authorized dealer.If there is a fault present in the airbag system, the Airbag
Warning Light (a red light located in the center of the
instrument cluster directly in front of the driver) will be
turned on. This indicates that you should have an autho-
rized dealer service the system immediately. The Airbag
Warning Light is turned on whenever there is a fault that
can affect the operation of the airbag system. If there is a
fault present in the PAD Indicator Light, the Airbag
Warning Light will be illuminated to show that the
passenger Advanced Front Airbag may be turned off
until the fault is cleared. If the Airbag Warning Light is
illuminated, have an authorized dealer service the airbag
system immediately. If an object is lodged under the seat
and interferes with operation of the weight sensors, a
fault will occur which turns on both the PAD Indicator
Light and the Airbag Warning Light. Once the lodged
object is removed, the fault will be automatically cleared
after a short period of time.
2
THINGS TO KNOW BEFORE STARTING YOUR VEHICLE 67
Page 178 of 498
CUPHOLDERS
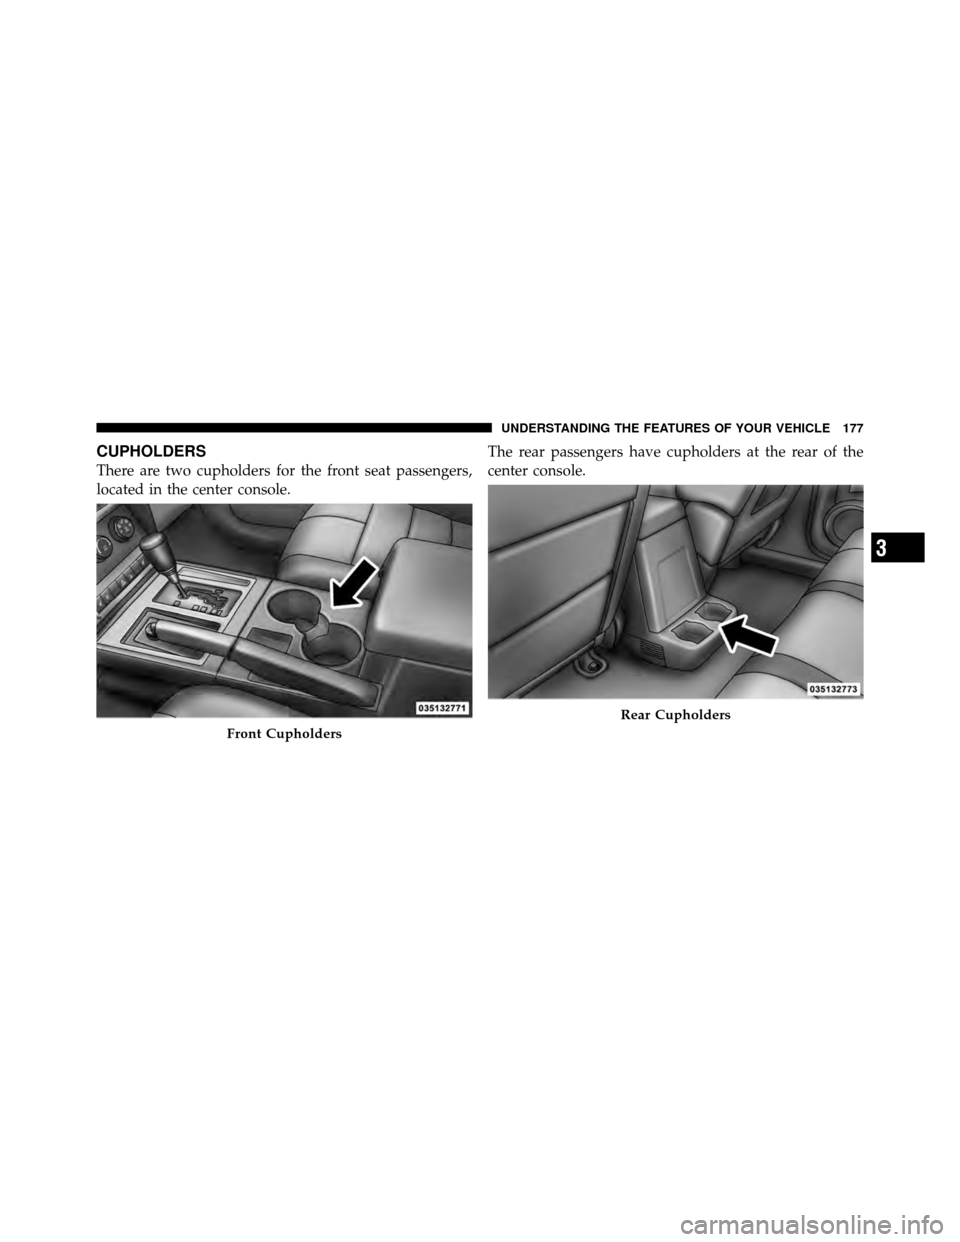
There are two cupholders for the front seat passengers,
located in the center console.The rear passengers have cupholders at the rear of the
center console.
Front Cupholders
Rear Cupholders
3
UNDERSTANDING THE FEATURES OF YOUR VEHICLE 177
Page 180 of 498
Console Storage Compartment
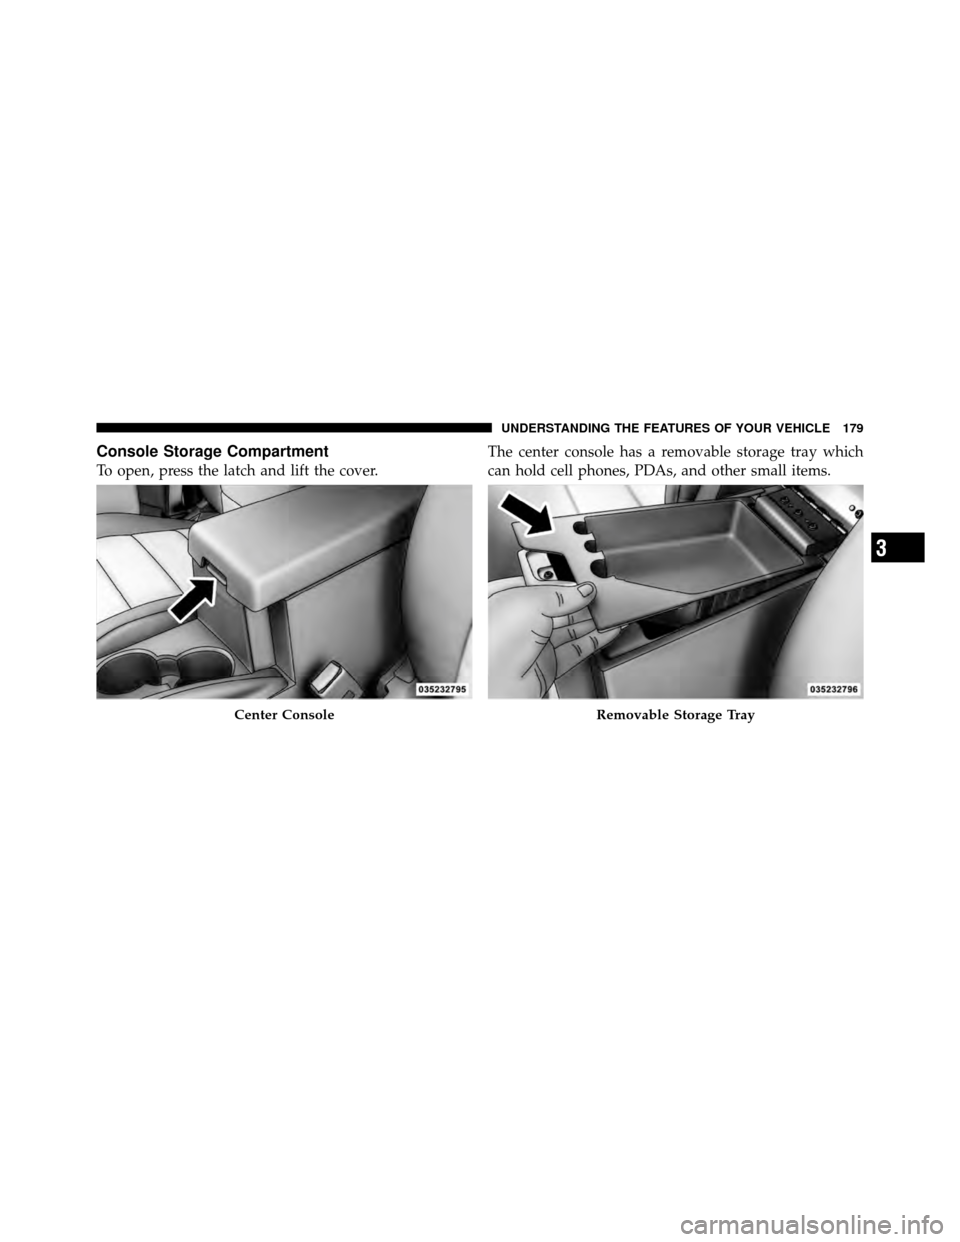
To open, press the latch and lift the cover.The center console has a removable storage tray which
can hold cell phones, PDAs, and other small items.
Center ConsoleRemovable Storage Tray
3
UNDERSTANDING THE FEATURES OF YOUR VEHICLE 179
Page 309 of 498
•If the vehicle has not been driven in several days, the
first few seconds of operation after shifting the trans-
mission into gear may seem sluggish. This is due to the
fluid partially draining from the torque converter into
the transmission. This condition is normal and will not
cause damage to the transmission. The torque con-
verter will refill within five seconds of shifting from
PARK into any other gear position.
FOUR-WHEEL DRIVE OPERATION — IF
EQUIPPED
MP 143 Single-Speed Part-Time Transfer Case
Operating Information/Precautions
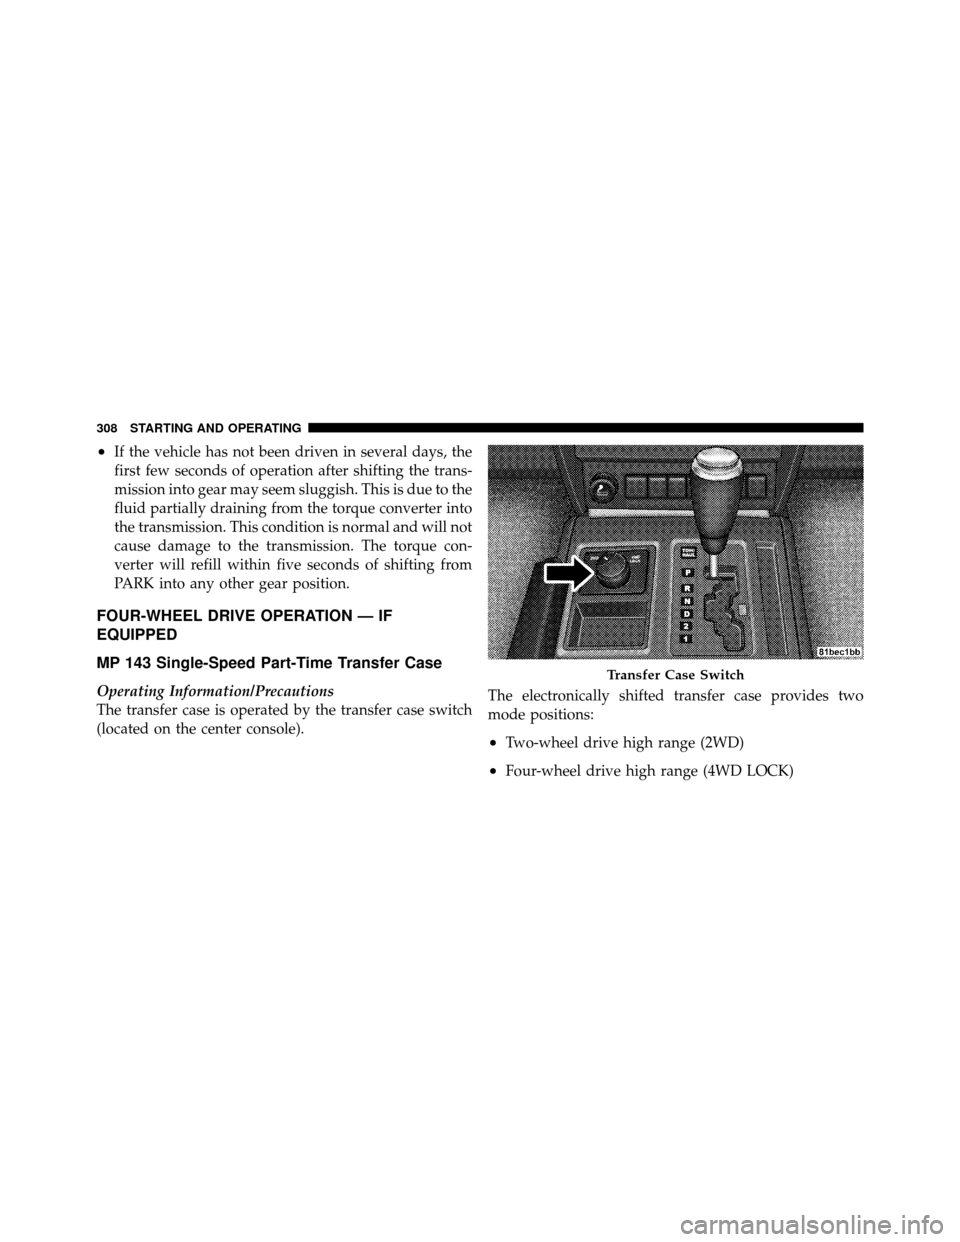
The transfer case is operated by the transfer case switch
(located on the center console).The electronically shifted transfer case provides two
mode positions:
•Two-wheel drive high range (2WD)
•Four-wheel drive high range (4WD LOCK)
Transfer Case Switch
308 STARTING AND OPERATING
Page 318 of 498
If necessary, add fluid to restore to the proper indicated
level. With a clean cloth, wipe any spilled fluid from all
surfaces. Refer to “Fluids, Lubricants, and Genuine
Parts” in “Maintaining Your Vehicle” for further
information.
PARKING BRAKE
Before leaving the vehicle, make sure that the parking
brake is fully applied. Also, be certain to leave the
transmission in PARK.
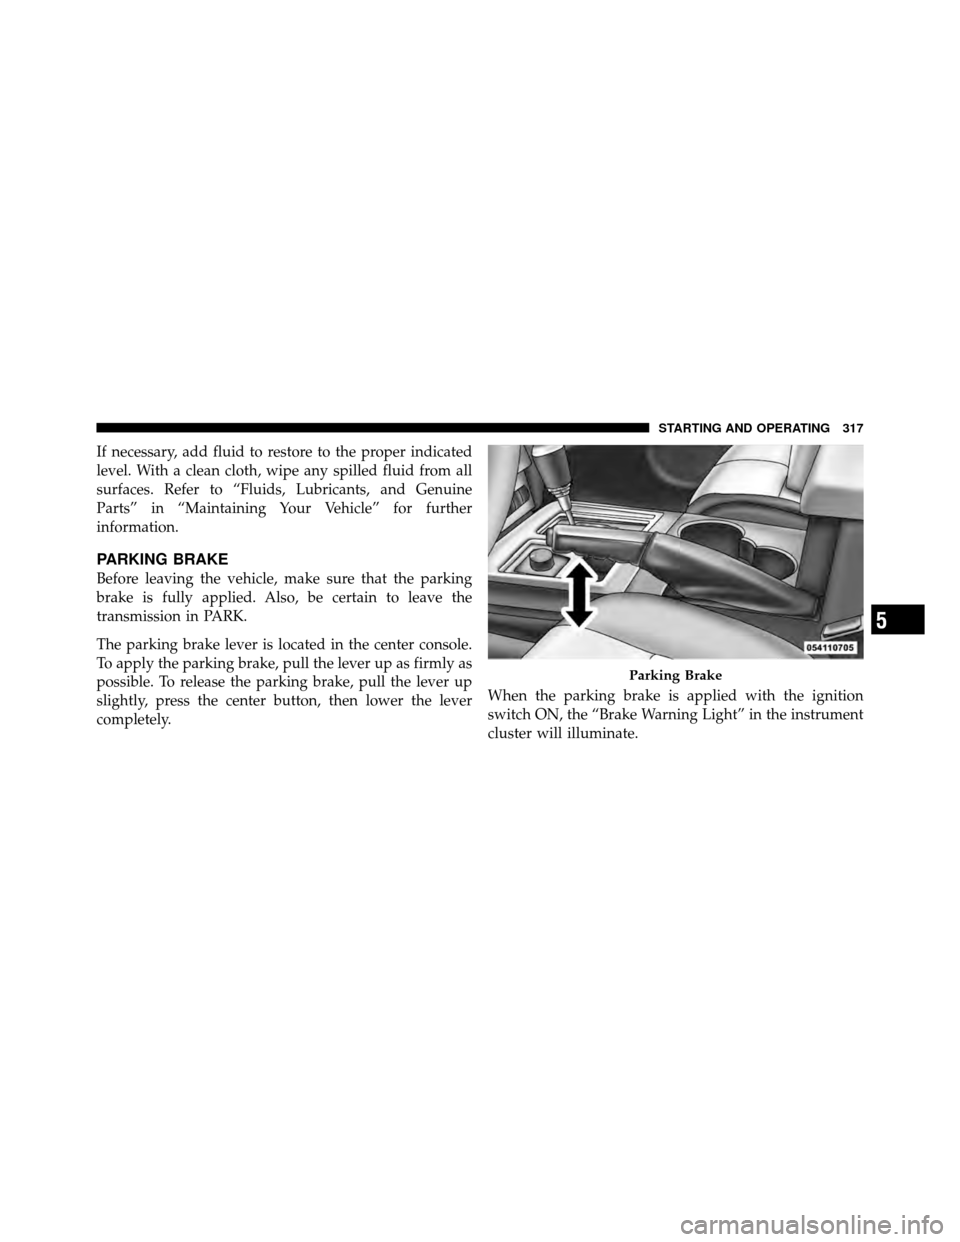
The parking brake lever is located in the center console.
To apply the parking brake, pull the lever up as firmly as
possible. To release the parking brake, pull the lever up
slightly, press the center button, then lower the lever
completely.When the parking brake is applied with the ignition
switch ON, the “Brake Warning Light” in the instrument
cluster will illuminate.
Parking Brake
5
STARTING AND OPERATING 317
Page 441 of 498
CAUTION! (Continued)
•When replacing a blown fuse, it is important to
use only a fuse having the correct amperage rating.
The use of a fuse with a rating other than indicated
may result in a dangerous electrical system over-
load. If a properly rated fuse continues to blow, it
indicates a problem in the circuit that must be
corrected.
REPLACEMENT BULBS
LIGHT BULBS – InteriorBulb No.
Dome Lamp ......................... TL212–2
Liftgate Lamp ........................... 567
Overhead Console Lamps ............. PLW214–2A
Reading Lamp ...................... WL212–2LIGHT BULBS – Exterior
Bulb No.
Headlamp ......................... 9008 H13
Front Park/Turn ...................... 3157AK
Front Sidemarker ......................... 168
Back-Up ............................. 3057K
Center High Mounted Stoplamp ............. LED
(serviced at an authorized dealer)
Fog Lamp .......................... H10 9145
License Plate Lamp ....................... 168
Rear Tail, Stop, Turn Signal ................3057K
BULB REPLACEMENT
Headlamp
1. Open the hood.
2. Reach behind the headlamp unit in the engine com-
partment to access the headlamp bulb lock ring.
3. Firmly grasp the lock ring on the back of the headlamp
unit housing.
440 MAINTAINING YOUR VEHICLE
Page 483 of 498
Cargo Load Floor........................ 182
Cargo Tie-Downs ........................ 180
Cargo (Vehicle Loading) ................... 366
Cellular Phone ....................... 100,275
Center High Mounted Stop Light ............ 444
Certification Label ....................... 366
Changing A Flat Tire ..................... 388
Chart, Tire Sizing ........................ 330
Check Engine Light
(Malfunction Indicator Light) .............205,404
Checking Your Vehicle For Safety ............. 86
Checks, Safety ........................... 86
Child Restraint .................... 76,77,81,83
Child Restraint Tether Anchors .............80,81
Child Safety Locks ........................ 31
Climate Control ......................... 275
Clock ..................... 223,238,240,243,253
Coin Holder ........................... 179
Compact Disc (CD) Maintenance ............. 274Compact Spare Tire
...................... 341
Compass ........................ 207,210,216
Compass Calibration .................. 210,217
Compass Variance .................... 209,218
Computer, Trip/Travel .................... 215
Console .............................. 179
Console, Floor .......................... 179
Contract, Service ........................ 473
Cooling System ......................... 417
Adding Coolant (Antifreeze) .............. 419
Coolant Capacity ...................... 445
Coolant Level ......................... 421
Disposal of Used Coolant ................ 421
Drain, Flush, and Refill .................. 418
Inspection ........................... 417
Points to Remember .................... 422
Pressure Cap ......................... 420
Selection of Coolant (Antifreeze) ......418,445,446
Corrosion Protection ..................... 428
482 INDEX