instrument cluster DODGE POWER WAGON 2007 2.G User Guide
[x] Cancel search | Manufacturer: DODGE, Model Year: 2007, Model line: POWER WAGON, Model: DODGE POWER WAGON 2007 2.GPages: 492, PDF Size: 8.25 MB
Page 255 of 492
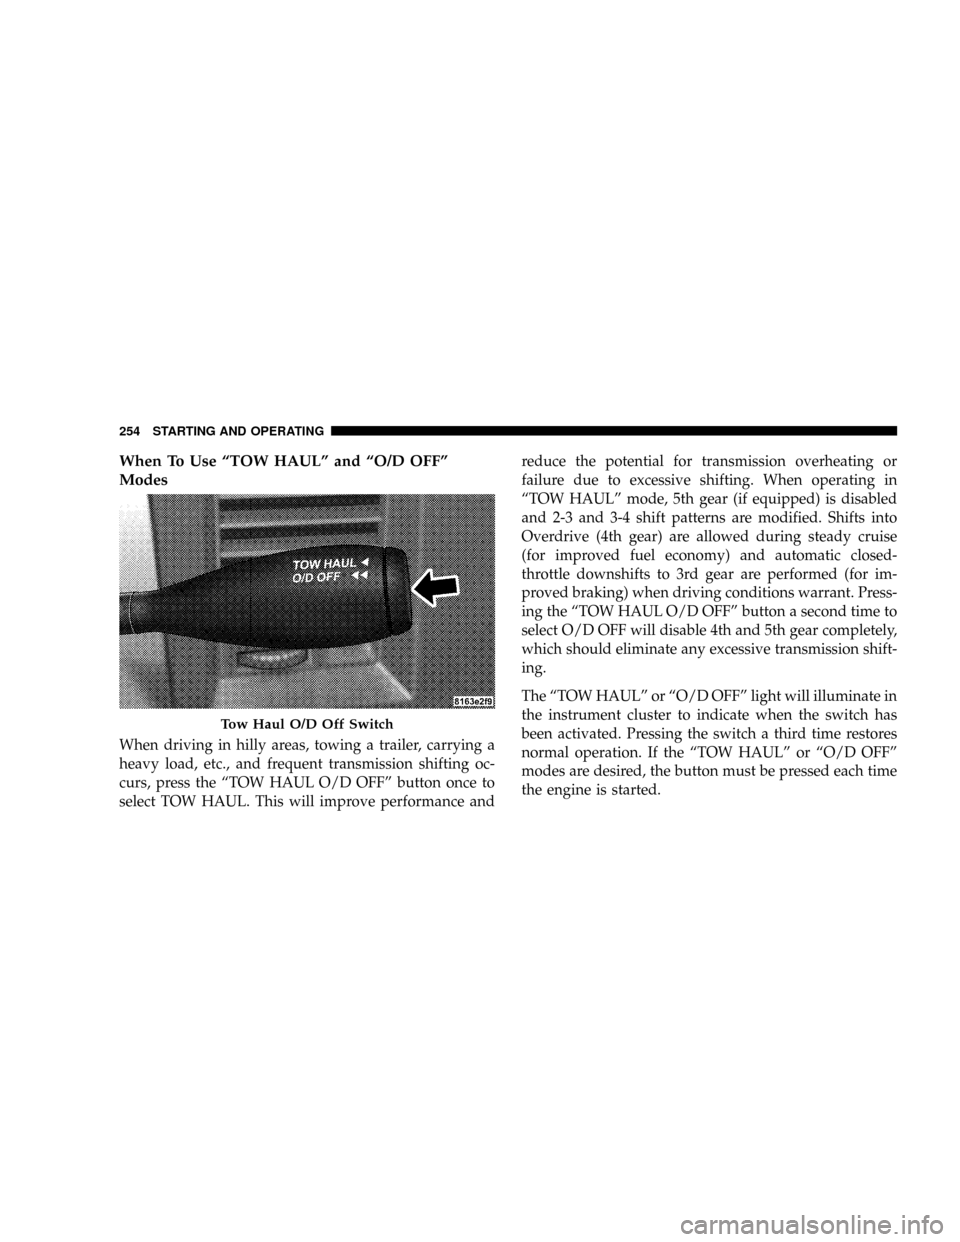
When To Use ªTOW HAULº and ªO/D OFFº
Modes
When driving in hilly areas, towing a trailer, carrying a
heavy load, etc., and frequent transmission shifting oc-
curs, press the ªTOW HAUL O/D OFFº button once to
select TOW HAUL. This will improve performance andreduce the potential for transmission overheating or
failure due to excessive shifting. When operating in
ªTOW HAULº mode, 5th gear (if equipped) is disabled
and 2-3 and 3-4 shift patterns are modified. Shifts into
Overdrive (4th gear) are allowed during steady cruise
(for improved fuel economy) and automatic closed-
throttle downshifts to 3rd gear are performed (for im-
proved braking) when driving conditions warrant. Press-
ing the ªTOW HAUL O/D OFFº button a second time to
select O/D OFF will disable 4th and 5th gear completely,
which should eliminate any excessive transmission shift-
ing.
The ªTOW HAULº or ªO/D OFFº light will illuminate in
the instrument cluster to indicate when the switch has
been activated. Pressing the switch a third time restores
normal operation. If the ªTOW HAULº or ªO/D OFFº
modes are desired, the button must be pressed each time
the engine is started.
Tow Haul O/D Off Switch
254 STARTING AND OPERATING
Page 260 of 492
road surfaces only. Driving in the 4H and 4L positions on
dry hard surfaced roads may cause increased tire wear
and damage to the driveline components.
The 4-wheel drive high (4LOCK) and 4±wheel drive low
(4LOW) lights, located in the instrument cluster, alert the
driver that the vehicle is either in 4-wheel drive high or
4±wheel drive low and that the front and rear driveshafts
are locked together. There are no lights for the 2H or N
(Neutral) positions.
When operating your vehicle in 4L, the engine speed is
approximately three times that of the 2H or 4H positions
at a given road speed. Take care not to overspeed the
engine and do not exceed 25 mph (40 km/h).
Proper operation of 4-wheel-drive vehicles depends on
tires of equal size, type and circumference on each wheel.
Any difference will adversely affect shifting and can
cause damage to the transfer case.NOTE:Do not attempt to make a shift while only the
front or rear wheels are spinning. The transfer case is not
equipped with a synchronizer and therefore the front and
rear driveshaft speeds must be equal for the shift to take
place. Shifting while only the front or rear wheels are
spinning can cause damage to the transfer case.
Because 4-wheel drive provides improved traction, there
is a tendency to exceed safe turning and stopping speeds.
Do not go faster than road conditions permit.
NOTE:Delayed shifts out of four-wheel drive may be
experienced due to uneven tire wear, low or uneven tire
pressures, excessive vehicle loading, or cold tempera-
tures.
STARTING AND OPERATING 259
5
Page 263 of 492
NOTE:Shifting into or out of 4L is possible with the
vehicle completely stopped, however difficulty may oc-
cur due to the mating clutch teeth not being properly
aligned. Several attempts may be required for clutch
teeth alignment and shift completion to occur. The pre-
ferred method is with the vehicle rolling 2 to 3 mph (3 to
5 km/h). Avoid attempting to engage or disengage 4L
with the vehicle moving faster than 2 to 3 mph (3 to 5
km/h).
NOTE:Do not attempt to shift to or from 4L while the
transmission is in gear or clutch is engaged.
Transfer Case Reminder Light
The four-wheel-drive operating light (4LOCK), located in
the instrument cluster, is used to alert the driver that the
front axle is fully engaged and all four wheels are
driving.
LIMITED-SLIP DIFFERENTIAL Ð IF EQUIPPED
The limited-slip differential provides additional traction
on snow, ice, mud, sand and gravel, particularly when
there is a difference between the traction characteristics
of the surface under the right and left rear wheels. During
normal driving and cornering, the limited-slip unit per-
forms similarly to a conventional differential. On slip-
pery surfaces, however, the differential delivers more of
the driving effort to the rear wheel having the better
traction.
The limited-slip differential is especially helpful during
slippery driving conditions. With both rear wheels on a
slippery surface, a slight application of the accelerator
will supply maximum traction. When starting with only
one rear wheel on an excessively slippery surface, slight
momentary application of the parking brake may be
necessary to gain maximum traction.
262 STARTING AND OPERATING
Page 309 of 492
vehicle's frame/tow hook and run the wire rope through
a snatch block. Disengage the clutch and, using the
snatch block, pull out enough wire to reach your anchor
point. Do not attach hook to mounting kit. Secure to the
anchor point with a tree trunk protector or choker chain.
Attach the clevis/shackle. Attach the shackle to the two
ends of the strap/chain, being careful not to over tighten
(tighten and back-off 1/2 turn).
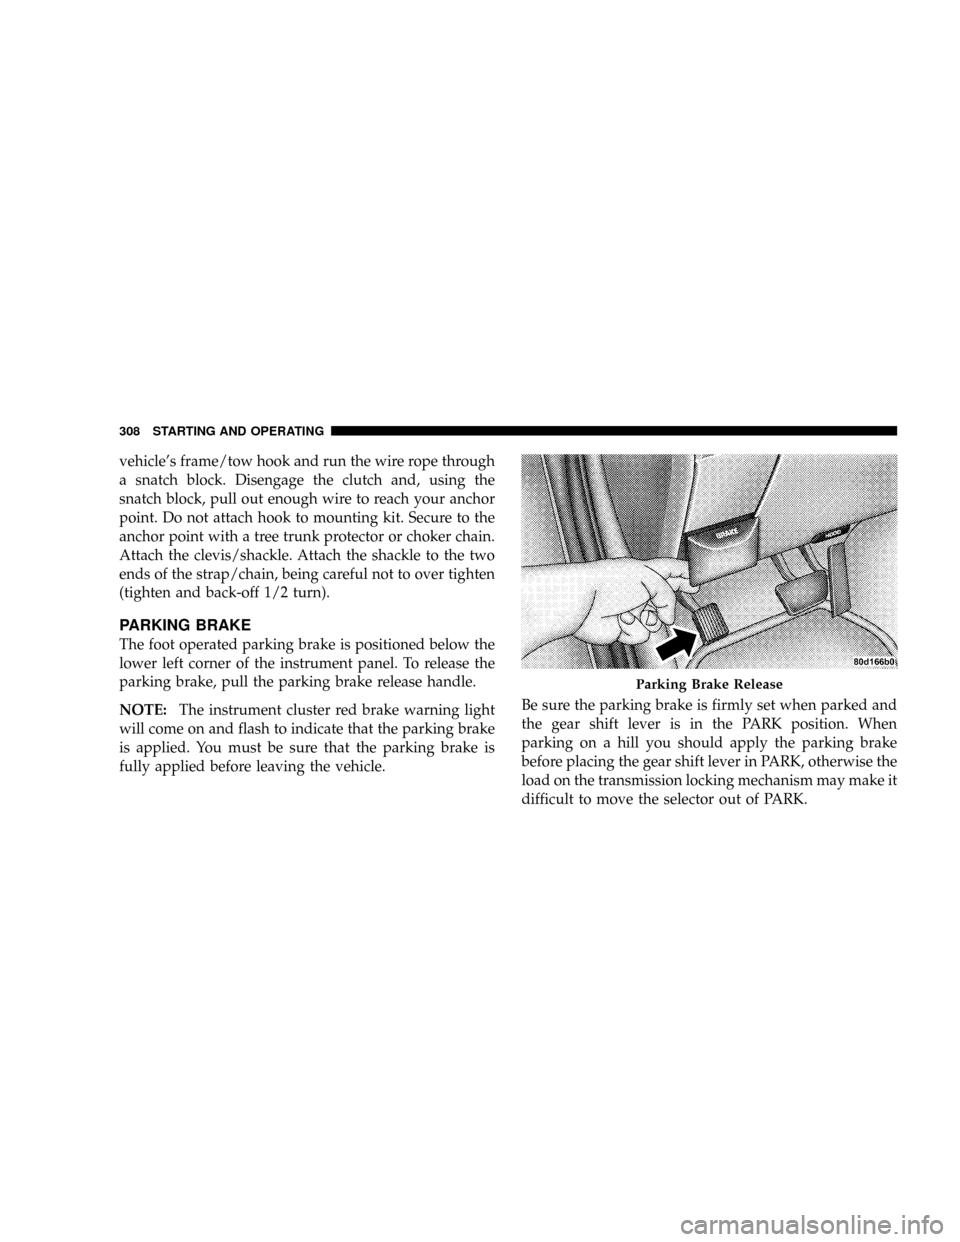
PARKING BRAKE
The foot operated parking brake is positioned below the
lower left corner of the instrument panel. To release the
parking brake, pull the parking brake release handle.
NOTE:The instrument cluster red brake warning light
will come on and flash to indicate that the parking brake
is applied. You must be sure that the parking brake is
fully applied before leaving the vehicle.Be sure the parking brake is firmly set when parked and
the gear shift lever is in the PARK position. When
parking on a hill you should apply the parking brake
before placing the gear shift lever in PARK, otherwise the
load on the transmission locking mechanism may make it
difficult to move the selector out of PARK.
Parking Brake Release
308 STARTING AND OPERATING
Page 342 of 492
NOTE:Tighten the gas cap 1/4 turn until you hear one
click. This is an indication that the cap is properly
tightened.
If the gas cap is not tightened properly, the Malfunction
Indicator Light will come on, Be sure the gas cap is
tightened every time the vehicle is refueled.
WARNING!
A fire may result if gasoline is pumped into a
portable container that is inside of a vehicle. You
could be burned. Always place gas containers on the
ground while filling.
Loose Fuel Filler Cap Message
If the vehicles diagnostic system determines that the fuel
filler cap in loose, improperly installed, or damaged, a
GASCAP message will be displayed in the instrumentcluster. Tighten the gas cap until a ªclickingº sound is
heard. This is an indication that the gas cap is properly
tightened. Press the odometer reset button to turn the
message off. If the problem persists, the message will
appear the next time the vehicle is started. This might
indicate a damaged cap. If the problem is detected twice
in a row, the system will turn on the Malfunction
Indicator Light (MIL). Resolving the problem will turn
the MIL light off.
VEHICLE LOADING
Certification Label
As required by National Highway Traffic Safety Admin-
istration Regulations, your vehicle has a certification
label affixed to the driver's side door or pillar.
This label contains the month and year of manufacture,
Gross Vehicle Weight Rating (GVWR), Gross Axle Weight
Rating (GAWR) front and rear, and Vehicle Identification
Number (VIN). A Month-Day-Hour (MDH) number is
STARTING AND OPERATING 341
5
Page 386 of 492
ONBOARD DIAGNOSTIC SYSTEM (OBD II)
Vehicles equipped with California emissions controls
have a sophisticated onboard diagnostic system called
OBDII. This system monitors the performance of the
emissions, engine, and automatic transmission control
systems. When these systems are operating properly,
your vehicle will provide excellent performance and fuel
economy, as well as engine emissions well within current
government regulations.
If any of these systems require service, the OBD II system
will turn on the ªMalfunction Indicator Light.º It will
also store diagnostic codes and other information to
assist your service technician in making repairs. Al-
though your vehicle will usually be driveable and not
need towing, see your dealer for service as soon as
possible.CAUTION!
Prolonged driving with the ªMalfunction Indicator
Lightº on could cause further damage to the emis-
sion control system. It could also affect fuel economy
and driveability. The vehicle must be serviced before
any emissions tests can be performed.
If the ªMalfunction Indicator Lightº is flashing,
severe catalytic converter damage and power loss
will soon occur. Immediate service is required.
Loose Fuel Filler Cap Message
If the vehicles diagnostic system determines that the fuel
filler cap in loose, improperly installed, or damaged, a
GASCAP message will be displayed in the instrument
cluster. Tighten the gas cap until a ªclickingº sound is
heard. This is an indication that the gas cap is properly
tightened. Press the odometer reset button to turn the
MAINTAINING YOUR VEHICLE 385
7
Page 425 of 492
soaking your leather upholstery with any liquid. Please
do not use polishes, oils, cleaning fluids, solvents, deter-
gents, or ammonia based cleaners to clean your leather
upholstery. Application of a leather conditioner is not
required to maintain the original condition.
WARNING!
Do not use volatile solvents for cleaning purposes.
Many are potentially flammable, and if used in
closed areas they may cause respiratory harm.
Glass Surfaces
All glass surfaces should be cleaned on a regular basis
with MopartGlass Cleaner or any commercial
household-type glass cleaner. Never use an abrasive type
cleaner. Use caution when cleaning the inside rear win-
dow equipped with electric defrosters or the right rear
quarter window equipped with the radio antenna. Donot use scrapers or other sharp instruments which may
scratch the elements. When cleaning the rear view mirror,
spray cleaner on the towel or rag that you are using. Do
not spray cleaner directly on the mirror.
Cleaning Plastic Instrument Cluster Lenses
The lenses in front of the instruments in this vehicle are
molded in clear plastic. When cleaning the lenses, care
must be taken to avoid scratching the plastic.
1. Clean with a wet soft rag. A mild soap solution may be
used, but do not use high alcohol content or abrasive
cleaners. If soap is used, wipe clean with a clean damp
rag.
2. Dry with a soft tissue.
Seat Belt Maintenance
Do not bleach, dye or clean the belts with chemical
solvents or abrasive cleaners. This will weaken the fabric.
Sun damage can also weaken the fabric.
424 MAINTAINING YOUR VEHICLE
Page 431 of 492
VEHICLE STORAGE
If you are storing your vehicle for more than 21 days, we
recommend that you take the following steps to mini-
mize the drain on your vehicle's battery:
²Disconnect the Ignition-Off Draw fuse (I.O.D.) fuse
located in the Integrated Power Module, located in the
engine compartment. The I.O.D. cavity includes a
snap-in retainer that allows the fuse to be discon-
nected, without removing it from the fuse block.
²The electronic shift transfer case should be placed in
the 4HI mode and kept in this position to minimize the
battery drain.
²As an alternative to the above steps you may, discon-
nect the negative cables from both batteries.
²Anytime you store your vehicle, or keep it out of
service (i.e. vacation) for two weeks or more, run the
air conditioning system at idle for about five minutesin the fresh air and high blower setting. This will
insure adequate system lubrication to minimize the
possibility of compressor damage when the system is
started again.
NOTE:When reinstalling the IOD fuse push firmly until
fully seated, the gages in the Instrument Cluster will do
a full sweep, when the ignition key is cycled to RUN. This
is a normal condition.
REPLACEMENT LIGHT BULBS
LIGHT BULBS Ð Inside Bulb No.
Overhead Console Lights............... TS212-2
Dome Light............................7679
All of the inside bulbs are brass or glass wedge base.
Aluminum base bulbs are not approved.
430 MAINTAINING YOUR VEHICLE
Page 481 of 492
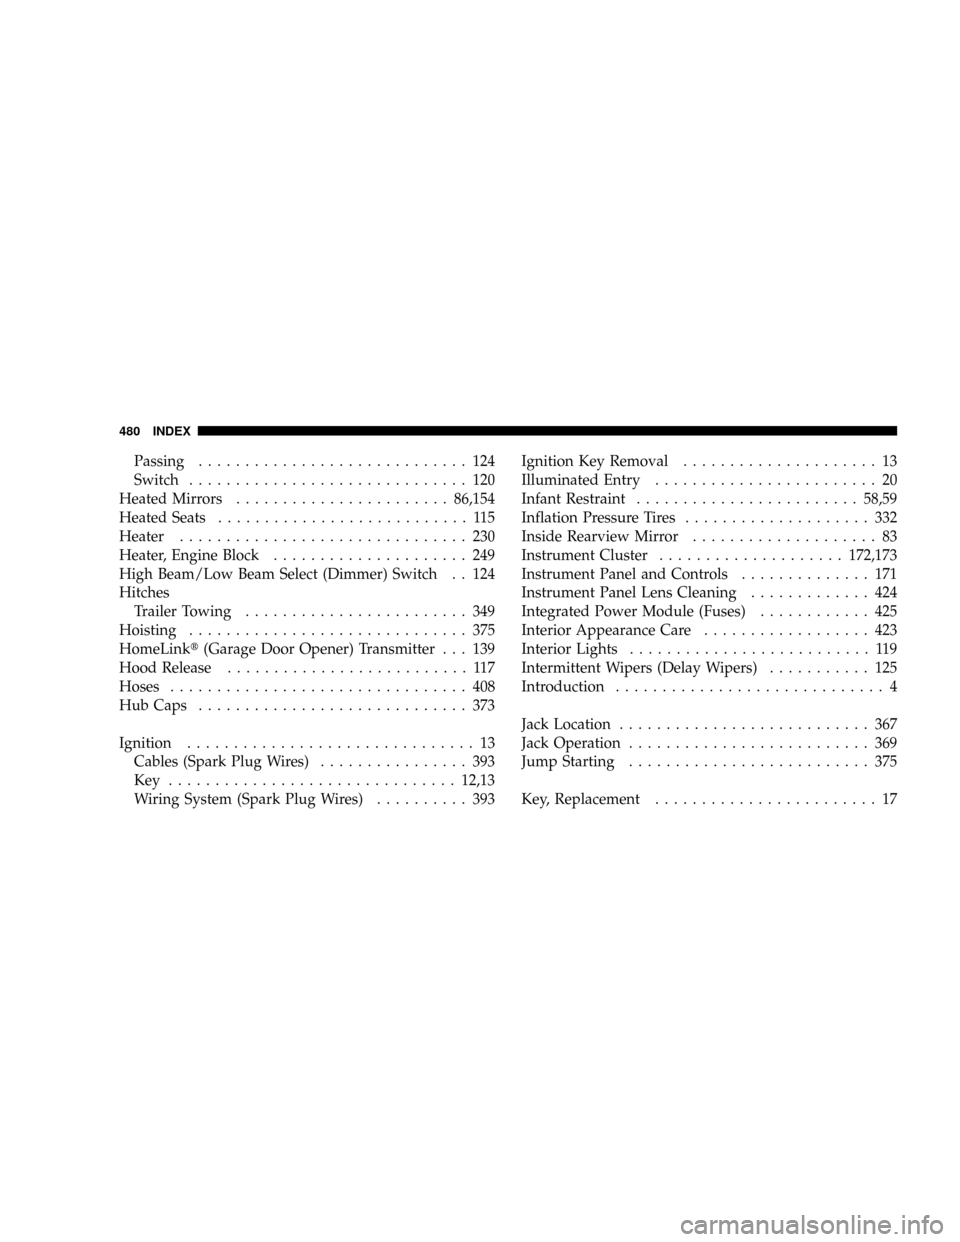
Passing............................. 124
Switch.............................. 120
Heated Mirrors.......................86,154
Heated Seats........................... 115
Heater............................... 230
Heater, Engine Block..................... 249
High Beam/Low Beam Select (Dimmer) Switch . . 124
Hitches
Trailer Towing........................ 349
Hoisting.............................. 375
HomeLinkt(Garage Door Opener) Transmitter . . . 139
Hood Release.......................... 117
Hoses................................ 408
Hub Caps............................. 373
Ignition............................... 13
Cables (Spark Plug Wires)................ 393
Key ...............................12,13
Wiring System (Spark Plug Wires).......... 393Ignition Key Removal..................... 13
Illuminated Entry........................ 20
Infant Restraint........................58,59
Inflation Pressure Tires.................... 332
Inside Rearview Mirror.................... 83
Instrument Cluster....................172,173
Instrument Panel and Controls.............. 171
Instrument Panel Lens Cleaning............. 424
Integrated Power Module (Fuses)............ 425
Interior Appearance Care.................. 423
Interior Lights.......................... 119
Intermittent Wipers (Delay Wipers)........... 125
Introduction............................. 4
Jack Location........................... 367
Jack Operation.......................... 369
Jump Starting.......................... 375
Key, Replacement........................ 17
480 INDEX
Page 482 of 492
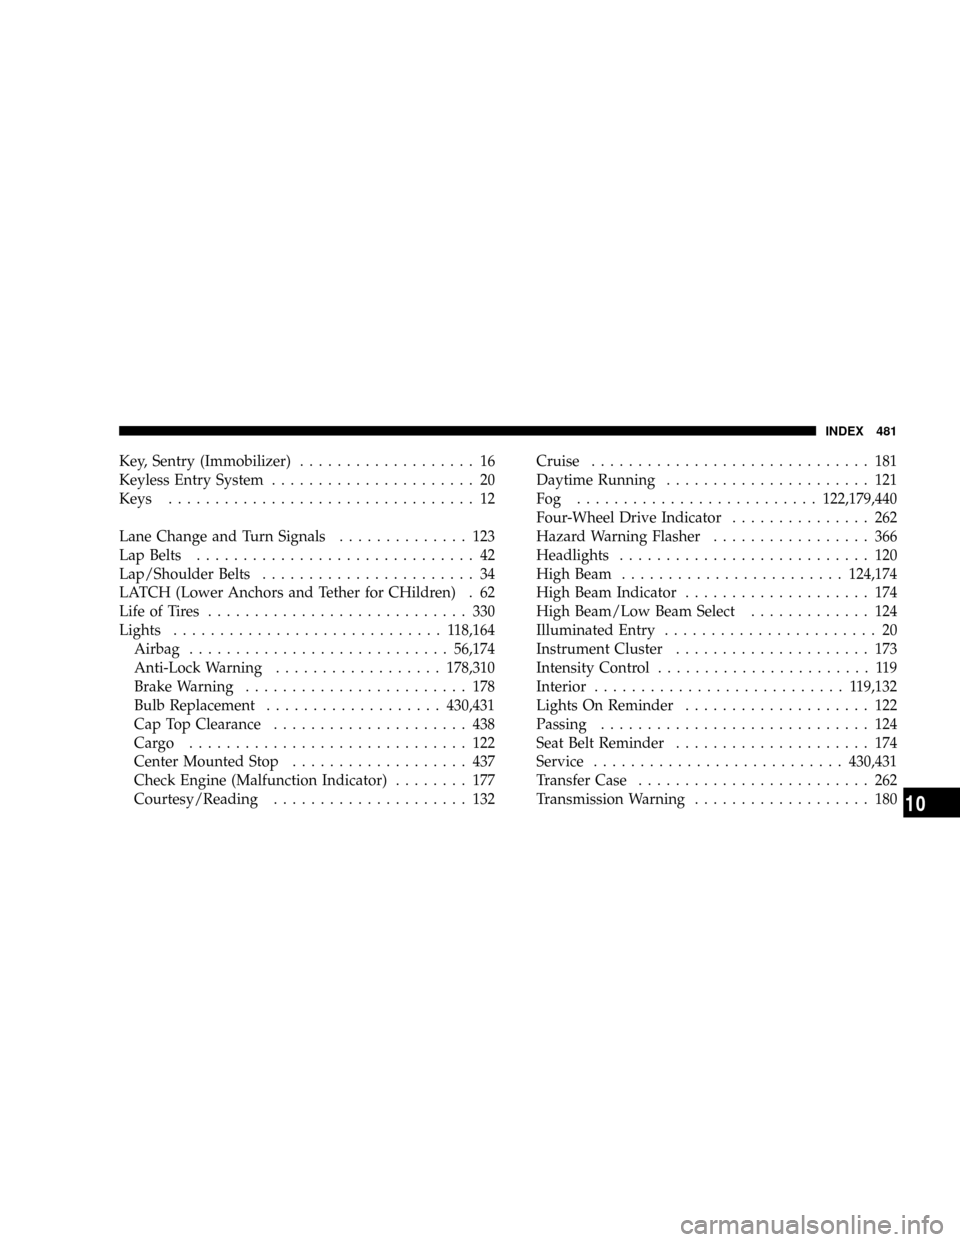
Key, Sentry (Immobilizer)................... 16
Keyless Entry System...................... 20
Keys................................. 12
Lane Change and Turn Signals.............. 123
Lap Belts.............................. 42
Lap/Shoulder Belts....................... 34
LATCH (Lower Anchors and Tether for CHildren) . 62
Life of Tires............................ 330
Lights............................. 118,164
Airbag............................56,174
Anti-Lock Warning..................178,310
Brake Warning........................ 178
Bulb Replacement...................430,431
Cap Top Clearance..................... 438
Cargo .............................. 122
Center Mounted Stop................... 437
Check Engine (Malfunction Indicator)........ 177
Courtesy/Reading..................... 132Cruise.............................. 181
Daytime Running...................... 121
Fog ..........................122,179,440
Four-Wheel Drive Indicator............... 262
Hazard Warning Flasher................. 366
Headlights........................... 120
High Beam........................124,174
High Beam Indicator.................... 174
High Beam/Low Beam Select............. 124
Illuminated Entry....................... 20
Instrument Cluster..................... 173
Intensity Control....................... 119
Interior........................... 119,132
Lights On Reminder.................... 122
Passing............................. 124
Seat Belt Reminder..................... 174
Service...........................430,431
Transfer Case......................... 262
Transmission Warning................... 180
INDEX 481
10