weight DODGE POWER WAGON 2007 2.G Owners Manual
[x] Cancel search | Manufacturer: DODGE, Model Year: 2007, Model line: POWER WAGON, Model: DODGE POWER WAGON 2007 2.GPages: 492, PDF Size: 8.25 MB
Page 60 of 492
Infants and Small Children
There are different sizes and types of restraints for
children from newborn size to the child almost large
enough for an adult safety belt. Use the restraint that is
correct for your child:
²Safety experts recommend that children ride
rearward-facing in the vehicle until they are at least
one year old and weigh at least 20 lbs (9 kg). Two types
of child restraints can be used rearward-facing: infant
carriers and9convertible9child seats. Both types of
child restraints are held in the vehicle by the lap/
shoulder belt.
²The infant carrier is only used rearward-facing in the
vehicle. It is recommended for children who weigh up
to about 20 lbs (9 kg).9Convertible9child seats can be
used either rearward-facing or forward-facing in the
vehicle. Convertible child seats often have a higher
weight limit in the rearward-facing direction thaninfant carriers do, so they can be used rearward-facing
by children who weigh more than 20 lbs (9 kg) but are
less than one year old.
²Rearward-facing child seats mustNEVERbe used in
the front seat of a vehicle with a front passenger airbag
unless the airbag is turned off. An airbag deployment
could cause severe injury or death to infants in this
position.
²Children who weigh more than 20 lbs (9 kg) and who
are older than one year can ride forward-facing in the
vehicle. Forward-facing child seats and convertible
child seats used in the forward-facing direction are for
children who weigh 20 to 40 lbs (9 to 18 kg) and who
are older than one year. These child seats are also held
in the vehicle by the lap/shoulder belt.
²The belt-positioning booster seat is for children weigh-
ing more than 40 lbs (18 kg), but who are still too small
to fit the vehicle's seat belts properly. If the child
THINGS TO KNOW BEFORE STARTING YOUR VEHICLE 59
2
Page 62 of 492
Here are some tips for getting the most out of your child
restraint:
²Before buying any restraint system, make sure that it
has a label certifying that it meets all applicable Safety
Standards. We also recommend that you make sure
that you can install the child restraint in the vehicle
where you will use it before you buy it.
²The restraint must be appropriate for your child's
weight and height. Check the label on the restraint for
weight and height limits.
²Carefully follow the instructions that come with the
restraint. If you install the restraint improperly, it may
not work when you need it.
²The passenger seat belts are equipped with Automatic
Locking Retractors (ALR), which are designed to keep
the lap portion tight around the child restraint so that
it is not necessary to use a locking clip.Pull the belt from the retractor until there is enough to
allow you to pass through the child restraint and slide
the latch plate into the buckle. Then pull on the belt
until it is all removed from the retractor. Allow the belt
to return to the retractor, pulling on the excess web-
bing to tighten the lap portion about the child re-
straint. Refer to the9Automatic Locking Retractors
(ALR) Mode9earlier in this section.
²In the rear seat, you may have trouble tightening the
lap/shoulder belt on the child restraint because the
buckle or latch plate is too close to the belt path
opening on the restraint. Disconnect the latch plate
from the buckle and twist the short buckle-end belt
several times to shorten it. Insert the latch plate into
the buckle with the release button facing out.
²If the belt still can't be tightened, or if pulling and
pushing on the restraint loosens the belt, disconnect
the latch plate from the buckle, turn the latch plate
THINGS TO KNOW BEFORE STARTING YOUR VEHICLE 61
2
Page 82 of 492
Wheels
Stylish forged aluminum 179wheels give the Power
Wagon a powerful stance. Forging a wheel from alumi-
num produces a stronger, lighter weight wheel than
machining or casting the wheel out of the same material.
Standard package features:
²
Fuel Tank Skid Plate - protects the fuel tank from
impingement damage.
²Transfer Case Skid Plate and Tubing - protects the
transfer case and exhaust catalyst from impingement
damage.
²Heavy Duty Cross Members - protects the under
carriage and supports the under body protection skid
plates.
²Fore/Aft rails - which connect the cross member for
additional support and prevent the truck from getting
hung up on large rocks between the cross members.
²Steering Dampener Skid Plate - protects the steering
dampener from impingement damage.
²Electronically Locking Front And Rear Axle Differen-
tials With 4:56 Gears - improves mobility and articu-
lation by locking the differentials.
²Electronically Disconnecting Stabilizer Bar - improves
mobility and articulation by disconnecting the Stabi-
lizer Bar.
²160 Amp Alternator - supplies increased electrical
power for the winch and other off-road accessories.
²Heavy Duty Battery - supplies increased electrical
power for the winch and other off-road accessories.
²Heavy Duty Cooling Fan - provides enhanced engine
and transmission cooling under vigorous off-road
conditions.
UNDERSTANDING THE FEATURES OF YOUR VEHICLE 81
3
Page 135 of 492
Global Reset
If the RESET button is pressed twice within 2 seconds
while in any of the 3 resettable displays (AVG ECO,
ODO, ET), the Global Reset will reset all 3 displays.
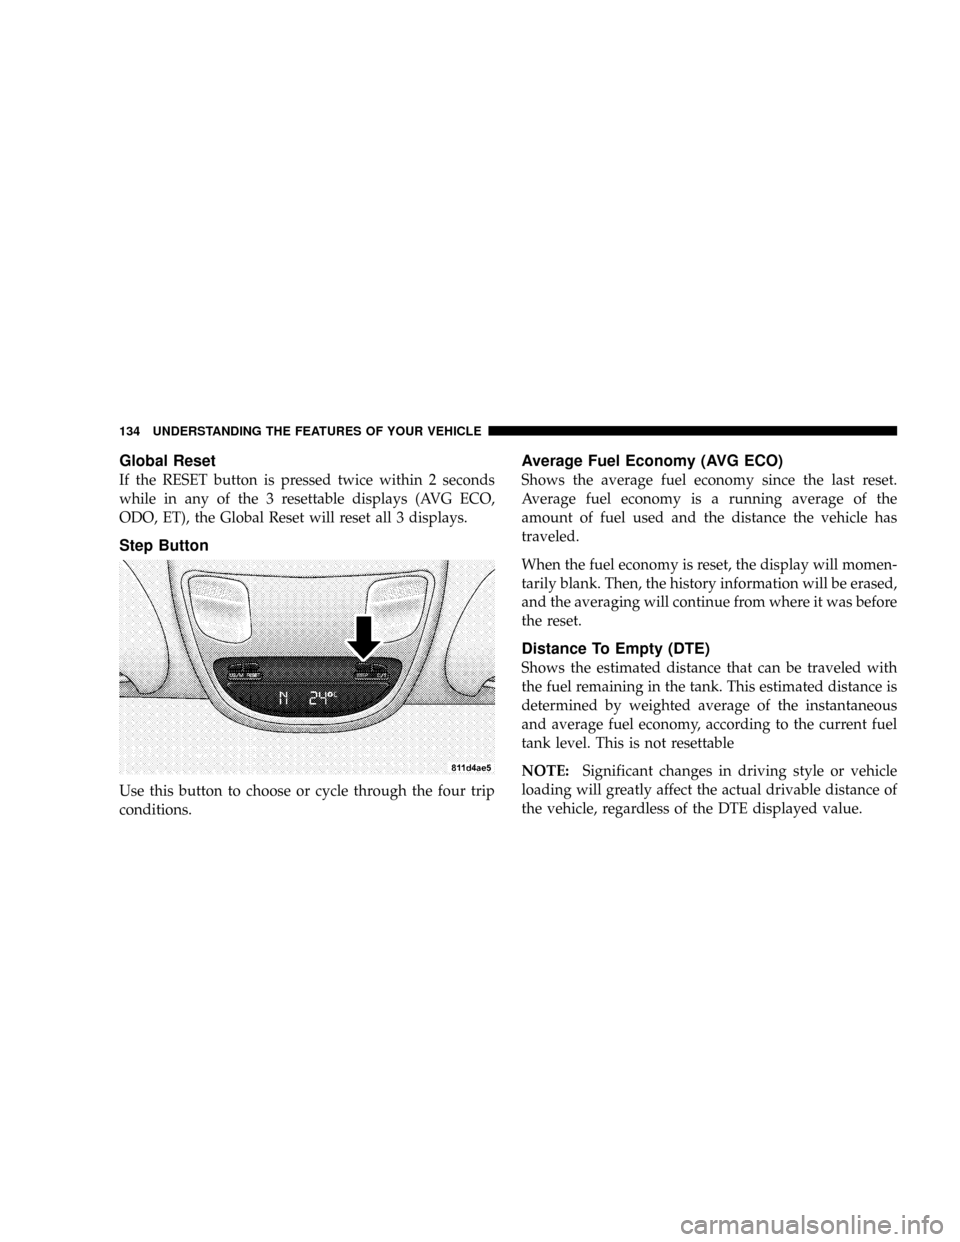
Step Button
Use this button to choose or cycle through the four trip
conditions.
Average Fuel Economy (AVG ECO)
Shows the average fuel economy since the last reset.
Average fuel economy is a running average of the
amount of fuel used and the distance the vehicle has
traveled.
When the fuel economy is reset, the display will momen-
tarily blank. Then, the history information will be erased,
and the averaging will continue from where it was before
the reset.
Distance To Empty (DTE)
Shows the estimated distance that can be traveled with
the fuel remaining in the tank. This estimated distance is
determined by weighted average of the instantaneous
and average fuel economy, according to the current fuel
tank level. This is not resettable
NOTE:Significant changes in driving style or vehicle
loading will greatly affect the actual drivable distance of
the vehicle, regardless of the DTE displayed value.
134 UNDERSTANDING THE FEATURES OF YOUR VEHICLE
Page 153 of 492
STORAGE
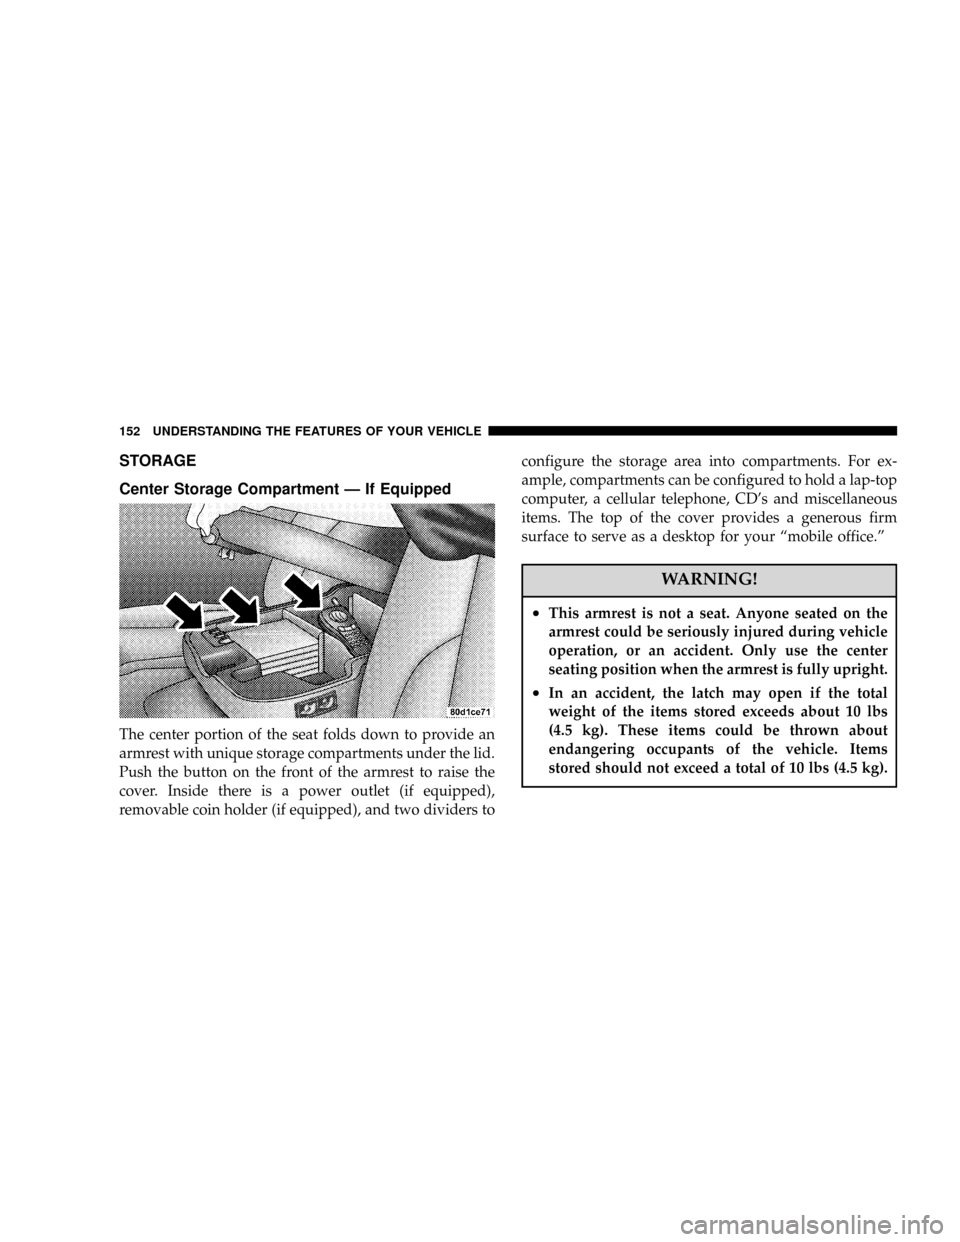
Center Storage Compartment Ð If Equipped
The center portion of the seat folds down to provide an
armrest with unique storage compartments under the lid.
Push the button on the front of the armrest to raise the
cover. Inside there is a power outlet (if equipped),
removable coin holder (if equipped), and two dividers toconfigure the storage area into compartments. For ex-
ample, compartments can be configured to hold a lap-top
computer, a cellular telephone, CD's and miscellaneous
items. The top of the cover provides a generous firm
surface to serve as a desktop for your ªmobile office.º
WARNING!
²This armrest is not a seat. Anyone seated on the
armrest could be seriously injured during vehicle
operation, or an accident. Only use the center
seating position when the armrest is fully upright.
²In an accident, the latch may open if the total
weight of the items stored exceeds about 10 lbs
(4.5 kg). These items could be thrown about
endangering occupants of the vehicle. Items
stored should not exceed a total of 10 lbs (4.5 kg).
152 UNDERSTANDING THE FEATURES OF YOUR VEHICLE
Page 161 of 492
WARNING!
²Care should always be exercised when operating a
vehicle with unrestrained cargo. Vehicle speeds
may need to be reduced. Severe turns or rough
roads may cause shifting or bouncing of the cargo
that may result in vehicle damage. If wide build-
ing materials are to be frequently carried, the
installation of a support is recommended. This
will restrain the cargo and transfer the load to the
pickup box floor.
²If you wish to carry more than 600 lbs (272 kg) of
material suspended above the wheelhouse, sup-
ports must be installed to transfer the weight of
the load to the pickup box floor or vehicle damage
may result. The use of proper supports will permit
loading up to the rated payload.
²Unrestrained cargo may be thrown forward in an
accident causing serious or fatal injury.
There are stampings in the sheet metal on the inner side
bulkheads of the box in front of and behind both wheel
housings. Place wooden boards across the box from side
to side to create separate load compartments in the
pickup box.
There are four tie-down cleats bolted to the lower sides of
the pickup box that can sustain loads up to 1000 lbs (450
kg) total.
SLIDE-IN CAMPERS
DO NOTuse slide-in campers on Power Wagon models.
EASY-OFF TAILGATE
The tailgate can be removed quickly. Tailgate removal is
sometimes required for pickup box loading. To remove
the tailgate unlatch the tailgate and remove the support
cables by releasing the lock tang from the pivot, then
rotate and pull away from the box. Once the cables are
free, move to the right side of the tailgate hinge bracket.
160 UNDERSTANDING THE FEATURES OF YOUR VEHICLE
Page 245 of 492
NSulfur In Gasoline.....................337
NMaterials Added To Fuel................337
NFuel System Cautions..................338
NCarbon Monoxide Warnings..............339
mAdding Fuel..........................339
NAdding Fuel (Gas Engines)..............339
mVehicle Loading........................341
NCertification Label.....................341
mTrailer Towing.........................345
NCommon Towing Definitions.............345
NTrailer Hitch Classification...............349
NTrailer Towing Weights (Maximum Trailer
Weight Ratings)......................350NTrailer And Tongue Weight..............350
NTowing Requirements..................351
NTowing Tips.........................356
NTrailer Towing Mirrors Ð If Equipped......358
mSnowplow............................359
NDodge Power Wagon Models.............359
mRecreational Towing Ð 4±Wheel Drive Vehicles
(Behind Motorhome, Etc.).................360
NRecreational Towing Procedure Ð Manual
Shift Transfer Case Ð If Equipped.........361
NReturning To Normal Operation Ð Manual
Shift Transfer Case....................362
mEquipment Identification Plate.............363
244 STARTING AND OPERATING
Page 278 of 492
WARNING!
There is an increased risk of roll over when crossing
an obstacle, at any angle, with steep sides.
Crossing Logs
To cross a log, approach it at a slight angle (approxi-
mately 10 to 15 degrees). This allows one front tire to be
on top of the log while the other just starts to climb the
log. While climbing the log, modulate your brake and
accelerator to avoid spinning the log out from under your
tires. Then ease the vehicle off the log using your brakes.
CAUTION!
Do not attempted to cross a log with a greater
diameter than the running ground clearance or the
vehicle will become high centered.
Getting High Centered
If you get hung up or high centered on an object, get out
of the vehicle and try to determine what the vehicle is
hung up on, where it is contacting the underbody and
what is the best direction to recover the vehicle. Depend-
ing on what you are in contact with, jack the vehicle up
and place a few rocks under the tires so the weight is off
of the high point when you let the vehicle down. You can
also try rocking the vehicle or winching the vehicle off
the object.
STARTING AND OPERATING 277
5
Page 281 of 492
more weight on the down hill wheels, which increases
the possibilities of a down hill slide or roll over. Make
sure the surface has good traction with firm and stable
soils. If possible transverse the incline at an angle
heading slightly up or down.
WARNING!
Driving across an incline increases the risk of a roll
over, which may result in severe injury.
²If You Stall Or Begin To Lose Headway± If you stall
or begin to lose headway while climbing a steep hill,
allow your vehicle to come to a stop and immediately
apply the brake. Restart the engine and shift to R
(Reverse). Back slowly down the hill allowing the
compression braking of the engine and transmission tohelp regulate your speed. If the brakes are required to
control vehicle speed, apply them lightly and avoid
locking or skidding the tires.
WARNING!
If the engine stalls or you lose headway or cannot
make it to the top of a steep hill or grade, never
attempt to turn around. To do so may result in
tipping and rolling the vehicle, which may result in
severe injury. Always back carefully straight down a
hill in R (Reverse) gear. Never back down a hill in N
(Neutral) or with the clutch pedal depressed using
only the vehicle brakes. Never drive diagonally
across a hill, always drive straight up or down.
280 STARTING AND OPERATING
Page 288 of 492
controlled force is required to recover the vehicle,
there is a high risk of environmental or vehicle dam-
age, or where nothing else seemed to work. A winch
can deliver a high pulling force with a great deal of
control. It allows you to walk the vehicle out of the
situation in a slow controlled manor. This control
works well for avoiding further vehicle damage. Once
you decide it is time to use the winch look for a good
anchor point. It needs to be strong enough to hold
more than the vehicle's weight and provide a direction
of pull as straight as possible. Use block and tackle if
necessary to improve the angle of pull or increase the
winch's pulling force. If the anchor point is a tree use
a strap around its base and hook the cable to the strap.
If it is another vehicle, then place that vehicle in park
and block the front tires. If you cannot find an anchor
point within reach try using your spare tire by burying
it. Once you have determined an anchor point hook up
the cable, ensuring there are a least five wraps of cableleft on the drum, and place a floor mat or something
else over the strung out cable. Placing something over
the strung out cable helps keep the cable on the
ground if it breaks. Next, place the vehicle in 1st gear
and apply a very light throttle as you power the winch
in. Be careful not to allow slack in the cable as you
recover the vehicle. Do not try to guide the cable into
the drum. If it starts to bunch up on one end, let it. You
can re-spool the cable afterwards. Never use a winch
cable as a tow strap and always stand back while
winching.
STARTING AND OPERATING 287
5