clutch DODGE RAM 2500 DIESEL 2005 3.G Owners Manual
[x] Cancel search | Manufacturer: DODGE, Model Year: 2005, Model line: RAM 2500 DIESEL, Model: DODGE RAM 2500 DIESEL 2005 3.GPages: 448, PDF Size: 27.88 MB
Page 125 of 448

To Set At A Desired Speed
When the vehicle has reached the desired speed, press
and release the SET button. Release the accelerator and
the vehicle will operate at the selected speed.
To Deactivate
A soft tap on the brake pedal, normal braking, clutch
pressure while slowing the vehicle, or pressing the CAN-
CEL button will deactivate speed control without erasing
the memory. Pushing the ON/OFF button to the OFF
position or turning off the ignition erases the memory.
WARNING!
Leaving the Speed Control ON when not in use is
dangerous. You could accidentally set the system to
cause it to go faster than you want. You could lose
control and have an accident. Always leave the
system OFF when you aren’t using it.
To Resume Speed
To resume a previously set speed, push and release the
RESUME button. Resume can be used at any speed above
30 mph (50 km/h).
To Vary The Speed Setting
When the speed control is on, speed can be increased by
pressing and holding the ACCEL button. When the
button is released, a new set speed will be established.
Tapping the ACCEL button once will result ina2mph
(3km/h) speed increase. Each time the button is tapped,
speed increases so that tapping the button three times
will increase speed by 6 mph (10 km/h), etc.
Tapping the DECEL button once will result in a 1 mph (2
km/h) speed decrease. Each time the button is tapped,
speed will decrease. For example, tapping the button 3
times will decrease the speed by 3 mph (5 km/h), etc.
UNDERSTANDING THE FEATURES OF YOUR VEHICLE 125
3
Page 225 of 448

•A heated intake air system both improves engine
starting and reduces the amount of white smoke
generated by a warming engine.
Normal Starting Procedure — Engine Manifold
AirTemperature Above 66°F (19°C)
Observe the Instrument Panel Cluster lights when start-
ing the engine.
1. Always apply the parking brake.
2. Shift into PARK for an automatic transmission. Fully
depress and hold the clutch and shift into NEUTRAL for
a manual transmission. Models with manual transmis-
sion are equipped with a clutch interlocking cranking
system. The clutch must be fully depressed to start the
vehicle.
3. Turn the ignition key to the ON position and look at
the instrument panel cluster lamps.The lamps in the instrument panel cluster will illuminate
when the ignition key is first turned to the ON position.
This is a bulb check programmed to last for approxi-
mately 3 seconds. After the bulb check is completed, the
Malfunction Indicator Light and Brake Warning light will
remain on. After the bulb check is complete and the
WAIT TO START indicator goes out proceed to step 4.
CAUTION!
If WATER IN FUEL indicator light remains on DO
NOT START engine before you drain water from the
fuel filter to avoid engine damage. See Section 7 —
Maintaining Your Vehicle, for water drain proce-
dures.
4. Turn the ignition key to START and crank the engine.
Do not press the accelerator during starting.
STARTING AND OPERATING 225
5
Page 241 of 448
Torque Converter Clutch
A feature, designed to improve fuel economy, has been
included in the automatic transmission on your vehicle.
A clutch within the torque converter engages automati-
cally at calibrated speeds. This may result in a slightly
different feeling or response during normal operation in
high gear. When the vehicle speed drops or during
acceleration when the transmission downshifts to second
gear, the clutch automatically disengages.
NOTE:The torque converter clutch will not engage
until the transmission fluid and engine coolant are warm
[usually after 1-3 miles (1.6 – 4.8 km) of driving]. Because
the engine speed is higher when the torque converter
clutch is not engaged, it may seem as if the transmission
is not shifting into Overdrive when cold. This is normal.
Pressing the “TOW/HAUL” button, when the transmis-
sion is sufficiently warm, will demonstrate that the
transmission is able to shift into and out of overdrive.NOTE:If the vehicle has not been driven in several
days, the first few seconds of operation after shifting the
transmission into gear may seem sluggish. This is due to
the fluid partially draining from the torque converter into
the transmission. This condition is normal and will not
cause damage to the transmission. The torque converter
will refill within five seconds of shifting from Park into
any other gear position.
Manual Transmission — 6-Speed — If Equipped
NOTE:The parking brake should be engaged before
leaving the vehicle, especially on an incline.
Truck models with manual transmission are equipped
with a clutch interlocking ignition system. The clutch
pedal must be fully depressed to start the vehicle.
STARTING AND OPERATING 241
5
Page 242 of 448
Fully depress the clutch pedal before shifting gears. As
you release the clutch pedal, lightly depress the accelera-
tor pedal. When launching a stationary vehicle, keep the
engine speed low until the clutch is fully engaged.
This transmission has a “creeper” 1st gear which should
be used to start from a standing position when carrying
a payload or towing a trailer. Damage to the clutch can
result from starting in 2nd or 3rd gear with a loaded
vehicle. Use each gear in numerical order – do not skip a
gear.
For steady highway driving with light acceleration, 6th
gear is recommended. When shifting from 4th to 5th gear,
apply side effort away and forward without pushing
hard enough to engage Reverse gear. Shifting from 5th to
6th requires the same side effort or the lever will return to
center resulting in a shift into 4th gear and damage the
transmission, clutch, or engine.You should use low gear when starting from a standing
position if under a heavy load.
To shift into Reverse, come to a complete stop. Depress
the clutch and pause briefly to allow the gear train to
stop. Move the shift lever from the Neutral position
straight across and up into Reverse.
Never drive with your foot resting on the clutch pedal, or
attempt to hold the vehicle on a hill with the clutch pedal
partially engaged, as this will cause abnormal wear on
the clutch.
Downshifting
Moving from a high gear down to a lower gear is
recommended to preserve brakes when driving down
steep hills. In addition, downshifting at the right time
provides better acceleration when you desire to resume
speed. Downshift progressively. Do not skip gears to
242 STARTING AND OPERATING
Page 243 of 448
avoid overspeeding the engine and clutch. For accelera-
tion at speeds less than 15 mph (25 km/h), 2nd gear is
recommended.
CAUTION!
When descending a hill, be very careful to downshift
one gear at a time to prevent overspeeding the
engine which can cause valve damage.
FOUR-WHEEL- DRIVE OPERATION — IF
EQUIPPED
•
Four-Wheel-Drive Dodge Ram Trucks are equipped
with either a Manually Shifted transfer case or an
Electronically Shifted transfer case. See the operating
instructions for your transfer case, located within this
section.
Manually Shifted Transfer Case Operating
Information/Precautions
The transfer case provides 4 mode positions-2(rear)-
wheel-drive high range, 4-wheel-drive high range, neu-
tral, and 4-wheel-drive low range.
This transfer case is intended to be driven in the 2-wheel-
drive position (2H) for normal street and highway con-
ditions such as dry hard surfaced roads.
When additional traction is required the transfer case 4H
and 4L positions can be used to lock the front and rear
driveshafts together and force the front and rear wheels
to rotate at the same speed. This is accomplished by
simply moving the shift lever to the desired positions.
The 4H and 4L positions are intended for loose, slippery
road surfaces only. Driving in the 4H and 4L positions on
dry hard surfaced roads may cause increased tire wear
and damage to the driveline components.
STARTING AND OPERATING 243
5
Page 246 of 448
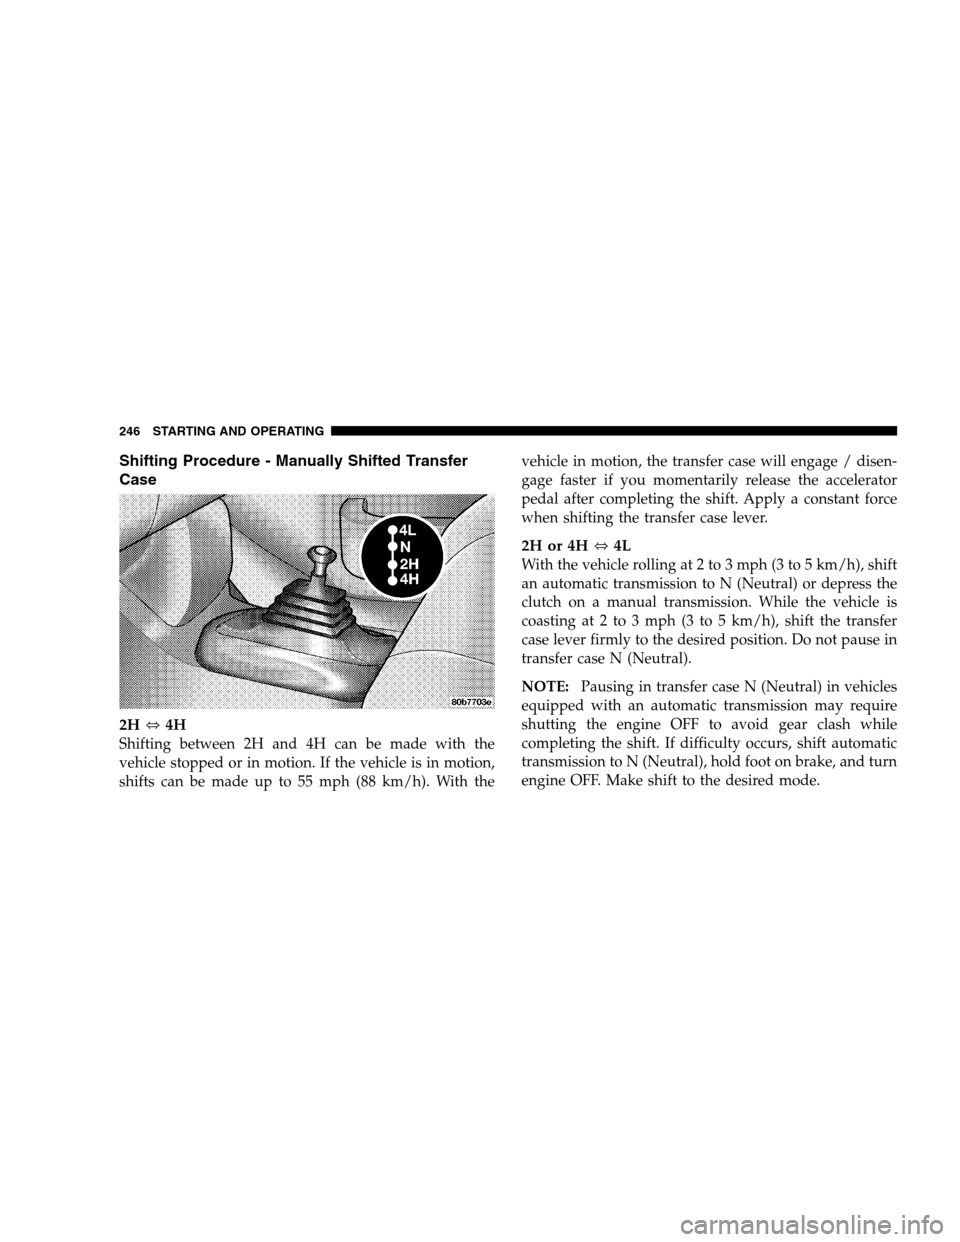
Shifting Procedure - Manually Shifted Transfer
Case
2H⇔4H
Shifting between 2H and 4H can be made with the
vehicle stopped or in motion. If the vehicle is in motion,
shifts can be made up to 55 mph (88 km/h). With thevehicle in motion, the transfer case will engage / disen-
gage faster if you momentarily release the accelerator
pedal after completing the shift. Apply a constant force
when shifting the transfer case lever.
2H or 4H⇔4L
With the vehicle rolling at 2 to 3 mph (3 to 5 km/h), shift
an automatic transmission to N (Neutral) or depress the
clutch on a manual transmission. While the vehicle is
coasting at 2 to 3 mph (3 to 5 km/h), shift the transfer
case lever firmly to the desired position. Do not pause in
transfer case N (Neutral).
NOTE:Pausing in transfer case N (Neutral) in vehicles
equipped with an automatic transmission may require
shutting the engine OFF to avoid gear clash while
completing the shift. If difficulty occurs, shift automatic
transmission to N (Neutral), hold foot on brake, and turn
engine OFF. Make shift to the desired mode.
246 STARTING AND OPERATING
Page 247 of 448
NOTE:Shifting into or out of 4L is possible with the
vehicle completely stopped, however difficulty may oc-
cur due to the mating clutch teeth not being properly
aligned. Several attempts may be required for clutch
teeth alignment and shift completion to occur. The pre-
ferred method is with the vehicle rolling 2 to 3 mph (3 to
5 km/h). Avoid attempting to engage or disengage 4L
with the vehicle moving faster than 2 to 3 mph (3 to 5
km/h).
NOTE:Do not attempt to shift to or from 4L while the
transmission is in gear or clutch is engaged.
Transfer Case Reminder Light
The four-wheel-drive operating light (4WD), located in
the instrument cluster, is used to alert the driver that the
front axle is fully engaged and all four wheels are
driving.
Electronically Shifted Transfer Case Operating
Information/Precautions
This is an electric shift transfer case and is operated by
the 4WD Control Switch (Transfer Case Switch), which is
located on the instrument panel.
The Electronically Shifted transfer case provides 4 mode
positions: 2 (rear) wheel drive high range or all wheel
drive high range, 4 wheel drive high range, 4 wheel drive
low range, and neutral.
The Electronically Shifted transfer case is designed to be
driven in the 2 wheel drive position (2WD) or all wheel
drive position (AWD) for normal street and highway
conditions (dry hard surfaced roads).
When additional traction is required, the transfer case
4HI and 4LO positions can be used to lock the front and
rear driveshafts together and force the front and rear
wheels to rotate at the same speed. This is accomplished
by rotating the 4WD Control Switch to the desired
STARTING AND OPERATING 247
5
Page 253 of 448
key must be in the ON position with the engine either
RUNNING or OFF. This shift cannot be completed if the
key is in the accessory position.
NOTE:The 4x4 system will not allow shifts between
(2WD/AWD)/4HI if the front and/or rear wheels are
spinning (no traction). In this situation the selected
position indicator light will flash and the original posi-
tion indicator light will remain ON. At this time, reduce
speed and stop spinning the wheels to complete the shift.
2WD/AWD or 4HI⇔4LO
NOTE:When shifting into or out of 4LO some gear
noise may be heard. This noise is normal and is not
detrimental to the vehicle or occupants.
Shifting can be performed with the vehicle rolling 2 to 3
mph (3 to 5 km/h) or completely stopped. USE EITHER
OF THE FOLLOWING PROCEDURES:Preferred Procedure
1. With engine RUNNING, slow vehicle to 2 to 3 mph (3
to 5 km/h).
2. Shift the transmission into NEUTRAL (depress clutch
on manual transmissions).
3. While still rolling, rotate the transfer case control
switch to the desired position.
4. After the desired position indicator light is ON (not
flashing), shift transmission back into gear (release clutch
on manual transmissions).
Alternate Procedure
1. Bring the vehicle to complete stop.
2. With the key ON and the engine either OFF or
RUNNING, shift the transmission into NEUTRAL (de-
press clutch on manual transmissions).
STARTING AND OPERATING 253
5
Page 254 of 448
3. Rotate the transfer case control switch to the desired
position.
4. After the desired position indicator light is ON (not
flashing), shift transmission back into gear (release clutch
on manual transmissions).
NOTE:If steps 1 or 2 of either the Preferred or Alternate
Procedure are not satisfied prior to attempting the shift or
if they no longer are being met while the shift attempt is
in process then the desired position indicator light will
flash continuously while the original position indicator
light is ON, until all requirements have been met.
NOTE:The ignition key must be ON for a shift to take
place and for the position indicator lights to be operable.
If the key is not ON then the shift will not take place and
no position indicator lights will be on or flashing.
NOTE:If your are leaving your vehicle stored for longer
than 21 days, refer to the section on “Vehicle Storage.”LIMITED-SLIP DIFFERENTIAL — IF EQUIPPED
The limited-slip differential provides additional traction
on snow, ice, mud, sand and gravel, particularly when
there is a difference between the traction characteristics
of the surface under the right and left rear wheels. During
normal driving and cornering, the limited-slip unit per-
forms similarly to a conventional differential. On slip-
pery surfaces, however, the differential delivers more of
the driving effort to the rear wheel having the better
traction.
The limited-slip differential is especially helpful during
slippery driving conditions. With both rear wheels on a
slippery surface, a slight application of the accelerator
will supply maximum traction. When starting with only
one rear wheel on an excessively slippery surface, slight
momentary application of the parking brake may be
necessary to gain maximum traction.
254 STARTING AND OPERATING
Page 303 of 448
CAUTION!
Internal damage to the transfer case will occur if a
front or rear wheel lift is used when recreational
towing.
NOTE:Both the Manual Shift and Electronic Shift
transfer cases must be shifted into Neutral (N) for
recreational towing. Automatic transmissions must be
placed in P (Park) position for recreational towing.
Manual transmissions must be left in gear (not in neutral)
for recreational towing. Refer below for the proper trans-
fer case Neutral shifting procedure for your vehicle.
Recreational Towing Procedure — Manual Shift
Transfer Case — If Equipped
Use the following procedure to prepare your vehicle for
recreational towing:
CAUTION!
It is necessary to follow these steps to be certain that
the transfer case is fully in N (NEUTRAL) before
recreational towing to prevent damage to internal
parts.
1. Bring the vehicle to a complete stop.
2. Shut OFF the engine.
3. Depress the brake pedal.
4. Shift automatic transmission to N (NEUTRAL), or
depress the clutch on manual transmissions.
STARTING AND OPERATING 303
5