open hood DODGE RAM 2500 POWER WAGON 2008 3.G Owners Manual
[x] Cancel search | Manufacturer: DODGE, Model Year: 2008, Model line: RAM 2500 POWER WAGON, Model: DODGE RAM 2500 POWER WAGON 2008 3.GPages: 504, PDF Size: 8.17 MB
Page 27 of 504

Remote start will also cancel if any of the following occur:
²If the engine stalls or RPM exceeds 2500
²Any engine warning lamps come on
²The hood is opened
²The hazard switch is pressed
²The transmission is moved out of park
²The brake pedal is pressed.
The vehicle can be started remotely up to a maximum of
two times. The vehicle is also allowed a maximum of one
failed start, where the remote start sequence was initiated
but the engine stopped cranking without starting. After
either of these conditions, or if the Vehicle Theft Alarm is
alarming, or if the PANIC button was pressed, the vehicle
must be reset by inserting a valid key into the ignition
and moving it to the RUN position, then back to LOCK.
DOOR LOCKS
Manual Door Locks
Front and Rear doors may be locked, by moving the lock
plunger up or down.
All doors may be opened with the inside door handle
without lifting the lock plunger. Doors locked before
closing will remain locked when closed.
The ignition key will unlock all the locks on your vehicle.
THINGS TO KNOW BEFORE STARTING YOUR VEHICLE 27
2
Page 80 of 504

NExterior Mirrors Folding Feature...........90
NElectronic Power Mirrors ± If Equipped......91
NElectric Rear Window Defroster And Heated
Sideview Mirrors ± If Equipped............92
NTrailer Towing Mirrors ± If Equipped........92
mHands±Free Communication (UConnectt)Ð
If Equipped............................93
NOperation............................95
NPhone Call Features...................102
NUConnecttSystem Features..............105
NAdvanced Phone Connectivity............110
NThings You Should Know About Your
UConnecttSystem....................111
NGeneral Information...................120mSeats................................120
N40-20-40 Front Seat....................121
NReclining Seats.......................122
NAdjustable Head Restraints..............122
NManual Rotary Lumbar Support Adjustment Ð
If Equipped.........................123
NPower Seats Ð If Equipped..............124
NHeated Seats Ð If Equipped.............125
mTo Open And Close The Hood.............127
mLights...............................128
NInterior Lights.......................129
NBattery Saver........................130
NHeadlamp Delay......................130
80 UNDERSTANDING THE FEATURES OF YOUR VEHICLE
Page 127 of 504

TO OPEN AND CLOSE THE HOOD
To open the hood, two latches must be released. First pull
the hood release lever located below the steering wheel at
the base of the instrument panel. Once the hood isreleased you must reach into the opening beneath the
center of the grille and push up the latch to release the
safety catch before raising the hood.
To prevent possible damage, do not slam the hood to
close it. Use a firm downward push at the front center of
the hood to ensure that both latches engage.
Hood Release Lever
Secondary Latch
UNDERSTANDING THE FEATURES OF YOUR VEHICLE 127
3
Page 183 of 504

To reset a trip odometer, display the desired trip odom-
eter to be reset then push and hold the button until the
display resets (approximately 2 seconds).
Vehicle Warning Messages
When the appropriate conditions exist, messages such as
ªdoorº (indicates that a door(s) may be ajar), ªhoodº (if
the hood is open or ajar, on vehicles with remote start),
ªgASCAPº (which indicates that your gas cap is possibly
loose or damaged),9CHANgE OILº (indicates that the
engine oil should be change), ªLoWASHº (low washer
fluid),º LoCOOLº (low engine coolant level), and ªno-
FUSEº (indicates that the IOD fuse is removed from the
Integrated Power Module), will display in the odometer.
NOTE:There is also an engine hour function. This
indicates the total number of hours the engine has been
running. To display the engine hours perform the follow-
ing: Place the ignition in RUN, but do not start the
engine. With the odometer value displayed, hold the tripbutton down for a period of 6 seconds. The odometer will
change to trip value first, then it will display the engine
hour value. The engine hours will be displayed for a
period of 30 seconds until the ignition is turned off or the
engine is started.
Change Oil Message
Your vehicle is equipped with an engine oil change
indicator system. The ªCHANgE OILº message will flash
in the instrument cluster odometer for approximately 3
seconds and a single chime will sound to indicate the
next scheduled oil change interval. The engine oil change
indicator system is duty cycle based, which means the
engine oil change interval may fluctuate dependent upon
your personal driving style.
Unless reset, this message will continue to display each
time you turn the ignition switch to the ON/RUN
position. To turn off the message temporarily, press and
release the Trip Odometer button on the instrument
UNDERSTANDING YOUR INSTRUMENT PANEL 183
4
Page 249 of 504

NOTE:When you turn off the engine you may hear a
hissing sound from under the hood for a short period of
time. This is a normal condition that occurs if the air
conditioning system has been on. It is not an indication of
a problem with the air conditioning system.
Operating Tips
Fast Cooldown
For a fast cooldown, turn the blower fan rotary knob to
the extreme right position, turn the mode control to the
panel fresh position, press the snowflake button to turn
on the air conditioning, and drive with the windows
open for the first few minutes. Once the hot air has been
expelled, close the windows and press the Recirculation
push-button. When a comfortable condition has been
reached, choose a mode position and adjust the tempera-
ture control slide and blower speed as necessary tomaintain comfort. For high humidity conditions it may
be necessary to remain in the Recirculation mode to
maintain comfort.
Window Fogging
Windows will fog on the inside when the humidity inside
the vehicle is high. This often occurs in mild or cool
temperatures when it's rainy or humid. In most cases
turning on the Air-conditioning (pressing the snowflake
button) will clear the fog. Adjust the temperature control,
air direction and blower speed to maintain comfort.
As the temperature gets colder it may be necessary to
direct air onto the windshield by using MIX Mode
position on the control. Adjust the temperature control
and blower speed to maintain comfort. Higher blower
speeds will reduce fogging. Interior fogging on the
windshield can be quickly removed by selecting the
defrost mode.
UNDERSTANDING YOUR INSTRUMENT PANEL 249
4
Page 426 of 504
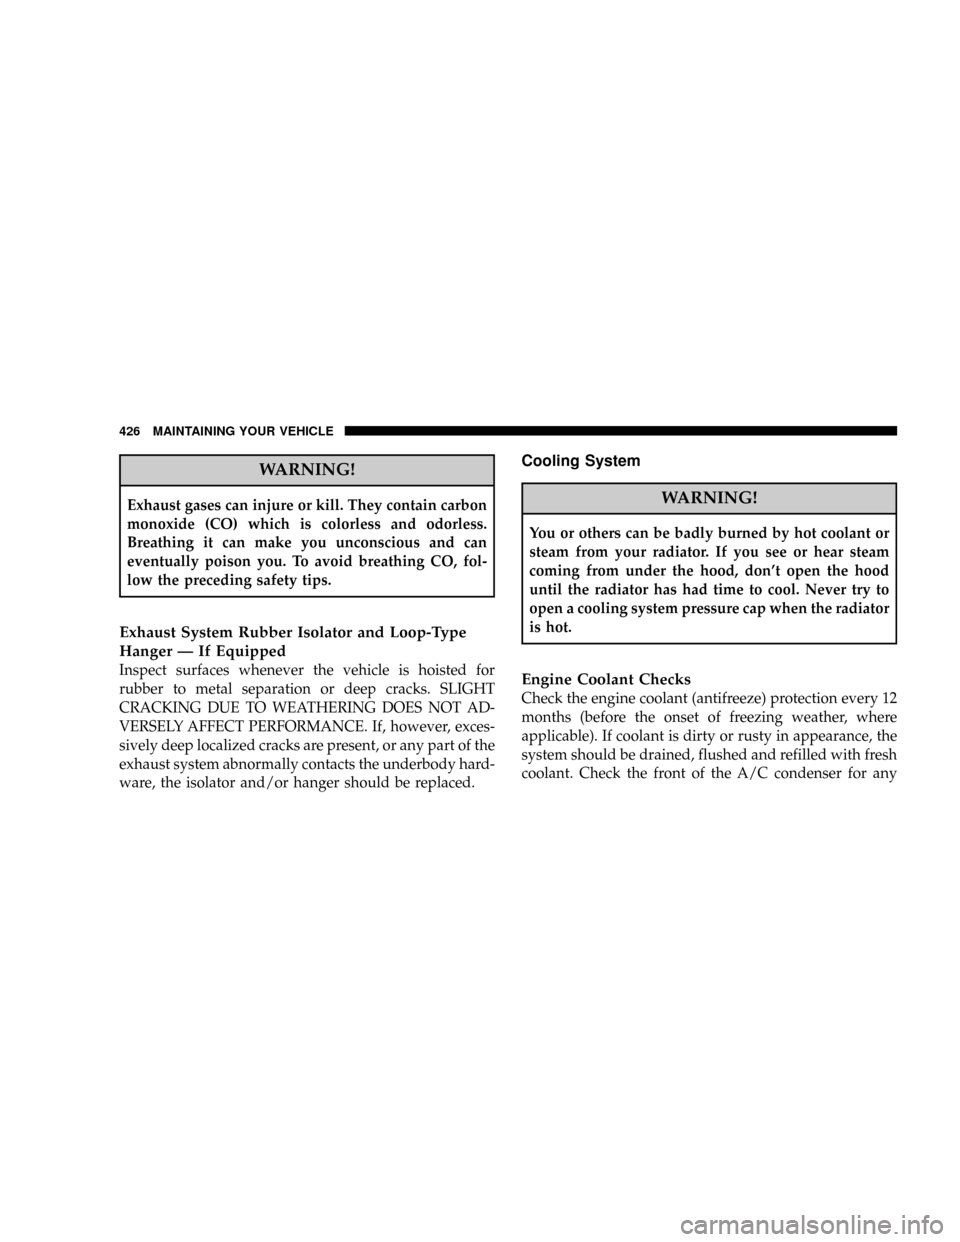
WARNING!
Exhaust gases can injure or kill. They contain carbon
monoxide (CO) which is colorless and odorless.
Breathing it can make you unconscious and can
eventually poison you. To avoid breathing CO, fol-
low the preceding safety tips.
Exhaust System Rubber Isolator and Loop-Type
Hanger Ð If Equipped
Inspect surfaces whenever the vehicle is hoisted for
rubber to metal separation or deep cracks. SLIGHT
CRACKING DUE TO WEATHERING DOES NOT AD-
VERSELY AFFECT PERFORMANCE. If, however, exces-
sively deep localized cracks are present, or any part of the
exhaust system abnormally contacts the underbody hard-
ware, the isolator and/or hanger should be replaced.
Cooling System
WARNING!
You or others can be badly burned by hot coolant or
steam from your radiator. If you see or hear steam
coming from under the hood, don't open the hood
until the radiator has had time to cool. Never try to
open a cooling system pressure cap when the radiator
is hot.
Engine Coolant Checks
Check the engine coolant (antifreeze) protection every 12
months (before the onset of freezing weather, where
applicable). If coolant is dirty or rusty in appearance, the
system should be drained, flushed and refilled with fresh
coolant. Check the front of the A/C condenser for any
426 MAINTAINING YOUR VEHICLE
Page 453 of 504

EPLACEMENT LIGHT BULBS
LIGHT BULBS Ð Inside Bulb No.
Overhead Console Lights............... TS212-2
Dome Light............................7679
All of the inside bulbs are brass or glass wedge base.
Aluminum base bulbs are not approved.
LIGHT BULBS Ð Outside Bulb No.
Back-Up..............................3057
Center High Mounted Stop Lamp............. 912
Fog Lamp...........................9006LL
Headlamp (Halogen)..................... H13
Side Marker, Park & Turn Signal.........3157NAK
Rear License Plate Lamp................... 168
Rear Cargo Light......................... 912
Tail & Stop............................3057
BULB REPLACEMENT
Headlight (Halogen)/Front Park and Turn Lights
CAUTION!
This is a halogen bulb. Avoid touching the glass with
your fingers. Reduced bulb life will result.
1. Open the hood
MAINTAINING YOUR VEHICLE 453
7
Page 492 of 504

Hands-Free Phone (UConnectŸ).............. 93
Hazard Warning Flasher................... 390
Head Restraints......................... 122
Headlights............................ 453
High Beam........................... 134
High Beam/Low Beam Select Switch........ 134
Lights On Reminder.................... 132
Passing............................. 134
Switch.............................. 130
Heated Mirrors.......................92,165
Heated Seats........................... 125
Heater............................... 242
Heater, Engine Block..................... 261
High Beam/Low Beam Select (Dimmer) Switch . . 134
Hitches
Trailer Towing........................ 371
Hoisting.............................. 399
HomeLinkt(Garage Door Opener) Transmitter . . . 150
Hood Release.......................... 127Hoses................................ 431
Hub Caps............................. 397
Ignition............................... 13
Key ...............................12,13
Ignition Key Removal..................... 13
Illuminated Entry........................ 21
Immobilizer (Sentry Key)................... 15
Infant Restraint........................61,62
Inflation Pressure Tires.................... 344
Inside Rearview Mirror.................... 88
Instrument Cluster....................178,179
Instrument Panel and Controls.............. 177
Instrument Panel Lens Cleaning............. 446
Integrated Power Module (Fuses)............ 447
Interior Appearance Care.................. 445
Interior Lights.......................... 129
Intermittent Wipers (Delay Wipers)........... 135
Introduction............................. 4
492 INDEX
Page 504 of 504
INTRODUCTION INTRODUCTION HOW TO USE THIS MANUAL WARNINGS AND CAUTIONS VAN CONVERSIONS/CAMPERS VEHICLE IDENTIFICATION NUMBER VEHICLE MODIFICATIONS/ALTERATIONS THINGS TO KNOW BEFORE STARTING YOUR VEHICLE
POWER WAGON: THINGS TO KNOW BEFORE STARTING YOUR VEHICLE FeaturesInstrument Panel and ControlsOperationEmergenciesA WORD ABOUT YOUR KEYS Ignition Key RemovalLocking Doors With The KeySENTRY KEY Replacement KeysCustomer Key
ProgrammingGeneral InformationSTEERING WHEEL LOCK - IF EQUIPPED If You Wish To Manually Lock The Steering WheelTo Release The Steering Wheel LockAutomatic Transmission Ignition Interlock SystemSECURITY ALARM SYSTEM - IF EQUIPPED Rearming
of the SystemTo Set the AlarmTo Disarm the SystemILLUMINATED ENTRY SYSTEM - IF EQUIPPED REMOTE KEYLESS ENTRY - IF EQUIPPED To unlock the doorsTo lock the doorsUsing the Panic AlarmGeneral InformationTransmitter Battery Service REMOTE
STARTING SYSTEM - IF EQUIPPED DOOR LOCKS Manual Door LocksPower Door Locks - If EquippedChild Protection Door LockWINDOWS Power Windows-If EquippedWind BuffetingOCCUPANT RESTRAINTS Lap/Shoulder BeltsAdjustable Upper Shoulder Belt
AnchorageAutomatic Locking Retractors (ALR) Mode - If EquippedCenter Lap BeltsSeat Belt Pretensioners - If EquippedEnhanced Seat Belt Reminder System (BeltAlert) Seat Belts and Pregnant WomenSeat Belt ExtenderDriver And Right Front Passenger Supplemental
Restraint System (SRS)-Airbags Event Data Recorder (EDR)Child RestraintENGINE BREAK-IN RECOMMENDATIONS SAFETY TIPS Transporting PassengersLock Your VehicleExhaust GasSafety Checks You Should Make Inside The VehicleSafety Checks You Should
Make Outside The VehicleUNDERSTANDING THE FEATURES OF YOUR VEHICLE POWER WAGON FEATURES Locking Front and Rear Differentials4.56:1 GearsElectronically Disconnecting Stabilizer/Sway BarIncreased Ride Height12,000 lb. WinchHigh-Pressure
Monotube Shocks/New Front and Rear SpringsOff-Road TiresSkid Plates And Underbody ProtectionWheel FlaresWheelsStandard package featuresMoparOptionsMIRRORS Inside MirrorAutomatic Dimming Mirror - If EquippedOutside MirrorsExterior Mirrors Folding Feature
Electronic Power Mirrors - If Equipped Electric Rear Window Defroster and Heated Sideview Mirrors - If EquippedTrailer Towing Mirrors - If EquippedHANDS-FREE COMMUNICATION (UConnect) - IF EQUIPPED OperationPhone Call FeaturesUConnect System Features
Advanced Phone ConnectivityThings You Should Know About Your UConnect SystemGeneral InformationSEATS 40-20-40 Front Seat Reclining SeatsAdjustable Head RestraintsManual Rotary Lumbar Support Adjustment - If EquippedPower Seats - If EquippedHeated Seats
- If EquippedTO OPEN AND CLOSE THE HOOD LIGHTS Interior Lights Battery SaverHeadlamp DelayHeadlights, Parking Lights, Panel LightsDaytime RunningLights (Canada Only and Fleet Vehicles)Lights-on ReminderFog Lights - If EquippedCargo Light - If Equipped
Multifunction Control LeverWINDSHIELD WIPERS AND WASHERS Windshield Wipers Windshield WashersTILT STEERING COLUMN ELECTRONIC SPEED CONTROL - IFEQUIPPED To ActivateTo Set At A Desired SpeedTo DeactivateTo Resume SpeedTo Vary The
Speed SettingTo Accelerate For PassingOVERHEAD CONSOLE - IF EQUIPPED Courtesy/Reading LightsOVERHEAD CONSOLE WITH COMPASS/TEMPERATURE MINI-TRIP COMPUTER - IF EQUIPPED US/M Button RESET Button Global ResetStep Button Average
Fuel Economy (AVG ECO)Distance To Empty (DTE)Trip Odometer (ODO)Elapsed Time (ET)C/T Button Automatic Compass CalibrationManual Compass CalibrationRecalibrating The CompassOutside TemperatureGARAGE DOOR OPENER - IF EQUIPPED Programming
HomeLinkGate Operator/Canadian ProgrammingUsing HomeLinkReprogramming a Single HomeLink ButtonSecurityTroubleshooting TipsGeneral InformationPOWER SUNROOF - IF EQUIPPED Open Sunroof - Express ModeComfort StopClosing Sunroof - ExpressPinch
Protect FeaturePinch Protect OverrideVenting Sunroof - ExpressSunshade OperationWind BuffetingSunroof MaintenanceSunroof Fully ClosedELECTRICAL POWER OUTLETS CIGAR LIGHTER AND ASH RECEIVER CUPHOLDERS Front Instrument Panel Cupholders
Rear Cupholder - Quad Cab - If EquippedSTORAGE Center Storage Compartment - If Equipped Storage and Seats - If EquippedREAR WINDOW FEATURES Electric Rear Window Defroster and Heated Side view Mirrors - If EquippedPower Sliding Rear Window - If Equipped
Sliding Rear Window - If EquippedFOLD FLAT LOAD FLOOR - IF EQUIPPED PICKUP BOX SLIDE-IN CAMPERS EASY-OFF TAILGATE UNDERSTANDING YOUR INSTRUMENT PANEL INSTRUMENTS AND CONTROLS INSTRUMENT CLUSTER INSTRUMENT
CLUSTER DESCRIPTION ELECTRONIC DIGITAL CLOCK Clock Setting ProcedureRADIO GENERAL INFORMATION Radio Broadcast SignalsTwo Types of SignalsElectrical DisturbancesAM ReceptionFM ReceptionSALES CODE REF - AM/FM/CD (SINGLE DISC) RADIO
WITH OPTIONAL SATELLITE RADIO AND HANDS FREE PHONE CAPABILITY Operating Instructions - Radio ModeOperation Instructions - CD ModeOperation Instructions - Auxiliary ModeOperating Instructions - Hands Free Phone - If EquippedOperating Instructions
- Satellite Radio - If EquippedSALES CODE RAQ - AM/FM/CD (6-DISC) RADIO WITH OPTIONAL SATELLITE RADIO, HANDS FREE PHONE, AND VEHICLE ENTERTAINMENT SYSTEMS (VES) CAPABILITIES Operating Instructions - Radio ModeOperation Instructions
- (CD MODE for CD Audio Play)LOAD/EJECT Button (CD Mode for CD Audio Play)Notes On Playing MP3 FilesOperation Instructions - (CD Mode for MP3 Audio Play)LOAD/EJECT Button (CD Mode for MP3 Play)SALES CODE RAK - AM/FM/CASSETTE/CD (6-DISC)
RADIO WITH OPTIONAL SATELLITE RADIO, HANDS FREE PHONE, VIDEO, MP3, and WMA CAPABILITIES Operating Instructions - Radio ModeOperating Instructions- Tape PlayerSeek ButtonFast Forward (FF)Rewind (RW)Tape EjectScan ButtonChanging Tape
DirectionMetal Tape SelectionPinch Roller ReleaseNoise ReductionOperation Instructions - (CD MODE for CD Audio Play)LOAD/EJECT Button (CD Mode for CD Audio Play)Notes On Playing MP3 FilesOperation Instructions - (CD Mode for MP3 and WMA Audio Play)
LOAD/EJECT Button (CD Mode for MP3 and WMA Play)SALES CODE REC - AM/FM/CD (6-DISC) RADIO WITH NAVIGATION SYSTEM Operating Instructions - Satellite Radio (If Equipped)REC Setting the ClockAudio Clock DisplaySATELLITE RADIO - IF EQUIPPED
System ActivationElectronic Serial Number/Sirius Identification Number (ESN/SID)Selecting Satellite Mode in REF, RAQ, and RAK RadiosSelectinga ChannelStoring and Selecting Pre-Set ChannelsUsing the PTY (Program Type) Button - If EquippedPTY Button SCAN
PTY Button SEEKSatellite AntennaReception QualityREMOTE SOUND SYSTEM CONTROLS - IF EQUIPPED Radio OperationTape PlayerCD PlayerCASSETTE TAPE AND PLAYER MAINTENANCE COMPACT DISC MAINTENANCE RADIO OPERATION AND CELLULAR
PHONES CLIMATE CONTROLS Heater Only - Fleet Vehicles Air Conditioning and Heating - If Equipped Air Conditioning with Dual Zone Temperature Control -If EquippedOperating TipsOperating Tips Chart STARTING AND OPERATING STARTING PROCEDURES -
GAS ENGINES Manual Transmission - If EquippedAutomatic Transmission - If EquippedNormal StartingIf Engine Fails To StartAfter StartingENGINE BLOCK HEATER - IF EQUIPPED AUTOMATIC TRANSMISSION Automatic Transmission with OverdriveMANUAL
TRANSMISSION Manual Transmission - 6 Speed (G56)Recommended Vehicle Shift SpeedsDownshifting - All Manual TransmissionsFOUR-WHEEL- DRIVE OPERATION Manually Shifted Transfer Case Operating Information/PrecautionsShifting Procedure - Manually
Shifted Transfer Case Transfer Case Reminder LightLIMITED-SLIP DIFFERENTIAL - IF EQUIPPED DRIVING ON SLIPPERY SURFACES Axle Locker System Stabilizer/Sway Bar System POWER WAGON - SAFE OFF-ROAD DRIVING Off-Road Driving Tips and Vehicle
CharacteristicsDriving in Snow, Mud and SandCrossing Obstacles (Rocks And Other High Points)Hill ClimbingDriving Through WaterAiring Down For Off-Road DrivingVehicle RecoveryAfter Driving Off-RoadWINCH USAGE - IF EQUIPPED Things To Know Before Using
Your WinchUNDERSTANDING THE FEATURES OF YOUR WINCH WINCH ACCESSORIESOPERATING YOUR WINCHRIGGING TECHNIQUESPARKING BRAKE BRAKE SYSTEM Brake NoiseFour-Wheel Anti-Lock Brake System (ABS) - If EquippedPOWER STEERING MULTI DISPLACEMENT SYSTEM (MDS) - 5.7L Engine Only TIRE SAFETY INFORMATION Tire Markings Tire Identification Number (TIN)Tire Loading and Tire PressureTIRES - GENERAL INFORMATION Tire PressureTire Inflation PressuresRadial-Ply TiresCompact Spare
Tire - If EquippedLimited Use Spare - If EquippedTire SpinningTread Wear IndicatorsLife of TireReplacement TiresAlignment And BalanceSUPPLEMENTAL TIRE PRESSURE INFORMATION - IF EQUIPPED TIRE CHAINS SNOW TIRES TIRE ROTATION
RECOMMENDATIONS TIRE PRESSURE MONITOR SYSTEM (TPMS) - IF EQUIPPED Tire Pressure Monitor System (TPMS) Light Load Reset Switch Description - If EquippedTire Pressure Monitor System ComponentsGeneral InformationFUEL REQUIREMENTS
Reformulated GasolineGasoline/Oxygenate BlendsMMT In GasolineSulfur In GasolineMaterials Added To FuelFuel System CautionsCarbon Monoxide WarningsADDING FUEL Adding Fuel (Gas Engines)VEHICLE LOADING Certification LabelTRAILER TOWING Common
Towing DefinitionsTrailer Hitch ClassificationTrailer Towing Weights (Maximum Trailer Weight Ratings)Trailer and Tongue WeightTowing RequirementsTowing TipsTrailer Towing Mirrors - If EquippedSNOWPLOW RECREATIONAL TOWING - 4-WHEEL DRIVE VEHICLES
(BEHIND MOTORHOME, ETC.) Recreational Towing Procedure - Manual Shift Transfer Case - If EquippedReturning to Normal Operation - Manual Shift Transfer CaseEQUIPMENT IDENTIFICATION PLATE WHAT TO DO IN EMERGENCIES HAZARD WARNING FLASHER
JACKING AND TIRE CHANGING All Models - If EquippedJACKING INSTRUCTIONS Removing The Spare TireTire Changing ProcedureHOISTING JUMP-STARTING FREEING A STUCK VEHICLE EMERGENCY TOW HOOKS - IF EQUIPPED TOWING A DISABLED
VEHICLE 4-Wheel-Drive VehiclesWINCH USAGE MAINTAINING YOUR VEHICLE ENGINE COMPARTMENT- 5.7L GAS ENGINE ONBOARD DIAGNOSTIC SYSTEM (OBD II) Loose Fuel Filler Cap MessageEMISSIONS INSPECTION AND MAINTENANCE PROGRAMS
REPLACEMENT PARTS DEALER SERVICE MAINTENANCE PROCEDURES Engine OilEngine Oil FilterDrive Belts - Check Condition and TensionSpark Plugs (Gas Engines)Engine Air Cleaner FilterEngine Fuel FilterCatalytic ConverterEmission-Related Components
Maintenance Free BatteryAir Conditioner MaintenancePower Steering - Fluid CheckFront Suspension Ball JointsSteering Linkage - InspectionFrontProp Shaft LubricationBody LubricationWindshield Wiper BladesWindshield WashersExhaust SystemCooling SystemHoses
And Vacuum/Vapor HarnessesBrake SystemClutch Hydraulic SystemClutch LinkageRear Axle And 4x4 Front Driving Axle Fluid LevelTransfer CaseFront Drive ShaftManual TransmissionAutomatic TransmissionFront Wheel BearingsNoise Control System Required
Maintenance and WarrantyAppearance Care and Protection from CorrosionFUSES (INTEGRATED POWER MODULE) VEHICLE STORAGE EPLACEMENT LIGHT BULBS BULB REPLACEMENT Headlight (Halogen)/Front Park and Turn LightsTail, Stop, Turn and Backup
LightsCenter High-Mounted Stoplight With Cargo LightCab Top Clearance Lights - If EquippedFog LightsFLUIDS AND CAPACITIES FLUIDS, LUBRICANTS ANDGENUINE PARTS EngineChassisMAINTENANCE SCHEDULES EMISSION CONTROL SYSTEM
MAINTENANCE MAINTENANCE SCHEDULE Required Maintenance IntervalsIF YOU NEED CONSUMER ASSISTANCE SUGGESTIONS FOR OBTAINING SERVICE FOR YOUR VEHICLE Prepare For The AppointmentPrepare A ListBe Reasonable With RequestsIF YOU
NEED ASSISTANCE WARRANTY INFORMATION (U.S. Vehicles Only) MOPAR PARTS REPORTING SAFETY DEFECTS In CanadaPUBLICATION ORDER FORMS DEPARTMENT OF TRANSPORTATION UNIFORM TIRE QUALITY GRADES TreadwearTraction Grades
Temperature GradesINDEX