DODGE RAM 3500 GAS 2008 3.G Owners Manual
Manufacturer: DODGE, Model Year: 2008, Model line: RAM 3500 GAS, Model: DODGE RAM 3500 GAS 2008 3.GPages: 554, PDF Size: 9.93 MB
Page 311 of 554
WARNING!
Always engage the parking brake when powering
down the vehicle if the(SERVICE 4WD(light is
illuminated. Not engaging the parking brake may
allow the vehicle to roll, which may cause personal
injury.
NOTE:Do not attempt to make a shift while only the
front or rear wheels are spinning, as this can cause
damage to driveline components.When operating your vehicle in 4WD LOW, the engine
speed is approximately three times that of the 2WD or
4WD LOCK positions at a given road speed. Take care
not to overspeed the engine and do not exceed 25 mph
(40 km/h).
Proper operation of 4-wheel drive vehicles depends on
tires of equal size, type and circumference on each wheel.
Any difference in tire size can cause damage to the
transfer case.
Because 4-wheel drive provides improved traction, there
is a tendency to exceed safe turning and stopping speeds.
Do not go faster than road conditions permit.
STARTING AND OPERATING 309
5
Page 312 of 554
WARNING!
You or others could be injured if you leave the
vehicle unattended with the transfer case in the
NEUTRAL position without first fully engaging the
parking brake. The transfer case NEUTRAL position
disengages both the front and rear driveshafts from
the powertrain and will allow the vehicle to move
regardless of the transmission position. The parking
brake should always be applied when the driver is
not in the vehicle.
For additional information on the appropriate use of each
transfer case mode position see the information below:
2WD
Rear Wheel Drive High Range - Normal street and
highway driving. Dry, hard surfaced roads.4WD LOCK
4-Wheel Drive Lock Range - Locks the front and rear
driveshafts together. Forces the front and rear wheels to
rotate at the same speed. Additional traction for loose,
slippery road surfaces only.
4WD LOW
4-Wheel Drive Low Range - Low speed 4-wheel drive.
Locks the front and rear driveshafts together. Forces the
front and rear wheels to rotate at the same speed.
Additional traction and maximum pulling power for
loose, slippery road surfaces only. Do not exceed 25 mph
(40 km/h).
N
Neutral - Disengages both the front and rear driveshafts
from the powertrain. To be used for flat towing behind
another vehicle. See Recreational Towing for more infor-
mation.
310 STARTING AND OPERATING
Page 313 of 554
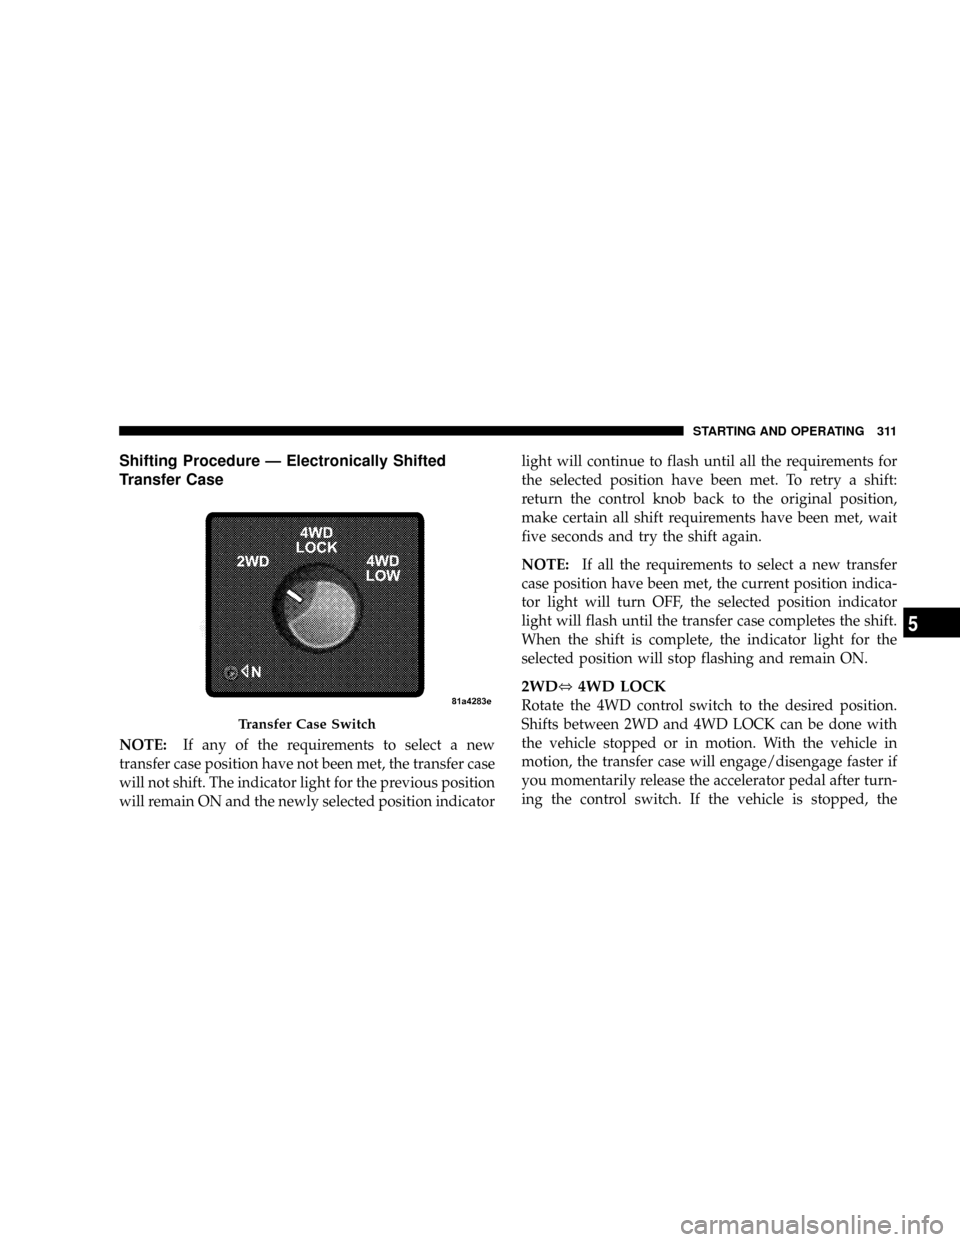
Shifting Procedure Ð Electronically Shifted
Transfer Case
NOTE:If any of the requirements to select a new
transfer case position have not been met, the transfer case
will not shift. The indicator light for the previous position
will remain ON and the newly selected position indicatorlight will continue to flash until all the requirements for
the selected position have been met. To retry a shift:
return the control knob back to the original position,
make certain all shift requirements have been met, wait
five seconds and try the shift again.
NOTE:If all the requirements to select a new transfer
case position have been met, the current position indica-
tor light will turn OFF, the selected position indicator
light will flash until the transfer case completes the shift.
When the shift is complete, the indicator light for the
selected position will stop flashing and remain ON.
2WD,4WD LOCK
Rotate the 4WD control switch to the desired position.
Shifts between 2WD and 4WD LOCK can be done with
the vehicle stopped or in motion. With the vehicle in
motion, the transfer case will engage/disengage faster if
you momentarily release the accelerator pedal after turn-
ing the control switch. If the vehicle is stopped, the
Transfer Case Switch
STARTING AND OPERATING 311
5
Page 314 of 554
ignition key must be in the ON position with the engine
either running or off. This shift cannot be completed if the
key is in the ACC position.
NOTE:The 4x4 system will not allow shifts between
2WD/4WD LOCK if the front and/or rear wheels are
spinning (no traction). In this situation the selected
position indicator light will flash and the original posi-
tion indicator light will remain ON. At this time, reduce
speed and stop spinning the wheels to complete the shift.
2WD or 4WD LOCK,4WD LOW
NOTE:When shifting into or out of 4WD LOW some
gear noise may be heard. This noise is normal and is not
detrimental to the vehicle or occupants.Shifting can be performed with the vehicle rolling 2 to 3
mph (3 to 5 km/h) or completely stopped. USE EITHER
OF THE FOLLOWING PROCEDURES:
Preferred Procedure
1. With engine running, slow vehicle to 2 to 3 mph (3 to
5 km/h).
2. Shift the transmission into NEUTRAL (depress clutch
on manual transmissions).
3. While still rolling, rotate the transfer case control
switch to the desired position.
4. After the desired position indicator light is ON (not
flashing), shift transmission back into gear (release clutch
on manual transmissions).
312 STARTING AND OPERATING
Page 315 of 554
Alternate Procedure
1. Bring the vehicle to complete stop.
2. With the key ON and the engine either OFF or
running, shift the transmission into NEUTRAL (depress
clutch on manual transmissions).
3. Rotate the transfer case control switch to the desired
position.
4. After the desired position indicator light is ON (not
flashing), shift transmission back into gear (release clutch
on manual transmissions).
NOTE:If steps 1 or 2 of either the Preferred or Alternate
Procedure are not satisfied prior to attempting the shift
then the desired position indicator light will flash con-
tinuously while the original position indicator light is
ON, until all requirements have been met.NOTE:The ignition key must be ON for a shift to take
place and for the position indicator lights to be operable.
If the key is not ON then the shift will not take place and
no position indicator lights will be on or flashing.
NOTE:If your are leaving your vehicle stored for longer
than 21 days, refer to the section on ªVehicle Storage.º
LIMITED-SLIP DIFFERENTIAL ± IF EQUIPPED
The limited-slip differential provides additional traction
on snow, ice, mud, sand and gravel, particularly when
there is a difference between the traction characteristics
of the surface under the right and left rear wheels. During
normal driving and cornering, the limited-slip unit per-
forms similarly to a conventional differential. On slip-
pery surfaces, however, the differential delivers more of
the driving effort to the rear wheel having the better
traction.
The limited-slip differential is especially helpful during
slippery driving conditions. With both rear wheels on a
STARTING AND OPERATING 313
5
Page 316 of 554
slippery surface, a slight application of the accelerator
will supply maximum traction. When starting with only
one rear wheel on an excessively slippery surface, slight
momentary application of the parking brake may be
necessary to gain maximum traction.
WARNING!
On vehicles equipped with a limited-slip differen-
tial, never run the engine with one rear wheel off the
ground, since the vehicle may drive through the rear
wheel remaining on the ground. You could lose
control of the vehicle.
Care should be taken to avoid sudden accelerations when
both rear wheels are on a slippery surface. This could
cause both rear wheels to spin, and allow the vehicle to
slide sideways on the crowned surface of a road or in a
turn.
DRIVING ON SLIPPERY SURFACES
When driving on wet or slushy roads, it is possible for a
wedge of water to build up between the tire and road
surface. This is known as hydroplaning and may cause
partial or complete loss of vehicle control and stopping
ability. To reduce this possibility, the following precau-
tions should be observed:
1. Slow down during rainstorms or when roads are
slushy.
2. Slow down if road has standing water or puddles.
3. Replace tires when tread wear indicators first become
visible.
4. Keep tires properly inflated.
5. Maintain sufficient distance between your vehicle and
the car in front to avoid a collision in a sudden stop.
314 STARTING AND OPERATING
Page 317 of 554
DRIVING THROUGH WATER
Driving through water more than a few inches/
centimeters deep will require extra caution to ensure
safety and prevent damage to your vehicle.
Flowing/Rising Water
WARNING!
Do not drive on, or cross, a road or a path where
water is flowing and/or rising (as in storm run-off).
Flowing water can wear away the road or path's
surface and cause your vehicle to sink into deeper
water. Furthermore, flowing and/or rising water can
carry your vehicle away swiftly. Failure to follow this
warning may result in injuries that are serious or
fatal to you, your passengers, and others around you.
Shallow Standing Water
Although your vehicle is capable of driving through
shallow standing water, consider the following Caution
and Warning before doing so.
CAUTION!
²Always check the depth of the standing water
before driving through it. Never drive through
standing water that is deeper than the bottom of
the tire rims mounted on the vehicle.
²Determine the condition of the road or the path
that is under water, and if there are any obstacles
in the way, before driving through the standing
water.
²Do not exceed 5 mph (8 km/h) when driving
through standing water. This will minimize wave
effects.
STARTING AND OPERATING 315
5
Page 318 of 554
CAUTION!
²Driving through standing water may cause dam-
age to your vehicle's drivetrain components. Al-
ways inspect your vehicle's fluids (i.e., engine oil,
transmission, axle, etc.) for signs of contamination
(i.e., fluid that is milky or foamy in appearance)
after driving through standing water. Do not con-
tinue to operate the vehicle if any fluid appears
contaminated, as this may result in further dam-
age. Such damage is not covered by the New
Vehicle Limited Warranty.
²Getting water inside your vehicle's engine can
cause it to lock up and stall out, and cause serious
internal damage to the engine. Such damage is not
covered by the New Vehicle Limited Warranty.
WARNING!
²Driving through standing water limits your vehi-
cle's traction capabilities. Do not exceed 5 mph (8
km/h) when driving through standing water.
²Driving through standing water limits your vehi-
cle's braking capabilities, which increases stop-
ping distances. Therefore, after driving through
standing water, drive slowly and lightly press on
the brake pedal several times to dry the brakes.
²Getting water inside your vehicle's engine can
cause it to lock up and stall out, and leave you
stranded.
²Failure to follow these warnings may result in
injuries that are serious or fatal to you, your
passengers, and others around you.
316 STARTING AND OPERATING
Page 319 of 554
DRIVING OFF-ROAD
Care should be taken when attempting to climb steep
hills or driving diagonally across a hill or slope. If natural
obstacles force you to travel diagonally up or down a hill,
choose a mild angle and keep as little side tilt as possible.
Keep the vehicle moving and make turns slowly and
cautiously.
If you must back down a hill, back straight down using
REVERSE gear. Never back down in NEUTRAL, or
diagonally across the hill.
When driving over sand, mud, and other soft terrain,
shift to low gear and drive steadily. Apply the accelerator
slowly to avoid spinning the wheels.
DO NOT REDUCE the tire pressures for this type of
driving.NOTE:After off-road usage, particularly in sand or
mud, inspect the underside of the vehicle for accumu-
lated dirt at the propeller shaft, axles, U-joints, brake
rotors and calipers.
Use a hose to clean off any accumulation of dirt or mud.
Check the exhaust system and all exposed components
for any sign of damage.
If you experience unusual vibration after driving in mud,
slush or similar conditions, check the wheels for im-
pacted material. Impacted foreign material can cause a
wheel imbalance. Removing the foreign material from
the wheels will correct the situation.
STARTING AND OPERATING 317
5
Page 320 of 554
PARKING BRAKE
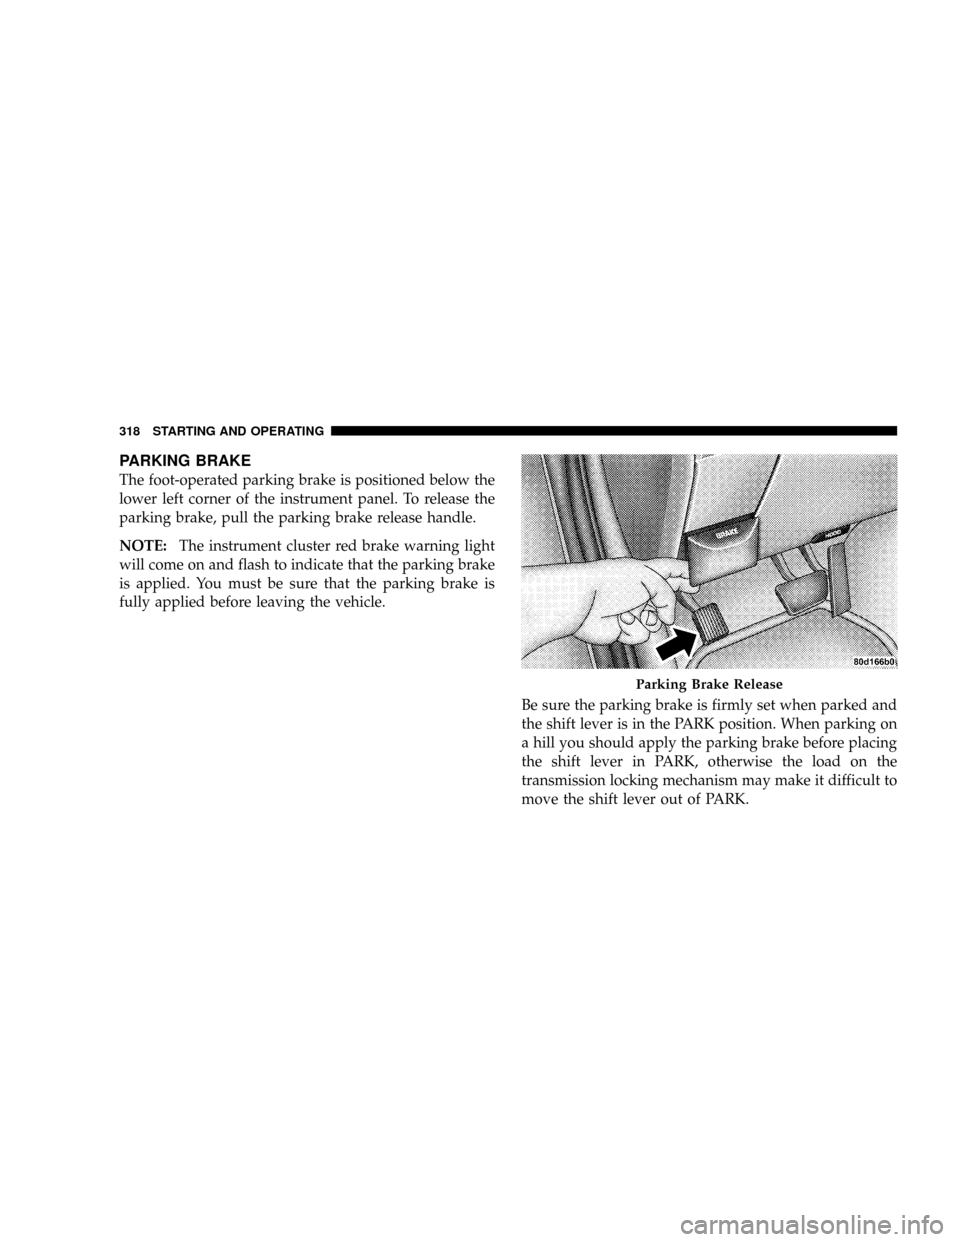
The foot-operated parking brake is positioned below the
lower left corner of the instrument panel. To release the
parking brake, pull the parking brake release handle.
NOTE:The instrument cluster red brake warning light
will come on and flash to indicate that the parking brake
is applied. You must be sure that the parking brake is
fully applied before leaving the vehicle.
Be sure the parking brake is firmly set when parked and
the shift lever is in the PARK position. When parking on
a hill you should apply the parking brake before placing
the shift lever in PARK, otherwise the load on the
transmission locking mechanism may make it difficult to
move the shift lever out of PARK.
Parking Brake Release
318 STARTING AND OPERATING