ECO mode DODGE RAM 5500 CHASSIS CAB 2008 3.G Workshop Manual
[x] Cancel search | Manufacturer: DODGE, Model Year: 2008, Model line: RAM 5500 CHASSIS CAB, Model: DODGE RAM 5500 CHASSIS CAB 2008 3.GPages: 528, PDF Size: 7.84 MB
Page 283 of 528

a suitable level. During this condition, the ability of the
vehicle to accelerate under heavily loaded conditions
may be reduced. Refer also to the Note under torque
converter clutch, later in this section.
If the transmission temperature gets extremely hot, the
transmission will automatically select the most desirable
gear for operation at this temperature. If the transmission
temperature becomes hot enough the TRANS TEMP light
may illuminate and the transmission may downshift out
of Overdrive until the transmission cools down. After
cooldown, the transmission will resume normal opera-
tion.
The transmission will downshift from Overdrive to Drive
if the accelerator pedal is fully depressed at vehicle
speeds above approximately 37 mph (60 km/h) for 6th to
5th and 29 mph (47 km/h) for 5th to 4th.When To Use ªTOW HAULº and ªO/D OFFº
Modes
When driving in hilly areas, towing a trailer, carrying a
heavy load, etc., and frequent transmission shifting oc-
curs, press the ªTOW HAUL O/D OFFº button once to
select TOW HAUL. This will improve performance and
Tow Haul O/D Off Switch
STARTING AND OPERATING 283
5
Page 284 of 528

reduce the potential for transmission overheating or
failure due to excessive shifting. When operating in
ªTOW HAULº mode, 6th gear (if equipped) is disabled
and 2-3 and 3-4 and 4±5 shift patterns are modified. Shifts
into Overdrive (5th gear) are allowed during steady
cruise (for improved fuel economy). Pressing the ªTOW
HAUL O/D OFFº button a second time to select O/D
OFF will disable 5th and 6th gear completely, which
should eliminate any excessive transmission shifting.
The ªTOW HAULº or ªO/D OFFº light will illuminate in
the instrument cluster to indicate when the switch has
been activated. Pressing the switch a third time restores
normal operation. If the ªTOW HAULº or ªO/D OFFº
modes are desired, the button must be pressed each time
the engine is started.WARNING!
Do not use the Tow/Haul feature when driving in icy
or slippery conditions as the increased engine brak-
ing can cause the rear wheels to slide and the vehicle
to swing around with the possible loss of vehicle
control, which may cause an accident possibly result-
ing in personal injury or death.
When To Lock Out Overdrive
When driving in hilly areas, towing a trailer, carrying a
heavy load, etc., and frequent 6±5±6 or 5±4±5 transmis-
sion shifting occurs, press the ªTOW/HAULº button.
This will improve performance and reduce the potential
for transmission overheating or failure due to excessive
shifting.
284 STARTING AND OPERATING
Page 286 of 528

Truck models with manual transmission are equipped
with a clutch interlocking ignition system. The clutch
pedal must be fully depressed to start the vehicle.
Fully depress the clutch pedal before shifting gears. As
you release the clutch pedal, lightly depress the accelera-
tor pedal.
To shift into Reverse, come to a complete stop. Depress
the clutch and pause briefly to allow the gear train to
stop. Move the shift lever from the Neutral position
straight across and back into Reverse.
Never drive with your foot resting on the clutch pedal, or
attempt to hold the vehicle on a hill with the clutch pedal
partially engaged, as this will cause abnormal wear on
the clutch.Manual Transmission Ð 6 Speed (G56)
Your vehicle may be equipped with the G56 manual
transmission. This transmission has a ªcreeperº 1st gear
which should be used to start from a standing position
when carrying a payload or towing a trailer. Damage to
the clutch can result from starting in 2nd or 3rd gear with
a loaded vehicle. An unloaded vehicle may be launched
in 2nd gear. Use each gear in numerical order ± do not
skip a gear.
For most city driving you may find it easier to use only
1st through 5th gear ranges. For steady highway driving
with light accelerations, 6th gear is recommended. To
shift into 5th gear, move the shift lever to the right
beyond the spring pressure point and push it forward.
When shifting from 5th to 4th gear, pull the lever down
toward you in one motion. Do not pull the lever sharply
left as you may shift accidentally into 2nd gear and
damage the transmission.
286 STARTING AND OPERATING
Page 289 of 528

avoid overspeeding the engine and clutch. For accelera-
tion at speeds less than 15 mph (25 km/h), 2nd gear is
recommended.
CAUTION!
When descending a hill, be very careful to downshift
one gear at a time to prevent overspeeding the engine
which can cause valve damage.
Failure to follow the recommended downshifting
speeds may cause the engine to over speed and / or
damage the clutch disc even if the clutch pedal is
depressed.
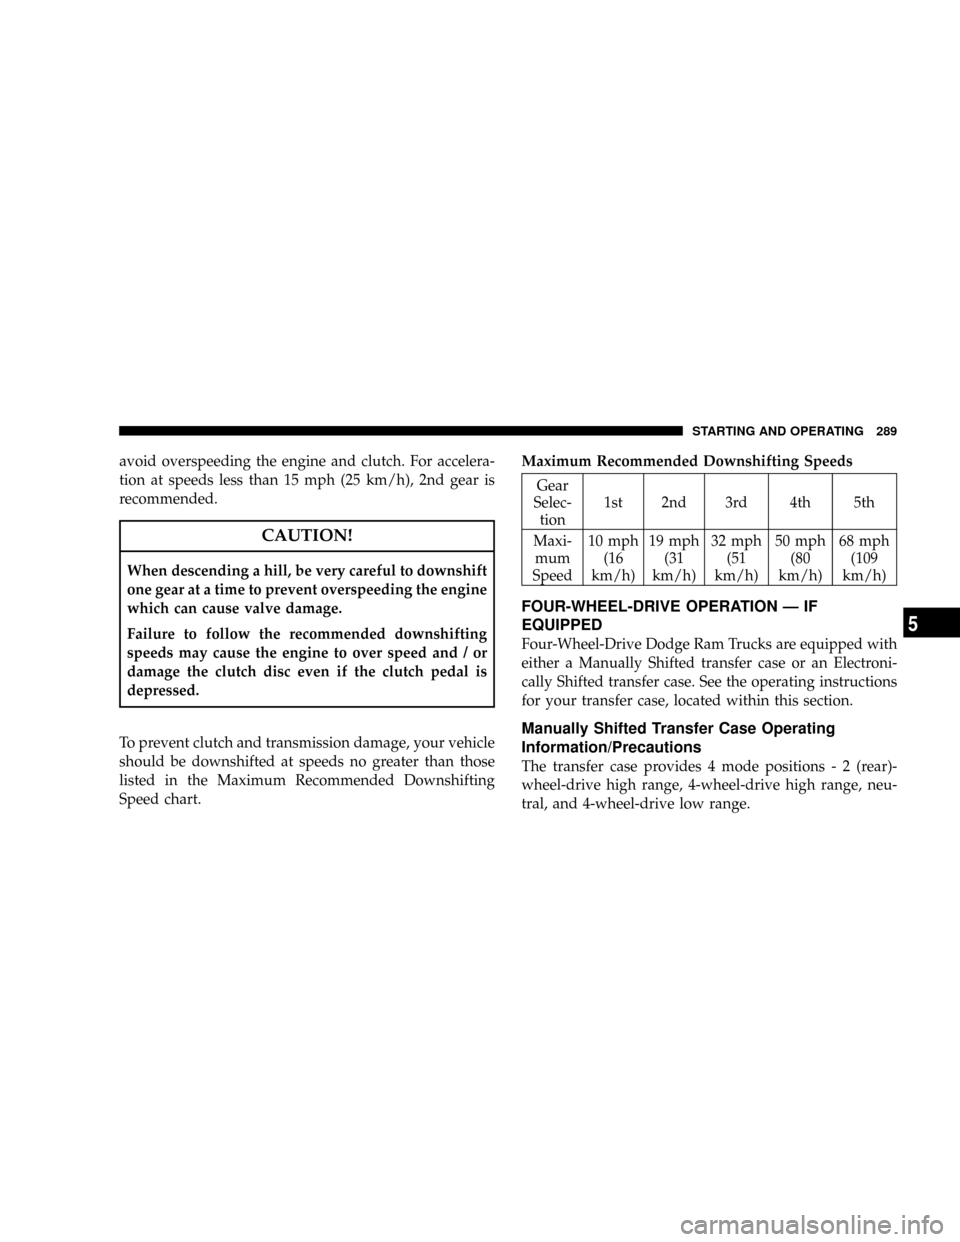
To prevent clutch and transmission damage, your vehicle
should be downshifted at speeds no greater than those
listed in the Maximum Recommended Downshifting
Speed chart.Maximum Recommended Downshifting Speeds
Gear
Selec-
tion1st 2nd 3rd 4th 5th
Maxi-
mum
Speed10 mph
(16
km/h)19 mph
(31
km/h)32 mph
(51
km/h)50 mph
(80
km/h)68 mph
(109
km/h)
FOUR-WHEEL-DRIVE OPERATION Ð IF
EQUIPPED
Four-Wheel-Drive Dodge Ram Trucks are equipped with
either a Manually Shifted transfer case or an Electroni-
cally Shifted transfer case. See the operating instructions
for your transfer case, located within this section.
Manually Shifted Transfer Case Operating
Information/Precautions
The transfer case provides 4 mode positions-2(rear)-
wheel-drive high range, 4-wheel-drive high range, neu-
tral, and 4-wheel-drive low range.
STARTING AND OPERATING 289
5
Page 327 of 528

When adjusting inflation pressure to a tire and wheel
assembly mounted on a vehicle, use Remote Mount
Automatic Inflation Kit (similar to model number 27-
cc1021234, available from TEAM PSE ± PENTASTAR
Service Equipment Phone Number 1-800-734-4334.
NOTE:Never attempt to re-inflate a tire and wheel
assembly which has been run flat or extremely under
inflated without first removing the tire from the wheel
assembly for inspection.
Personnel trained, supervised, and equipped according
to Federal Occupational Safety and Health Administra-
tion (OSHA).Inflation Pressure Adjustment When Not Mounted to
Vehicle
When adjusting inflation pressure to a tire and wheel
assembly not mounted on a vehicle, use a Remote Mount
Automatic Inflation Kit and a Tire Inflation Cage similar
to model number #174-2240 available from TEAM PSE
(PENTASTAR Service Equipment ± 1-800-223-5623).
Tire Pressures for High Speed Operation
The manufacturer advocates driving at safe speeds
within posted speed limits. Where speed limits or condi-
tions are such that the vehicle can be driven at high
speeds, maintaining correct tire inflation pressure is very
important. Increased tire pressure and reduced vehicle
loading may be required for high-speed vehicle opera-
tion. Refer to original equipment or an authorized tire
dealer for recommended safe operating speeds, loading
and cold tire inflation pressures.
STARTING AND OPERATING 327
5
Page 375 of 528

8. After the Neutral (N) button has been released the
transfer case will shift to the position identified by the
selector switch.
9. Shift automatic transmission into P (Park).
NOTE:The transfer case can not be shifted into Neutral
(N) from the 4Auto (if equipped) position.
NOTE:Items 1 through 5 are requirements that must be
met prior to depressing the Neutral (N) selection button,
and must continue to be met until 1 second elapses and
the shift has been completed. If any of these requirements
(with the exception of 3 - key ON) are not met prior todepressing the Neutral (N) button or are no longer met
during the 1 second time, then all of the mode position
indicator lights will flash continuously until all require-
ments are met or until the Neutral (N) button is released.
NOTE:The ignition key must be ON for a shift to take
place and for the position indicator lights to be operable.
If the key is not ON, the shift will not take place and no
position indicator lights will be on or flashing.
NOTE:Flashing neutral (N) position indicator light
indicates that shift requirements have not been met.
STARTING AND OPERATING 375
5
Page 380 of 528

WARNING!
After using the jack and tools, always reinstall them
in the original carrier and location. While driving
you may experience, abrupt stopping, rapid accelera-
tion, or sharp turns. A loose jack, tools, bracket or
other objects in the vehicle may move around with
force, resulting in serious injury.
4500/5500 Models
These vehicles do not come with a jack.
NOTE:Jacking and tire changing on 4500/5500 models
should be performed by an authorized dealer, or knowl-
edgeable service personnel with the appropriate heavy
duty equipment like a tire service company.
JACKING INSTRUCTIONS
Tire Changing Procedure
WARNING!
Getting under a jacked-up vehicle is dangerous. The
vehicle could slip off the jack and fall on you. You
could be crushed. Never get any part of your body
under a vehicle that is on a jack. Never start or run
the engine while the vehicle is on a jack. If you need
to get under a raised vehicle, take it to a service center
where it can be raised on a lift.
Do not raise this vehicle using a bumper jack. The jack is
designed as a tool for changing tires on this vehicle only.
It is not recommended that the jack be used for service
purposes or to lift more than one wheel at a time.
380 WHAT TO DO IN EMERGENCIES
Page 451 of 528

The fluid and filter(s) should be changed as specified in
the Maintenance Schedule (Section 8).
NOTE:If the transmission is disassembled for any
reason, the fluid and filter should be changed, and the
bands adjusted (if equipped).
Special Additives
The manufacturer recommends against the addition of
any additives to the transmission. Exception to this
policy is the use of special dyes to aid in detecting fluid
leaks. The use of transmission sealers should be avoided,
since they may adversely affect seals.
Front and Rear Wheel Bearings
Front Wheel Bearings
Front wheel bearings for all Dodge Ram Trucks are
sealed-for-life. They do not require greasing or seal
replacement. In some instances, these bearings willªpurgeº excess grease and the bearing will look slightly
wet. This is normal. Periodic inspection for excess play is
recommended.
Rear Wheel Bearings Ð Manufacturer's Axles
These bearings are normally considered permanently
lubricated. Cleaning and repacking is required only
when axle shafts are removed or in case of extreme water
or dust contamination.
Noise Control System Required Maintenance &
Warranty
For 3500/4500/5500 Two-Wheel Drive and Four-Wheel
Drive models over 10,000 lbs. (4 535 kg) Gross Vehicle
Weight Rating.
MAINTAINING YOUR VEHICLE 451
7
Page 467 of 528

VEHICLE STORAGE
If you are storing your vehicle for more than 21 days, we
recommend that you take the following steps to mini-
mize the drain on your vehicle's battery:
²Disconnect the Ignition-Off Draw fuse (I.O.D.) fuse
located in the Integrated Power Module, located in the
engine compartment. The I.O.D. cavity includes a
snap-in retainer that allows the fuse to be discon-
nected, without removing it from the fuse block.
²The electronic shift transfer case should be placed in
the 4HI mode and kept in this position to minimize the
battery drain.
²As an alternative to the above steps you may, discon-
nect the negative cables from both batteries.
²Anytime you store your vehicle, or keep it out of
service (i.e. vacation) for two weeks or more, run the
air conditioning system at idle for about five minutesin the fresh air and high blower setting. This will
insure adequate system lubrication to minimize the
possibility of compressor damage when the system is
started again.
NOTE:When reinstalling the IOD fuse push firmly until
fully seated, the gages in the Instrument Cluster will do
a full sweep, when the ignition key is cycled to RUN. This
is a normal condition.
NOTE:When the vehicle is shipped from the factory,
the IOD fuse is in the up, or extracted position. If the
radio, interior lamps, keyless entry, or other features do
not work with the key off, check the position of the fuse
(or check to see if the fuse is blown) to ensure that it is
fully seated. When the IOD fuse is extracted, the instru-
ment cluster, in the odometer window, will display9NO
FUSE
MAINTAINING YOUR VEHICLE 467
7
Page 528 of 528

INTRODUCTION INTRODUCTION A MESSAGE FROM DAIMLERCHRYSLER CORPORATION - DIESEL ENGINES ONLY HOW TO USE THIS MANUAL WARNINGS AND CAUTIONS VAN CONVERSIONS/CAMPERS VEHICLE IDENTIFICATION NUMBER VEHICLE
MODIFICATIONS/ALTERATIONS THINGS TO KNOW BEFORE STARTING YOUR VEHICLE A WORD ABOUT YOUR KEYS Ignition Key RemovalLocking Doors With The KeySENTRY KEY Replacement KeysCustomer Key ProgrammingGeneral InformationSTEERING
WHEEL LOCK - IF EQUIPPED If You Wish To Manually Lock The Steering WheelTo Release The Steering Wheel LockAutomatic Transmission Ignition Interlock SystemSECURITY ALARM SYSTEM - IF EQUIPPED Rearming of the SystemTo Set the AlarmTo Disarm the
SystemILLUMINATED ENTRY SYSTEM - IF EQUIPPED REMOTE KEYLESS ENTRY - IF EQUIPPED To unlock the doorsTo lock the doorsUsing the Panic AlarmGeneral InformationTransmitter Battery Service REMOTE STARTING SYSTEM - IF EQUIPPED DOOR LOCKS
Manual Door Locks - If EquippedPower Door Locks - If EquippedChild Protection Door LockWINDOWS Power Windows - If Equipped Power Sliding Rear Window -If Equipped Sliding Rear Window - If EquippedWind BuffetingOCCUPANT RESTRAINTS Lap/Shoulder Belts
Adjustable Upper Shoulder Belt AnchorageAutomatic Locking Restraint (ALR) Mode - If EquippedCenter Lap BeltsSeat Belt PretensionersEnhanced Driver Seat Belt Reminder System (BeltAlert) Seat Belts and Pregnant WomenSeat Belt ExtenderDriver And Right Front
Passenger Supplemental Restraint System (SRS)-AirbagEvent Data Recorder (EDR)Child RestraintNEW ENGINE BREAK-IN 5.7L Gas Engine6.7L Diesel EngineSAFETY TIPS Transporting PassengersLock Your VehicleExhaust GasSafety Checks You Should Make Inside
The VehicleSafety Checks You Should Make Outside The VehicleUNDERSTANDING THE FEATURES OF YOUR VEHICLE MIRRORS Inside MirrorAutomatic Dimming Mirror - If EquippedOutside MirrorsExterior Mirrors Folding FeatureElectronic Power Mirrors - If Equipped
Electric Rear Window Defroster and Heated Sideview Mirrors - If EquippedTrailer Towing Mirrors - If EquippedHANDS-FREE COMMUNICATION (UConnect) -IF EQUIPPED OperationsPhone Call FeaturesUConnect System FeaturesAdvanced Phone ConnectivityThings
You Should Know About Your UConnect SystemGeneral InformationSEATS 40-20-40 Front Seat Reclining SeatsAdjustable Head RestraintsManual Rotary Lumbar Support Adjustment - If EquippedPower Seats - If EquippedHeated Seats - If EquippedTO OPEN AND CLOSE
THE HOOD LIGHTS Interior Lights Battery SaverHeadlamp DelayHeadlights, Parking Lights, Panel LightsDaytime Running Lights (Canada Only and FleetVehicles)Lights-on ReminderFog Lights - If EquippedMultifunction Control LeverWINDSHIELD WIPERS AND
WASHERS Windshield Wipers Windshield WashersTILT STEERING COLUMN DRIVER ADJUSTABLE PEDALS - IF EQUIPPED AdjustmentELECTRONIC SPEED CONTROL - IF EQUIPPED To ActivateTo Set At A Desired SpeedTo DeactivateTo Resume SpeedTo Vary
The Speed SettingTo Accelerate For PassingOVERHEAD CONSOLE WITH COMPASS/TEMPERATURE MINI-TRIP COMPUTER - IF EQUIPPED US/M Button RESET Button Global ResetStep Button Average Fuel Economy (AVG ECO)Distance To Empty (DTE)Trip
Odometer (ODO)Elapsed Time (ET)C/T Button Automatic Compass CalibrationManual Compass CalibrationRecalibrating The CompassOutside TemperatureOVERHEAD CONSOLE WITH ELECTRONIC VEHICLE INFORMATION CENTER (EVIC) - DIESEL ONLY
Dome/Reading LightsElectronic Vehicle Information Center (EVIC) - If Equipped Compass/Temperature ButtonELECTRICAL POWER OUTLETS CIGAR LIGHTER AND ASH RECEIVER CUPHOLDERS Front Instrument Panel Cupholders (40-20-40 Seats) - Automatic
TransmissionFront Instrument Panel Cupholders (Bucket Seats) - Automatic TransmissionFront Instrument Panel Cupholders - Manual Transmission Rear Cupholder (Quad Cab) - If EquippedSTORAGE Center Storage Compartment (40-20-40 Seat) - If Equipped Center
Storage Compartment (Bucket Seats) - If Equipped Storage and Seats (Quad Cab Models)Plastic Grocery Bag Retainers REAR WINDOW FEATURES Electric Rear Window Defroster and Heated Side view Mirrors - If EquippedPower Sliding Rear Window - If Equipped
Sliding Rear Window - If EquippedFOLD FLAT LOAD FLOOR - IF EQUIPPED UNDERSTANDING YOUR INSTRUMENT PANEL INSTRUMENTS AND CONTROLS INSTRUMENT CLUSTERS 5.7L Gas Engines 6.7L Cummins Diesel Engines INSTRUMENT CLUSTER
DESCRIPTION ELECTRONIC DIGITAL CLOCK Clock Setting ProcedureRADIO GENERAL INFORMATION Radio Broadcast SignalsTwo Types of SignalsElectrical DisturbancesAM ReceptionFM ReceptionSALES CODE REF - AM/FM/CD (SINGLE DISC) RADIO WITH
OPTIONAL SATELLITE RADIO AND HANDS FREE PHONE CAPABILITY Operating Instructions - Radio ModeOperation Instructions - CD ModeOperation Instructions - Auxiliary ModeOperating Instructions - Hands Free Phone - If EquippedOperating Instructions - Satellite
Radio - If EquippedSALES CODE RAQ - AM/FM/CD (6-DISC) RADIO WITH OPTIONAL SATELLITE RADIO, HANDS FREE PHONE, AND VEHICLE ENTERTAINMENT SYSTEMS (VES)CAPABILITIES Operating Instructions - Radio ModeOperation Instructions - (CD MODE
for CD Audio Play)LOAD/EJECT Button (CD Mode for CD Audio Play)Notes On Playing MP3 FilesOperation Instructions - (CD Mode for MP3 Audio Play)LOAD/EJECT Button (CD Mode for MP3 Play)SALES CODE RAK - AM/FM/CASSETTE/CD (6-DISC) RADIO WITH
OPTIONAL SATELLITE RADIO, HANDS FREE PHONE, VIDEO, MP3, and WMA CAPABILITIES Operating Instructions - Radio ModeOperating Instructions - Tape PlayerSeek ButtonFast Forward (FF)Rewind (RW)Tape EjectScan ButtonChanging Tape DirectionMetal Tape
SelectionPinch Roller ReleaseNoise ReductionOperation Instructions - (CD MODE for CD Audio Play)LOAD/EJECT Button (CD Mode for CD Audio Play)Notes On Playing MP3 FilesOperation Instructions - (CD Mode for MP3 and WMA Audio Play)LOAD/EJECT Button
(CD Mode for MP3 and WMA Play)SALES CODE REC - AM/FM/CD (6-DISC) RADIO WITH NAVIGATION SYSTEM Operating Instructions - Satellite Radio (If Equipped)REC Setting the ClockAudio Clock DisplayVIDEO ENTERTAINMENT SYSTEM (SALES CODE XRV)
- IF EQUIPPED SATELLITE RADIO - IF EQUIPPED System ActivationElectronic Serial Number/Sirius Identification Number (ESN/SID)Selecting Satellite Mode in REF, RAQ, and RAK RadiosSelecting a ChannelStoring and Selecting Pre-Set ChannelsUsing the PTY (Program
Type) Button - If EquippedPTY Button SCANPTY Button SEEKSatellite AntennaReception QualityREMOTE SOUND SYSTEM CONTROLS - IF EQUIPPED Radio OperationTape PlayerCD PlayerCASSETTE TAPE AND PLAYER MAINTENANCE COMPACT DISC
MAINTENANCE RADIO OPERATION AND CELLULAR PHONES CLIMATE CONTROLS Heater Only - If Equipped Air Conditioning and Heating - If Equipped Air Conditioning with Dual Zone Temperature Control - If EquippedOperating TipsOperating Tips Chart STARTING
AND OPERATING STARTING PROCEDURES - GAS ENGINES Manual Transmission - If EquippedAutomatic Transmission - If EquippedNormal StartingIf Engine Fails To StartAfter StartingSTARTING PROCEDURES - DIESEL ENGINES Manual Transmission - If Equipped
Automatic Transmission - If EquippedNormal Starting Procedure - Engine Manifold Air Temperature Above 66 degrees F (19 degrees C)Starting Procedure - Engine Manifold Air Temperature Below 66 degrees F (19 degrees C)Starting FluidsNORMAL OPERATION - DIESEL
ENGINE Cold Weather PrecautionsEngine Idling - In Cold WeatherStopping The EngineEngine Speed ControlOperating PrecautionsCooling System Tips -Automatic TransmissionENGINE BLOCK HEATER (GAS ENGINES)- IF EQUIPPED DIESEL EXHAUST BRAKE
(ENGINE BRAKING) - IF EQUIPPED AUTOMATIC TRANSMISSION Automatic Transmission with Overdrive (5 Speed 545RFE) - If EquippedAutomatic Transmission(6 Speed AS68RC) - If EquippedMANUAL TRANSMISSION Manual Transmission - 6 Speed (G56)
Recommended Vehicle Shift SpeedsDownshifting - Gas EngineDownshifting - Diesel EngineFOUR-WHEEL-DRIVE OPERATION - IF EQUIPPED Manually ShiftedTransfer Case Operating Information/PrecautionsShifting Procedure - Manually Shifted Transfer Case Transfer
Case Reminder LightElectronically Shifted Transfer Case Operating Information/Precautions (4 Position Switch) - If Equipped Shifting Procedure- Electronically Shifted Transfer Case LIMITED-SLIP DIFFERENTIAL - IF EQUIPPED POWER TAKE OFF OPERATION - IF
EQUIPPED Stationary ModeMobile ModePower Take Off - Aftermarket InstallationDRIVING ON SLIPPERY SURFACES DRIVING THROUGH WATER Flowing/Rising WaterShallow Standing WaterDRIVING OFF-ROAD PARKING BRAKE BRAKE SYSTEM Brake Noise
Four-Wheel Anti-Lock Brake SystemPOWER STEERING TIRE SAFETY INFORMATION Tire Markings Tire Identification Number (TIN)Tire Loading and Tire PressureTIRES - GENERAL INFORMATION Tire PressureTire Inflation PressuresRadial-Ply TiresLimited Use Spare
- If EquippedTire SpinningTread Wear IndicatorsLife of TireReplacement TiresAlignment And BalanceSUPPLEMENTAL TIRE PRESSURE INFORMATION - IF EQUIPPED TIRE CHAINS SNOW TIRES TIRE ROTATION RECOMMENDATIONS Dual Rear Wheels ENGINE
RUNAWAY FUEL REQUIREMENTS Fuel Requirements (5.7L Gas Engines)Fuel Requirements (6.7L Diesel Engines)ADDING FUEL Adding Fuel (Gas Engines)Adding Fuel (Diesel Engines)VEHICLE LOADING Certification LabelTRAILER TOWING Common Towing
DefinitionsTrailer Hitch ClassificationTrailer Towing Weights (Maximum Trailer Weight Ratings)Trailer and Tongue WeightTowing RequirementsTowing TipsTrailer Towing Mirrors - If EquippedSNOWPLOW Before plowingSnowplow Prep Package Model AvailabilityOver the
Road Operation With Snowplow AttachedMethods For Removing Snow Operating TipsGeneral MaintenanceRECREATIONAL TOWING (BEHIND MOTORHOME, ETC.) Recreational Towing - 2 Wheel Drive ModelsRecreational Towing - 4 Wheel Drive ModelsWHAT TO DO
IN EMERGENCIES HAZARD WARNING FLASHER JACKING AND TIRE CHANGING 3500 Models - If EquippedJACKING INSTRUCTIONS Tire Changing ProcedureHOISTING JUMP-STARTING With Portable Starting UnitFREEING A STUCK VEHICLE EMERGENCY
TOW HOOKS - IF EQUIPPED TOWING A DISABLED VEHICLE 4-Wheel- Drive Vehicles2-Wheel- Drive VehiclesMAINTAINING YOUR VEHICLE ENGINE COMPARTMENT - 6.7LDIESEL ENGINE ENGINE COMPARTMENT- 5.7L GAS ENGINE ONBOARD DIAGNOSTIC
SYSTEM (OBD II) Loose Fuel Filler Cap MessageREPLACEMENT PARTS ENGINE DATA PLATE DEALER SERVICE SERVICE INFORMATION MAINTENANCE PROCEDURES EngineOilDrive Belts (Gas Engines)Drive Belt (Diesel Engines)Engine Air Cleaner Filter (Gas
Engines)Engine Air Cleaner Filter (Diesel Engines)Draining Fuel/Water Separator Filter (Diesel Engines) Engine Fuel Filter (Gas Engines)Spark Plugs (Gas Engines)Catalytic Converter (Gas Engines)Intervention Regeneration Strategy - EVIC Message Process Flow (Catalyst
Full Message) (Diesel Engines Only)Emission-Related Components (Gas Engines)Maintenance Free Battery (Gas Engines)Maintenance Free Batteries(Diesel Engines)Air Conditioner MaintenancePower Steering - Fluid CheckFront Suspension Ball JointsSteering Linkage
- InspectionFront Prop Shaft LubricationFront Axle Universal Drive Joints And Ball JointsBody LubricationWindshield Wiper BladesWindshield WashersExhaust SystemCooling SystemFanCharge Air Cooler - Inter-Cooler (Diesel Engines)Hoses And Vacuum/Vapor Harnesses
Fuel System ConnectionsBrake SystemClutch Hydraulic SystemClutch LinkageRear Axle And 4x4 Front Driving Axle Fluid LevelTransfer Case - If EquippedManual Transmission - If EquippedAutomatic Transmission (Gas Engine Only)Automatic Transmission (Diesel Engine
Only)Front and Rear Wheel BearingsNoise Control System Required Maintenance and WarrantyAppearance Care and Protection from CorrosionFUSES (INTEGRATED POWER MODULE) VEHICLE STORAGE REPLACEMENT LIGHT BULBS BULB REPLACEMENT
Headlight (Halogen)/Front Park and Turn LightsFog LightsCab Top Clearance Lights - If EquippedFLUID AND CAPACITIES FLUIDS, LUBRICANTS AND GENUINEPARTS EngineChassisMAINTENANCE SCHEDULES EMISSION CONTROL SYSTEM MAINTENANCE
MAINTENANCE SCHEDULES - 6.7L TURBO DIESEL Oil Change Indicator SystemMaintenance ScheduleMAINTENANCE SCHEDULE - 5.7L GAS ENGINE Required Maintenance IntervalsIF YOU NEED CONSUMER ASSISTANCE SUGGESTIONS FOR OBTAINING
SERVICE FOR YOUR VEHICLE Prepare For The AppointmentPrepare A ListBe Reasonable With RequestsIF YOU NEED ASSISTANCE WARRANTY INFORMATION (U.S. Vehicles Only) MOPAR PARTS REPORTING SAFETY DEFECTS In CanadaPUBLICATION ORDER
FORMS DEPARTMENT OF TRANSPORTATION UNIFORM TIRE QUALITY GRADES TreadwearTraction GradesTemperature GradesINDEX