display DODGE SPRINTER 2004 1.G Owner's Manual
[x] Cancel search | Manufacturer: DODGE, Model Year: 2004, Model line: SPRINTER, Model: DODGE SPRINTER 2004 1.GPages: 272, PDF Size: 22.71 MB
Page 107 of 272
UNDERSTANDING YOUR INSTRUMENT PANEL 107
4
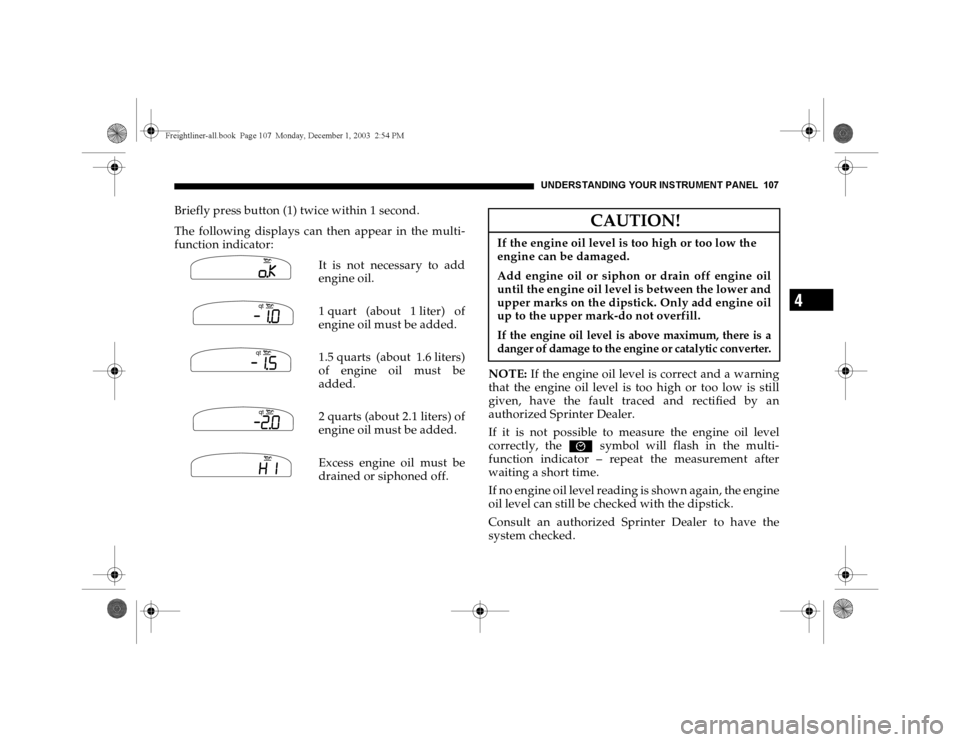
Briefly press button (1) twice within 1 second.
The following displays can then appear in the multi-
function indicator:
It is not necessary to add
engine oil.
1quart (about 1liter) of
engine oil must be added.
1.5 quarts (about 1.6 liters)
of engine oil must be
added.
2 quarts (about 2.1 liters) of
engine oil must be added.
Excess engine oil must be
drained or siphoned off.NOTE: If the engine oil level is correct and a warning
that the engine oil level is too high or too low is still
given, have the fault traced and rectified by an
authorized Sprinter Dealer.
If it is not possible to measure the engine oil level
correctly, the È symbol will flash in the multi-
function indicator – repeat the measurement after
waiting a short time.
If no engine oil level reading is shown again, the engine
oil level can still be checked with the dipstick.
Consult an authorized Sprinter Dealer to have the
system checked.
Sy mb
N00.00-2151-00Sy mb
N00.00-2385-00
qt
Sy mb
N00.00-2386-00
qt
Sy mb
N00.00-2384-00
qt
CAUTION!
If the engine oil level is too high or too low the
engine can be damaged.
Add engine oil or siphon or drain off engine oil
until the engine oil level is between the lower and
upper marks on the dipstick. Only add engine oil
up to the upper mark-do not overfill.If the engine oil level is above maximum, there is a
danger of damage to the engine or catalytic converter.
Freightliner-all.book Pag e 107 Monday, December 1, 2003 2:54 PM
Page 125 of 272
UNDERSTANDING YOUR INSTRUMENT PANEL 125
4
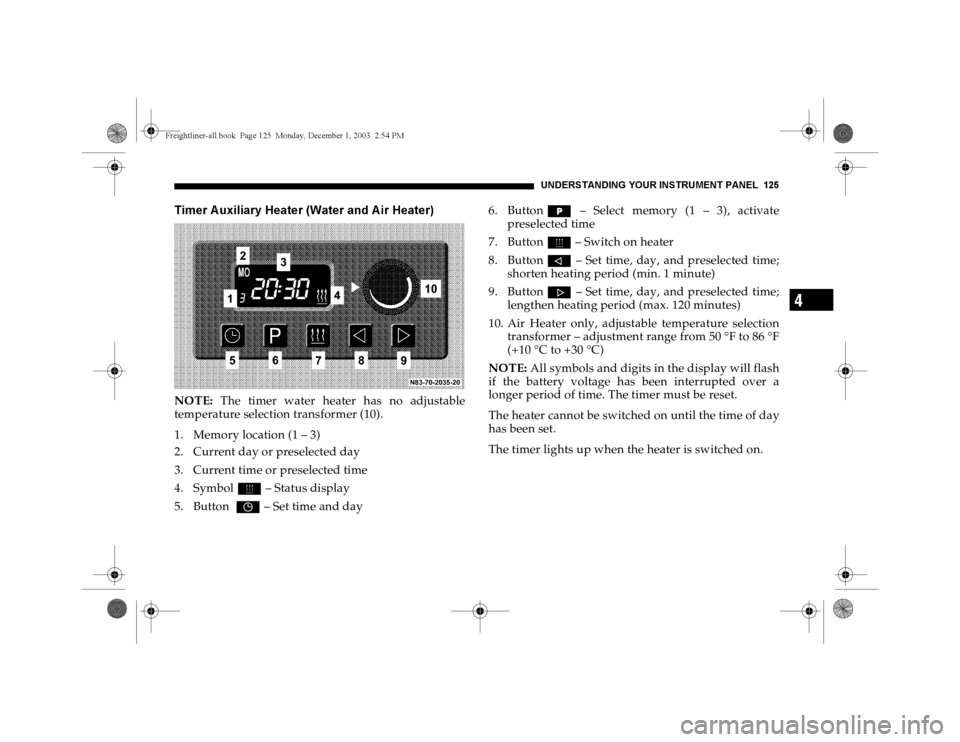
Timer A uxiliary Heater (Water and A ir Heater)NOTE: The timer water heater has no adjustable
temperature selection transformer (10).
1. Memory location (1 – 3)
2. Current day or preselected day
3. Current time or preselected time
4. Symbolö – Status display
5. Button ” – Set time and day 6. ButtonH – Select memory (1 – 3), activate
preselected time
7. Buttonö – Switch on heater
8. Buttoný – Set time, day, and preselected time;
shorten heating period (min. 1 minute)
9. Buttonþ – Set time, day, and preselected time;
lengthen heating period (max. 120 minutes)
10. Air Heater only, adjustable temperature selection
transformer – adjustment range from 50 °F to 86 °F
(+10 °C to +30 °C)
NOTE: All symbols and digits in the display will flash
if the battery voltage has been interrupted over a
longer period of time. The timer must be reset.
The heater cannot be switched on until the time of day
has been set.
The timer lights up when the heater is switched on.Freightliner-all.book Pag e 125 Monday, December 1, 2003 2:54 PM
Page 126 of 272
126 UNDERSTANDING YOUR INSTRUMENT PANELSwitching the Auxiliary Heater On and Off - Ignition
Off
To switch it on:
Press buttonö.
The vehicle-side blower automatically switches on.
Display: Symbolö and remaining heating period.
The remaining heating period can be lengthened by
using the buttonþ (max. of 120 minutes); it may be
shortened by using the buttoný (min. of 1 minute).
To switch off:
Press buttonö again.
The blower inside the vehicle automatically switches
off. The auxiliary heater will automatically switch off
after about 3 minutes.
Display: Current time and current day of the week
(about 15 seconds).
Switching the Auxiliary Heater On and Off - Ignition
On
To switch it on:
Press the buttonö.The auxiliary heater is running.
Display: Symbolö, current time and current day of
the week.
If the ignition is switched off, the auxiliary heater will
remain on for another 15 minutes before automatically
switching off. The remaining heating period can be
lengthened by using the buttonþ (max. of
120 minutes); it may be shortened by using the
buttoný (min. of 1 minute).
To switch off:
Press the buttonö again.
The auxiliary heater will automatically switch off after
about 3 minutes.
Display: Current time and current day of the week.
Setting the time and day
Press the button” until the "Time" display begins to
flash.
Use either the buttonýorþ to set the current
time. The current time has been saved when the
display stops flashing or the button” is used for
confirmation.Freightliner-all.book Pag e 126 Monday, December 1, 2003 2:54 PM
Page 127 of 272
UNDERSTANDING YOUR INSTRUMENT PANEL 127
4
The "Day" display then flashes.
Use either the buttonýorþ to set the current
day of the week. The current day has been saved when
the display stops flashing or the button” i s u se d f or
confirmation.
When the ignition is switched on, the current time and
day remain on display. When the ignition is switched
off, the display disappears after about 15 seconds.
Setting/Activating Preselected Times
3 preselected times may be saved.
Setting preselected times:
Press the buttonH repeatedly until the desired
memory (1 – 3) flashes.
Briefly press the buttonýorþ – the preselected
time will flash.
Use either the buttonýorþ to set the
preselected time. The current preselected time has
been saved when the display stops flashing.
Activate the preselected time (up to 24 hours):Press the buttonH until the desired memory (1 – 3)
and the preselected time both flash.
The preselected time has been activated when the
display stops flashing. Within the next 24 hours, the
heater will switch on at the preselected time displayed.
Activate the preselected time (from 24 hours to a max.
of 7 days):
A preselected time may be chosen up to 7 days
beforehand.
Press the buttonH until the desired memory (1 – 3)
and the preselected time both flash.
After about 5 seconds, the "Preselected Day" display
will appear – use either the buttonýorþ to set
the preselected day.
The preselected time and day have been activated
when the display stops flashing and when the current
time, activated memory, and the flashing symbolö
appear in the display.
To call up the activated memory:
Briefly press the buttonH – the preselected day and
time will be displayed for about 5 seconds.Freightliner-all.book Pag e 127 Monday, December 1, 2003 2:54 PM
Page 128 of 272
128 UNDERSTANDING YOUR INSTRUMENT PANELSwitching off preselected times:
Press the buttonH repeatedly until no memory is
displayed – no preselected time is activated.
Setting the Heating Period
Settings between 1 minute and 120 minutes may be set
for heating periods to run when the ignition is
switched off.
Do not switch on the heater.
Press the buttoný until the current heating period
begins to flash.
Use either the buttonýorþ to set the desired
heating period. The new heating period will be saved
as soon as the display disappears.
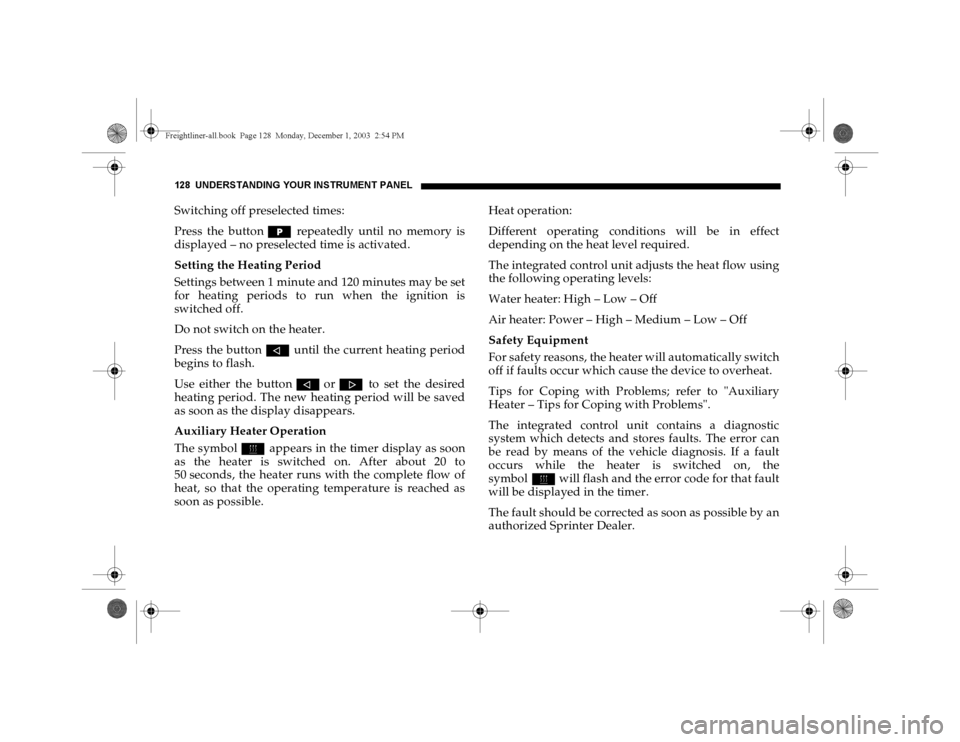
Auxiliary Heater Operation
The symbolö appears in the timer display as soon
as the heater is switched on. After about 20 to
50 seconds, the heater runs with the complete flow of
heat, so that the operating temperature is reached as
soon as possible.Heat operation:
Different operating conditions will be in effect
depending on the heat level required.
The integrated control unit adjusts the heat flow using
the following operating levels:
Water heater: High – Low – Off
Air heater: Power – High – Medium – Low – Off
Safety Equipment
For safety reasons, the heater will automatically switch
off if faults occur which cause the device to overheat.
Tips for Coping with Problems; refer to "Auxiliary
Heater – Tips for Coping with Problems".
The integrated control unit contains a diagnostic
system which detects and stores faults. The error can
be read by means of the vehicle diagnosis. If a fault
occurs while the heater is switched on, the
symbolö will flash and the error code for that fault
will be displayed in the timer.
The fault should be corrected as soon as possible by an
authorized Sprinter Dealer.Freightliner-all.book Pag e 128 Monday, December 1, 2003 2:54 PM
Page 136 of 272
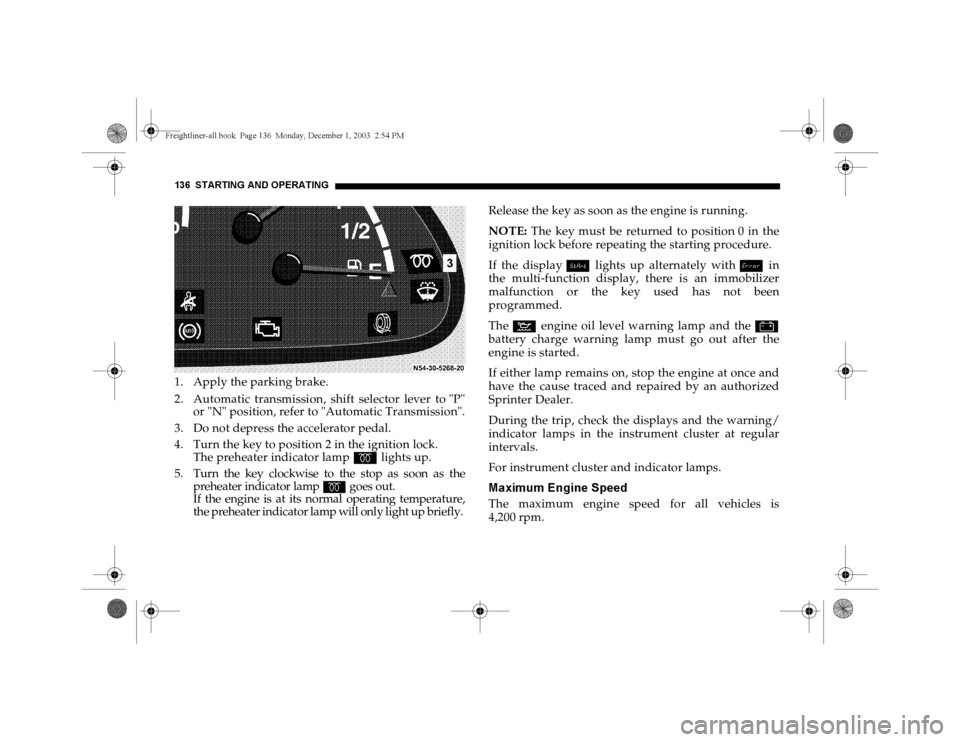
136 STARTING AND OPERATING1. Apply the parking brake.
2. Automatic transmission, shift selector lever to "P"
or "N" position, refer to "Automatic Transmission".
3. Do not depress the accelerator pedal.
4. Turn the key to position 2 in the ignition lock.
The preheater indicator lampq lights up.5. Turn the key clockwise to the stop as soon as the
preheater indicator lamp
q
goes out.
If the engine is at its normal operating temperature,
the preheater indicator lamp will only light up briefly.
Release the key as soon as the engine is running.
NOTE: The key must be returned to position 0 in the
ignition lock before repeating the starting procedure.
If the displayÁ lights up alternately withî in
the multi-function display, there is an immobilizer
malfunction or the key used has not been
programmed.
The: engine oil level warning lamp and the#
battery charge warning lamp must go out after the
engine is started.
If either lamp remains on, stop the engine at once and
have the cause traced and repaired by an authorized
Sprinter Dealer.
During the trip, check the displays and the warning/
indicator lamps in the instrument cluster at regular
intervals.
For instrument cluster and indicator lamps.Maximum Engine SpeedThe maximum engine speed for all vehicles is
4,200 rpm.
Freightliner-all.book Pag e 136 Monday, December 1, 2003 2:54 PM
Page 141 of 272
STARTING AND OPERATING 141
5
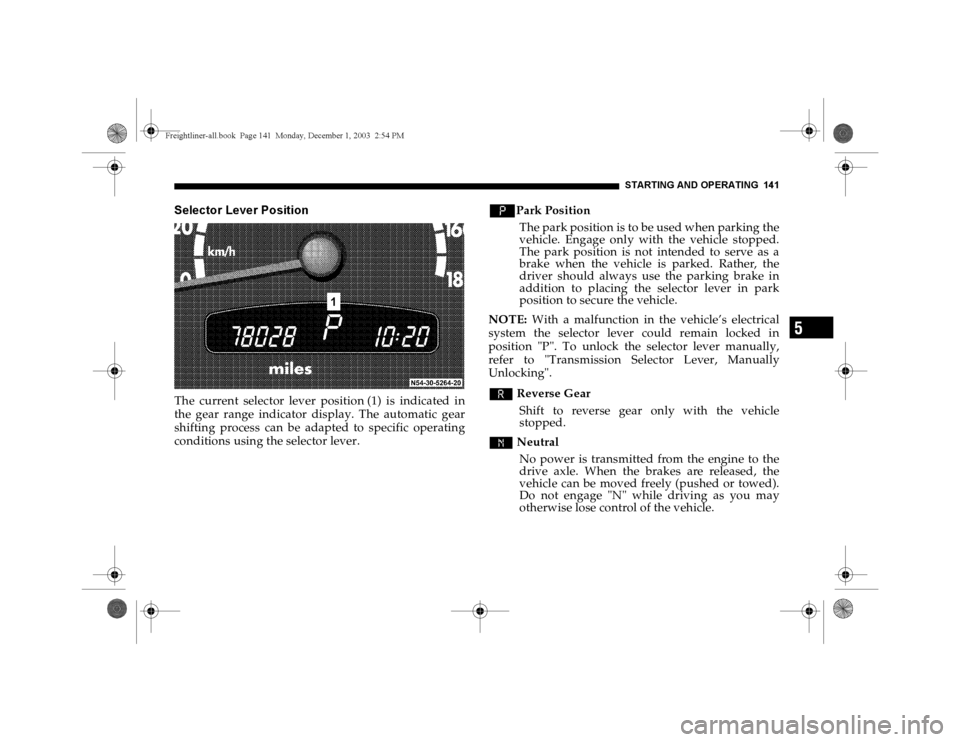
Selector Lever PositionThe current selector lever position (1) is indicated in
the gear range indicator display. The automatic gear
shifting process can be adapted to specific operating
conditions using the selector lever.
v
Park Position
The park position is to be used when parking the
vehicle. Engage only with the vehicle stopped.
The park position is not intended to serve as a
brake when the vehicle is parked. Rather, the
driver should always use the parking brake in
addition to placing the selector lever in park
position to secure the vehicle.
NOTE: With a malfunction in the vehicle’s electrical
system the selector lever could remain locked in
position "P". To unlock the selector lever manually,
refer to "Transmission Selector Lever, Manually
Unlocking".
t Reverse Gear
Shift to reverse gear only with the vehicle
stopped.
s Neutral
No power is transmitted from the engine to the
drive axle. When the brakes are released, the
vehicle can be moved freely (pushed or towed).
Do not engage "N" while driving as you may
otherwise lose control of the vehicle.
Freightliner-all.book Pag e 141 Monday, December 1, 2003 2:54 PM
Page 142 of 272
142 STARTING AND OPERATINGNOTE: Coasting the vehicle, or driving with selector
lever in "N" can result in transmission damage that is
not covered by the Sprinter Warranty.
wThe transmission automatically upshifts through
5th gear. Position "D" provides optimum driving
characteristics under all normal operating
conditions.Gear Selection for Special CircumstancesThe transmission gear ranges for special circumstances
can be selected by pushing the selector lever to the
right or the left with the selector lever in position "D".
The gear range currently selected is indicated in the
instrument cluster display.
Briefly press selector lever in the ç direction:
The transmission downshifts, one gear range at a time,
in the order "4", "3", "2", "1".
Press and hold selector lever in the ç direction:
The transmission will shift to a gear range which
favorably accelerates or decelerates the vehicle. This
way downshiftings can be caused.Briefly press selector lever in the æ direction:
The transmission will shift from the current gear range
to the next higher gear range. If the transmission is
already in gear range "D", an additional upshift of one
gear is not possible.
Press and hold selector lever in the æ direction:
The transmission will shift from the current gear range
directly to gear range "D".
NOTE: With transmission in gear range "D", "4"
or "3",
upshifting from 1st to 2nd to 3rd gear is delayed
depending on vehicle speed and engine temperature.
This allows the catalytic converter to heat up more
quickly to operating temperatures.
During the brief warm-up period this delayed upshift
and increased engine noise might be perceived as a
malfunction. However, neither the engine nor
WARNING!
On slippery road surfaces, never downshift in order
to slow the vehicle down. This could result in drive
wheel slip and reduced vehicle control. Your vehi-
cle’s ABS will not prevent this type of loss of control.
Freightliner-all.book Pag e 142 Monday, December 1, 2003 2:54 PM
Page 250 of 272
250 MAINTENANCE SCHEDULES
M
A
I
N
T
E
N
A
N
C
E
S
C
H
E
D
U
L
E
S8
MA INTENA NCE - WITH A SSYST MA INTENA NCE
COMPUTERASSYST provides you with information on the best
possible timing for maintenance work.
NOTE: The engine manufacturer strongly
recommends the use of synthetic engine oils, such as
Mobil 1 SAE 0W-40.
When the next maintenance service is due, this will be
indicated in the multi-function display with the
symbol
9 Oil service
9 Maintenance service - displayed in km/miles
or days.
9
If the display shows the number of days, the symbol
È will also appear in the multi-function display.
You should have the maintenance performed within
the stated period/distance.
The service indicator will be reset by your Sprinter
Dealer after an oil service and/or maintenance service
has been performed.
REGULA R CHECK-UPSTo maintain the safe operation of your vehicle, it is
recommended that you perform the following tasks on
a regular basis (i.e., weekly or whenever the vehicle is
refueled). Check:
Engine oil level
Brake system, clutch mechanism – fluid level
Battery – acid level
Windshield washer system and headlamp cleaning
system – fluid level
Mechanical assemblies (e. g. ,engine, transmission,
etc.) – check for leaks
Condition of tires and tire pressures
All exterior lights
Freightliner-all.book Pag e 250 Monday, December 1, 2003 2:54 PM
Page 263 of 272
INDEX 263
10
Service Brake . . . . . . . . . . . . . . . . . . . . . . . . . . . . . . 146
Bulbs
Bulb Replacement . . . . . . . . . . . . . . . . . . . . . . . . . . 233
Front Lamp Unit . . . . . . . . . . . . . . . . . . . . . . . . . . . 233
CCapacities . . . . . . . . . . . . . . . . . . . . . . . . . . . . . . . . . . . 244
Care of Vehicle
Engine Cleaning . . . . . . . . . . . . . . . . . . . . . . . . . . . 221
Headlamps, Taillamps, Turn Signal Lenses . . . . 222
Vehicle Washing . . . . . . . . . . . . . . . . . . . . . . . . . . . 222
Care of vehicle
Paintwork, painted body components . . . . . . . . 221
Power washer . . . . . . . . . . . . . . . . . . . . . . . . . . . . . 220
Tar stains . . . . . . . . . . . . . . . . . . . . . . . . . . . . . . . . . 221
Catalytic Converter . . . . . . . . . . . . . . . . . . . . . . . . . . . 183
Central Locking . . . . . . . . . . . . . . . . . . . . . . . . . . . . . . . 11
Locking . . . . . . . . . . . . . . . . . . . . . . . . . . . . . . . . . . . . 12
Central Locking Switch. . . . . . . . . . . . . . . . . . . . . . . . . 13
Locking and Unlocking . . . . . . . . . . . . . . . . . . . . . . 15
Locking Status Display . . . . . . . . . . . . . . . . . . . . . . 14To Program the Automatic Lock Feature . . . . . . . 15
Chains, Snow . . . . . . . . . . . . . . . . . . . . . . . . . . . . . . . . 170
Changing a Bulb
Additional Brake Lamp . . . . . . . . . . . . . . . . . . . . . 240
Exit Lamps . . . . . . . . . . . . . . . . . . . . . . . . . . . . . . . . 243
Front Lamp Unit . . . . . . . . . . . . . . . . . . . . . . . . . . . 233
Interior Lighting . . . . . . . . . . . . . . . . . . . . . . . . . . . 242
Interior Lighting with Interior Sensor
Protection . . . . . . . . . . . . . . . . . . . . . . . . . . . . . . . . . 243
License Plate Lamp . . . . . . . . . . . . . . . . . . . . . . . . . 240
Reading Lamp . . . . . . . . . . . . . . . . . . . . . . . . . . . . . 242
Side-Marker Lamp . . . . . . . . . . . . . . . . . . . . . . . . . 241
Side-Mounted Turn Signal . . . . . . . . . . . . . . . . . . 241
Taillamp . . . . . . . . . . . . . . . . . . . . . . . . . . . . . . . . . . 238
Changing the Tire . . . . . . . . . . . . . . . . . . . . . . . . . . . . 187
Charging the Battery . . . . . . . . . . . . . . . . . . . . . . . . . . 217
Checking Coolant Level . . . . . . . . . . . . . . . . . . . . . . . 213
Checking Weights of Vehicle and Trailer. . . . . . . . . 179
Cigar Lighter. . . . . . . . . . . . . . . . . . . . . . . . . . . . . . . . . . 76Freightliner-all.book Pag e 263 Monday, December 1, 2003 2:54 PM