ECO mode DODGE STRATUS 2004 2.G Owner's Manual
[x] Cancel search | Manufacturer: DODGE, Model Year: 2004, Model line: STRATUS, Model: DODGE STRATUS 2004 2.GPages: 273
Page 116 of 273

NOTE:The changer will not random play between
discs.
Press the top of the Seek button once to move to the next
randomly selected track. Press the bottom of the Seek
button to go back to the beginning of the track.
Press button 4 a second time to stop random play.
Program Button 5
Press this button to play the previous disc.
Time Button
Press this button to switch between time of day and CD
track time.
Changing Modes
While in the radio mode, if a cassette is loaded, press the
Mode button to switch to the tape mode. If a CD is
loaded, press the Mode button to select the CD mode. If
neither a tape nor CD is loaded, the radio will ignore the
command.
²Inserting either a tape or CD automatically starts that
mode of play.
²Pressing the AM/FM button while in the tape or CD
mode will select the radio mode.
²If in the CD mode and the last CD is ejected, the radio
will tune to the last station selected.
Removing Discs from the CD Changer
If there is a single CD in the changer, press the EJT button
and the CD will eject. If the CD is not removed within 15
seconds, it will automatically reload into the CD changer.
To eject additional CDs from the changer, first select the
numbered button where the CD is located and then press
the EJT button.
CD Changer Operation with the Changer Off
The CD changer is able to load and eject discs with the
ignition power off. However, while the ignition is off, one
of the six numbered buttons must be pressed first.
116 UNDERSTANDING YOUR INSTRUMENT PANEL
Page 117 of 273

REMOTE SOUND SYSTEM CONTROLS Ð IF
EQUIPPED
The remote sound system controls are located on the rear
surface of the steering wheel. Reach behind the wheel to
access the switches.
The right hand control is a rocker type switch with a
push-button in the center and controls the volume and
mode of the sound system. Pressing the top of the rocker
switch will increase the volume and pressing the bottom
of the rocker switch will decrease the volume.Pressing the center button will make the radio switch
between the various modes available (AM/FM/TAPE/
CD, Etc.).
The left hand control is a rocker type switch with a
push-button in the center. The function of the left hand
control is different depending on which mode you are in.
The following describes the left hand control operation in
each mode.
Radio Operation
Pressing the top of the switch will ªSeekº up for the next
listenable station and pressing the bottom of the switch
will ªSeekº down for the next listenable station.
The button located in the center of the left hand control
will tune to the next preset station that you have pro-
grammed in the radio preset push-button.
Tape Player
Pressing the top of the switch once will go to the next
selection on the cassette. Pressing the bottom of the
switch once will go to the beginning of the current
selection or to the beginning of the previous selection if it
is within the first 5 seconds of the current selection.
UNDERSTANDING YOUR INSTRUMENT PANEL 117
4
Page 118 of 273

If you press the switch up or down twice it plays the
second selection, three times, it will play the third, etc.
The button in the center of the left hand switch has no
function in this mode.
CD Player Ð Single Disc in Radio
Pressing the top of the switch once will go to the next
track on the CD. Pressing the bottom of the switch once
will go to the beginning of the current track or to the
beginning of the previous track if it is within one second
after the current track begins to play.
If you press the switch up or down twice it plays the
second track, three times, it will play the third, etc.
The button in the center of the left hand switch has no
function in this mode.
CD Player Ð 6 Disc CD Changer
Pressing the top of the switch once will go to the next
track on the CD. Pressing the bottom of the switch once
will go to the beginning of the current track or to the
beginning of the previous track if it is within one second
after the current track begins to play.If you press the switch up or down twice it plays the
second track, three times, it will play the third, etc.
The button in the center of the left hand switch will cause
the CD changer to play the next available disc.
CASSETTE TAPE AND PLAYER MAINTENANCE
To keep the cassette tapes and player in good condition,
take the following precautions:
1. Do not use cassette tapes longer than C-90; otherwise,
sound quality and tape durability will be greatly dimin-
ished.
2. Keep the cassette tape in its case to protect from
slackness and dust when it is not in use.
3. Keep the cassette tape away from direct sunlight, heat
and magnetic fields such as the radio speakers.
4. Before inserting a tape, make sure that the label is
tightly secured to the cassette.
5. A loose tape should not be inserted into the radio.
118 UNDERSTANDING YOUR INSTRUMENT PANEL
Page 121 of 273

The controls are as follows:
Fan and Air Conditioning Control
Use this control to regulate the
amount of air forced through the sys-
tem in any mode you select. The 0
Setting represents OFF and the 4 Set-
ting is the greatest amount of air flow.
Air Conditioning Operation
To turn on the Air Conditioning,
choose the direction of the air through
the outlets by selecting between the
Air Conditioning Recirculation, Panel-
Air Conditioning, or Bi-Level Air Con-
ditioning modes on the Mode Control.
Air Conditioning modes are indicated
by the snowflake symbol shown above in illustration.
Adjust the Temperature and Fan Controls.Slight changes in engine speed or power may be noticed
when the air conditioning compressor is on. This is a
normal occurrence as the compressor will cycle on and
off to maintain comfort and increase fuel economy.
NOTE:If your air conditioning performance seems
lower than expected, check the front of the air condition-
ing condenser for an accumulation of dirt or insects. The
air conditioning condenser is located in front of the
radiator. Clean with a gentle water spray from behind the
radiator and through the condenser. Fabric front fascia
protectors may reduce air flow to the condenser, reducing
air conditioning performance.
Temperature Control
Use this control to regulate the tem-
perature of the air inside the passenger
compartment. The blue area of the
scale indicates cooler temperatures
while the red area indicates warmer
temperatures.
UNDERSTANDING YOUR INSTRUMENT PANEL 121
4
Page 122 of 273

Mode Control
The mode control allows you to
choose from several patterns of air
distribution.
²Recirculation Ð Air Conditioning
Recirculated interior air is cooled and sent
through the instrument panel vents. Upon
initial start up of the vehicle in very hot or
humid weather, open windows and put in
outside air modes to flush hot/humid air out. Then
turn on the Recirculation mode to cool the vehicle
interior rapidly. The Recirculation mode can also be
used to temporarily block out any outside odors,
smoke, or dust.
NOTE:
Continuous use of the Recirculation mode may
make the inside air stuffy and under mild, humid condi-
tions cause windows to fog. Use of this mode for longer
than 15 minutes is not recommended.
²Panel Ð Air Conditioning
Outside air flows through the air condition-
ing system and then through the outlets
located in the instrument panel.
²
Bi-Level Ð Air Conditioning
Outside air flows through the air condition-
ing system and then through the outlets
located in both the instrument panel and floor
outlets.
²
Panel
Air is directed through the outlets in the instru-
ment panel. These outlets can be adjusted to
direct air flow.
²
Bi-Level
Air is directed through the instrument panel
and floor outlets.
NOTE:
There is a difference in temperature between the
upper and lower outlets for added comfort. The warmer
air goes to the floor outlets. This feature gives improved
comfort during sunny but cool conditions.
122 UNDERSTANDING YOUR INSTRUMENT PANEL
Page 123 of 273

²Floor
Air is directed through the floor outlets with a
lesser amount through the defrost and side
window demist outlets.
²
Mix
Air is directed through the floor, defrost and
side window demist outlets. This setting
works best in cold or snowy conditions that
require extra heat at the windshield. This setting is
good for maintaining comfort while reducing mois-
ture on the windshield.
²
Defrost
Air is directed through the windshield and
side window demist outlets. Use this mode
with maximum fan and temperature settings for
best windshield and side window defrosting.
NOTE:
The air conditioning compressor operates in
both Mix and Defrost modes even if the Air Conditioning
is not selected. This dehumidifies the air to help dry the
windshield.
Rear Seat Outlets
These outlets are located under the front seats and direct
warm air to the rear seat passengers. Air is directed
through these outlets when you select either the Floor,
Bi-Level, or Mix modes.
Rear Window Defroster
The Rear Window Defroster button is located to
the right of the Mode Control. Press this button
once to turn on the Rear Window Defrost and a second
time to turn them off. A light above the button shows that
the defroster is on.
NOTE:The defroster turns off automatically after 15
minutes of operation. Each later activation will allow 10
minutes of operation.
Side Window Demisters
A side window demister outlet is at each end of the
instrument panel. These non-adjustable outlets direct air
toward the side windows when the system is in either the
FLOOR, MIX, or DEFROST modes. A small amount of air
is directed to the side window demisters in BI-LEVEL
mode as well. The air is directed at the area of the
windows through which you view the outside mirrors.
UNDERSTANDING YOUR INSTRUMENT PANEL 123
4
Page 124 of 273

Windshield and Side Window Fogging
Interior fogging on the windshield can be quickly
removed by using the defrost position on the mode
control.
Your side windows may fog on the inside in mild
rainy or humid weather. To clear the windows,
select the Panel-Air Conditioning mode on the
Mode Control. Point the panel outlets toward the side
windows.
NOTE:Do not use the recirculation mode as it will not
clear windows under these conditions.
Summer Operation
Air conditioned vehicles must be protected with a high-
quality antifreeze coolant to provide proper corrosion
protection and to raise the boiling point of the coolant for
protection against overheating. A 50 % concentration is
recommended.
Winter Operation
The blower air will heat faster in cold weather if you use
only the low blower speeds for the first 10 minutes of
operation. During engine warm up in cold weather, use
the Defrost mode to direct any cold air away from vehicle
occupants. Use of the Recirculate-Air Conditioning Mode
during winter months is not recommended due to the
possibility of window fogging.
NOTE:See Operating Tips chart (for Manual A/C
Control) at the end of this section for suggested control
settings in different weather conditions.
124 UNDERSTANDING YOUR INSTRUMENT PANEL
Page 127 of 273

STARTING AND OPERATING
CONTENTS
mStarting Procedures....................130
NAutomatic Transaxle...................130
NManual Transaxle.....................130
NNormal Starting......................130
NExtreme Cold Weather
(Below -20ÉF Or -29ÉC).................131
NIf Engine Fails To Start.................132
NAfter Starting........................132
mBattery And Engine Block Heaters Ð If
Equipped
............................132
mAutomatic Transaxle....................133
NBrake/Transmission Interlock.............133NAutomatic Transaxle Ignition Interlock
System.............................134
NFour Speed Automatic Transaxle..........135
NReset Mode.........................135
NGear Ranges For Four Speed Automatic
Transaxle...........................135
mManual Transaxle......................137
NRecommended Shift Speeds..............138
NDownshifting........................138
NCruise Control.......................138
mParking Brake.........................139
mBrake System.........................140
5
Page 135 of 273

Four Speed Automatic Transaxle
The electronically controlled transaxle provides a precise
shift schedule. The transaxle electronics are self calibrat-
ing; therefore, the first few shifts on a new vehicle may be
somewhat abrupt. This is a normal condition, and preci-
sion shifts will develop within a few shift cycles.
Reset Mode
The transaxle is monitored electronically for abnormal
conditions. If a condition is detected that could cause
damage, the transaxle shifts automatically into second
gear. The transaxle remains in second gear despite the
forward gear selected. Park (P), Reverse (R), and Neutral
(N) will continue to operate. This Reset feature allows the
vehicle to be driven to a dealer for service without
damaging the transaxle.
In the event that the problem has been momentary, the
transaxle can be reset to regain all forward gears.
Stop the vehicle and shift into Park (P).
Turn the Key to LOCK then restart the engine.
Shift into D and resume driving.
NOTE:Even if the transaxle can be reset, it is recom-
mended that you visit a dealer at your earliest possible
convenience. Your dealer has diagnostic equipment to
determine if the problem could recur.
If the transaxle cannot be reset, dealer service is required.
Gear Ranges For Four Speed Automatic
Transaxle
DO NOT race the engine when shifting from PARK or
NEUTRAL positions into another gear range.
NOTE:If the key is in the RUN position, you must
press the brake pedal to shift out of the ªPº Park position.
ªPº Park
Supplements parking by locking the transaxle. Engine
can be started in this range. Never attempt to use PARK
while vehicle is in motion.
Apply parking brake when leaving the vehicle in this
range.
STARTING AND OPERATING 135
5
Page 159 of 273

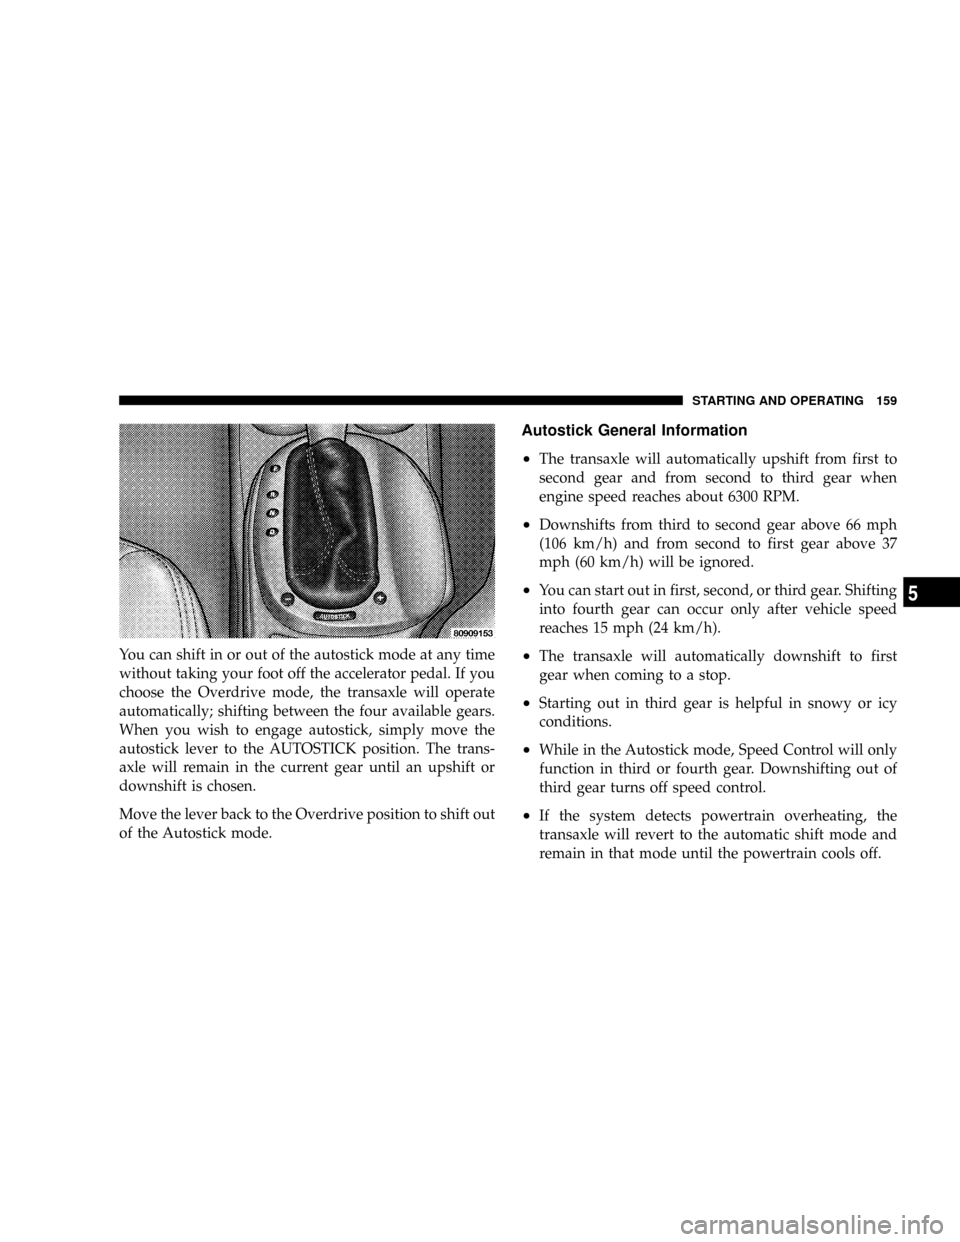
You can shift in or out of the autostick mode at any time
without taking your foot off the accelerator pedal. If you
choose the Overdrive mode, the transaxle will operate
automatically; shifting between the four available gears.
When you wish to engage autostick, simply move the
autostick lever to the AUTOSTICK position. The trans-
axle will remain in the current gear until an upshift or
downshift is chosen.
Move the lever back to the Overdrive position to shift out
of the Autostick mode.
Autostick General Information
²
The transaxle will automatically upshift from first to
second gear and from second to third gear when
engine speed reaches about 6300 RPM.
²Downshifts from third to second gear above 66 mph
(106 km/h) and from second to first gear above 37
mph (60 km/h) will be ignored.
²You can start out in first, second, or third gear. Shifting
into fourth gear can occur only after vehicle speed
reaches 15 mph (24 km/h).
²The transaxle will automatically downshift to first
gear when coming to a stop.
²Starting out in third gear is helpful in snowy or icy
conditions.
²While in the Autostick mode, Speed Control will only
function in third or fourth gear. Downshifting out of
third gear turns off speed control.
²If the system detects powertrain overheating, the
transaxle will revert to the automatic shift mode and
remain in that mode until the powertrain cools off.
STARTING AND OPERATING 159
5