instrument panel DODGE STRATUS COUPE 2004 2.G Owners Manual
[x] Cancel search | Manufacturer: DODGE, Model Year: 2004, Model line: STRATUS COUPE, Model: DODGE STRATUS COUPE 2004 2.GPages: 388, PDF Size: 2.28 MB
Page 5 of 388

WARNINGS, CAUTIONS AND NOTES
This manual containsWARNINGSagainst operating
procedures which could result in an accident or bodily
injury. It also containsCAUTIONSagainst procedures
which could result in damage to your vehicle. If you do
not read this entire manual you may miss important
information. Observe all Warnings and Cautions. Notes
are provided as helpful information.
VEHICLE IDENTIFICATION NUMBER
Vehicle Identification Number (VIN) is found on a
stamped plate located on the driver's front corner of the
instrument panel, visible through the windshield. This
number also appears on the vehicle registration or title.
WARNING!
This product contains or emits chemicals known to
the State of California to cause birth defects or other
reproductive harm.
INTRODUCTION 5
1
Page 6 of 388

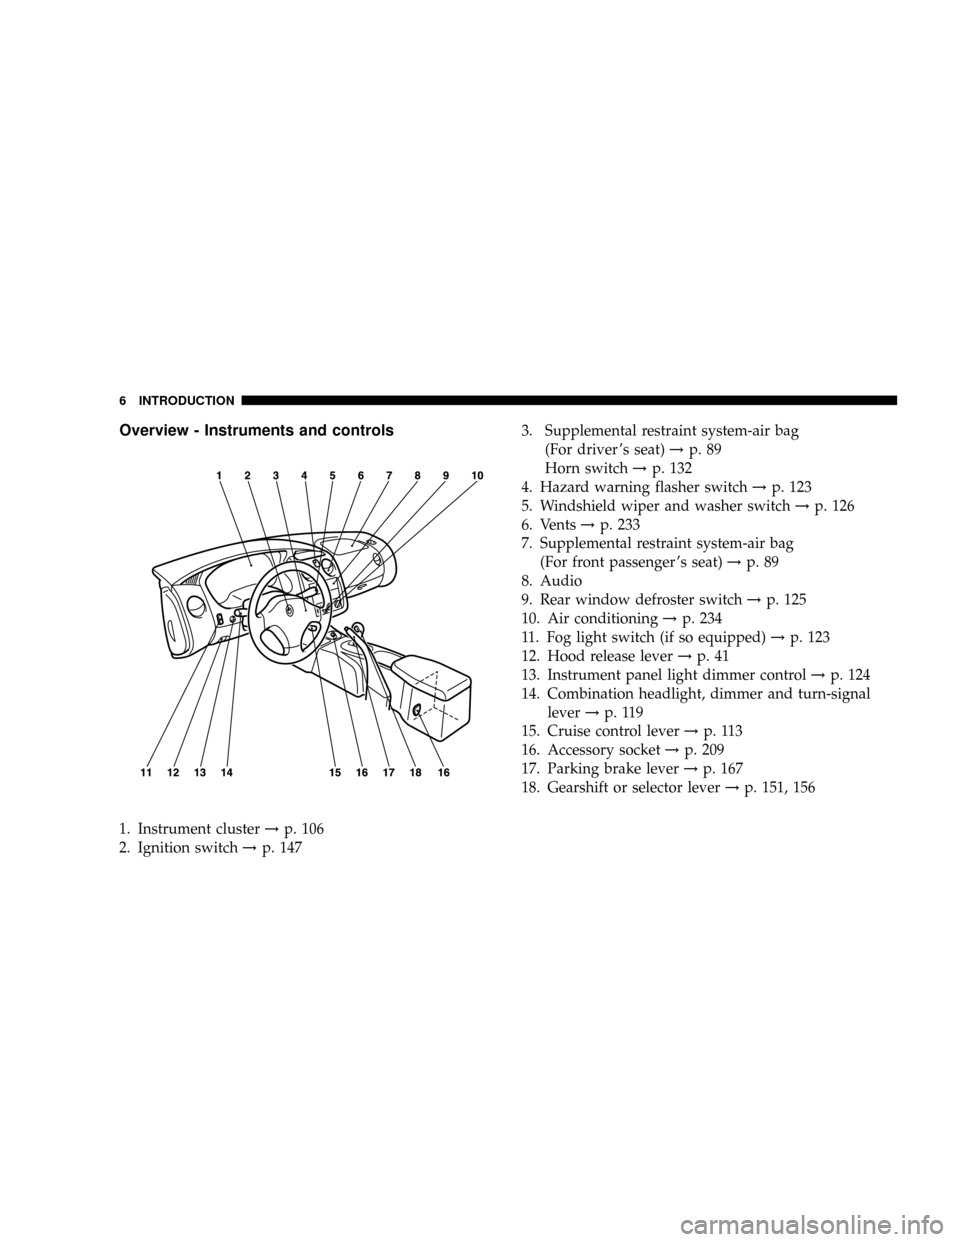
Overview - Instruments and controls
1. Instrument cluster!p. 106
2. Ignition switch!p. 1473. Supplemental restraint system-air bag
(For driver 's seat)!p. 89
Horn switch!p. 132
4. Hazard warning flasher switch!p. 123
5. Windshield wiper and washer switch!p. 126
6. Vents!p. 233
7. Supplemental restraint system-air bag
(For front passenger 's seat)!p. 89
8. Audio
9. Rear window defroster switch!p. 125
10. Air conditioning!p. 234
11. Fog light switch (if so equipped)!p. 123
12. Hood release lever!p. 41
13. Instrument panel light dimmer control!p. 124
14. Combination headlight, dimmer and turn-signal
lever!p. 119
15. Cruise control lever!p. 113
16. Accessory socket!p. 209
17. Parking brake lever!p. 167
18. Gearshift or selector lever!p. 151, 156
6 INTRODUCTION
Page 90 of 388

WARNING!
²IT IS VERY IMPORTANT TO ALWAYS WEAR
YOUR SEAT BELT PROPERLY EVEN WITH
AN AIR BAG.
²Seat belts help keep the driver and front pas-
senger properly positioned. This reduces the
risk of injury in all collisions, and reduces the
risk of serious or fatal injuries when the air bags
inflate. During sudden braking just before a
collision, an unrestrained or improperly re-
strained driver or front passenger can move
forward into direct contact with, or within close
proximity to, the air bag when it begins to
inflate. The beginning stage of air bag inflation
is the most forceful and can cause serious or
fatal injuries if the occupant comes in contact
with the air bag at this time.
²Seat belts reduce the risk of injury in rollovers,
side or rear impact collisions, and in lower-
speed frontal collisions, because the air bags are
not designed to inflate in those situations.
²Seat belts reduce the risk of being thrown from
your vehicle in a collision or rollover.
WARNING!
²IT IS VERY IMPORTANT TO BE PROPERLY
SEATED.
A driver or front passenger sitting too close to the
steering wheel or instrument panel during air bag
deployment can be killed or seriously injured
Air bags inflate very quickly and with great force. If
the driver and front passenger are not properly
seated and restrained, the air bag may not provide
proper protection, and could cause serious or fatal
injuries when it inflates.
²Before driving, adjust the driver 's seat as far back
as possible without affecting your ability to be in
complete control of the vehicle.
²Before driving, adjust the front passenger seat as
far back as possible.
²Make sure all vehicle occupants are always prop-
erly restrained using the available seat belts.
²With seat belts properly fastened, the driver and
front passenger should sit well back in their seats
and remain upright without leaning against the
window or door.
90 SEATS, SEAT BELTS, CHILD RESTRAINTS AND AIR BAGS
Page 91 of 388

WARNING!
²Do not sit on the edge of the seat or lean your head
or chest close to the steering wheel or instrument
panel. Do not put your feet or legs on or against
the instrument panel.
²Seat all infants and children 12 years of age and
under in the rear seat properly restrained using an
appropriate child restraint system.
WARNING!
²Infants and small children should never ride
unrestrained, or lean against the instrument
panel. They should never ride held in your arms
or on your lap. They could be seriously injured or
killed in a collision, especially when the air bag
inflates. Children should be properly seated in
the rear seat in an appropriate child restraint
system. Refer to ``Child Restraints'' on page 76.
G28G1570G28G1760
SEATS, SEAT BELTS, CHILD RESTRAINTS AND AIR BAGS 91
3
Page 96 of 388

WARNING!
²Do not attach anything to the steering wheel's
padded cover, such as trim material, badges, etc.
These could strike and injure an occupant if the
air bag inflates.
WARNING!
²Do not set anything on, or attach anything to, the
instrument panel above the glove compartment. Such
items could strike and injure an occupant if the air
bag inflates.
²Do not mount or locate any aftermarket equipment
on or behind the knee bolsters.
²Do not attach accessories to, or put them in front of,
the windshield. They could restrict the air bag infla-
tion, or strike and injure an occupant, when the air
bag inflates.
²Do not put packages, pets or other objects between the
air bags and either the driver or the front passenger.
This could affect air bag performance, or could cause
severe or even fatal injury when the air bag inflates.
²Right after air bag inflation, several parts of the air
bag system will be hot. Do not touch them. You could
be burned.
²The air bag system is designed to work only once.
After the air bags deploy, they will not work again.
They must promptly be replaced and the entire air
bag system inspected by an authorized dealer.
96 SEATS, SEAT BELTS, CHILD RESTRAINTS AND AIR BAGS
Page 100 of 388

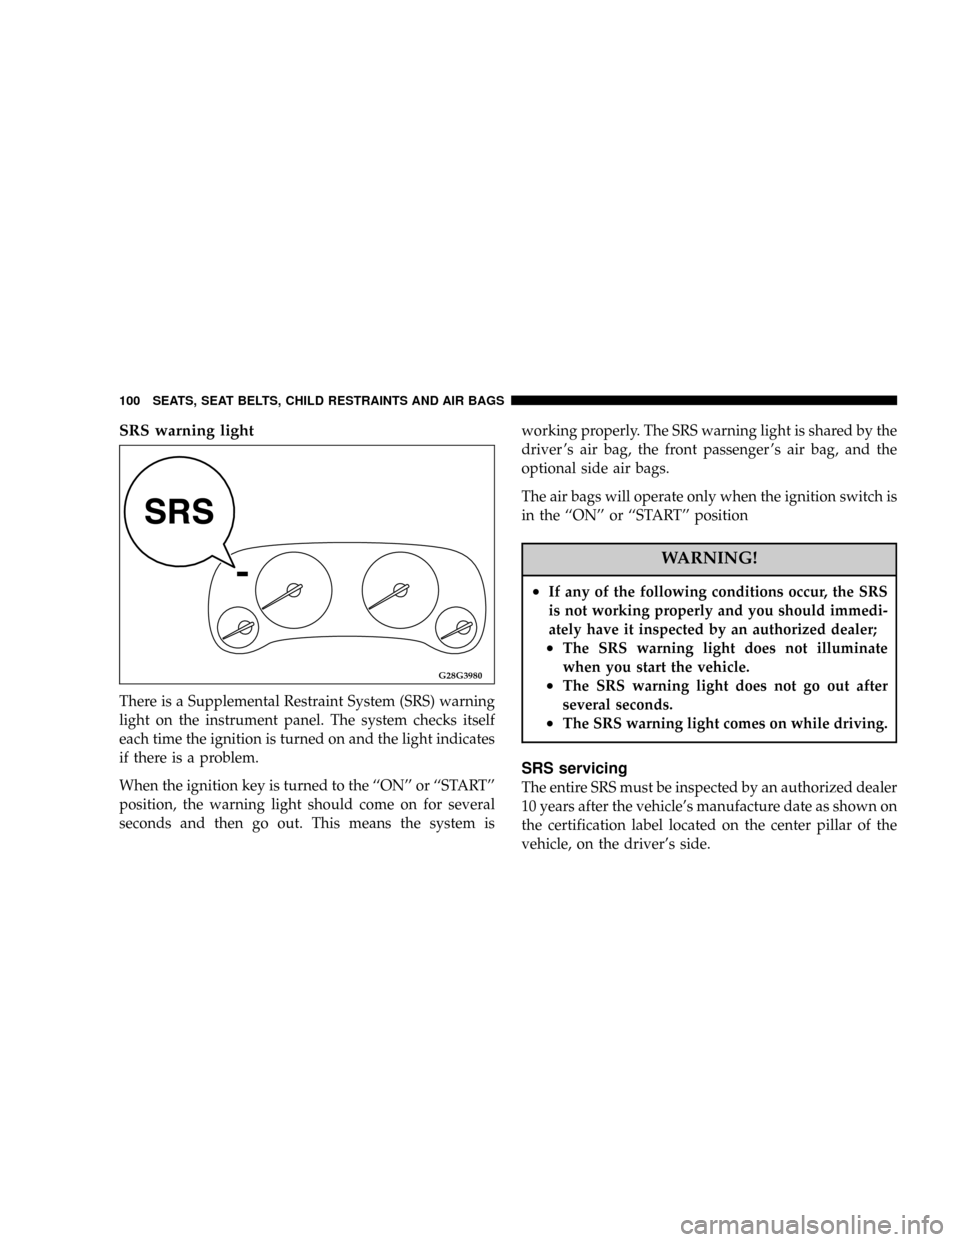
SRS warning light
There is a Supplemental Restraint System (SRS) warning
light on the instrument panel. The system checks itself
each time the ignition is turned on and the light indicates
if there is a problem.
When the ignition key is turned to the ``ON'' or ``START''
position, the warning light should come on for several
seconds and then go out. This means the system isworking properly. The SRS warning light is shared by the
driver 's air bag, the front passenger 's air bag, and the
optional side air bags.
The air bags will operate only when the ignition switch is
in the ``ON'' or ``START'' position
WARNING!
²If any of the following conditions occur, the SRS
is not working properly and you should immedi-
ately have it inspected by an authorized dealer;
²The SRS warning light does not illuminate
when you start the vehicle.
²The SRS warning light does not go out after
several seconds.
²The SRS warning light comes on while driving.
SRS servicing
The entire SRS must be inspected by an authorized dealer
10 years after the vehicle's manufacture date as shown on
the certification label located on the center pillar of the
vehicle, on the driver's side.
G28G3980
100 SEATS, SEAT BELTS, CHILD RESTRAINTS AND AIR BAGS
Page 104 of 388

NChanging the setting for warning operation . . . 118
NAutomatic transaxle indicator
(if so equipped).......................119
NTraction Control System warning light
(if so equipped).......................119
NWasher fluid level indicator..............119
mCombination headlights, dimmer and
turn signal lever
.......................120
NHeadlights..........................120
NLight auto-cutout feature
(headlights, fog lights, etc.)...............120
NWhen you want to keep the lights on
(time delay)..........................120
NHeadlight reminder chime...............121
NHeadlight flasher (high/low beam).........121
NDimmer (high/low beam change)..........122
NTurn signals..........................122
mFog light switch (if so equipped)...........123
mHazard warning flasher switch............124
mInstrument panel light dimmer control.......125
mElectric rear window defroster.............125
mWindshield wipers......................126
mIntermittent wipers.....................127
mWindshield washer.....................128
mPrecautions to observe when using wipers
and washers
..........................128
mDome light...........................129
mLights (dome lights, etc.) auto-cutout
function
.............................130
mReading lights.........................131
mRear personal lights.....................132
mHorn switch..........................132
mGarage door opener (if so equipped)........132
NTraining the Universal Transceiver..........133
104 INSTRUMENTS AND CONTROLS
Page 120 of 388

COMBINATION HEADLIGHTS, DIMMER AND
TURN SIGNAL LEVER
Headlights
Rotate the switch to operate the lights.
OFF - All lights off
- Parking, tail, front and rear side marker, license
plate and instrument panel lights on
- Headlights and other lights on
NOTE: Do not leave the headlights and other lamps on
for a long time while the engine is not running. A
discharged battery could result.
Light auto-cutout feature (headlights, fog lights,
etc.)
1. This feature will help prevent a discharged battery. If
the headlamps are left on ª
ºorªº when leaving
the vehicle (ignition key removed, in ªACCº or ªLOCKº
position), the lights will stay on for approximately 10
minutes and then turn off.
2. If the light switch is turned to ON ª
ºorªº
again, the light auto-cutout will not function and the
headlamps will stay on.
When you want to keep the lights on (time delay):
The lights can be made to stay on for about 60 seconds
after the driver leaves the vehicle. This feature provides
the safety of headlight illumination when leaving your
vehicle in an unlighted area.E11A0320
120 INSTRUMENTS AND CONTROLS
Page 125 of 388

INSTRUMENT PANEL LIGHT DIMMER CONTROL
The brightness of the instrument panel lights can be
adjusted by turning this knob while the light switch is in
the ON ª
º orªº position.
ELECTRIC REAR WINDOW DEFROSTER
The electric rear window defogger can be operated when
the ignition key is in the ªONº position.
When the switch is pressed, an indicator in the switch
(amber) will illuminate to indicate the electric rear win-
dow defogger is on, and electric current will flow
through the heating wire on the rear window to clear
away fog or frost.
E15A0380
DimBright
E17A0450
Indicator
INSTRUMENTS AND CONTROLS 125
4
Page 161 of 388

WARNING!
Always depress the brake pedal when shifting the
selector lever into a gear from the ªNº (NEUTRAL)
position. When beginning to drive, do not shift the
selector lever from the ªNº (NEUTRAL) position
while depressing the accelerator pedal; doing so may
cause the vehicle to ªjumpº forward or backward.
CAUTION!
If the button is always depressed to operate the
selector lever, the lever may be accidentally shifted
into the ªPº, ªRº position. Be sure not to depress the
button when performing the operations indicated by
in the illustration.
NOTE:
If the brake pedal is not depressed and held, the
shift-lock device activates to prevent the selector lever
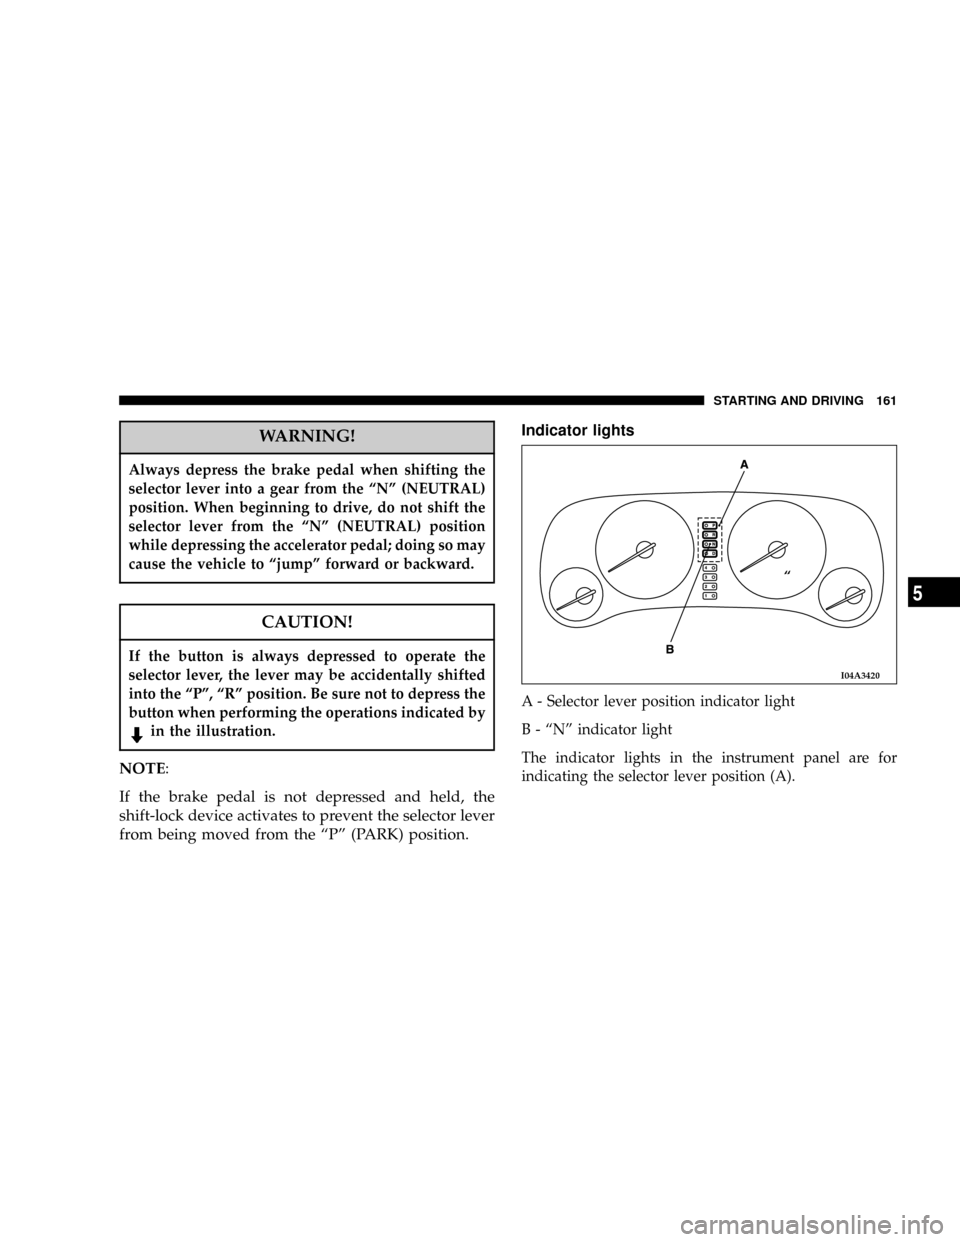
from being moved from the ªPº (PARK) position.Indicator lights
A - Selector lever position indicator light
B - ªNº indicator light
The indicator lights in the instrument panel are for
indicating the selector lever position (A).
I04A3420
ª
STARTING AND DRIVING 161
5