warning lights DODGE STRATUS COUPE 2005 2.G Owners Manual
[x] Cancel search | Manufacturer: DODGE, Model Year: 2005, Model line: STRATUS COUPE, Model: DODGE STRATUS COUPE 2005 2.GPages: 396
Page 10 of 396

QUICK INDEX
If this warning light comes on¼
NOTE:These warning lights will illuminate for a few seconds for a bulb check when the ignition key is first turned on.
Warning light Do this Ref. page
´Park the vehicle in a safe place and turn off the engine.
Test the system as described on page 115.
´If the light does not go out after the test, or if it illumi-
nates again, have your vehicle inspected at an autho-
rized dealer.
´When this light comes on, the anti-lock braking system is
not functioning and only the ordinary braking system is
functioning.P. 1 1 5
Anti-lock braking system
´If this light comes on while driving, check to see that the
parking brake is fully released.
´If this light stays on after releasing the parking brake,
stop and check the brake fluid level is correct.
´If the brake fluid level is correct, call an authorized
dealer for assistance.P. 1 1 9
Brake warning light
´If this light comes on while driving, park your vehicle in
a safe place and stop the engine immediately.
Call an authorized dealer for assistance.P. 1 1 6
Oil pressure warning light
10 INTRODUCTION
Page 105 of 396

INSTRUMENTS AND CONTROLS
CONTENTS
mInstrument cluster......................108
NMeter cluster.........................108
NIndicator and warning light package........109
NSpeedometer.........................110
NTachometer..........................110
NFuel gauge..........................111
NOdometer/Trip odometer................112
NEngine coolant temperature gauge..........113
NTurn signal indicators/hazard warning lights . . 114
NHigh beam indicator...................114
NTheft-alarm indicator...................114
NDoor-ajar warning light and chime.........114NAnti-lock braking system warning light
(if so equipped).......................115
NCruise/speed control indicator............115
NLow-fuel warning light and chime..........115
NFront fog light indicator (if so equipped).....116
NCharging system warning light............116
NOil pressure warning light...............116
NMalfunction indicator light
(SERVICE ENGINE SOON)...............117
NSupplemental Restraint System (SRS)-air bag
warning light.........................118
NBrake warning light....................119
NSeat belt reminder/warning light...........120
4
Page 106 of 396

NChanging the setting for warning operation . . . 120
NAutomatic transaxle indicator
(if so equipped).......................121
NTraction Control System warning light
(if so equipped).......................121
NWasher fluid level indicator..............121
mCombination headlights, dimmer and
turn signal lever
.......................122
NHeadlights..........................122
NLight auto-cutout feature
(headlights, fog lights, etc.)...............122
NWhen you want to keep the lights on
(time delay)..........................122
NHeadlight reminder chime...............123
NHeadlight flasher (high/low beam).........123
NDimmer (high/low beam change)..........124
NTurn signals..........................124
mFog light switch (if so equipped)...........125
mHazard warning flasher switch............126
mInstrument panel light dimmer control.......127
mElectric rear window defroster.............127
mWindshield wipers......................128
mIntermittent wipers.....................129
mWindshield washer.....................130
mPrecautions to observe when using wipers
and washers
..........................130
mDome light...........................131
mLights (dome lights, etc.) auto-cutout
function
.............................132
mReading lights.........................133
mRear personal lights.....................134
mHorn switch..........................134
mGarage door opener (if so equipped)........134
NTraining the Universal Transceiver..........135
106 INSTRUMENTS AND CONTROLS
Page 114 of 396

CAUTION!
While driving, care should always be taken to main-
tain normal engine operating temperature. If the
indicator enters the ªHº (hot) position while driving,
the engine is overheating. (Refer to ªEngine over-
heatingº on page 279.)
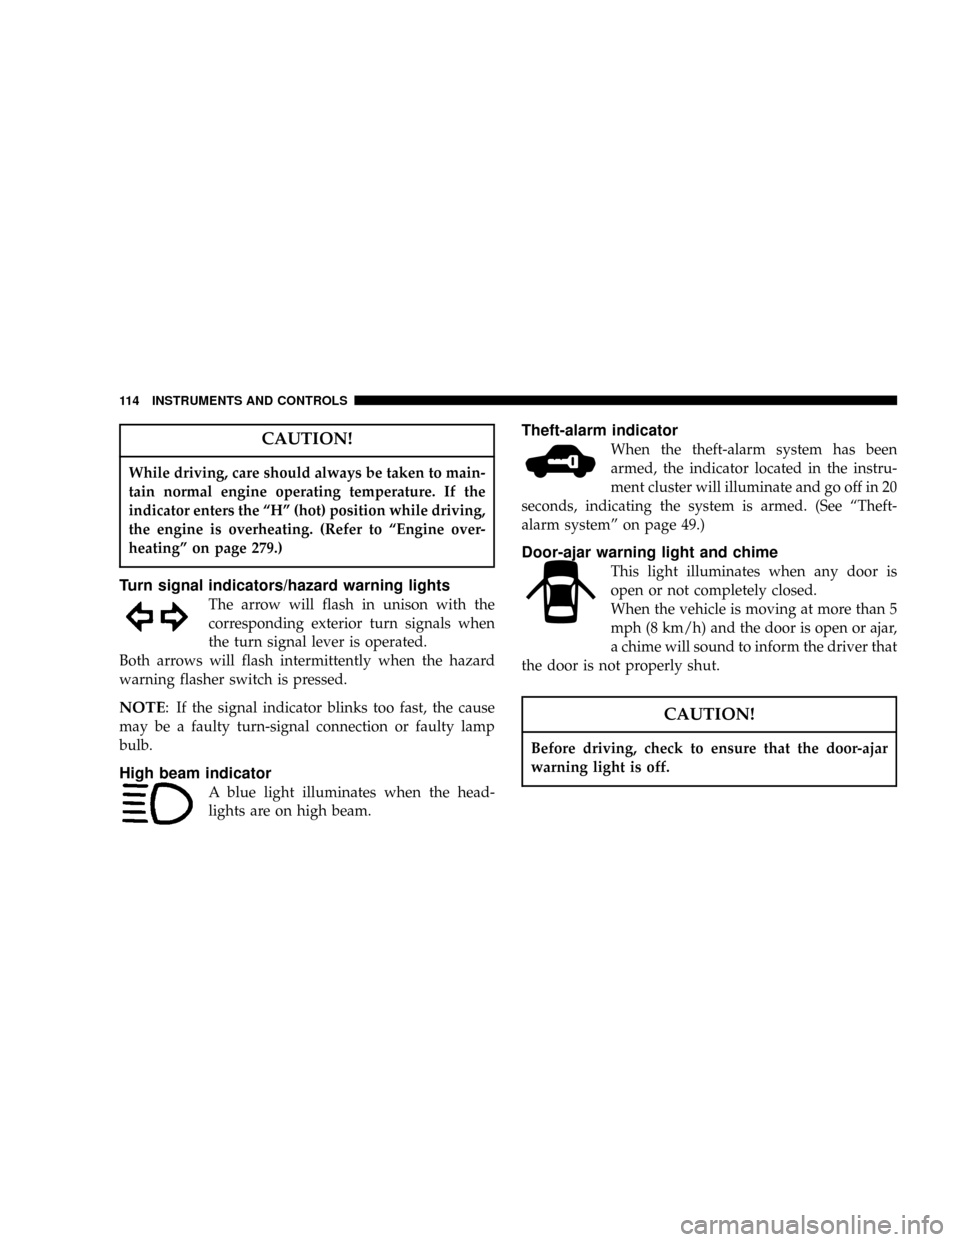
Turn signal indicators/hazard warning lights
The arrow will flash in unison with the
corresponding exterior turn signals when
the turn signal lever is operated.
Both arrows will flash intermittently when the hazard
warning flasher switch is pressed.
NOTE: If the signal indicator blinks too fast, the cause
may be a faulty turn-signal connection or faulty lamp
bulb.
High beam indicator
A blue light illuminates when the head-
lights are on high beam.
Theft-alarm indicator
When the theft-alarm system has been
armed, the indicator located in the instru-
ment cluster will illuminate and go off in 20
seconds, indicating the system is armed. (See ªTheft-
alarm systemº on page 49.)
Door-ajar warning light and chime
This light illuminates when any door is
open or not completely closed.
When the vehicle is moving at more than 5
mph (8 km/h) and the door is open or ajar,
a chime will sound to inform the driver that
the door is not properly shut.
CAUTION!
Before driving, check to ensure that the door-ajar
warning light is off.
114 INSTRUMENTS AND CONTROLS
Page 116 of 396

CAUTION!
Do not drive with an extremely low fuel level;
running out of fuel could cause damage to the
catalytic converter.
Front fog light indicator (if so equipped)
This indicator illuminates while the fog
lights are on.
NOTE:Fog lights will not be operational when high
beam (headlights) are selected.
Charging system warning light
This light illuminates in the event of a
malfunction in the charging system.
This light illuminates when the ignition key
is turned to the ªONº position (engine off). When the
engine is started, the light should go off. Always be sure
that the light goes out before beginning to drive.
CAUTION!
If the charging light remains on after the engine has
started, the battery charging system may be malfunc-
tioning. In this case, take your vehicle to an autho-
rized dealer and have the system checked.
Oil pressure warning light
This light illuminates when the engine oil
pressure is below normal. If the light stays
on while driving, stop the engine as soon as possible and
do not drive until the cause of the low oil pressure is
corrected.
116 INSTRUMENTS AND CONTROLS
Page 126 of 396

NOTE
1. If the headlights are switched to high beam, the fog
lights will go out; they will illuminate again when the
headlights are switched back to low beam.
2. If the light switch is rotated to OFF while the fog lights
are illuminated, they will automatically turn off. They
can be turned back on again by moving the light switch
back to ON and pressing the fog light switch again.
HAZARD WARNING FLASHER SWITCH
Press the flasher switch and the front and rear turn
signals will flash intermittently, as the hazard warning
lights. This is an emergency warning system and is not
intended for use when the vehicle is in motion.
If it is necessary to leave the vehicle, the flasher system
will continue to operate with the ignition key removed.
NOTE: If the lights are kept flashing for several hours,
the battery will be discharged (rundown), resulting in
hard engine starting or a no start condition.
E16A0520
126 INSTRUMENTS AND CONTROLS
Page 154 of 396

WARNING!
Never run the engine in a closed or poorly ventilated
area any longer than is needed to move your vehicle
in or out of the area. Carbon monoxide gas, which is
odorless, colorless and extremely poisonous, could
build up, and cause serious injury or death.
CAUTION!
²Do not start the vehicle by pushing or pulling.
²Do not run the engine at high rpm or drive the
vehicle at high speed until the engine has had a
chance to warm up.
²Release the ignition key as soon as the engine
starts to avoid damaging the starter motor.
This vehicle is equipped with an electronically controlled
fuel injection system that automatically controls fuel
quantity. When starting the engine, there is normally no
need to depress the accelerator pedal.
Normal conditions
The starting procedure is as follows:
1. Insert the ignition key and make sure all occupants are
properly seated with seat belts fastened.
2. Depress and hold the brake pedal down with your
right foot.
3. Set the gearshift selector lever (manual transaxle) in
the ªNº (NEUTRAL) position, or the selector lever (au-
tomatic transaxle) in the ªPº (PARK) position.
4. Fully depress the clutch pedal (manual transaxle).
NOTE: For models equipped with a manual trans-
axle, the starter will not operate unless the clutch
pedal is fully depressed (Clutch interlock).
5. After turning the ignition key to the ªONº position,
make certain that all warning lights are functioning
properly before starting the engine.
6. Turn the ignition key to the ªSTARTº position without
depressing the accelerator pedal, and release the key
when the engine starts.
154 STARTING AND DRIVING
Page 163 of 396

WARNING!
Always depress the brake pedal when shifting the
selector lever into a gear from the ªNº (NEUTRAL)
position. When beginning to drive, do not shift the
selector lever from the ªNº (NEUTRAL) position
while depressing the accelerator pedal; doing so may
cause the vehicle to ªjumpº forward or backward.
CAUTION!
If the button is always depressed to operate the
selector lever, the lever may be accidentally shifted
into the ªPº, ªRº position. Be sure not to depress the
button when performing the operations indicated by
in the illustration.
NOTE:
If the brake pedal is not depressed and held, the
shift-lock device activates to prevent the selector lever
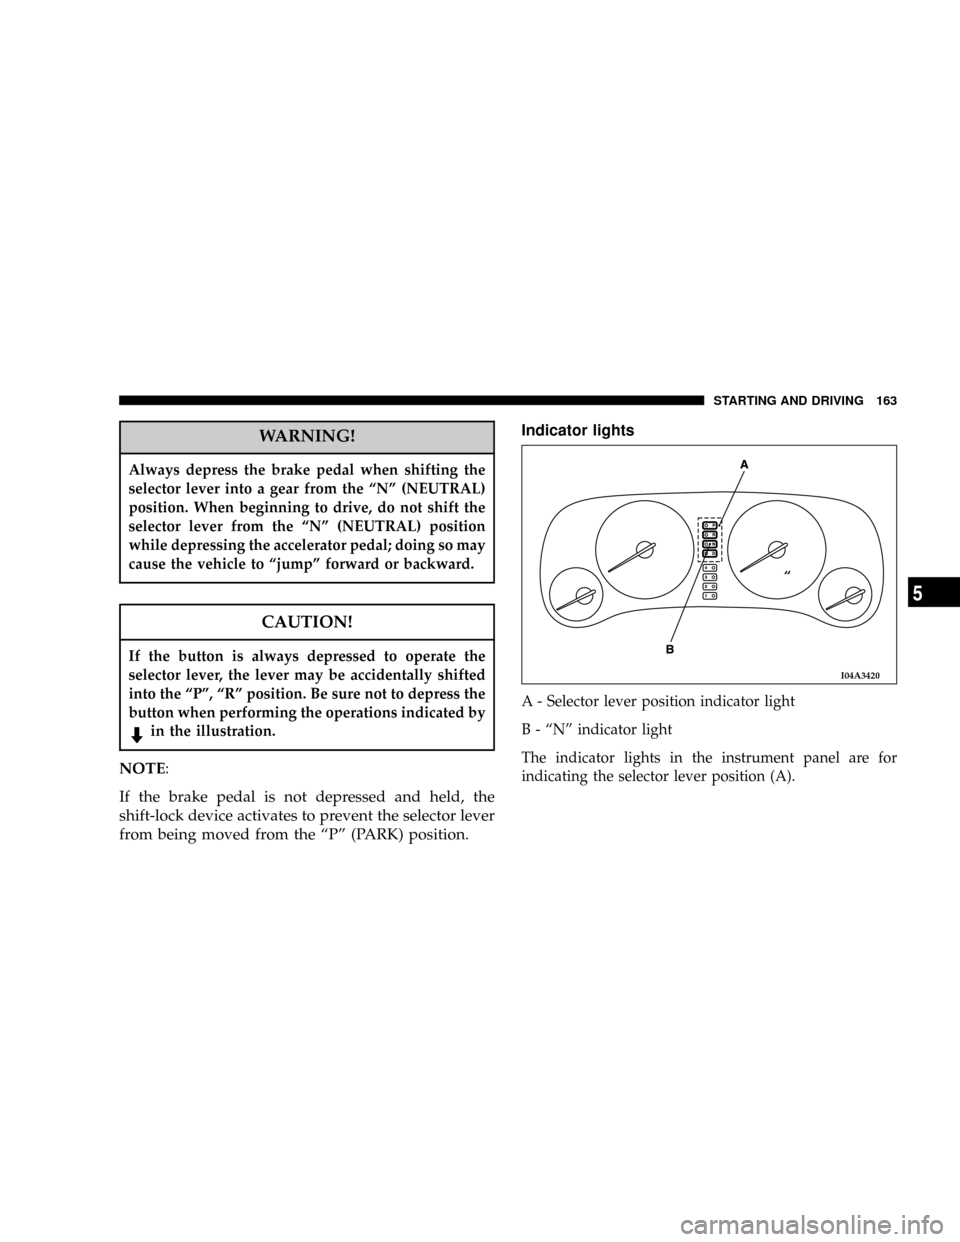
from being moved from the ªPº (PARK) position.Indicator lights
A - Selector lever position indicator light
B - ªNº indicator light
The indicator lights in the instrument panel are for
indicating the selector lever position (A).
I04A3420
ª
STARTING AND DRIVING 163
5
Page 179 of 396

INSIDE DAY/NIGHT REARVIEW MIRRORS
WARNING!
²Do not attempt to adjust the rearview mirrors
while driving. This can be dangerous.
²Your passenger's side mirror is convex. The ob-
jects you see in the mirror will look smaller and
farther away than they actually are. Do not use
this mirror to estimate the distance of following
vehicles when changing lanes.
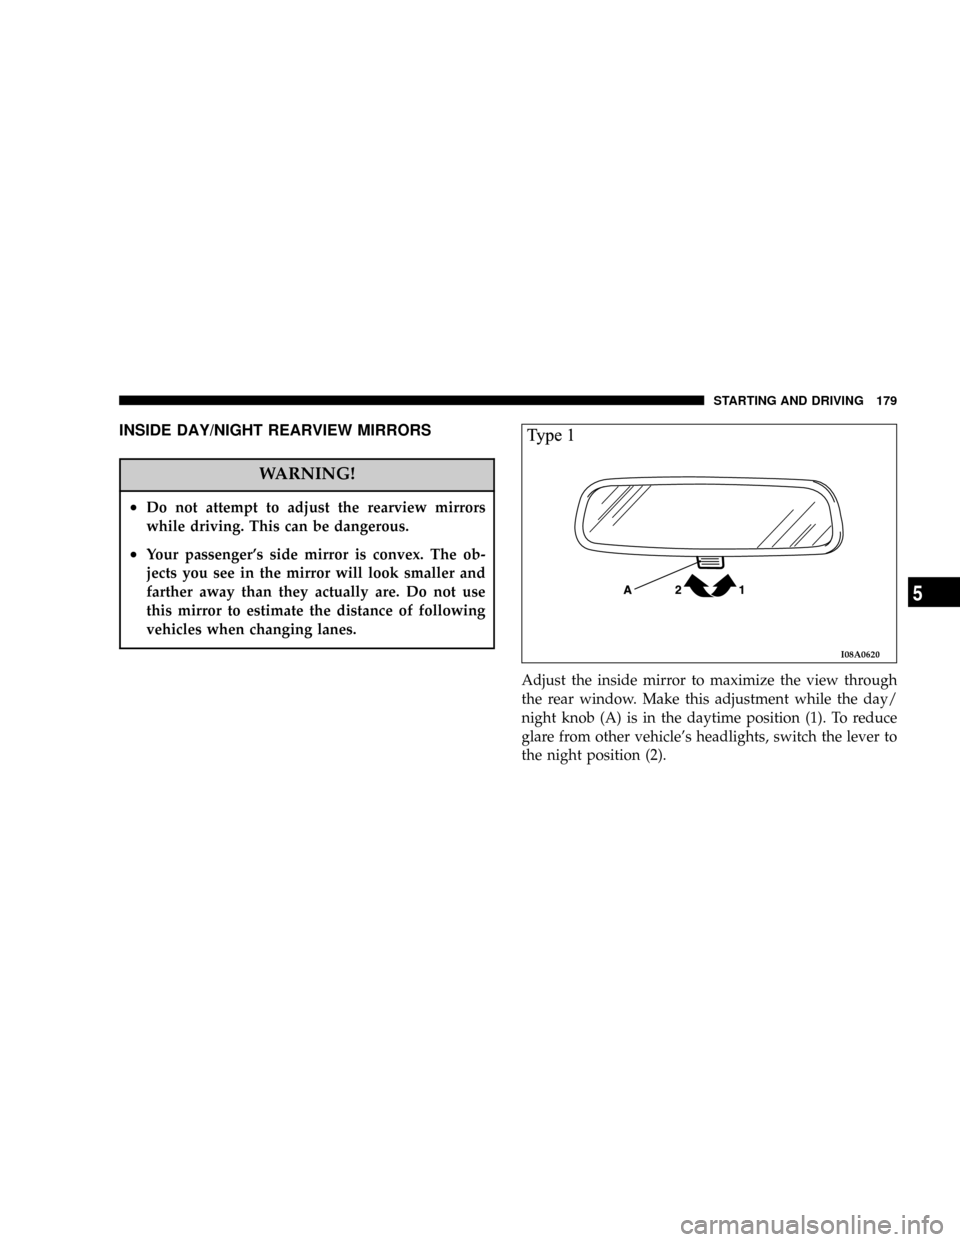
Adjust the inside mirror to maximize the view through
the rear window. Make this adjustment while the day/
night knob (A) is in the daytime position (1). To reduce
glare from other vehicle's headlights, switch the lever to
the night position (2).
I08A0620
STARTING AND DRIVING 179
5
Page 202 of 396

Check wheel nuts for tightness and tires (including spare
tire) for proper pressure. Maintain specified tire inflation
pressures. Replace tires before they are excessively worn.
Lights
Have someone observe the operation of all exterior lights
while you activate the controls. Check the turn signals
and highbeam indicators on the instrument panel.
Fluid leaks
Check the area under the vehicle after overnight parking
for fuel, water, oil, or other fluid leaks. Make sure all fluid
levels are at the proper levels. Also, if fuel leaks are
detected, the cause should be located and corrected
immediately.
Driver
Do not drive if you are tired or sleepy. Do not drive if you
have been drinking or taking drugs. Unless you are alert
and able to concentrate on your driving, you could have
an accident, resulting in serious or fatal injury to yourself
and others.
SAFE DRIVING TECHNIQUES
Even this vehicle's safety equipment, and your safest
driving, cannot guarantee that you can avoid accident or
injury. However, we recommend that you give extra
attention to the following, to help maximize the safety of
you and your passengers:
1. Drive defensively. Be aware of traffic, road and
weather conditions. Leave adequate stopping distance
for your vehicle.
2. Before changing lanes, check your mirrors and flash
the proper turn-signal light.
3. While driving, watch the behavior of other drivers,
bicyclists and pedestrians.
4. During an emergency stop, switch on the hazard
warning flasher.
5. When leaving the vehicle, set the parking brake and
place the gearshift lever into low gear.
In vehicles with an automatic transaxle, place the selector
lever in the ªPº (PARK) position. Remove the key.
202 STARTING AND DRIVING