ECU DODGE STRATUS SEDAN 2004 Owners Manual
[x] Cancel search | Manufacturer: DODGE, Model Year: 2004, Model line: STRATUS SEDAN, Model: DODGE STRATUS SEDAN 2004Pages: 273, PDF Size: 4.79 MB
Page 10 of 273
NPanic Alarm..........................21
NTo Use The Panic Alarm.................21
NTo Program Additional Transmitters.........21
NGeneral Information....................21
NTransmitter Battery Service...............22
mVehicle Theft Alarm.....................22
NTamper Alert.........................23
NSecurity System Manual Override...........23
mTrunk Lock And Release..................23
mTrunk Safety Warning....................24
NTrunk Internal Emergency Release..........24
mPower Windows........................25
NWind Buffeting........................25
mOccupant Restraints.....................25NLap/Shoulder Belts.....................26
NPretensioners.........................30
NEnhanced Driver Seat Belt Reminder System
(BeltAlert)...........................31
NSeat Belts And Pregnant Women............32
NSeat Belt Extender......................32
NDriver And Right Front Passenger Supplemental
Restraint System (SRS) - Airbag............33
mEngine Break-In Recommendations..........48
mSafety Tips............................49
NExhaust Gas..........................49
NSafety Checks You Should Make Inside The
Vehicle..............................49
NPeriodic Safety Checks You Should Make
Outside The Vehicle....................50
10 THINGS TO KNOW BEFORE STARTING YOUR VEHICLE
Page 13 of 273
SENTRY KEY Ð IF EQUIPPED
With this system, an electronically coded ignition key
sends a signal to the vehicle electronics. If the electronics
recognizes the signal, the vehicle will start and continue
to run. If the system does not recognize the signal the
vehicle will start and run for 2 seconds then shut off. The
system will allow the engine to be started and run (for 2
seconds) up to six times after which the starter motor will
be disabled and the engine will not crank.
NOTE:
²
The Sentry Key Immobilizer System is not compatible
with remote starting systems. Use of these systems
may result in vehicle starting problems and loss of
security protection.
²Additional Sentry Keys or Mobil Speed PassŸ devices
held too close to the ignition key when starting the
vehicle may cause problems when attempting to startthe vehicle. These devices cannot damage the Sentry
Key System, but can cause a momentary problem
when attempting to start the engine. If a problem
occurs, remove the Sentry Key from the key ring and
restart the vehicle. Pagers, cell phones, walkmans, etc.,
have no effect on this system.
The Theft Alarm Light, located on the instrument cluster
to the right of the fuel gauge, will illuminate for about 3
seconds when the ignition switch is first turned to the On
position. If the vehicle electronics do not receive a valid
signal from the ignition key, the theft alarm light will
flash continuously to signal that the vehicle has been
immobilized. If the Theft Alarm Light remains On during
vehicle operation, it indicates a fault in the system
electronics.
All of the keys provided with your new vehicle have
been programmed to the vehicle electronics.
THINGS TO KNOW BEFORE STARTING YOUR VEHICLE 13
2
Page 15 of 273
General Information
The Sentry Key system complies with FCC rules part 15.
Operation is subject to the following two conditions:
1. this device may not cause harmful interference
2. this device must accept any interference that may be
received, including interference that may cause undes-
ired operation
ILLUMINATED ENTRY SYSTEM
The interior lights will come on when you open any door,
unlock the vehicle with the remote keyless entry (if so
equipped) or central unlock (if so equipped). They will
remain on for about 30 seconds after all doors are closed
then fade to off.
The lights also will turn off if you turn on the ignition
after you close all doors.
DOOR LOCKS
WARNING!
For personal security and safety in the event of an
accident, lock the vehicle doors as you drive and
when you park and leave the vehicle.
WARNING!
When leaving the vehicle always remove the key
from the ignition lock, and lock your vehicle. Do not
leave children unattended in the vehicle, or with
access to an unlocked vehicle. Unsupervised use of
vehicle equipment may cause severe personal inju-
ries and death.
THINGS TO KNOW BEFORE STARTING YOUR VEHICLE 15
2
Page 23 of 273
2. Lock the door using either the power door lock switch,
the key, or the Keyless Entry Transmitter and close all
doors.
3. The light in the instrument cluster will flash rapidly
for 15 seconds. This shows that the system is arming. If
the light comes on but does not flash, the system is still
armed, but there is a problem in the trunk circuit. After 15
seconds the light will continue to flash slowly. This
shows that the system is fully armed.
To disarm the system:
Unlock a front door using either the key or the Keyless
Entry Transmitter.
Tamper Alert
If the horn sounds 3 times when you unlock a front door
using either a key or the Keyless Entry Transmitter, the
alarm had been triggered. Check the vehicle for tamper-
ing.
Security System Manual Override
The system will not arm if you lock the doors using the
manual lock control.
TRUNK LOCK AND RELEASE
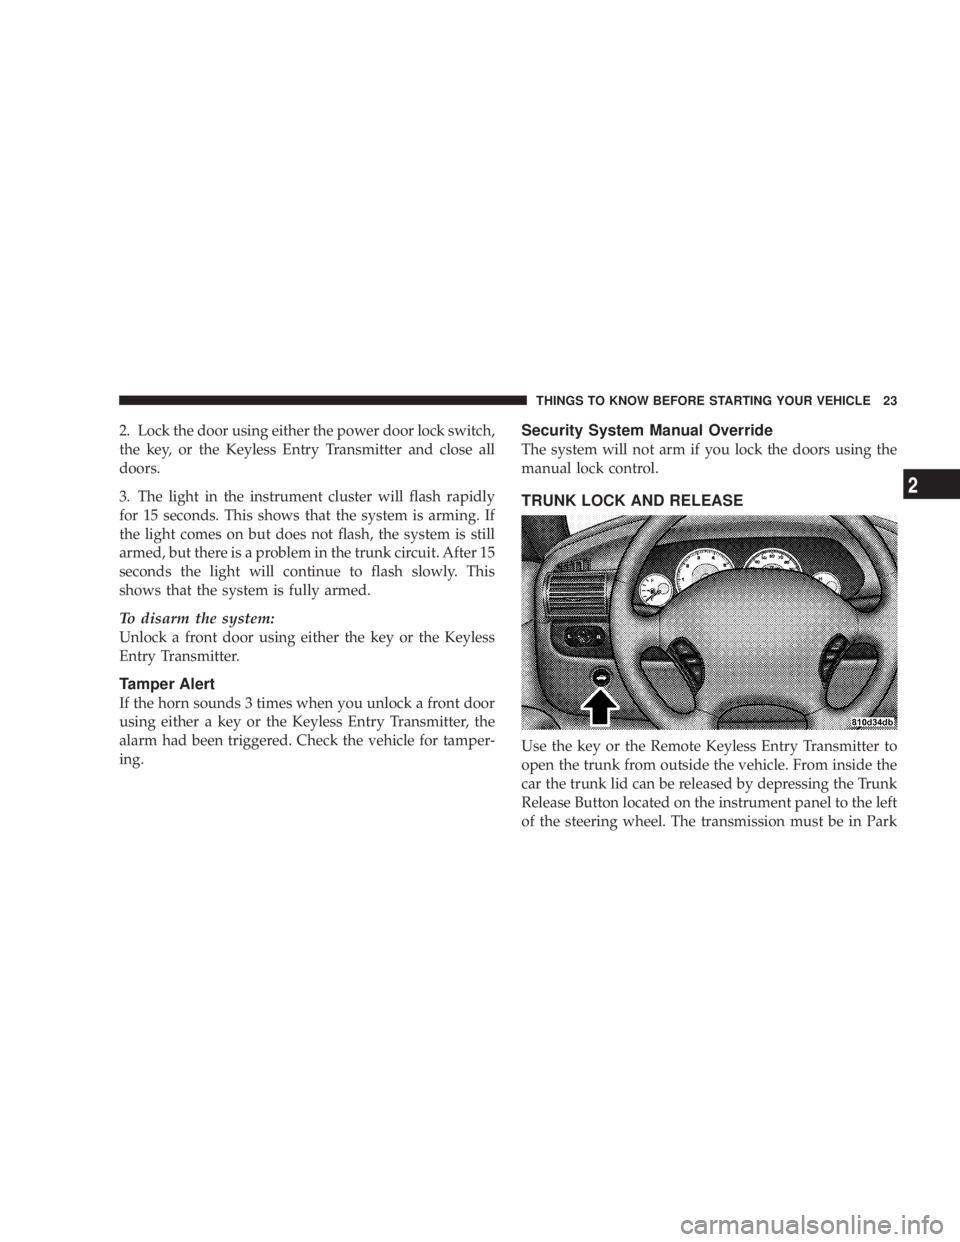
Use the key or the Remote Keyless Entry Transmitter to
open the trunk from outside the vehicle. From inside the
car the trunk lid can be released by depressing the Trunk
Release Button located on the instrument panel to the left
of the steering wheel. The transmission must be in Park
THINGS TO KNOW BEFORE STARTING YOUR VEHICLE 23
2
Page 24 of 273
before the switch will operate. Vehicles with manual
transmissions must be at zero mph for the switch to
work.
With the ignition ON, the word ªdeckº will be displayed
in place of the odometer display indicating that the trunk
is open. The odometer display will reappear once the
trunk is closed or if the trip button is depressed.
With the key in lock position or key out, the ªdeckº will
be displayed until the trunk is closed.
TRUNK SAFETY WARNING
WARNING!
Do not allow children to have access to the trunk,
either by climbing into the trunk from outside, or
through the inside of the vehicle. Always close the
trunk lid when your vehicle is unattended. Once in
the trunk, young children may not be able to escape,
even if they entered through the rear seat. If trapped
in the trunk, children can die from suffocation or
heat stroke.
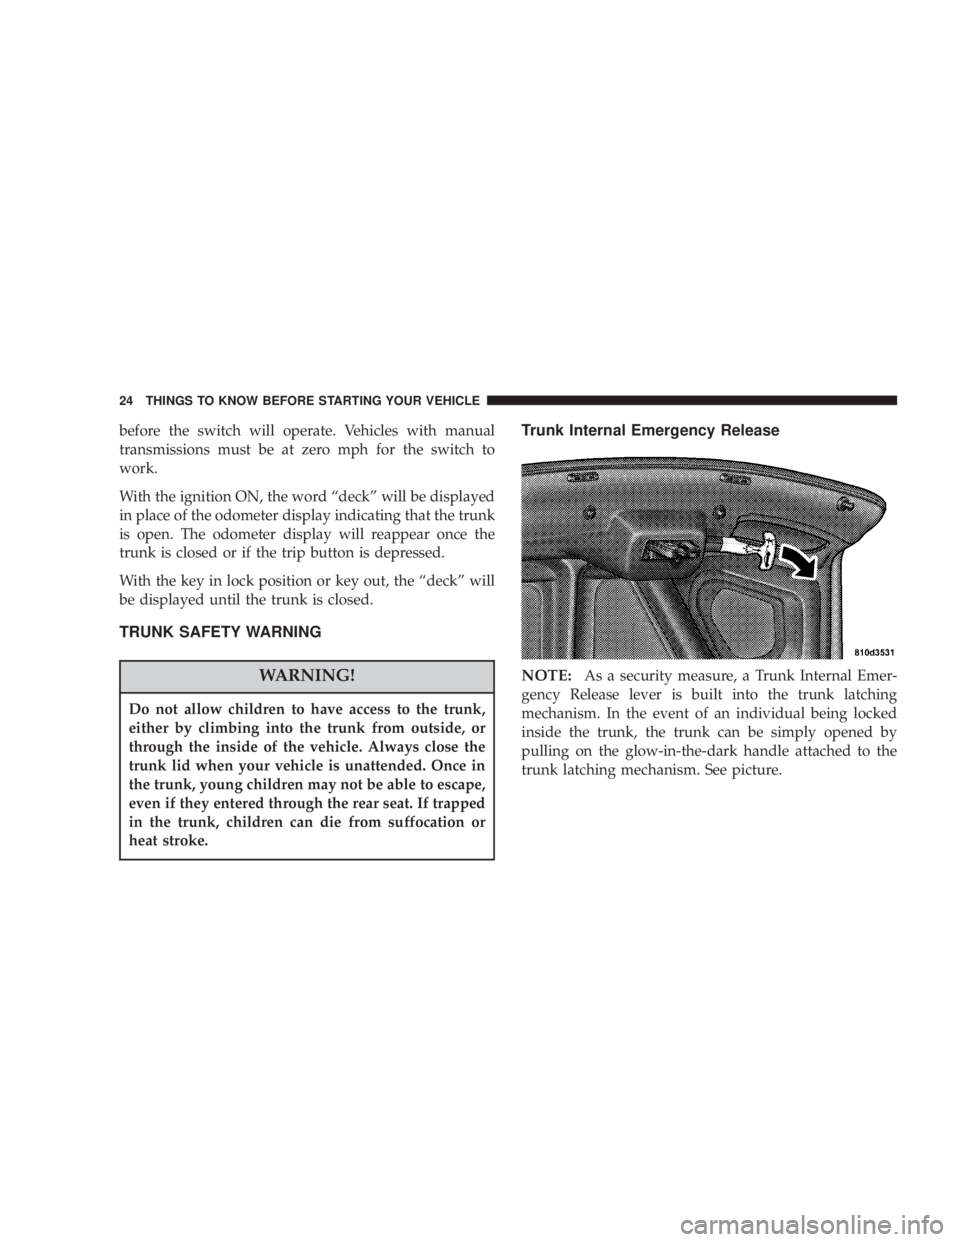
Trunk Internal Emergency Release
NOTE:
As a security measure, a Trunk Internal Emer-
gency Release lever is built into the trunk latching
mechanism. In the event of an individual being locked
inside the trunk, the trunk can be simply opened by
pulling on the glow-in-the-dark handle attached to the
trunk latching mechanism. See picture.
24 THINGS TO KNOW BEFORE STARTING YOUR VEHICLE
Page 35 of 273
Children that are not big enough to properly wear the
vehicle seat belt (see section on ªChild Restraintº) should
be secured in the rear seat in child restraints or belt-
positioning booster seats.
Older children who do not use child restraints or belt-
positioning booster seats should ride properly buckled
up in the rear seat. Never allow children to slide the
shoulder belt behind them or under their arm.
If a child from 1 to 12 years old must ride in the front
passenger seat because the vehicle is crowded, move the
seat as far back as possible, and use the proper child
restraint. See the section on ªChild Restraintº.
2. You should read the instructions provided with your
child restraint to make sure that you are using it properly.
3. All occupants should use their seat belts properly.
4. The driver and front passenger seats should be moved
back as far as practical to allow the airbags time to inflate.
5. If your vehicle has left and right window bags, do not
lean against the door, airbags will inflate forcefully into
the space between you and the door.WARNING!
²Relying on the airbags alone could lead to more
severe injuries in a collision. The airbags work
with your seat belt to restrain you properly. In
some collisions the airbags won't deploy at all.
Always wear your seat belts even though you
have airbags.
²Being too close to the steering wheel or instru-
ment panel during airbag deployment could cause
serious injury. Airbags need room to inflate. Sit
back, comfortably extending your arms to reach
the steering wheel or instrument panel.
²If the vehicle has left and right window bags, they
also need room to inflate. Do not lean against the
door or window. Sit upright in the center of the
seat.
Airbag System Components
The front airbag system consists of the following:
²Airbag Control Module
THINGS TO KNOW BEFORE STARTING YOUR VEHICLE 35
2
Page 40 of 273
Airbag Light
You will want to have the airbags ready for your protec-
tion in an impact. While the airbag system is designed to
be maintenance free, if any of the following occurs, have
an authorized dealer service the system promptly:
²TheAIRBAGlight does not come on or flickers during
the 6 to 8 seconds when the ignition switch is first
turned on.
²The light remains on or flickers after the 6 to 8 second
interval.
²The light flickers or comes on and remains on while
driving.
Child Restraint
Everyone in your vehicle needs to be buckled up all the
time, babies and children, too. Every state in the United
States and all Canadian provinces require that small
children ride in proper restraint systems. This is the law,
and you can be prosecuted for ignoring it.Children 12 years and under should ride properly buck-
led up in a rear seat, if available. According to crash
statistics, children are safer when properly restrained in
the rear seats rather than in the front.
WARNING!
In a collision, an unrestrained child, even a tiny
baby, can become a missile inside the vehicle. The
force required to hold even an infant on your lap
could become so great that you could not hold the
child, no matter how strong you are. The child and
others could be badly injured. Any child riding in
your vehicle should be in a proper restraint for the
child's size.
There are different sizes and types of restraints for
children from newborn size to the child almost large
enough for an adult safety belt. Always check the child
seat Owner's Manual to ensure you have the right seat
for your child. Use the restraint that is correct for your
child:
40 THINGS TO KNOW BEFORE STARTING YOUR VEHICLE
Page 42 of 273
Here are some tips on getting the most out of your child
restraint:
²Before buying any restraint system, make sure that it
has a label certifying that it meets all applicable Safety
Standards. We also recommend that you make sure
that you can install the child restraint in the vehicle
where you will use it before you buy it.
²The restraint must be appropriate for your child's
weight and height. Check the label on the restraint for
weight and height limits.
²Carefully follow the instructions that come with the
restraint. If you install the restraint improperly, it may
not work when you need it.
²Buckle the child into the seat according to the child
restraint manufacturer's directions.
²When your child restraint is not in use, secure it in the
vehicle with the seat belt or remove it from the vehicle.
Do not leave it loose in the vehicle. In a sudden stop or
collision, it could strike the occupants or seat backs
and cause serious personal injury.
NOTE:For additional information refer to
www.seatcheck.org or call 1±866±SEATCHECK.
Older Children and Child Restraints
Children who weigh more than 20 lbs (9 kg) and who are
older than one year can ride forward-facing in the
vehicle. Forward-facing child seats and convertible child
seats used in the forward-facing direction are for children
who weigh 20 to 40 lbs (9 to 18 kg) and who are older
than one year. These child seats are also held in the
vehicle by the lap/shoulder belt or the LATCH child
restraint anchorage system. (See the LATCH Ð Child
Seat Anchorage System Section.)
The belt-positioning booster seat is for children weighing
more than 40 lbs (18 kg), but who are still too small to fit
the vehicle's seat belts properly. If the child cannot sit
with knees bent over the vehicle's seat cushion while the
child's back is against the seat back, they should use a
belt-positioning booster seat. The child and belt-
positioning booster seat are held in the vehicle by the
lap/shoulder belt.
42 THINGS TO KNOW BEFORE STARTING YOUR VEHICLE
Page 43 of 273
Children Too Large For Booster Seats
Children who are large enough to wear the shoulder belt
comfortably, and whose legs are long enough to bend
over the front of the seat when their back is against the
seat back, should use the lap/shoulder belt in a rear seat.
²Make sure that the child is upright in the seat.
²The lap portion should be low on the hips and as snug
as possible.
²Check belt fit periodically. A child's squirming or
slouching can move the belt out of position.
²If the shoulder belt contacts the face or neck, move the
child closer to the center of the vehicle. Never allow a
child to put the shoulder belt under an arm or behind
their back.
LATCH Ð Child Seat Anchorage System (Lower
Anchors and Tether for CH ildren)
Your vehicle's rear seat is equipped with the child re-
straint anchorage system called LATCH. The LATCH
system provides for the installation of the child restraint
without using the vehicle's seat belts, instead securing thechild restraint using lower anchorages and upper tether
straps from the child restraint to the vehicle structure.
LATCH-compatible child restraint systems are now avail-
able. However, because the lower anchorages are to be
introduced over a period of years, child restraint systems
having attachments for those anchorages will continue to
also have features for installation using the vehicle's seat
belts. Child restraints having tether straps and hooks for
connection to the top tether anchorages have been avail-
able for some time. For some older child restraints, many
child restraint manufacturers offer add-on tether strap
kits or retro-fit kits. You are urged to take advantage of all
the available attachments provided with your child re-
straint in any vehicle.
All three rear seating positions have lower anchorages
that are capable of accommodating LATCH-compatible
child seats having flexible, webbing-mounted lower at-
tachments. Child seats with fixed lower attachments
must be installed in the outboard positions only. Regard-
less of the specific type of lower attachment,NEVER
install LATCH-compatible child seats such that two seats
share a common lower anchorage. If installing child seats
THINGS TO KNOW BEFORE STARTING YOUR VEHICLE 43
2
Page 46 of 273
In the rear seat, you may have trouble tightening the
lap/shoulder belt on the child restraint because the
buckle or latch plate is too close to the belt path opening
on the restraint. Disconnect the latch plate from the
buckle and twist the short buckle-end belt several times
to shorten it. Insert the latch plate into the buckle with the
release button facing out.
If the belt still can't be tightened, or if by pulling and
pushing on the restraint loosens the belt, you may need
to do something more. Disconnect the latch plate from
the buckle, turn the buckle around, and insert the latch
plate into the buckle again. If you still can't make the
child restraint secure, try a different seating position.
NOTE:This vehicle may be equipped with rotating
tether caps for accessing the tether anchors. Follow the
appropriate instructions below to attach child restraint
tether strap.
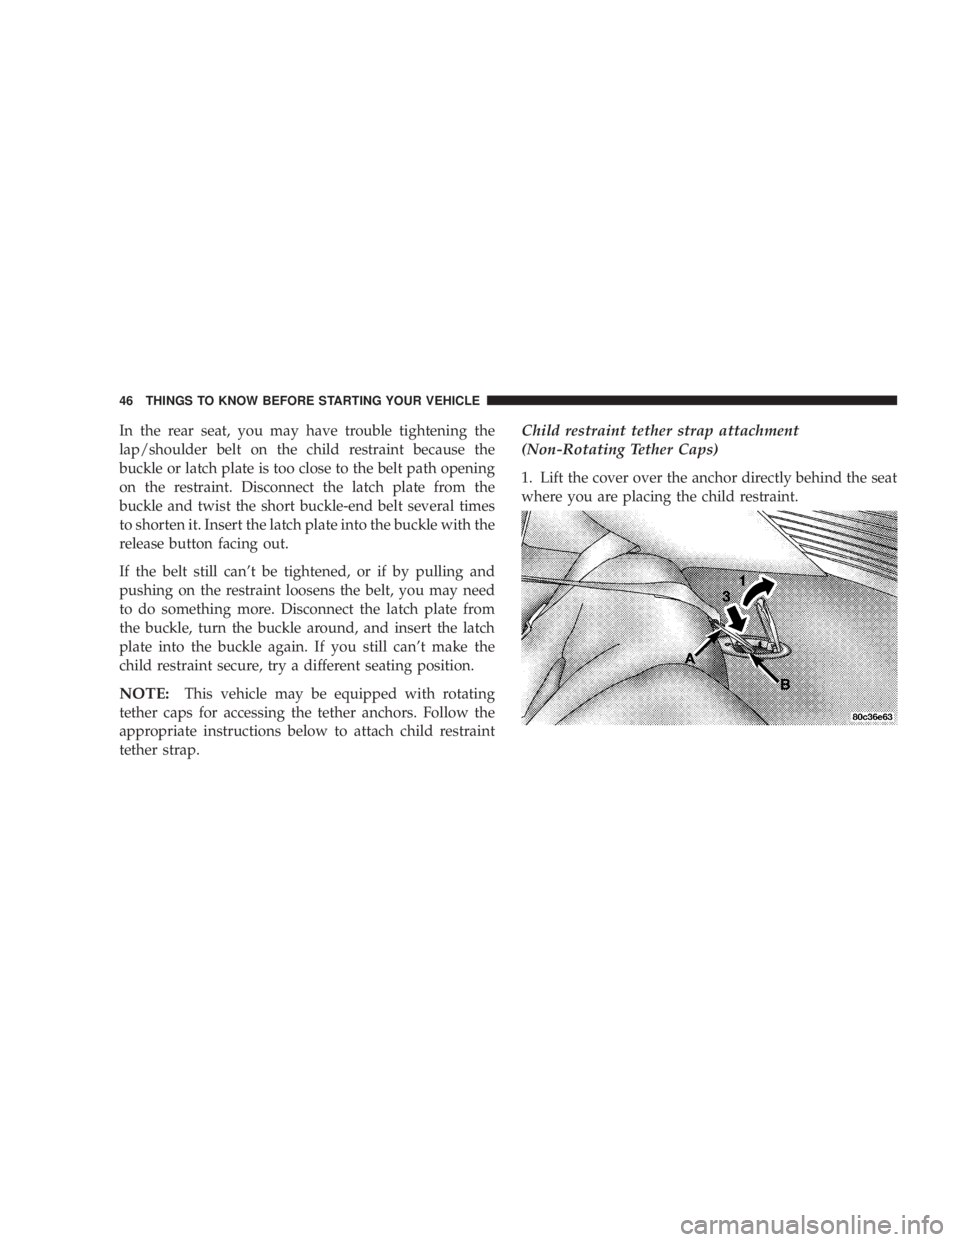
Child restraint tether strap attachment
(Non-Rotating Tether Caps)
1. Lift the cover over the anchor directly behind the seat
where you are placing the child restraint.
46 THINGS TO KNOW BEFORE STARTING YOUR VEHICLE