horn DODGE STRATUS SEDAN 2004 Owners Manual
[x] Cancel search | Manufacturer: DODGE, Model Year: 2004, Model line: STRATUS SEDAN, Model: DODGE STRATUS SEDAN 2004Pages: 273, PDF Size: 4.79 MB
Page 20 of 273
1.Press and hold the Unlock button on the transmitter.
2. Continue to hold the Unlock button, wait at least 4
but no longer than 10 seconds, then press the LOCK
button.
3. Release both buttons.
The headlights will flash twice to acknowledge the
unlock signal.
NOTE:The Lamp Flash can be enabled or disabled by
performing the following procedure:
1. Press and hold the Lock button on the transmitter.
2. Continue to hold the Lock button, wait at least 4 but
no longer than 10 seconds, then press the Trunk
button.
3. Release both buttons.
To lock the doors:
The horn will chirp and the headlamps will flash once to
acknowledge the lock signal.
NOTE:The horn chirp can be enabled or disabled by
the following procedure:
1. Press and hold the Lock button on the transmitter.
2. Continue to hold the Lock button, wait at least 4 but
no longer than 10 seconds, then press the Unlock
button.
3. Release both buttons.
To unlock the trunk:
Press and hold the Trunk button on the transmitter to
unlatch the trunk.
NOTE:The transmitter can be programmed to unlatch
the trunk immediately upon activation of the Trunk
button (without pressing and holding) by performing the
following procedure:
1. Press and hold the Unlock button on the transmit-
ter.
2. Continue to hold the Unlock button, wait at least 4
but no longer than 10 seconds, then press the Trunk
button.
3. Release both buttons.
20 THINGS TO KNOW BEFORE STARTING YOUR VEHICLE
Page 21 of 273
Panic Alarm
The panic mode unlocks the driver's door, turns on the
interior lights, flashes the headlights, and sounds the
horn for about 3 minutes or until the alarm is turned off.
To use the Panic Alarm:
Press and hold the Panic Button for at least 1 second to
activate the panic alarm. Press and hold the panic button
a second time or unlock the door with the key (if
equipped with central locking) to deactivate the alarm.
The alarm will also shut itself off after 3 minutes, or when
the vehicle speed reaches 15 MPH (24 km/h).
To Program Additional Transmitters:
Up to 4 transmitters can be programmed to your vehicle.
To program a transmitter, perform the following proce-
dure:
1. With the vehicle in Park, turn the ignition switch to the
ON/RUN position.
2. Using a currently programmed transmitter, press the
Unlock button on the transmitter. Continue to hold the
Unlock button, wait at least 4 but no longer than 10
seconds, then press and hold the Panic button for at leastone second. Release both buttons simultaneously. You
will hear a chime to signal that you can proceed with
programming the new transmitter.
3. Press and release the Lock and Unlock buttons simul-
taneously, followed by a press and release of ANY button
on each new transmitter to be programmed as well as the
original transmitter. You will hear a chime when a
transmitter has been successfully programmed. You will
have 30 seconds to finish programming all new transmit-
ters. A chime will sound when the 30 seconds is over or
the ignition switch is turned to the LOCK position.
General Information
This transmitter complies with FCC rules part 15 and
with RS-210 of Industry Canada. Operation is subject to
the following two conditions:
1. This device may not cause harmful interference
2. This device must accept any interference that may be
received, including interference that may cause undes-
ired operation
THINGS TO KNOW BEFORE STARTING YOUR VEHICLE 21
2
Page 22 of 273
If your Remote Lock Control fails to operate from a
normal distance, check for these two conditions:
1. Weak batteries in transmitter. The expected life of
batteries is from one to two years
2. Closeness to a radio transmitter such as a radio station
tower, airport transmitter, and some mobile or CB radios.
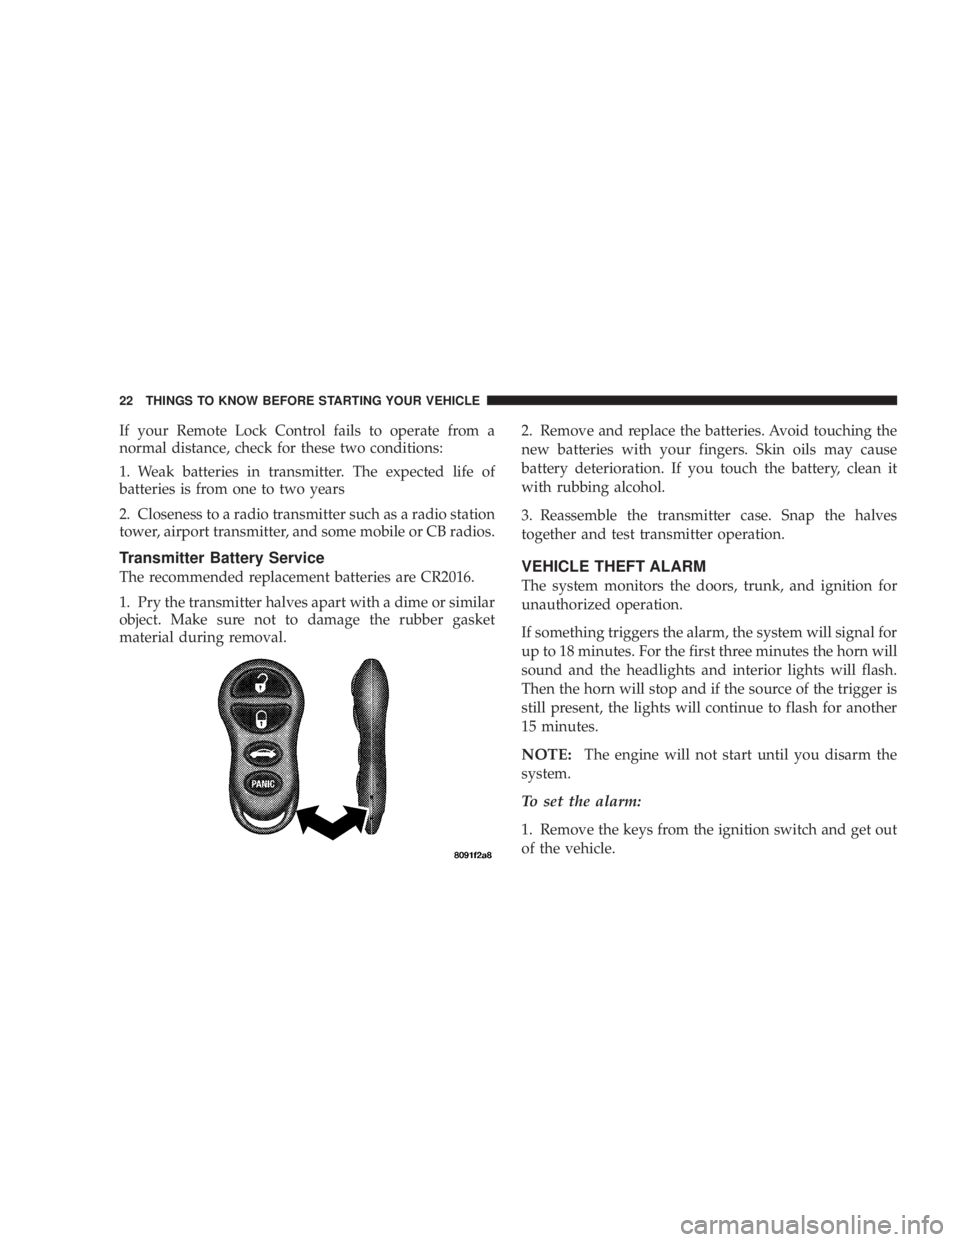
Transmitter Battery Service
The recommended replacement batteries are CR2016.
1. Pry the transmitter halves apart with a dime or similar
object. Make sure not to damage the rubber gasket
material during removal.2. Remove and replace the batteries. Avoid touching the
new batteries with your fingers. Skin oils may cause
battery deterioration. If you touch the battery, clean it
with rubbing alcohol.
3. Reassemble the transmitter case. Snap the halves
together and test transmitter operation.VEHICLE THEFT ALARM
The system monitors the doors, trunk, and ignition for
unauthorized operation.
If something triggers the alarm, the system will signal for
up to 18 minutes. For the first three minutes the horn will
sound and the headlights and interior lights will flash.
Then the horn will stop and if the source of the trigger is
still present, the lights will continue to flash for another
15 minutes.
NOTE:The engine will not start until you disarm the
system.
To set the alarm:
1. Remove the keys from the ignition switch and get out
of the vehicle.
22 THINGS TO KNOW BEFORE STARTING YOUR VEHICLE
Page 23 of 273
2. Lock the door using either the power door lock switch,
the key, or the Keyless Entry Transmitter and close all
doors.
3. The light in the instrument cluster will flash rapidly
for 15 seconds. This shows that the system is arming. If
the light comes on but does not flash, the system is still
armed, but there is a problem in the trunk circuit. After 15
seconds the light will continue to flash slowly. This
shows that the system is fully armed.
To disarm the system:
Unlock a front door using either the key or the Keyless
Entry Transmitter.
Tamper Alert
If the horn sounds 3 times when you unlock a front door
using either a key or the Keyless Entry Transmitter, the
alarm had been triggered. Check the vehicle for tamper-
ing.
Security System Manual Override
The system will not arm if you lock the doors using the
manual lock control.
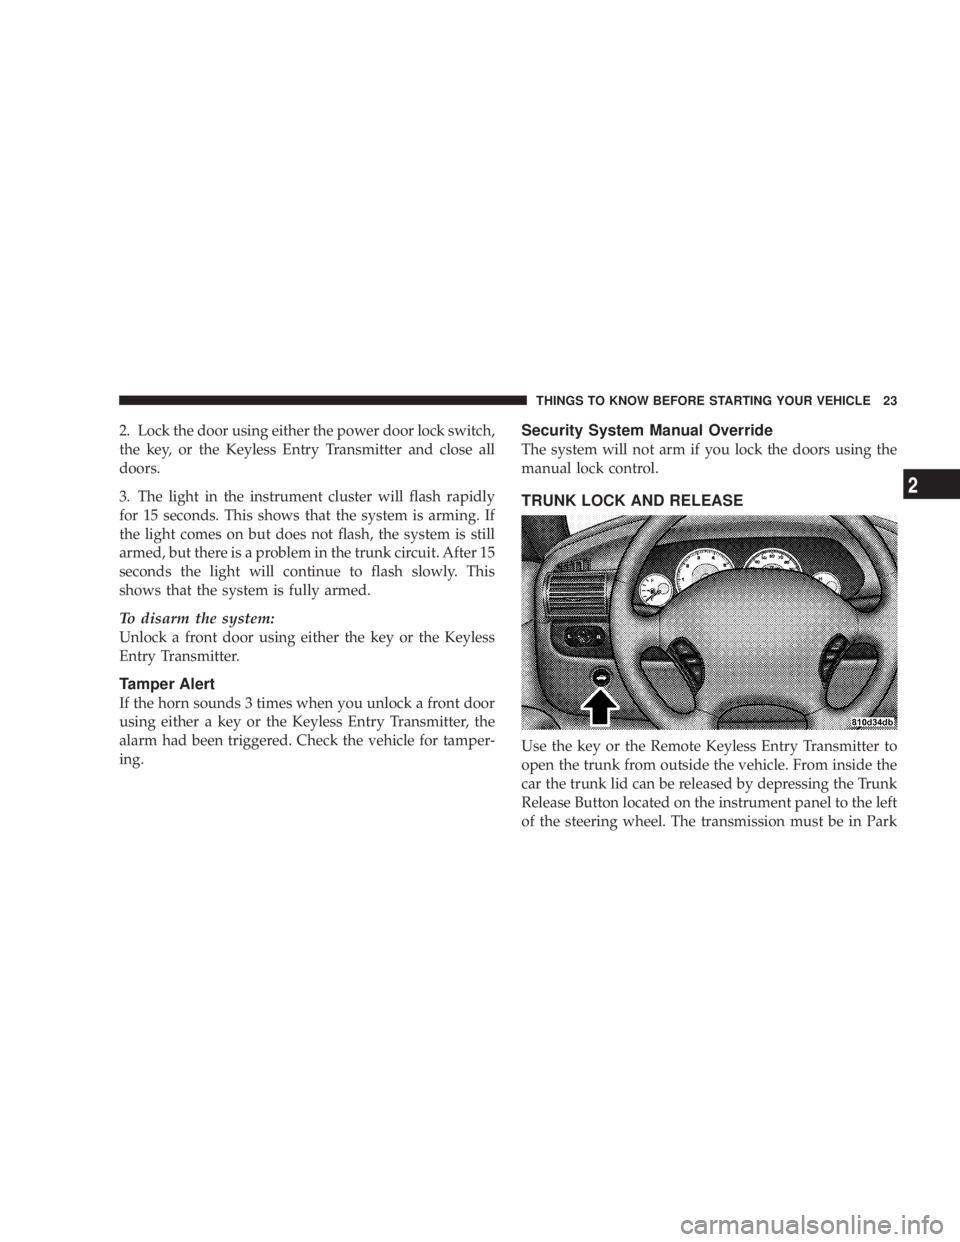
TRUNK LOCK AND RELEASE
Use the key or the Remote Keyless Entry Transmitter to
open the trunk from outside the vehicle. From inside the
car the trunk lid can be released by depressing the Trunk
Release Button located on the instrument panel to the left
of the steering wheel. The transmission must be in Park
THINGS TO KNOW BEFORE STARTING YOUR VEHICLE 23
2
Page 220 of 273
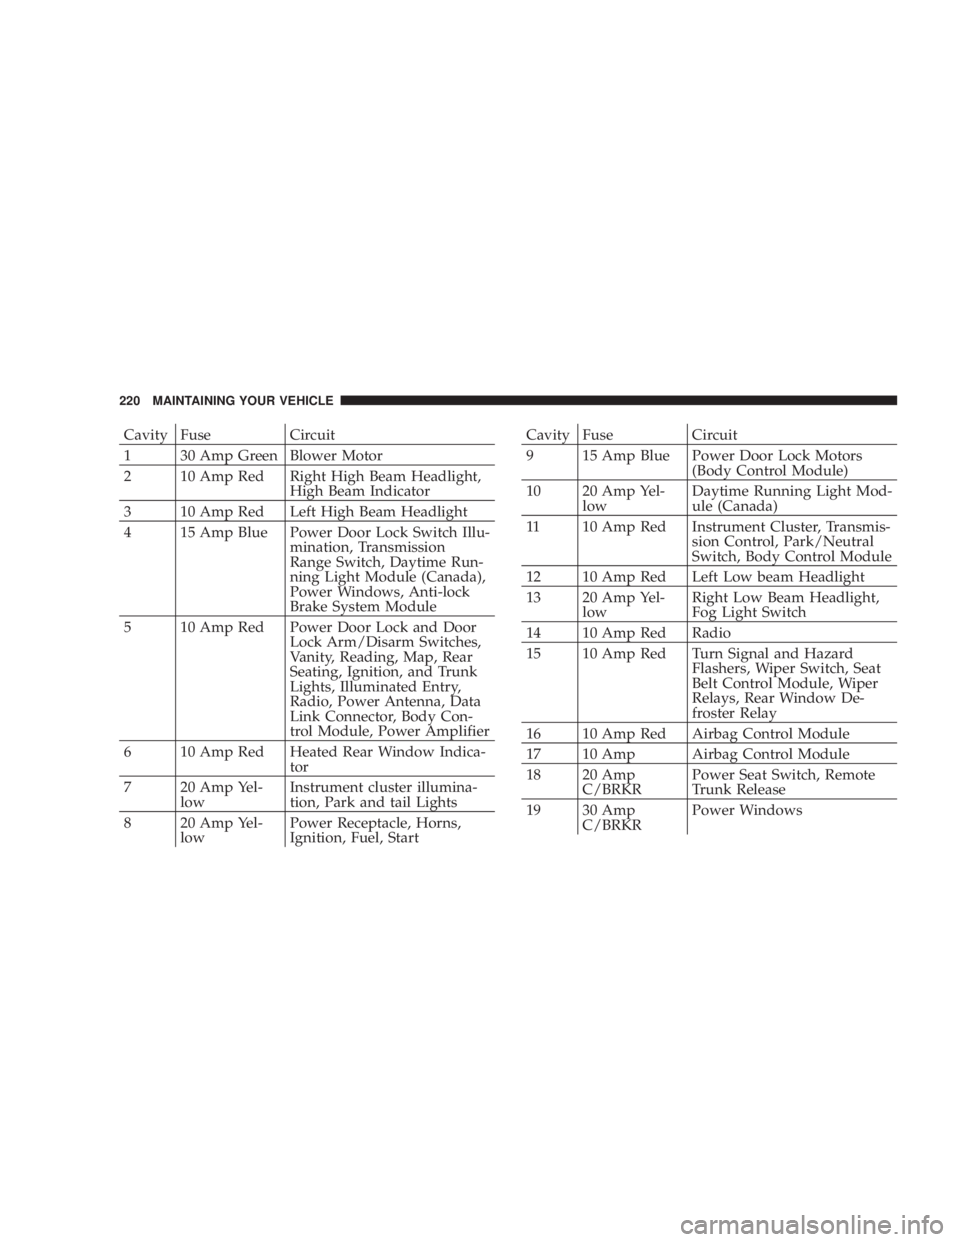
Cavity Fuse Circuit
1 30 Amp Green Blower Motor
2 10 Amp Red Right High Beam Headlight,
High Beam Indicator
3 10 Amp Red Left High Beam Headlight
4 15 Amp Blue Power Door Lock Switch Illu-
mination, Transmission
Range Switch, Daytime Run-
ning Light Module (Canada),
Power Windows, Anti-lock
Brake System Module
5 10 Amp Red Power Door Lock and Door
Lock Arm/Disarm Switches,
Vanity, Reading, Map, Rear
Seating, Ignition, and Trunk
Lights, Illuminated Entry,
Radio, Power Antenna, Data
Link Connector, Body Con-
trol Module, Power Amplifier
6 10 Amp Red Heated Rear Window Indica-
tor
7 20 Amp Yel-
lowInstrument cluster illumina-
tion, Park and tail Lights
8 20 Amp Yel-
lowPower Receptacle, Horns,
Ignition, Fuel, StartCavity Fuse Circuit
9 15 Amp Blue Power Door Lock Motors
(Body Control Module)
10 20 Amp Yel-
lowDaytime Running Light Mod-
ule (Canada)
11 10 Amp Red Instrument Cluster, Transmis-
sion Control, Park/Neutral
Switch, Body Control Module
12 10 Amp Red Left Low beam Headlight
13 20 Amp Yel-
lowRight Low Beam Headlight,
Fog Light Switch
14 10 Amp Red Radio
15 10 Amp Red Turn Signal and Hazard
Flashers, Wiper Switch, Seat
Belt Control Module, Wiper
Relays, Rear Window De-
froster Relay
16 10 Amp Red Airbag Control Module
17 10 Amp Airbag Control Module
18 20 Amp
C/BRKRPower Seat Switch, Remote
Trunk Release
19 30 Amp
C/BRKRPower Windows
220 MAINTAINING YOUR VEHICLE