engine DODGE VIPER 2008 ZB II / 2.G Owner's Guide
[x] Cancel search | Manufacturer: DODGE, Model Year: 2008, Model line: VIPER, Model: DODGE VIPER 2008 ZB II / 2.GPages: 303, PDF Size: 2.65 MB
Page 174 of 303
WARNING!
²Never have any smoking materials lit in or near
the vehicle when the gas cap is removed or the
tank filled.
²Never add fuel to the vehicle when the engine is
running.
²A fire may result if gasoline is pumped into a
portable container that is inside of a vehicle. You
could be burned. Always place gas containers on
the ground while filling.NOTE:
²Tighten the gas cap until you hear a ªclickingº sound.
This is an indication that the gas cap is tightened
properly. The Malfunction Indicator Light in the in-
strument cluster may turn on if the gas cap is not
secured properly. Make sure that the gas cap is tight-
ened each time the vehicle is refueled.
²If the gas cap is lost or damaged, be sure the replace-
ment cap is for use with this vehicle.
VEHICLE LOADING
Vehicle Loading Capacities
Front Seat Occupants....................... 2
Luggage....................... 115lbs. (51 kg)
Rated Vehicle Capacity............ 415lbs. (187 kg)
STARTING AND OPERATING 173
5
Page 176 of 303
WHAT TO DO IN EMERGENCIES
CONTENTS
mHazard Warning Flasher..................176
mIf Your Engine Overheats.................176
mTIREFIT Kit...........................177
NTIREFIT Storage......................178
NTIREFIT Usage Precautions..............178NTIREFIT Kit Components & Operation......180
NSealing a Tire With TIREFIT..............181
mJump-Starting Procedures.................186
mFreeing A Stuck Vehicle..................189
mTowing A Disabled Vehicle................189
6
Page 177 of 303
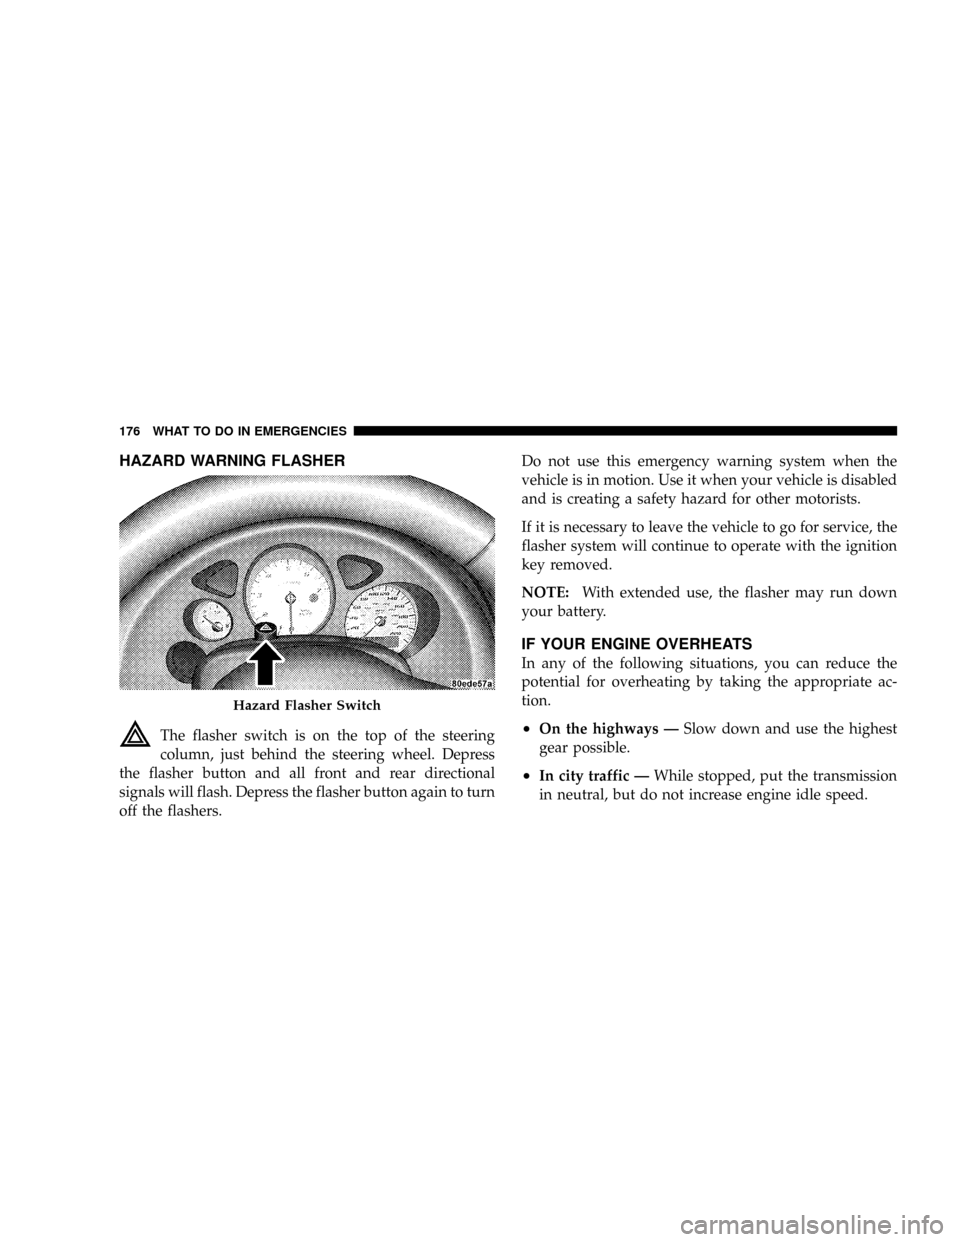
HAZARD WARNING FLASHER
The flasher switch is on the top of the steering
column, just behind the steering wheel. Depress
the flasher button and all front and rear directional
signals will flash. Depress the flasher button again to turn
off the flashers.Do not use this emergency warning system when the
vehicle is in motion. Use it when your vehicle is disabled
and is creating a safety hazard for other motorists.
If it is necessary to leave the vehicle to go for service, the
flasher system will continue to operate with the ignition
key removed.
NOTE:With extended use, the flasher may run down
your battery.
IF YOUR ENGINE OVERHEATS
In any of the following situations, you can reduce the
potential for overheating by taking the appropriate ac-
tion.
²On the highways ÐSlow down and use the highest
gear possible.
²In city traffic ÐWhile stopped, put the transmission
in neutral, but do not increase engine idle speed.
Hazard Flasher Switch
176 WHAT TO DO IN EMERGENCIES
Page 178 of 303
²In city traffic ÐWhile moving, shift into the highest
gear possible to reduce engine RPM.
NOTE:There are steps that you can take to slow down
an impending overheat condition. If your air conditioner
is on, turn it off. The air conditioning system adds heat to
the cooling system and turning off the A/C removes this
heat. You can also turn the Temperature control to
maximum heat, the Mode control to floor, and the fan
control to High. This allows the heater core to act as a
supplement to the radiator and aids in removing heat
from the cooling system.WARNING!
A hot cooling system is dangerous. You or others could
be badly burned by steam or boiling coolant. If your
temperature gauge pointer is in the red area, turn off
the engine immediately. You may want to call a service
center for service. If you decide to look under the hood
yourself, see Section 7 of this manual. Follow the
warnings under the Radiator Cap paragraph.
TIREFIT KIT
Small punctures in the tire tread can be sealed with
TIREFIT. Foreign objects (e.g., screws or nails) should not
be removed from the tire. TIREFIT can be used in outside
temperatures down to approximately -4ÉF (-20ÉC).
WHAT TO DO IN EMERGENCIES 177
6
Page 183 of 303
(B) Setting Up to Use TIREFIT:
Turn the Mode Select knob (4) to the Sealant/
Air Mode position.
1. Uncoil the Clear Sealant Hose (7) and then remove the
Yellow Cap from the fitting at the end of the hose.
2. Place the TIREFIT kit flat on the ground next to the
deflated tire.
3. Remove the cap from the valve stem and then screw
the fitting at the end of the Sealant Hose (7) onto the
valve stem.
4. Uncoil the Power Plug and Cable (5) and then insert
the plug into the vehicle's power outlet.
NOTE:Do not remove foreign objects (e.g., screws or
nails) from the tire.
(C)Injecting TIREFIT Sealant into the deflated tire:
1. Always start the engine before turning on the TIREFIT
kit.
2. After pressing the Air Pump Power Button
(3), the air pump should start to inflate the tire
and the sealant (white fluid) will flow from the
Sealant Bottle (1) through the Sealant Hose (7)
and into the tire.NOTE:Some sealant may leak out
through the puncture in the tire.
3.If the sealant Does Not Flow Through the Clear
Sealant Hose (7):
²Press the Air Pump Power Button (3) to turn off the
TIREFIT kit. Disconnect the Clear Sealant Hose (7)
from the valve stem. Make sure the valve stem is
free of debris. Reconnect the Clear Sealant Hose (7)
to the valve stem. Press the Air Pump Power Button
(3) to turn on the TIREFIT kit.
182 WHAT TO DO IN EMERGENCIES
Page 184 of 303
²Turn the Mode Select knob to the Sealant/Air Mode.
²Connect the Power Plug (5) to a different power
outlet in your vehicle or another vehicle, if available.
Make sure the engine is running before turning on
the TIREFIT kit.
²The Sealant Bottle (1) may be empty due to previous
use. Call for assistance.
(D) After Injecting TIREFIT Sealant:
1. Allow the air pump to inflate the tire to the pressure
indicated on the tire pressure label on the driver-side
latch pillar. Check the pressure in the tire by looking at
the Pressure Gauge (2).
²If the tire inflates to at least 26 psi (1.8 bar) within 15
minutes, proceed to Step 2 of this procedure.
²If tire fails to inflate to 26 psi (1.8 bar) within 15
minutes, perform the procedure steps described
under ª(G) Distributing TIREFIT Sealant to Better
Enable Tire Inflation.º
²Press the Air Pump Power Button (3) to
turn off the TIREFIT kit.
2. Remove the Speed Limit sticker from the top of the
Sealant Bottle (1) and place the sticker on the steering
wheel.
3. Disconnect the TIREFIT kit from the valve stem and
place it in the vehicle.
(E) Securing TIREFIT Sealant in the Tire
Drive the vehicle for approximately 5 miles (8 km) to
ensure distribution of the TIREFIT Sealant within the tire.
WHAT TO DO IN EMERGENCIES 183
6
Page 187 of 303
JUMP-STARTING PROCEDURES
WARNING!
²Take care to avoid the radiator cooling fans whenever the hood
is raised. They can start anytime the ignition switch is on. You
can be hurt by the fans.
²Take care to avoid the accessory drive whenever the hood is
raised. You can be hurt by the moving components.
²Do not attempt to push or tow your vehicle to get it started.
Unburned fuel could enter the catalytic converter and once the
engine has started, ignite and damage the converter and
vehicle. If the vehicle has a discharged battery, booster cables
may be used to obtain a start from a booster battery or the
battery in another vehicle. This type of start can be dangerous
if done improperly, so follow this procedure carefully.
²Battery fluid is a corrosive acid solution; do not allow battery
fluid to contact eyes, skin, or clothing. Don't lean over battery
when attaching clamps or allow the clamps to touch each
other. If acid splashes in eyes or on skin, flush contaminated
area immediately with large quantities of water.
²A battery generates hydrogen gas, which is flammable and
explosive. Keep flame or spark away from the vent holes.
²Do not use a booster battery or any other booster source with
an output that exceeds 12 volts.
NOTE:The battery is located underneath an access
panel inside the rear compartment on the left side of the
vehicle. A remote battery terminal is located in the engine
compartment for jump-starting.
1. Wear eye protection and remove any metal jewelry
such as watchbands or bracelets that might make an
inadvertent electrical contact.
2. When boost is provided by a battery in another
vehicle, park that vehicle within booster cable reach, but
without allowing the vehicles touch one another.
3. Set the parking brake, place the transmission in neu-
tral, and turn the ignition OFF on both vehicles.
4. Turn off the heater, radio, and all unnecessary electri-
cal loads.
186 WHAT TO DO IN EMERGENCIES
Page 188 of 303
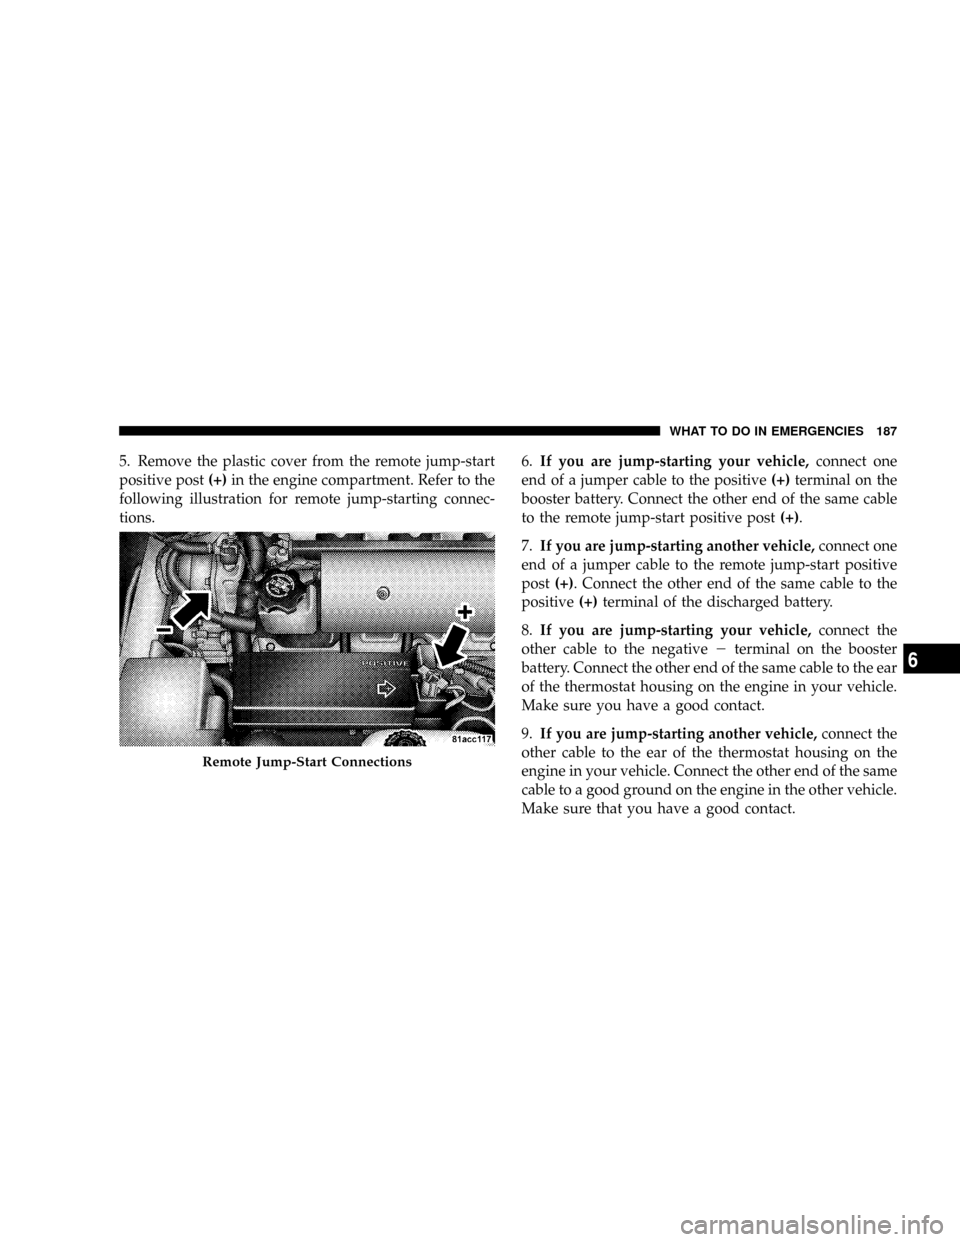
5. Remove the plastic cover from the remote jump-start
positive post(+)in the engine compartment. Refer to the
following illustration for remote jump-starting connec-
tions.6.If you are jump-starting your vehicle,connect one
end of a jumper cable to the positive(+)terminal on the
booster battery. Connect the other end of the same cable
to the remote jump-start positive post(+).
7.If you are jump-starting another vehicle,connect one
end of a jumper cable to the remote jump-start positive
post(+). Connect the other end of the same cable to the
positive(+)terminal of the discharged battery.
8.If you are jump-starting your vehicle,connect the
other cable to the negative2terminal on the booster
battery. Connect the other end of the same cable to the ear
of the thermostat housing on the engine in your vehicle.
Make sure you have a good contact.
9.If you are jump-starting another vehicle,connect the
other cable to the ear of the thermostat housing on the
engine in your vehicle. Connect the other end of the same
cable to a good ground on the engine in the other vehicle.
Make sure that you have a good contact.
Remote Jump-Start Connections
WHAT TO DO IN EMERGENCIES 187
6
Page 189 of 303
WARNING!
²You should not try to start your vehicle by pushing
or towing.
²Do not connect the cable to the negative post of the
discharge battery. The resulting electrical spark
could cause the battery to explode.
²During cold weather when temperatures are be-
low freezing point, electrolyte in a discharged
battery may freeze. Do not attempt jump-starting
because the battery could rupture or explode. The
battery temperature must be brought up above
freezing point before attempting jump-start.10. Start the engine in the vehicle that has the booster
battery. Let the engine idle a few minutes.
11. Turn off the Vehicle Security System.
NOTE:The Vehicle Security System will prevent the
engine from starting.
12. Start the engine in the vehicle with the discharged
battery. If engine does not start in 15 seconds, stop
cranking engine and allow starter to cool down before
cranking again.
13. When removing the booster cables, reverse the above
sequence exactly. Be careful of the moving belts and fans.
188 WHAT TO DO IN EMERGENCIES
Page 190 of 303
WARNING!
Any procedure other than above could result in:
1. Personal injury caused by electrolyte squirting out
the battery vent;
2. Personal injury or property damage due to battery
explosion;
3. Damage to charging system of booster vehicle or
of immobilized vehicle.
FREEING A STUCK VEHICLE
If your vehicle becomes stuck in mud, sand, or snow, it
can often be moved by a rocking motion. Turn your
steering wheel right and left to clear the area around the
front wheels. Then shift back and forth between Reverseand First gear. Usually the least accelerator pedal pres-
sure to maintain the rocking motion without spinning the
wheels is most effective.
CAUTION!
Racing the engine or spinning the wheels too fast
may lead to transmission/axle overheating and fail-
ure. It can also damage the tires. Do not spin the
wheels above 30 mph (48 km/h).
TOWING A DISABLED VEHICLE
Do not tow with sling type equipment. Only use flat bed
equipment. Always comply with applicable state or local
towing ordinances.
WHAT TO DO IN EMERGENCIES 189
6