steering wheel DODGE VIPER 2013 VX / 3.G Owner's Manual
[x] Cancel search | Manufacturer: DODGE, Model Year: 2013, Model line: VIPER, Model: DODGE VIPER 2013 VX / 3.GPages: 100, PDF Size: 3.1 MB
Page 44 of 100
WARNING!
• Any voice commanded system should be used only in safe driving conditionsfollowing applicable laws regarding phone use. Your attention should be focused on
safely operating the vehicle. Failure to do so may result in a collision causing you
and others to be severely injured or killed.
• In an emergency, to use Uconnect™ Phone, your mobile phone must be:
• turned on,
• paired to Uconnect™ Phone,
• and have network coverage.
Uconnect™ VOICE COMMAND
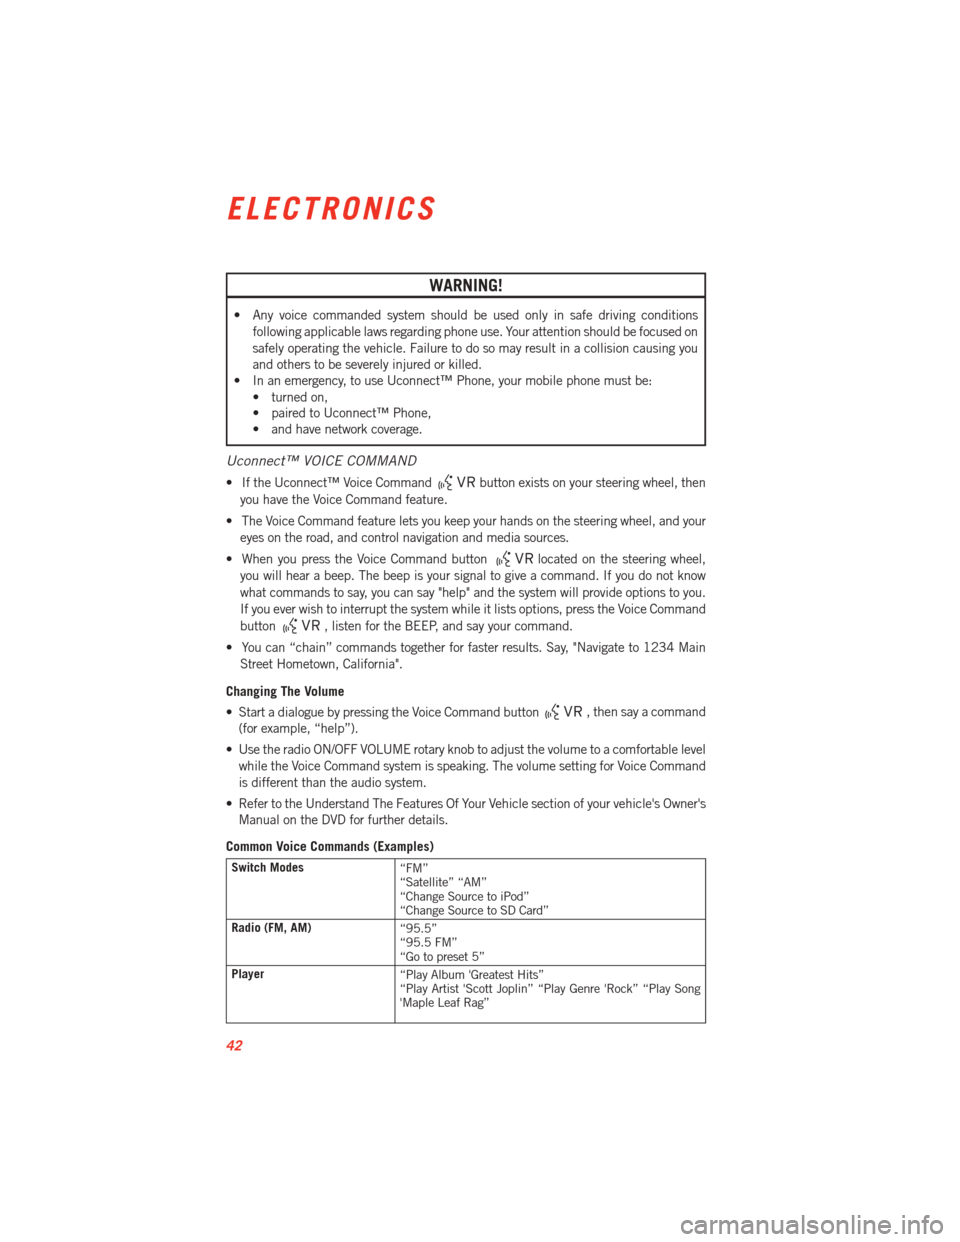
• If the Uconnect™ Voice Commandbutton exists on your steering wheel, then
you have the Voice Command feature.
• The Voice Command feature lets you keep your hands on the steering wheel, and your eyes on the road, and control navigation and media sources.
• When you press the Voice Command button
located on the steering wheel,
you will hear a beep. The beep is your signal to give a command. If you do not know
what commands to say, you can say "help" and the system will provide options to you.
If you ever wish to interrupt the system while it lists options, press the Voice Command
button
, listen for the BEEP, and say your command.
• You can “chain” commands together for faster results. Say, "Navigate to 1234 Main Street Hometown, California".
Changing The Volume
• Start a dialogue by pressing the Voice Command button
, then say a command
(for example, “help”).
• Use the radio ON/OFF VOLUME rotary knob to adjust the volume to a comfortable level while the Voice Command system is speaking. The volume setting for Voice Command
is different than the audio system.
• Refer to the Understand The Features Of Your Vehicle section of your vehicle's Owner's Manual on the DVD for further details.
Common Voice Commands (Examples)
Switch Modes “FM”
“Satellite” “AM”
“Change Source to iPod”
“Change Source to SD Card”
Radio (FM, AM) “95.5”
“95.5 FM”
“Go to preset 5”
Player “Play Album 'Greatest Hits”
“Play Artist 'Scott Joplin” “Play Genre 'Rock” “Play Song
'Maple Leaf Rag”
ELECTRONICS
42
Page 50 of 100
PLAYING iPod®/USB/MP3 DEVICES
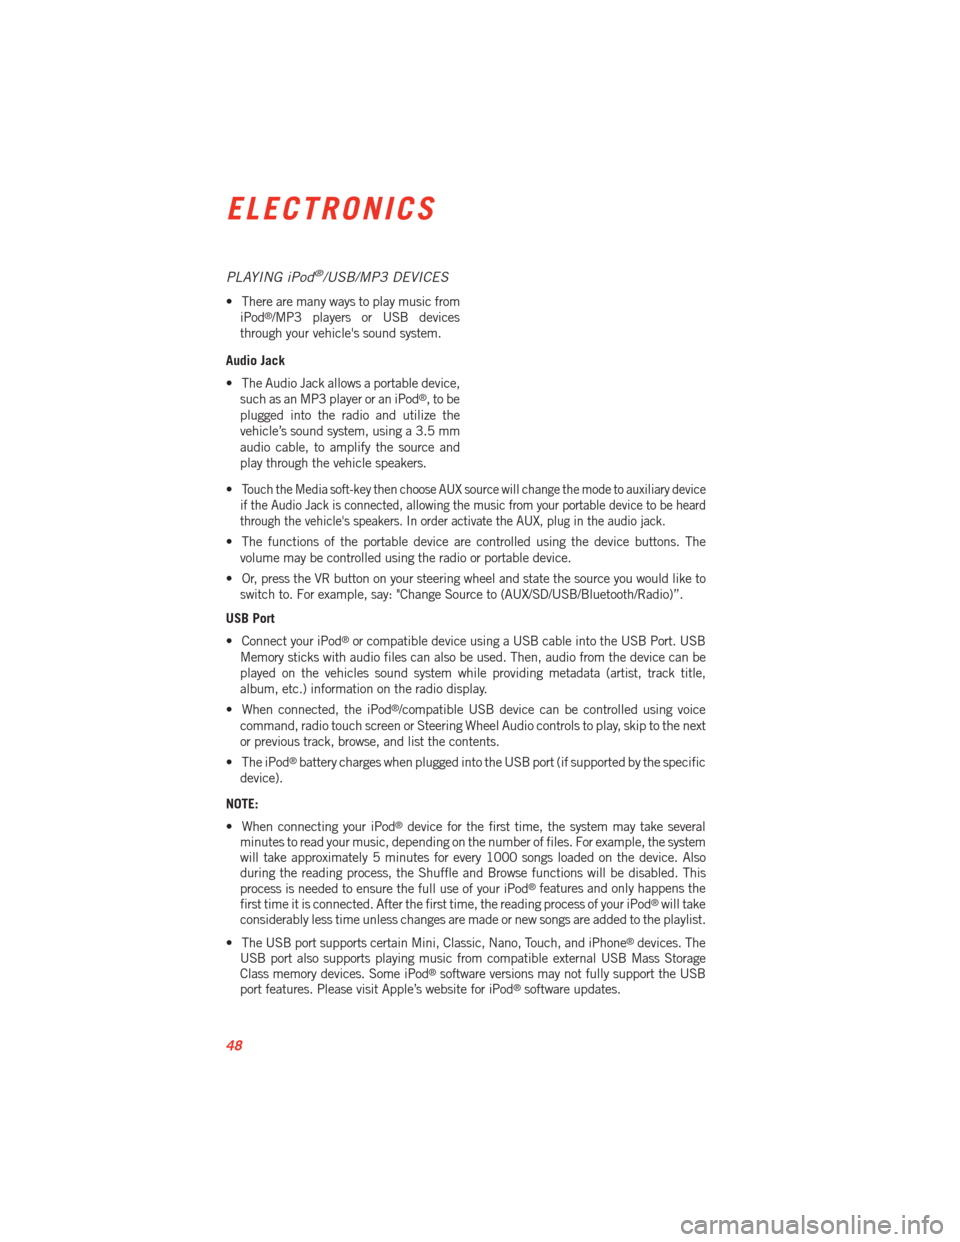
• There are many ways to play music fromiPod®/MP3 players or USB devices
through your vehicle's sound system.
Audio Jack
• The Audio Jack allows a portable device, such as an MP3 player or an iPod
®,tobe
plugged into the radio and utilize the
vehicle’s sound system, using a 3.5 mm
audio cable, to amplify the source and
play through the vehicle speakers.
•
Touch the Media soft-key then choose AUX source will change the mode to auxiliary device
if the Audio Jack is connected, allowing the music from your portable device to be heard
through the vehicle's speakers. In order activate the AUX, plug in the audio jack.
• The functions of the portable device are controlled using the device buttons. The volume may be controlled using the radio or portable device.
• Or, press the VR button on your steering wheel and state the source you would like to switch to. For example, say: "Change Source to (AUX/SD/USB/Bluetooth/Radio)”.
USB Port
• Connect your iPod
®or compatible device using a USB cable into the USB Port. USB
Memory sticks with audio files can also be used. Then, audio from the device can be
played on the vehicles sound system while providing metadata (artist, track title,
album, etc.) information on the radio display.
• When connected, the iPod
®/compatible USB device can be controlled using voice
command, radio touch screen or Steering Wheel Audio controls to play, skip to the next
or previous track, browse, and list the contents.
• The iPod
®battery charges when plugged into the USB port (if supported by the specific
device).
NOTE:
• When connecting your iPod
®device for the first time, the system may take several
minutes to read your music, depending on the number of files. For example, the system
will take approximately 5 minutes for every 1000 songs loaded on the device. Also
during the reading process, the Shuffle and Browse functions will be disabled. This
process is needed to ensure the full use of your iPod
®features and only happens the
first time it is connected. After the first time, the reading process of your iPod®will take
considerably less time unless changes are made or new songs are added to the playlist.
• The USB port supports certain Mini, Classic, Nano, Touch, and iPhone
®devices. The
USB port also supports playing music from compatible external USB Mass Storage
Class memory devices. Some iPod
®software versions may not fully support the USB
port features. Please visit Apple’s website for iPod®software updates.
ELECTRONICS
48
Page 51 of 100
SD Card
• Play songs stored on an SD card inserted into the SD card slot.
• Song playback can be controlled using the radio or Steering Wheel Audio Controls toplay, skip to the next or previous track, browse, and list the contents.
Bluetooth
®Streaming Audio
•
If equipped with Uconnect™ Voice Command, your Bluetooth-equipped iPod®devices,
cell phones or other media players, may also be able to stream music to your vehicle's
sound system. Your connected device must be Bluetooth-compatible, and paired with your
Uconnect™ system (see Uconnect™ Phone for pairing instructions). You can access the
music from your connected Bluetooth
®device by touching the Source soft-key while in
Player mode.
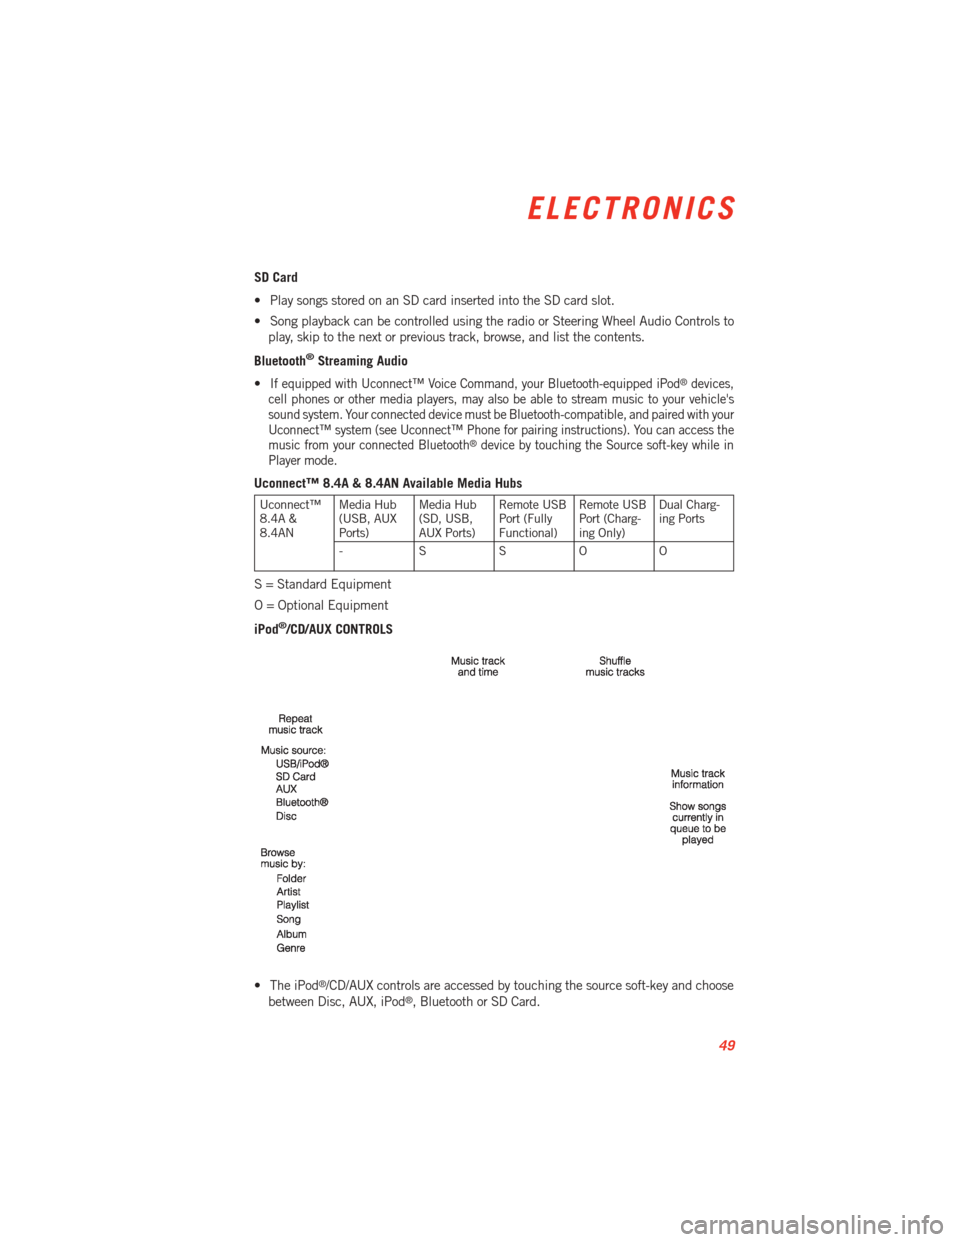
Uconnect™ 8.4A & 8.4AN Available Media Hubs
Uconnect™
8.4A &
8.4AN Media Hub
(USB, AUX
Ports) Media Hub
(SD, USB,
AUX Ports)Remote USB
Port (Fully
Functional)Remote USB
Port (Charg-
ing Only)Dual Charg-
ing Ports
- SSOO
S = Standard Equipment
O = Optional Equipment
iPod
®/CD/AUX CONTROLS
• The iPod
®/CD/AUX controls are accessed by touching the source soft-key and choose
between Disc, AUX, iPod®, Bluetooth or SD Card.
ELECTRONICS
49
Page 55 of 100
Uconnect™ PHONE (Bluetooth®HANDS FREE CALLING)
• If the Uconnect™ Phone Buttonexists on your steering wheel, then you have the
Uconnect™ Phone features.
• The Uconnect™ Phone is a voice-activated, hands-free, in-vehicle communications system with Voice Command Capability (see Voice Command section).
• The Uconnect™ Phone allows you to dial a phone number with your mobile phone using simple voice commands or using screen soft-keys.
• Refer to the Understand The Features Of Your Vehicle section of your vehicle's Owner's Manual on the DVD for further details.
• The Uconnect™ Phone requires a mobile phone equipped with the Bluetooth
®
Hands-Free Profile, Version 1.0 or higher. For Uconnect™ customer support, visit
www.Uconnect-Phone.com or call 1–877–855–8400. (U.S. Residents). Canadian
Residents call, 1-800-465–2001 (English) or 1-800-387-9983 (French).
Pairing a Phone
• To use the Uconnect™ Phone feature, you must first pair your Bluetooth®phone with
the Uconnect™ system.
Start pairing procedure on the radio
• Touch the Phone soft-key and then the Settings soft-key. Next, touch Add Device.
• Uconnect™ Phone will display an “In progress” screen while the system is connecting.
Start pairing procedure on mobile phone
•
Search for available devices on your Bluetooth®enabled mobile phone. This is usually
within Settings or Options under “Bluetooth”. See your mobile phone’s manual for details.
• When your phone finds the system, select “Uconnect” as the paired device.
Complete the pairing procedure
• A PIN code should appear on radio touch screen as well as on mobile device.
• Please ensure that these codes are the same, and if so accept the pairing on both.
• Pairing procedure is now complete.
Select the mobile phone's priority level
• When the pairing process has successfully completed, the system will prompt you to choose whether or not this is your favorite phone. Selecting Yes will make this phone the
highest priority. This phone will take precedence over other paired phones within range.
Only one phone can be paired at a time.
• You are now ready to make hands-free calls. Press the Uconnect™ Phone button on your steering wheel to begin.
ELECTRONICS
53
Page 57 of 100
Voice Command Tips
• Using complete names (i.e; Call John Doe vs. Call John) will result in greater systemaccuracy.
• You can “chain” commands together for faster results. Say “Call John Doe, mobile”, for example.
• If you are listening to available voice command options, you do not have to listen to the entire list. When you hear the command that you need, press the
button on the
steering wheel, wait for the beep and say your command.
Changing The Volume Of The Voice Command Prompts
• Start a dialogue by pressing the Phone button, then say a command, for example
- "Help".
• Use the radio ON/OFF VOLUME rotary knob to adjust the Uconnect™ audio prompt volume to a comfortable level. Please note that the Uconnect™ audio prompt volume
setting for Uconnect™ is different than the audio system.
NOTE:
To access help, press the Uconnect™ Phone
button on the steering wheel and say
"help." Touch the display or push either
orbutton and say "cancel" to cancel
the help session.
Voice Texting
• Uconnect™ Phone can read or send new text messages from your mobile phone.
• Your mobile phone must support SMS over Bluetooth
®(MAP Message Access Profile)
in order to use this feature. If the Uconnect™ Phone determines your phone is not
compatible with SMS messaging over Bluetooth
®the “Messaging” button on the touch
screen will be greyed out and the feature will not be available for use.
NOTE:
• For mobile phone compatibility and pairing instructions, please visit www.UconnectPhone.com
WARNING!
• Any voice commanded system should be used only in safe driving conditions
following applicable laws regarding phone use. Your attention should be focused on
safely operating the vehicle. Failure to do so may result in a collision causing you
and others to be severely injured or killed.
• In an emergency, to use Uconnect™ Phone, your mobile phone must be:
• turned on,
• paired to Uconnect™ Phone,
• and have network coverage.
ELECTRONICS
55
Page 58 of 100
Uconnect™ VOICE COMMAND
• If the Uconnect™ Voice Commandbutton exists on your steering wheel, then
you have the Voice Command feature.
• The Voice Command feature lets you keep your hands on the steering wheel, and your eyes on the road.
•
When you press the Voice Command buttonlocated on the radio faceplate or
steering wheel, you will hear a beep. The beep is your signal to give a command. If you do
not know what commands to say, you can say "help" and the system will provide options to
you. If you ever wish to interrupt the system while it lists options, press the Voice Command
button
, listen for the BEEP, and say your command.
• You can “chain” commands together for faster results. Say “Call John Doe, mobile”, for
example.
Changing The Volume
• Start a dialogue by pressing the Voice Command button
, then say a command
(for example, “help”).
•
Use the radio ON/OFF VOLUME rotary knob to adjust the volume to a comfortable level
while the Voice Command system is speaking. The volume setting for Voice Command is
different than the audio system.
• Refer to the Understand The Features Of Your Vehicle section of your vehicle's Owner's Manual on the DVD for further details.
Common Voice Commands (Examples)
Switch Modes “FM”
“Satellite” “AM”
“Change Source to iPod”
“Change Source to SD Card”
Radio (FM, AM) “95.5”
“95.5 FM”
“Go to preset 5”
Player “Play Album 'Greatest Hits”
“Play Artist 'Scott Joplin” “Play Genre 'Rock” “Play Song
'Maple Leaf Rag”
SiriusXM™ Satellite Radio “39”
“Foxxhole”
SiriusXM™ Travel Link “Show fuel prices”
“Show movie listings”
“Show current weather”
“Show extended weather”
“Show Travel Link favorites”
“Show NFL headlines”
“Show NBA rankings”
“Show NFL schedules”
“Show NBA scores”
SiriusXM™ Navigation “Navigate to (Address)”
“Navigate to (Point of Interest)”
ELECTRONICS
56
Page 60 of 100
STEERING WHEEL AUDIO CONTROLS
• The steering wheel audio controls arelocated on the rear surface of the steering
wheel.
Right Switch
• Press the switch up or down to increase
or decrease the volume.
• Press the button in the center to change modes AM/FM/SAT.
Left Switch
• Press the switch up or down to search for
the next listenable station or select the next or previous track.
• Press the button in the center to select the next preset radio station.
ELECTRONIC VEHICLE INFORMATION CENTER (EVIC)
• The EVIC features a driver interactive display that is located in the instrument
cluster. Pressing the controls on the left
side of the steering wheel allows the
driver to select vehicle information and
Personal Settings. For additional infor-
mation, refer to Programmable Features
in this guide.
• Press and release the UP arrow
button to scroll upward through the main
menus (Fuel Economy, Trip A, Trip B,
Audio, Stored Messages, Screen Set Up)
and sub menus.
• Press and release the DOWN arrow
button to scroll downward through the main
menus and sub menus.
• Press and release the RIGHT arrow
button for access to main menus, sub menus
or to select a personal setting in the setup menu.
• Press the BACK/LEFT arrow
button to scroll back to a previous menu or sub menu.
Compass Calibration
• This compass is self-calibrating, which eliminates the need to set the compass manually. When the vehicle is new, the compass may appear erratic and the EVIC will
display “CAL” until the compass is calibrated.
• You may also calibrate the compass by completing one or more 360 degree turns (in an area free from large metal or metallic objects) until the “CAL” message displayed in the
EVIC turns off. The compass will now function normally.
ELECTRONICS
58
Page 67 of 100
LAUNCH MODE
• This system maximizes accelerationtraction for straight line racing.
1. Bring vehicle to a complete stop.
2. Set the steering wheel for straight ahead driving.
3. Fully depress the clutch and select the first gear position.
4.
Press and release the “LAUNCH” Button
(Located on the steering wheel controls).
5. Press the accelerator pedal to the floor.
6. Release the clutch.
• Pressing the launch control button when launch control is active will deactivate launch control also shifting the vehicle into second gear will disable the system.
NOTE:
• Launch Mode brings the engine to optimum launch RPM and waits for the driver to release the clutch. Launch Mode then uses engine throttle only to achieve controlled
wheelslip for maximum acceleration through first gear.
• If the cluster launch EVIC message indicates all conditions are correct for launch and the throttle is pressed to the floor quickly (within approximately 1/2 second) the system
will hold the engine speed to a preset speed (below the engine rev limiter speed).
• Launch Mode can be used in any of the Electronic Stability Control (ESC) Modes.
SRT
65
Page 82 of 100
TOWING A DISABLED VEHICLE
Do not tow with sling-type equipment. Only use flatbed equipment. Always comply with
applicable state or local towing ordinances.
CAUTION!
• Failure to follow these towing methods can cause severe transmission damage.Such damage is not covered by the New Vehicle Limited Warranty.
• If the vehicle being towed requires steering, the ignition switch must be in the
ON/RUN position.
• Do not attempt to use sling-type equipment when towing. When securing the
vehicle to a flatbed truck, do not attach to front or rear suspension components.
Damage to your vehicle may result from improper towing.
FREEING A STUCK VEHICLE
• If your vehicle becomes stuck in mud, sand or snow, it can often be moved by a rockingmotion. Turn your steering wheel right and left to clear the area around the front wheels.
Then shift back and forth between 2nd gear and REVERSE. Using minimal accelerator
pedal pressure to maintain the rocking motion, without spinning the wheels, is most
effective.
WARNING!
Fast spinning tires can be dangerous. Forces generated by excessive wheel speeds may
cause tire damage or failure. A tire could explode and injure someone. Do not spin your
vehicle's wheels faster than 30 mph (48 km/h) when you are stuck. Do not let anyone
near a spinning wheel, no matter what the speed.
WHAT TO DO IN EMERGENCIES
80
Page 97 of 100
Maintenance Record..........85
Maintenance Schedule .........84
MOPAR
®Accessories ..........93
Navigation..............36,50
NewVehicleBreak-InPeriod......18
Oil, Engine Capacity ...............83
Outlet Power ................63
Overheating, Engine ...........71
Pedals,Adjustable............16
Placard, Tire and Loading Information..............89
Power Outlet (Auxiliary Electrical
Outlet) ................63
Seats ................14
Steering ...............83
Programmable Electronic Features.............59,67
Rain Sensitive Wiper System ......19
Rear Camera ...............23
Rear Park Sense System ........23
Recreational Towing ...........64
Replacement Bulbs ...........90
Reporting Safety Defects ........92
Rocking Vehicle When Stuck ......80
SeatBelts................10
Seats...................14 Adjustment .............15
Power ................14 SIRIUSTravelLink ...........52
Spark Plugs
...............83
Speed Control Accel/Decel .............20
Distance Setting (ACC Only) ....21
Steering TiltColumn .............17
Stuck, Freeing ..............80
Supplemental Restraint System - Airbag.................10
Temperature Control, Automatic(ATC)...........22
Theft System Arming ...........9
TiltSteeringColumn...........17
TIREFIT .................72
Tires AirPressure .............89
Towing..................64 DisabledVehicle ..........80
Recreational ............64
Towing Vehicle Behind a Motorhome . .64
Trailer Towing Trailer and Tongue Weight .....64
TrailerWeight ..............64
Transmission Fluid ................83
Uconnect™ 8.4A ............30
Uconnect™ 8.4AN ...........43
Uconnect™ Access ...........27
Washers,Windshield ..........19
Wheel and Wheel Trim Care .......90
Windshield Washers ...........19
WindshieldWipers............19
INDEX
95