warning light DODGE VIPER 2015 VX / 3.G User Guide
[x] Cancel search | Manufacturer: DODGE, Model Year: 2015, Model line: VIPER, Model: DODGE VIPER 2015 VX / 3.GPages: 148, PDF Size: 21.7 MB
Page 3 of 148
INTRODUCTION/WELCOME
WELCOME FROM FCA US LLC.......2
CONTROLS AT A GLANCE
DRIVER COCKPIT...............4INSTRUMENT CLUSTER...........6
GETTING STARTED
KEY FOB . . . . . . . . . . . . . . . . . . . . . 8ENGINE STARTING/STOPPING.......9VEHICLE SECURITY ALARM........10SEAT BELT SYSTEMS............11SUPPLEMENTAL RESTRAINTSYSTEM (SRS) — AIR BAGS........12CHILD RESTRAINTS............14NON-ADJUSTABLE HEAD RESTRAINTS...17FRONT SEATS................18ADJUSTABLE PEDALS...........19ADJUSTABLE FOOT REST..........20TILT STEERING COLUMN.........20
OPERATING YOUR VEHICLE
SRT ENGINE BREAK-INRECOMMENDATIONS............21TURN SIGNALS/WIPER/WASHER/HIGHBEAMS LEVER................22HEADLIGHT SWITCH............23ELECTRONIC SPEED CONTROL......24LAUNCH MODE................26ELECTRONIC CONTROL DAMPINGSYSTEM....................27ELECTRONIC STABILITY CONTROL(ESC)......................28MANUAL TRANSMISSION 1 TO 4 SKIPSHIFT.....................29ADDING FUEL................30AUTOMATIC TEMPERATURECONTROL (ATC)...............33PA R K V I E W®REAR BACK-UP CAMERA...35
ELECTRONICS
YOUR VEHICLE'S SOUND SYSTEM....36YOUR RADIO.................38Uconnect®ACCESS.............38Uconnect®8.4AN...............54Uconnect®8.4AN VOICE RECOGNITIONQUICK TIPS..................67Uconnect®PHONE..............82STEERING WHEEL AUDIO CONTROLS . . . 90DRIVER INFORMATION DISPLAY (DID) . . . 91PERFORMANCE PAGES...........93PROGRAMMABLE FEATURES.......94UNIVERSAL GARAGE DOOR OPENER(HomeLink®).................94POWER OUTLETS..............97
UTILITY
TRAILER TOWING WEIGHTS(MAXIMUM TRAILER WEIGHTRATINGS)...................98RECREATIONAL TOWING(BEHIND MOTORHOME, ETC.)......98
WHAT TO DO IN EMERGENCIES
ROADSIDE ASSISTANCE..........99INSTRUMENT CLUSTER WARNINGLIGHTS....................99INSTRUMENT CLUSTER INDICATORLIGHTS...................103IF YOUR ENGINE OVERHEATS......104TIRE SERVICE KIT.............105JUMP-STARTING..............111TOWING A DISABLED VEHICLE.....113FREEING A STUCK VEHICLE.......113EVENT DATA RECORDER (EDR).....114
MAINTAINING YOUR VEHICLE
OPENING THE HOOD...........115ENGINE COMPARTMENT.........116FLUID CAPACITIES............118FLUIDS, LUBRICANTS, ANDGENUINE PARTS..............118MAINTENANCE PROCEDURES......119MAINTENANCE SCHEDULES......120SRT – MAINTENANCE RECORD.....123FUSES....................124SUMMER/THREE-SEASON TIRES....126TIRE PRESSURES.............127SPARE TIRES — IF EQUIPPED......127WHEEL AND WHEEL TRIM CARE....129EXTERIOR BULBS.............129
CONSUMER ASSISTANCE
FCA US LLC CUSTOMER CENTER....130FCA CANADA INC. CUSTOMERCENTER...................130ASSISTANCE FOR THE HEARINGIMPAIRED..................130PUBLICATIONS ORDERING........130REPORTING SAFETY DEFECTS INTHE UNITED STATES............131
MOPAR® ACCESSORIES
AUTHENTIC ACCESSORIESBY MOPAR®.................132
FREQUENTLY ASKED QUESTIONS
FREQUENTLY ASKED QUESTIONS....133
INDEX.....................134
TABLE OF CONTENTS
Page 8 of 148
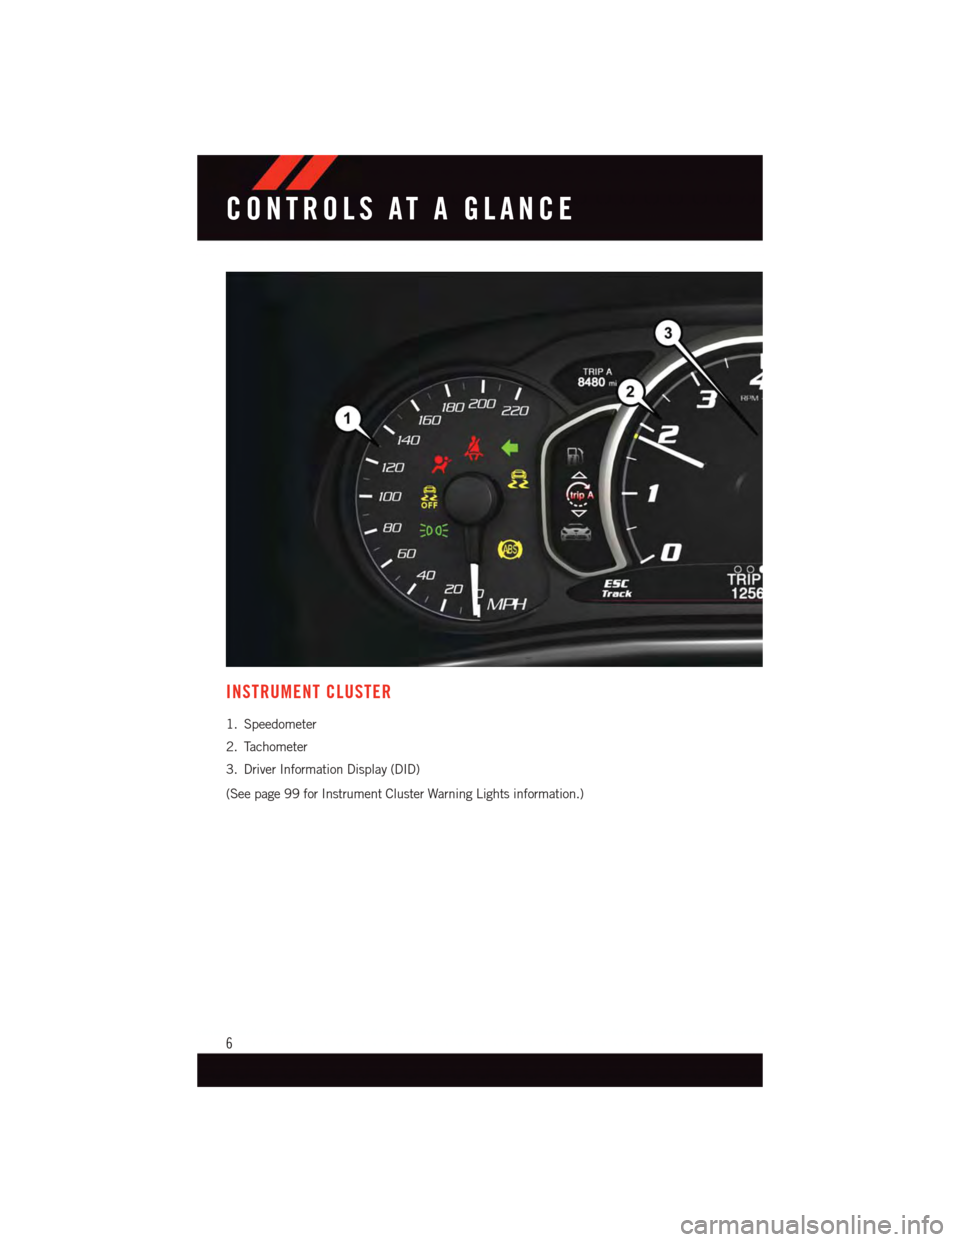
INSTRUMENT CLUSTER
1. Speedometer
2. Tachometer
3. Driver Information Display (DID)
(See page 99 for Instrument Cluster Warning Lights information.)
CONTROLS AT A GLANCE
6
Page 14 of 148
SUPPLEMENTAL RESTRAINT SYSTEM (SRS) — AIR BAGS
Air Bag System Components
Yo u r v e h i c l e m a y b e e q u i p p e d w i t h t h e f o l l o w i n g a i r b a g s y s t e m c o m p o n e n t s :
•OccupantRestraintController(ORC)
•AirBagWarningLight
•SteeringWheelandColumn
•InstrumentPanel
•KneeImpactBolsters
•AdvancedFrontAirBags
•SupplementalSideAirBags
•FrontandSideImpactSensors
•SeatBeltPretenioners
•SeatBeltBuckleSwitch
•SeatTrackPositionSensors
•OccupantClassificationSystem
Advanced Front Air Bags
•ThisvehiclehasAdvancedFrontAirBagsforboththedriverandfrontpassengerasa
supplement to the seat belt restraint systems. The Advanced Front Air Bags will not
deploy in every type of collision.
•AdvancedFrontAirBagsaredesignedtoprovideadditionalprotectionbysupplement-
ing the seat belts. Advanced Front Air Bags are not expected to reduce the risk of injury
in rear, side, or rollover collisions.
•TheAdvancedFrontAirBagswillnotdeployinallfrontalcollisions,includingsome
that may produce substantial vehicle damage — for example, some pole collisions,
truck underrides, and angle offset collisions.
•Ontheotherhand,dependingonthetypeandlocationofimpact,AdvancedFrontAir
Bags may deploy in crashes with little vehicle front-end damage but that produce a
severe initial deceleration.
•Becauseairbagsensorsmeasurevehicledecelerationovertime,vehiclespeedand
damage by themselves are not good indicators of whether or not an air bag should have
deployed.
•Seatbeltsarenecessaryforyourprotectioninallcollisions,andalsoareneededtohelp
keep you in position, away from an inflating air bag.
•Theairbagsmustbereadytoinflateforyourprotectioninacollision.TheOccupant
Restraint Controller (ORC) monitors the internal circuits and interconnecting wiring
associated with air bag system electrical components.
GETTING STARTED
12
Page 15 of 148
•TheORCturnsontheAirBagWarningLightintheinstrumentpanelforapproximately
four to eight seconds for a self-check when the ignition switch is first turned to the
ON/RUN position. After the self-check, the Air Bag Warning Light will turn off. If the
ORC detects a malfunction in any part of the system, it turns on the Air Bag Warning
Light, either momentarily or continuously. A single chime will sound to alert you if the
light comes on again after initial startup.
•TheORCmonitorsthereadinessoftheelectronicpartsoftheairbagsystemwhenever
the ignition switch is in the START or ON/RUN position. If the ignition switch is in the
OFF position or in the ACC position, the air bag system is not on and the air bags will
not inflate.
•IftheAirBagWarningLightintheinstrumentpanelisnotonduringthefourtoeight
seconds when the ignition switch is first turned to the ON/RUN position, stays on, or
turns on while driving, have the vehicle serviced by an authorized service center
immediately.
NOTE:
If the speedometer, tachometer, or any engine related gauges are not working, the
Occupant Restraint Controller (ORC) may also be disabled. In this condition the air bags
may not be ready to inflate for your protection. Have an authorized dealer service the air
bag system immediately.
•Afteranycollision,thevehicleshouldbetakentoanauthorizeddealerimmediately.
•Donotdriveyourvehicleaftertheairbagshavedeployed.Ifyouareinvolvedinanother
collision, the air bags will not be in place to protect you.
•Ifitisnecessarytomodifytheairbagsystemforpersonswithdisabilities,contactyour
authorized dealer.
•Referto“SupplementalRestraintSystem(SRS)”in“ThingsToKnowBeforeStarting
Yo u r Ve h i c l e ” i n t h e O w n e r ' s M a n u a l o n t h e D V D f o r f u r t h e r i n f o r m a t i o n .
WARNING!
•Relyingontheairbagsalonecouldleadtomoresevereinjuriesinacollision.The
air bags work with your seat belt to restrain you properly. In some collisions, the air
bags won't deploy at all. Always wear your seat belts even though you have air bags.
•BeingtooclosetothesteeringwheelorinstrumentpanelduringAdvancedFrontAir
Bag deployment could cause serious injury, including death. Air bags need room to
inflate. Sit back, comfortably extending your arms to reach the steering wheel or
instrument panel.
•Noobjectsshouldbeplacedoverorneartheairbagontheinstrumentpanelor
steering wheel because any such objects could cause harm if the vehicle is in a
collision severe enough to cause the air bag to inflate.
GETTING STARTED
13
Page 31 of 148
Rain Mode
•Rainmodeoffersincreasedtractioncontrolandstabilitycontrolforlowtraction
conditions such as wet roads, dry roads during cold temperatures, or when the driver
wants enhanced stability due to lack of familiarity or experience with the vehicle’s
response. To enter the “Rain Mode” mode, push the “ESC” switch three times. The
“ESC RAIN” light will illuminate, and the “ESC RAIN” message will display in the
vehicle cluster (left of the odometer).
NOTE:
Some models may not offer “Sport” or “Track” Mode.
WARNING!
The Electronic Stability Control System (ESC) cannot prevent the natural laws of physics
from acting on the vehicle, nor can it increase the traction afforded by prevailing road
conditions. ESC cannot prevent all accidents, including those resulting from excessive
speed in turns, driving on very slippery surfaces, or hydroplaning. ESC also cannot
prevent accidents resulting from loss of vehicle control due to inappropriate driver input
for the conditions. Only a safe, attentive, and skillful driver can prevent accidents. The
capabilities of an ESC equipped vehicle must never be exploited in a reckless or
dangerous manner which could jeopardize the user’s safety or the safety of others.
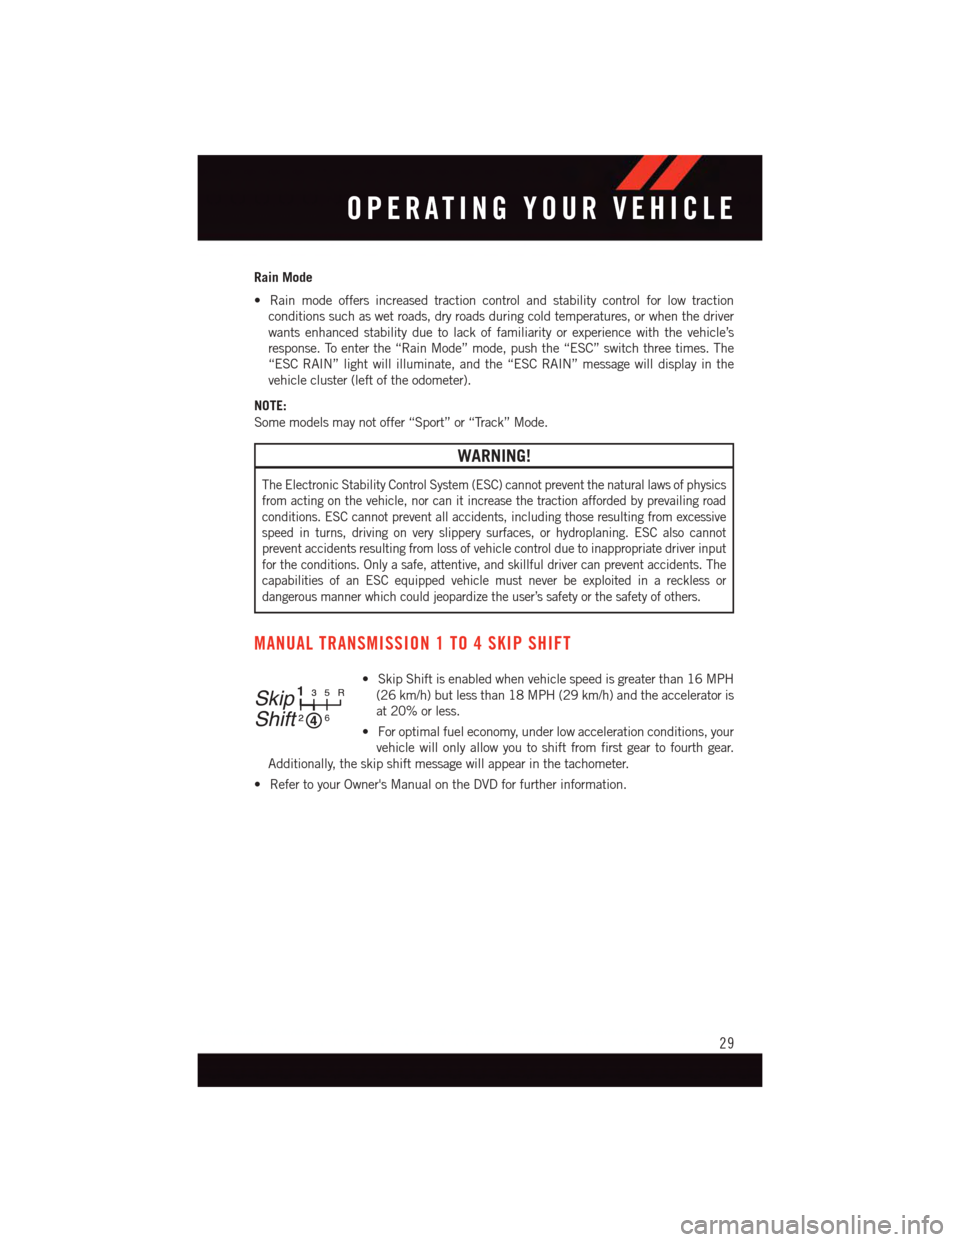
MANUAL TRANSMISSION 1 TO 4 SKIP SHIFT
•SkipShiftisenabledwhenvehiclespeedisgreaterthan16MPH
(26 km/h) but less than 18 MPH (29 km/h) and the accelerator is
at 20% or less.
•Foroptimalfueleconomy,underlowaccelerationconditions,your
vehicle will only allow you to shift from first gear to fourth gear.
Additionally, the skip shift message will appear in the tachometer.
•RefertoyourOwner'sManualontheDVDforfurtherinformation.
Skip
Shift
133
22
55RR
6
OPERATING YOUR VEHICLE
29
Page 32 of 148
ADDING FUEL
1. Press the fuel filler door release switch (located in the driver's door map pocket).
2. Open the fuel filler door.
3. There is no fuel filler cap. A flapper door inside the pipe seals the system.
4. Insert the fuel nozzle fully into the filler pipe – the nozzle opens and holds the flapper
door while refueling.
NOTE:
Only the correct size nozzle opens the latches allowing the flapper door to open.
5. Fill the vehicle with fuel – when the fuel nozzle “clicks” or shuts off the fuel tank is full.
6. Remove the fuel nozzle and close the fuel door.
NOTE:
Afunnelisprovided(locatedinthetrunkinthesparetirearea)toopentheflapper
door to allow for emergency refueling with a gas can.
CAUTION!
To a v o i d f u e l s p i l l a g e a n d o v e r f i l l i n g , d o n o t “ t o p o f f ” t h e f u e l t a n k a f t e r f i l l i n g .
WARNING!
•Neverhaveanysmokingmaterialslitinornearthevehiclewhenthefueldooris
open or the tank is being filled.
•Neveraddfuelwhentheengineisrunning.Thisisinviolationofmoststateand
federal fire regulations and may cause the “Malfunction Indicator Light” to turn on.
•Afiremayresultiffuelispumpedintoaportablecontainerthatisinsideofavehicle.
Yo u c o u l d b e b u r n e d . A l w a y s p l a c e f u e l c o n t a i n e r s o n t h e g r o u n d w h i l e f i l l i n g .
OPERATING YOUR VEHICLE
30
Page 51 of 148
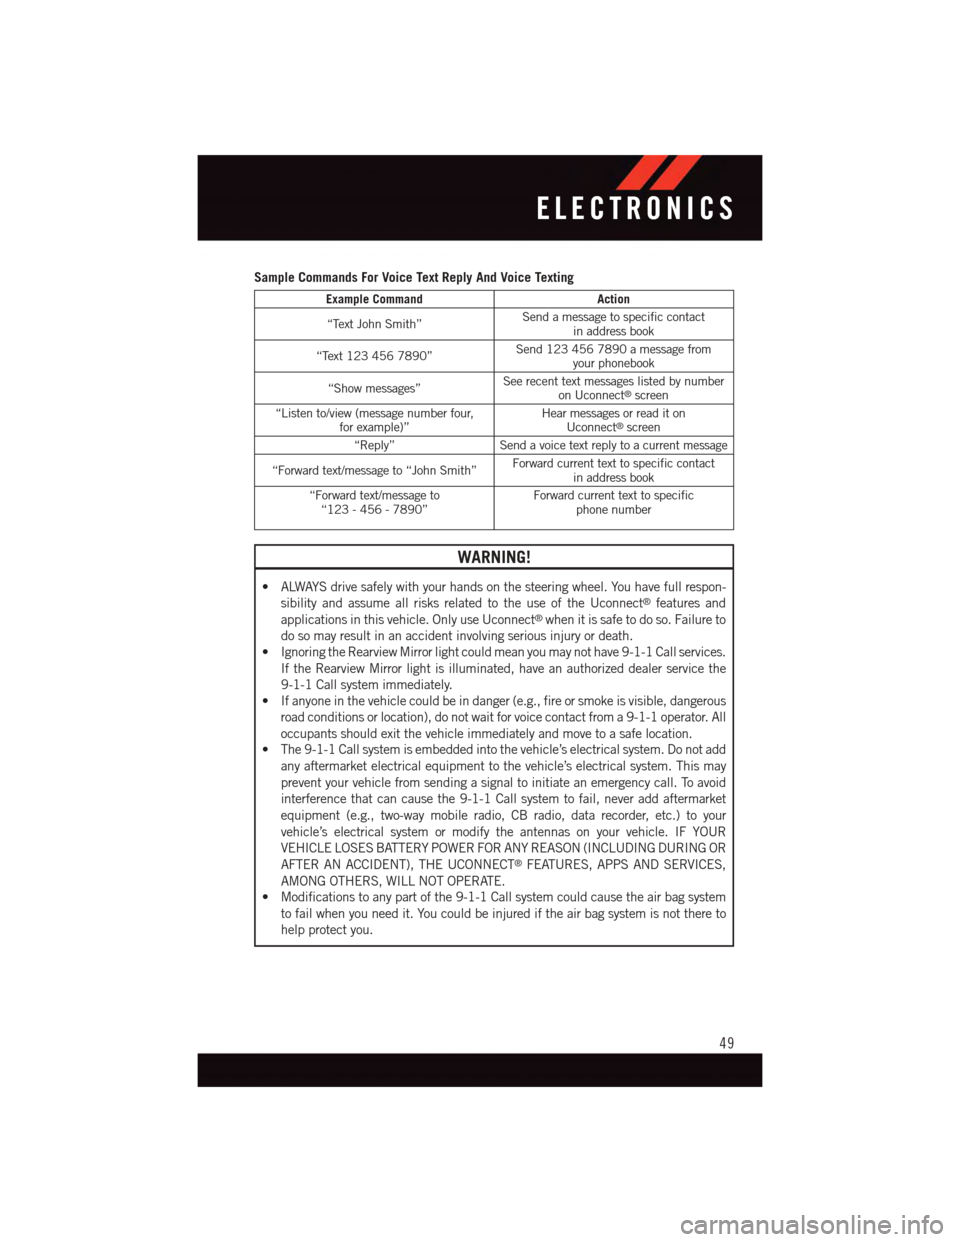
Sample Commands For Voice Text Reply And Voice Texting
Example CommandAction
“Text John Smith”Send a message to specific contactin address book
“Text 123 456 7890”Send 123 456 7890 a message fromyour phonebook
“Show messages”See recent text messages listed by numberon Uconnect®screen
“Listen to/view (message number four,for example)”Hear messages or read it onUconnect®screen
“Reply”Send a voice text reply to a current message
“Forward text/message to “John Smith”Forward current text to specific contactin address book
“Forward text/message to“123 - 456 - 7890”Forward current text to specificphone number
WARNING!
•ALWAYSdrivesafelywithyourhandsonthesteeringwheel.Youhavefullrespon-
sibility and assume all risks related to the use of the Uconnect®features and
applications in this vehicle. Only use Uconnect®when it is safe to do so. Failure to
do so may result in an accident involving serious injury or death.
•IgnoringtheRearviewMirrorlightcouldmeanyoumaynothave9-1-1Callservices.
If the Rearview Mirror light is illuminated, have an authorized dealer service the
9-1-1 Call system immediately.
•Ifanyoneinthevehiclecouldbeindanger(e.g.,fireorsmokeisvisible,dangerous
road conditions or location), do not wait for voice contact from a 9-1-1 operator. All
occupants should exit the vehicle immediately and move to a safe location.
•The9-1-1Callsystemisembeddedintothevehicle’selectricalsystem.Donotadd
any aftermarket electrical equipment to the vehicle’s electrical system. This may
prevent your vehicle from sending a signal to initiate an emergency call. To avoid
interference that can cause the 9-1-1 Call system to fail, never add aftermarket
equipment (e.g., two-way mobile radio, CB radio, data recorder, etc.) to your
vehicle’s electrical system or modify the antennas on your vehicle. IF YOUR
VEHICLE LOSES BATTERY POWER FOR ANY REASON (INCLUDING DURING OR
AFTER AN ACCIDENT), THE UCONNECT®FEATURES, APPS AND SERVICES,
AMONG OTHERS, WILL NOT OPERATE.
•Modificationstoanypartofthe9-1-1Callsystemcouldcausetheairbagsystem
to fail when you need it. You could be injured if the air bag system is not there to
help protect you.
ELECTRONICS
49
Page 98 of 148
Programming A Non-Rolling Code
NOTE:
For programming Garage Door Openers manufactured before 1995.
1. Turn the ignition switch to the ON/RUN position.
2. Place the hand-held transmitter 1 to 3 inches (3 to 8 cm) away from the HomeLink®
button you wish to program while keeping the HomeLink®indicator light in view.
3. Push and hold the HomeLink®button you want to program while you push and hold
the hand-held transmitter button.
4. Continue to hold both buttons and observe the indicator light. The HomeLink®
indicator will flash slowly and then rapidly after HomeLink®has received the fre-
quency signal from the hand-held transmitter. Release both buttons after the indicator
light changes from slow to rapid.
5. Push and hold the programmed HomeLink®button and observe the indicator light.
If the indicator light stays on constantly, programming is complete and the garage door
(or device) should activate when the HomeLink®button is pushed.
6. To program the two remaining HomeLink®buttons, repeat each step for each
remaining button. DO NOT erase the channels.
Using HomeLink®
To o p e r a t e , p u s h a n d r e l e a s e t h e p r o g r a m m e d H o m e L i n k®button. Activation will now
occur for the programmed device (i.e., garage door opener, gate operator, security system,
entry door lock, home/office lighting, etc.,). The hand-held transmitter of the device may
also be used at any time.
WARNING!
•Yourmotorizeddoororgatewillopenandclosewhileyouareprogrammingthe
universal transceiver. Do not program the transceiver if people or pets are in the
path of the door or gate.
•Donotrunyourvehicleinaclosedgarageorconfinedareawhileprogrammingthe
transceiver. Exhaust gas from your vehicle contains Carbon Monoxide (CO) which is
odorless and colorless. Carbon Monoxide is poisonous when inhaled and can cause
you and others to be severely injured or killed.
ELECTRONICS
96
Page 101 of 148
ROADSIDE ASSISTANCE
Dial toll-free 1-800-521-2779 for U.S. Residents or 1-800-363-4869 for Canadian
Residents.
•Provideyourname,vehicleidentificationnumber,licenseplatenumber,andyour
location, including the telephone number from which you are calling.
•Brieflydescribethenatureoftheproblemandanswerafewsimplequestions.
•Youwillbegiventhenameoftheserviceproviderandanestimatedtimeofarrival.
If you feel you are in an “unsafe situation”, please let us know. With your consent, we
will contact local police or safety authorities.
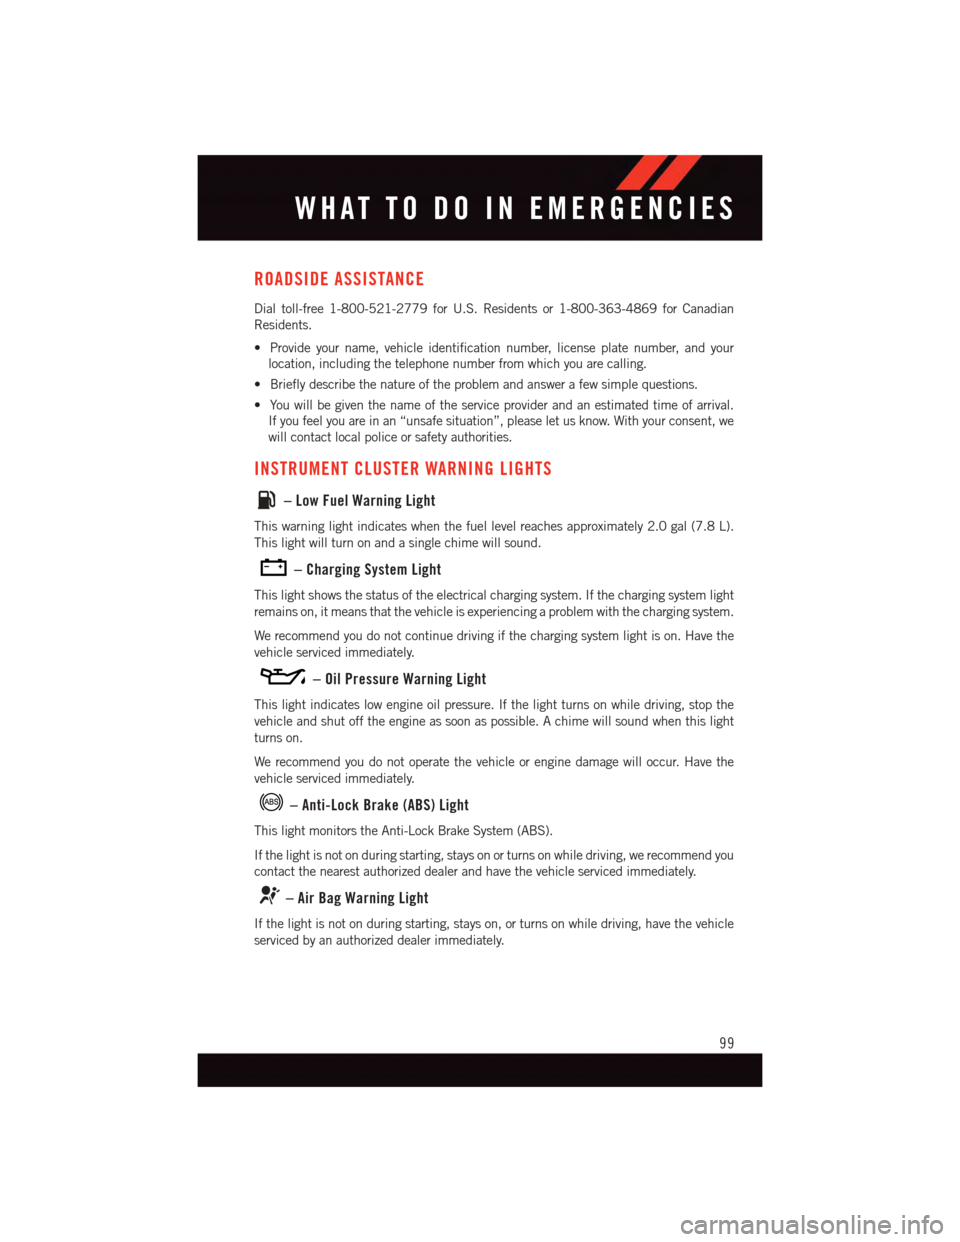
INSTRUMENT CLUSTER WARNING LIGHTS
–LowFuelWarningLight
This warning light indicates when the fuel level reaches approximately 2.0 gal (7.8 L).
This light will turn on and a single chime will sound.
–ChargingSystemLight
This light shows the status of the electrical charging system. If the charging system light
remains on, it means that the vehicle is experiencing a problem with the charging system.
We recommend you do not continue driving if the charging system light is on. Have the
vehicle serviced immediately.
–OilPressureWarningLight
This light indicates low engine oil pressure. If the light turns on while driving, stop the
vehicle and shut off the engine as soon as possible. A chime will sound when this light
turns on.
We recommend you do not operate the vehicle or engine damage will occur. Have the
vehicle serviced immediately.
–Anti-LockBrake(ABS)Light
This light monitors the Anti-Lock Brake System (ABS).
If the light is not on during starting, stays on or turns on while driving, we recommend you
contact the nearest authorized dealer and have the vehicle serviced immediately.
–AirBagWarningLight
If the light is not on during starting, stays on, or turns on while driving, have the vehicle
serviced by an authorized dealer immediately.
WHAT TO DO IN EMERGENCIES
99
Page 103 of 148
When the system detects a malfunction, the telltale will flash for approximately one
minute and then remain continuously illuminated. This sequence will continue upon
subsequent vehicle start-ups as long as the malfunction exists. When the malfunction
indicator is illuminated, the system may not be able to detect or signal low tire pressure
as intended. TPMS malfunctions may occur for a variety of reasons, including the
installation of replacement or alternate tires or wheels on the vehicle that prevent the
TPMS from functioning properly. Always check the TPMS malfunction telltale after
replacing one or more tires or wheels on your vehicle to ensure that the replacement or
alternate tires and wheels allow the TPMS to continue to function properly.
NOTE:
Ti r e p r e s s u r e s c h a n g e b y a p p r o x i m a t e l y 1 p s i ( 7 k P a ) p e r 1 2 ° F ( 7 ° C ) o f a i r t e m p e r a t u r e
change. Keep this in mind when checking tire pressure inside a garage, especially in the
Winter. Example: If garage temperature is 68°F (20°C), and the outside temperature is
32°F (0°C), then the cold tire inflation pressure should be increased by 3 psi (21 kPa),
which equals 1 psi (7 kPa) for every 12°F (7°C) for this outside temperature condition.
CAUTION!
The TPMS has been optimized for the original equipment tires and wheels. TPMS
pressures and warning have been established for the tire size equipped on your vehicle.
Undesirable system operation or sensor damage may result when using replacement
equipment that is not of the same size, type, and/or style. Aftermarket wheels can
cause sensor damage. Do not use tire sealant from a can, or balance beads if your
vehicle is equipped with a TPMS, as damage to the sensors may result.
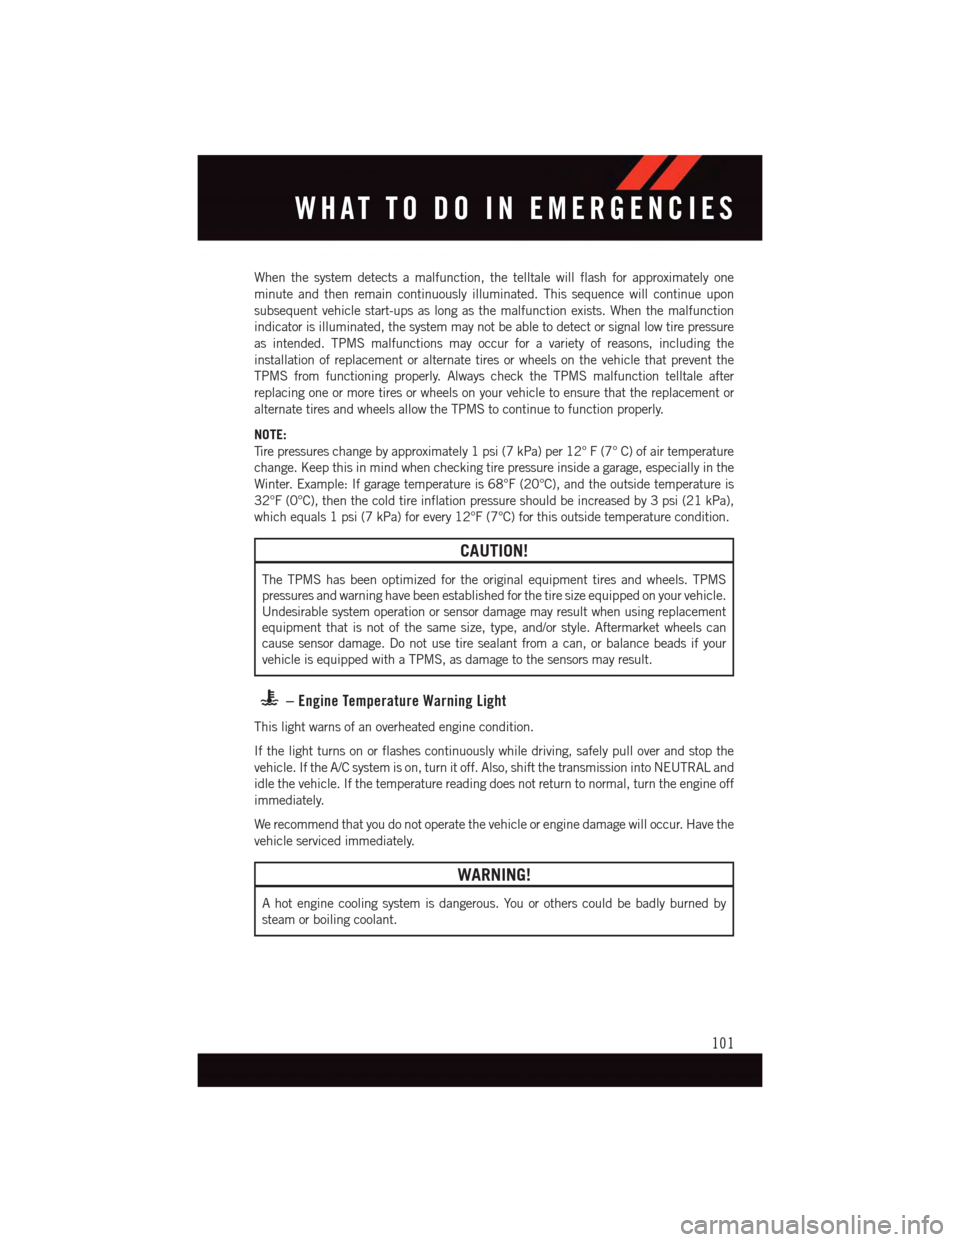
–EngineTemperatureWarningLight
This light warns of an overheated engine condition.
If the light turns on or flashes continuously while driving, safely pull over and stop the
vehicle. If the A/C system is on, turn it off. Also, shift the transmission into NEUTRAL and
idle the vehicle. If the temperature reading does not return to normal, turn the engine off
immediately.
We recommend that you do not operate the vehicle or engine damage will occur. Have the
vehicle serviced immediately.
WARNING!
Ahotenginecoolingsystemisdangerous.Youorotherscouldbebadlyburnedby
steam or boiling coolant.
WHAT TO DO IN EMERGENCIES
101