air FIAT 124 SPIDER 2020 Owner handbook (in English)
[x] Cancel search | Manufacturer: FIAT, Model Year: 2020, Model line: 124 SPIDER, Model: FIAT 124 SPIDER 2020Pages: 228, PDF Size: 5.08 MB
Page 185 of 228
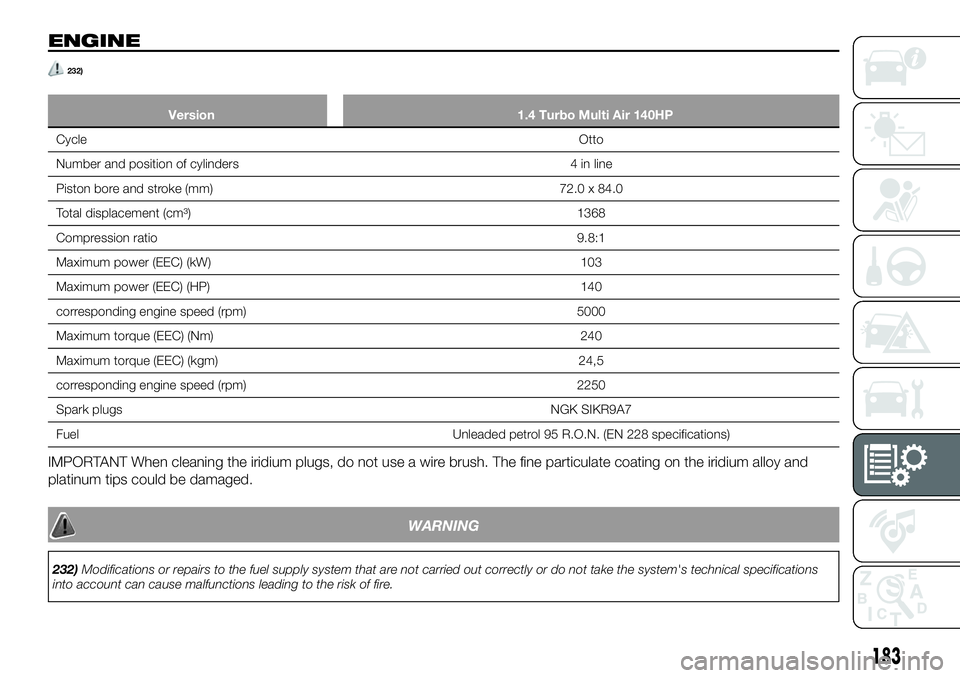
ENGINE
232)
Version 1.4 Turbo Multi Air 140HP
CycleOtto
Number and position of cylinders 4 in line
Piston bore and stroke (mm) 72.0 x 84.0
Total displacement (cm³) 1368
Compression ratio9.8:1
Maximum power (EEC) (kW) 103
Maximum power (EEC) (HP) 140
corresponding engine speed (rpm) 5000
Maximum torque (EEC) (Nm) 240
Maximum torque (EEC) (kgm) 24,5
corresponding engine speed (rpm) 2250
Spark plugsNGK SIKR9A7
Fuel Unleaded petrol 95 R.O.N. (EN 228 specifications)
IMPORTANT When cleaning the iridium plugs, do not use a wire brush. The fine particulate coating on the iridium alloy and
platinum tips could be damaged.
WARNING
232)Modifications or repairs to the fuel supply system that are not carried out correctly or do not take the system's technical specifications
into account can cause malfunctions leading to the risk of fire.
183
Page 193 of 228
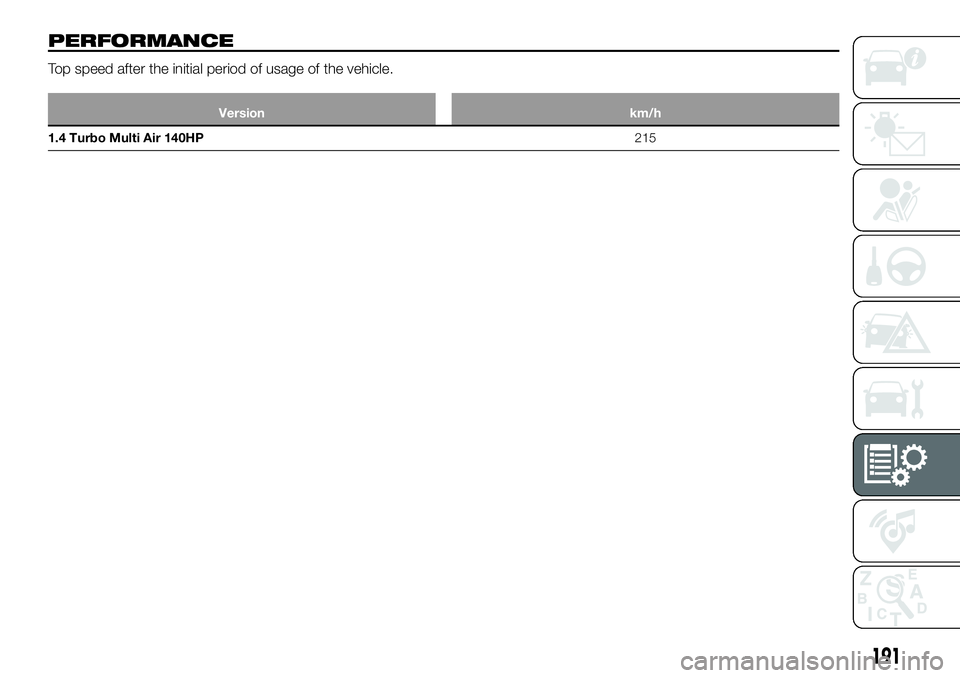
PERFORMANCE
Top speed after the initial period of usage of the vehicle.
Version km/h
1.4 Turbo Multi Air 140HP215
191
Page 198 of 228
TIPS, CONTROLS
AND GENERAL
INFORMATION
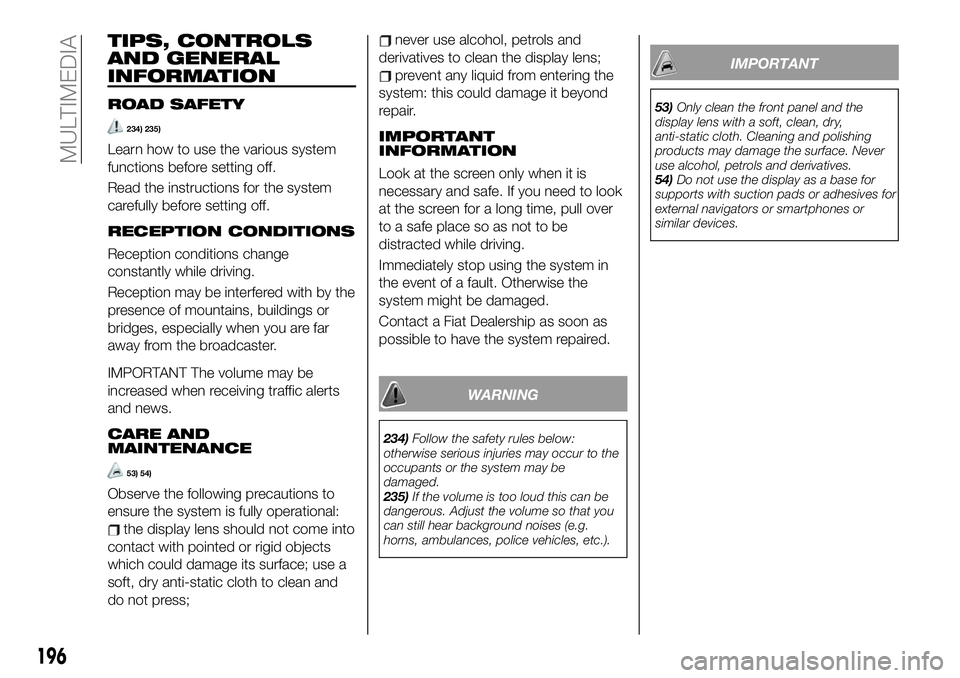
ROAD SAFETY
234) 235)
Learn how to use the various system
functions before setting off.
Read the instructions for the system
carefully before setting off.
RECEPTION CONDITIONS
Reception conditions change
constantly while driving.
Reception may be interfered with by the
presence of mountains, buildings or
bridges, especially when you are far
away from the broadcaster.
IMPORTANT The volume may be
increased when receiving traffic alerts
and news.
CARE AND
MAINTENANCE
53) 54)
Observe the following precautions to
ensure the system is fully operational:
the display lens should not come into
contact with pointed or rigid objects
which could damage its surface; use a
soft, dry anti-static cloth to clean and
do not press;
never use alcohol, petrols and
derivatives to clean the display lens;
prevent any liquid from entering the
system: this could damage it beyond
repair.
IMPORTANT
INFORMATION
Look at the screen only when it is
necessary and safe. If you need to look
at the screen for a long time, pull over
to a safe place so as not to be
distracted while driving.
Immediately stop using the system in
the event of a fault. Otherwise the
system might be damaged.
Contact a Fiat Dealership as soon as
possible to have the system repaired.
WARNING
234)Follow the safety rules below:
otherwise serious injuries may occur to the
occupants or the system may be
damaged.
235)If the volume is too loud this can be
dangerous. Adjust the volume so that you
can still hear background noises (e.g.
horns, ambulances, police vehicles, etc.).
IMPORTANT
53)Only clean the front panel and the
display lens with a soft, clean, dry,
anti-static cloth. Cleaning and polishing
products may damage the surface. Never
use alcohol, petrols and derivatives.
54)Do not use the display as a base for
supports with suction pads or adhesives for
external navigators or smartphones or
similar devices.
196
MULTIMEDIA
Page 202 of 228
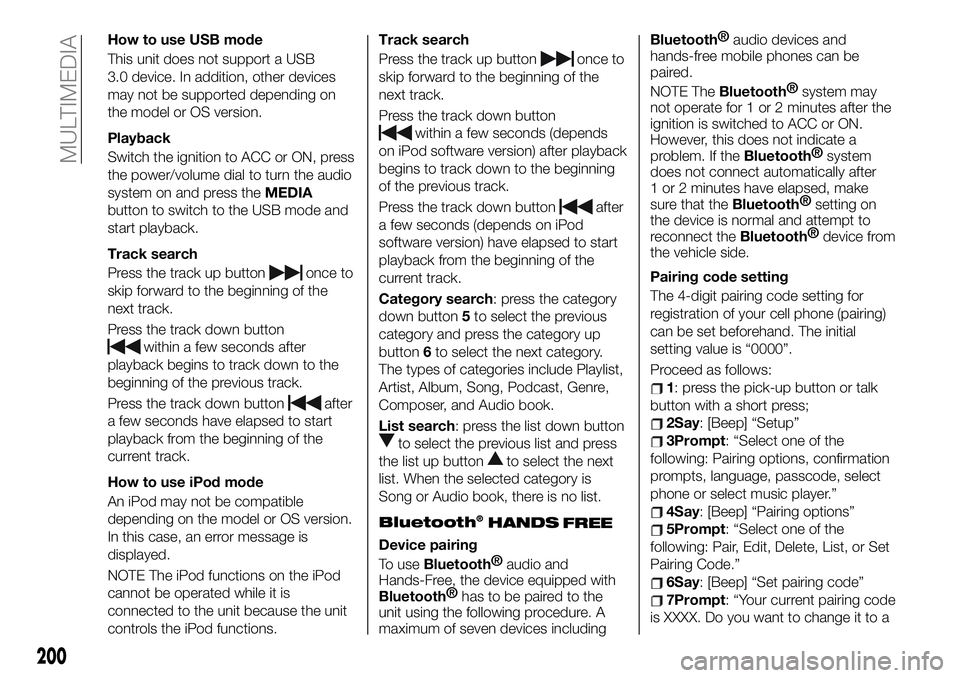
How to use USB mode
This unit does not support a USB
3.0 device. In addition, other devices
may not be supported depending on
the model or OS version.
Playback
Switch the ignition to ACC or ON, press
the power/volume dial to turn the audio
system on and press theMEDIA
button to switch to the USB mode and
start playback.
Track search
Press the track up button
once to
skip forward to the beginning of the
next track.
Press the track down button
within a few seconds after
playback begins to track down to the
beginning of the previous track.
Press the track down button
after
a few seconds have elapsed to start
playback from the beginning of the
current track.
How to use iPod mode
An iPod may not be compatible
depending on the model or OS version.
In this case, an error message is
displayed.
NOTE The iPod functions on the iPod
cannot be operated while it is
connected to the unit because the unit
controls the iPod functions.Track search
Press the track up button
once to
skip forward to the beginning of the
next track.
Press the track down button
within a few seconds (depends
on iPod software version) after playback
begins to track down to the beginning
of the previous track.
Press the track down button
after
a few seconds (depends on iPod
software version) have elapsed to start
playback from the beginning of the
current track.
Category search: press the category
down button5to select the previous
category and press the category up
button6to select the next category.
The types of categories include Playlist,
Artist, Album, Song, Podcast, Genre,
Composer, and Audio book.
List search: press the list down button
to select the previous list and press
the list up button
to select the next
list. When the selected category is
Song or Audio book, there is no list.
Bluetooth®
Device pairing
To use
Bluetooth®
audio and
Hands-Free, the device equipped with
Bluetooth®
has to be paired to the
unit using the following procedure. A
maximum of seven devices including
Bluetooth®
audio devices and
hands-free mobile phones can be
paired.
NOTE The
Bluetooth®
system may
not operate for 1 or 2 minutes after the
ignition is switched to ACC or ON.
However, this does not indicate a
problem. If the
Bluetooth®
system
does not connect automatically after
1 or 2 minutes have elapsed, make
sure that the
Bluetooth®
setting on
the device is normal and attempt to
reconnect the
Bluetooth®
device from
the vehicle side.
Pairing code setting
The 4-digit pairing code setting for
registration of your cell phone (pairing)
can be set beforehand. The initial
setting value is “0000”.
Proceed as follows:
1: press the pick-up button or talk
button with a short press;
2Say: [Beep] “Setup”
3Prompt: “Select one of the
following: Pairing options, confirmation
prompts, language, passcode, select
phone or select music player.”
4Say: [Beep] “Pairing options”
5Prompt: “Select one of the
following: Pair, Edit, Delete, List, or Set
Pairing Code.”
6Say: [Beep] “Set pairing code”
7Prompt: “Your current pairing code
is XXXX. Do you want to change it to a
200
MULTIMEDIA
HANDS
FREE
Page 203 of 228
![FIAT 124 SPIDER 2020 Owner handbook (in English) different pairing code?”
8Say: [Beep] “Yes”
9Prompt: “Please say a 4-digit
pairing code.”
10Say: [Beep] “YYYY”
11Prompt: “YYYY is this correct?”
12Say: [Beep] “Yes” or “No”. FIAT 124 SPIDER 2020 Owner handbook (in English) different pairing code?”
8Say: [Beep] “Yes”
9Prompt: “Please say a 4-digit
pairing code.”
10Say: [Beep] “YYYY”
11Prompt: “YYYY is this correct?”
12Say: [Beep] “Yes” or “No”.](/img/10/33063/w960_33063-202.png)
different pairing code?”
8Say: [Beep] “Yes”
9Prompt: “Please say a 4-digit
pairing code.”
10Say: [Beep] “YYYY”
11Prompt: “YYYY is this correct?”
12Say: [Beep] “Yes” or “No”. If “Yes”,
go to next step. If “No”, the procedure
returns to Step 9
13Prompt: “Your new pairing code
is YYYY. Use this pairing code when
pairing devices to the Hands free
system. Do you want to pair a device
now?”
14Say: [Beep] “Yes” or “No”. If “Yes”,
the system switches to the device
registration mode. If “No”, the system
returns to standby status.Device pairing
Proceed as follows:
1activate theBluetooth®
application of the device;
2press the pick-up button or talk
button with a short press;
3Say: [Beep] “Setup”
4Prompt: “Select one of the
following: Pairing options, confirmation
prompts, language, passcode, select
phone or select music player.”
5Say: [Beep] “Pairing options”
6Prompt: “Select one of the
following: Pair, Edit, Delete, List, or Set
Pairing Code.”
7Say: [Beep] “Pair”
8Prompt: “Start the pairing process
on your
Bluetooth®
device. Your
pairing code is 0000 (XXXX). Input this
on your
Bluetooth®
device when
prompted on the device. See device
manual for instructions.”
9using the device, perform a search
for the
Bluetooth®
device (Peripheral
device)
select “124 Spider” from the device
list searched by the device and input
the 4-digit pairing code to the device;
10Prompt: “Please say the name of
the device after the beep.”
11Say: [Beep] “XXXX - - -” (say a
“device tag”, an arbitrary name for the
device.). Example:“Stan's device.”
12Prompt: “XXXXXX---(Ex.
“Stan's device”) (Device tag). Is this
correct?”
13Say: [Beep] “Yes”
14Prompt: “Pairing complete”
After a device is registered, the system
automatically identifies the device.
NOTE Say a paired “device tag” within
10 seconds. If more than two devices
are to be paired, they cannot be paired
with the same or similar “device tag”.
201
Page 206 of 228
Bose®
AudioPilot(Automatic
volume adjustment) (Bose®
Sound
System, where provided): On/Off;
Beep(Audio operation sound):
On/Off.
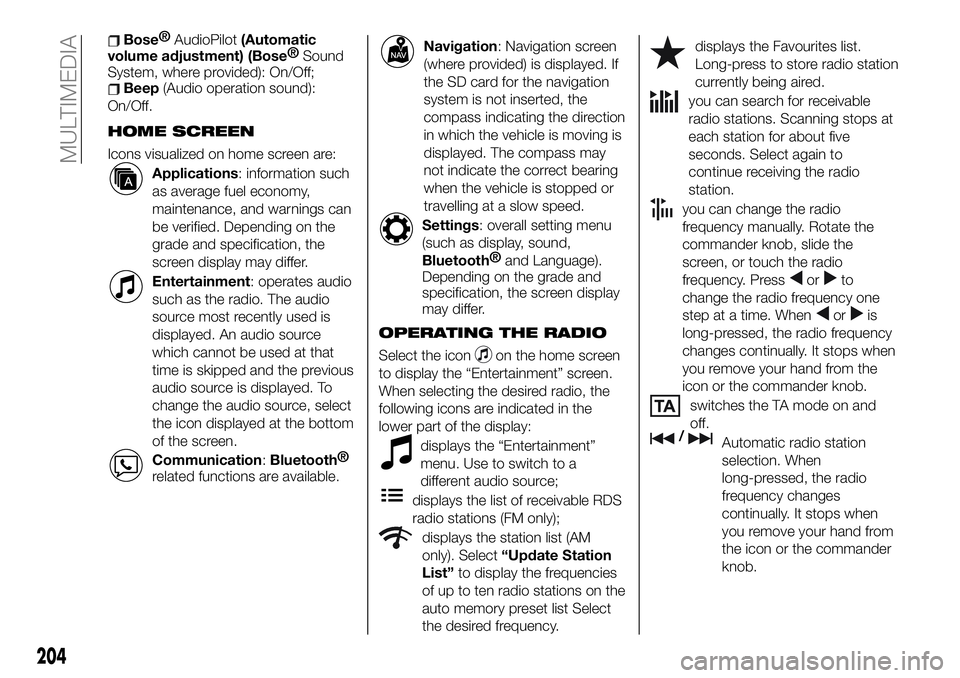
HOME SCREEN
Icons visualized on home screen are:
Applications: information such
as average fuel economy,
maintenance, and warnings can
be verified. Depending on the
grade and specification, the
screen display may differ.
Entertainment: operates audio
such as the radio. The audio
source most recently used is
displayed. An audio source
which cannot be used at that
time is skipped and the previous
audio source is displayed. To
change the audio source, select
the icon displayed at the bottom
of the screen.
Communication:Bluetooth®
related functions are available.
Navigation: Navigation screen
(where provided) is displayed. If
the SD card for the navigation
system is not inserted, the
compass indicating the direction
in which the vehicle is moving is
displayed. The compass may
not indicate the correct bearing
when the vehicle is stopped or
travelling at a slow speed.
Settings: overall setting menu
(such as display, sound,
Bluetooth®
and Language).
Depending on the grade and
specification, the screen display
may differ.
OPERATING THE RADIO
Select the iconon the home screen
to display the “Entertainment” screen.
When selecting the desired radio, the
following icons are indicated in the
lower part of the display:
displays the “Entertainment”
menu. Use to switch to a
different audio source;
displays the list of receivable RDS
radio stations (FM only);
displays the station list (AM
only). Select“Update Station
List”to display the frequencies
of up to ten radio stations on the
auto memory preset list Select
the desired frequency.
displays the Favourites list.
Long-press to store radio station
currently being aired.
you can search for receivable
radio stations. Scanning stops at
each station for about five
seconds. Select again to
continue receiving the radio
station.
you can change the radio
frequency manually. Rotate the
commander knob, slide the
screen, or touch the radio
frequency. Press
orto
change the radio frequency one
step at a time. When
oris
long-pressed, the radio frequency
changes continually. It stops when
you remove your hand from the
icon or the commander knob.
switches the TA mode on and
off.
/Automatic radio station
selection. When
long-pressed, the radio
frequency changes
continually. It stops when
you remove your hand from
the icon or the commander
knob.
204
MULTIMEDIA
Page 208 of 228
AUX / USB / iPod MODE
Audio can be heard from the vehicle's
speakers by connecting a commercially
available portable audio unit to the
auxiliary jack. A commercially-available,
non-impedance (3.5 Ø) stereo mini plug
lead is required.
In addition, audio can be played from
the vehicle audio device by connecting
a USB device or an iPod to the USB
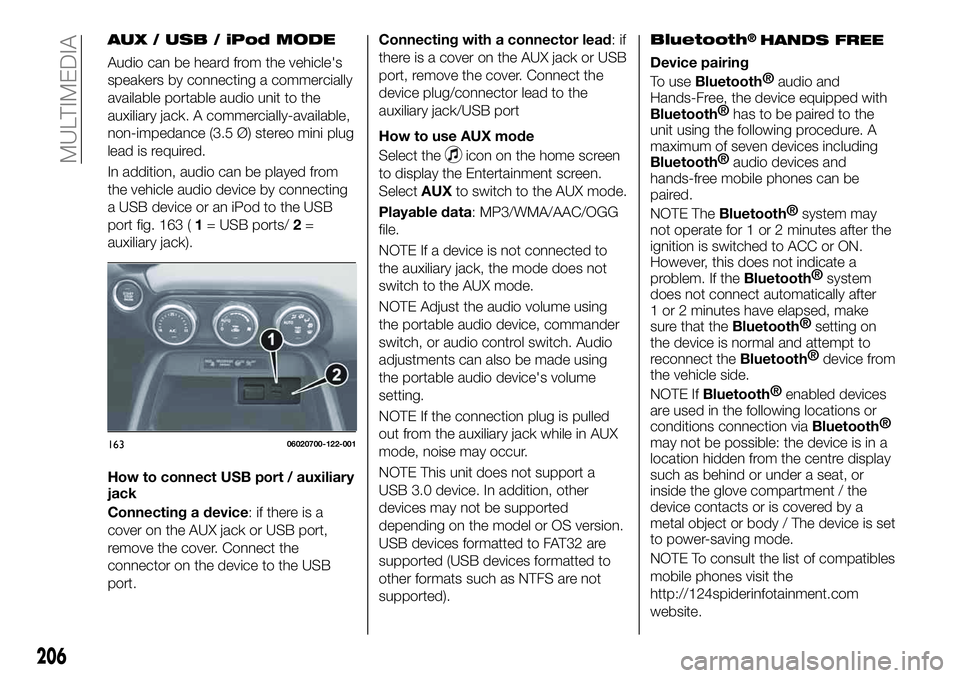
port fig. 163 (1= USB ports/2=
auxiliary jack).
How to connect USB port / auxiliary
jack
Connecting a device: if there is a
cover on the AUX jack or USB port,
remove the cover. Connect the
connector on the device to the USB
port.Connecting with a connector lead:if
there is a cover on the AUX jack or USB
port, remove the cover. Connect the
device plug/connector lead to the
auxiliary jack/USB port
How to use AUX mode
Select the
icon on the home screen
to display the Entertainment screen.
SelectAUXto switch to the AUX mode.
Playable data: MP3/WMA/AAC/OGG
file.
NOTE If a device is not connected to
the auxiliary jack, the mode does not
switch to the AUX mode.
NOTE Adjust the audio volume using
the portable audio device, commander
switch, or audio control switch. Audio
adjustments can also be made using
the portable audio device's volume
setting.
NOTE If the connection plug is pulled
out from the auxiliary jack while in AUX
mode, noise may occur.
NOTE This unit does not support a
USB 3.0 device. In addition, other
devices may not be supported
depending on the model or OS version.
USB devices formatted to FAT32 are
supported (USB devices formatted to
other formats such as NTFS are not
supported).
Bluetooth®HANDS FREE
Device pairing
To use
Bluetooth®
audio and
Hands-Free, the device equipped with
Bluetooth®
has to be paired to the
unit using the following procedure. A
maximum of seven devices including
Bluetooth®
audio devices and
hands-free mobile phones can be
paired.
NOTE The
Bluetooth®
system may
not operate for 1 or 2 minutes after the
ignition is switched to ACC or ON.
However, this does not indicate a
problem. If the
Bluetooth®
system
does not connect automatically after
1 or 2 minutes have elapsed, make
sure that the
Bluetooth®
setting on
the device is normal and attempt to
reconnect the
Bluetooth®
device from
the vehicle side.
NOTE If
Bluetooth®
enabled devices
are used in the following locations or
conditions connection via
Bluetooth®
may not be possible: the device is in a
location hidden from the centre display
such as behind or under a seat, or
inside the glove compartment / the
device contacts or is covered by a
metal object or body / The device is set
to power-saving mode.
NOTE To consult the list of compatibles
mobile phones visit the
http://124spiderinfotainment.com
website.
16306020700-122-001
206
MULTIMEDIA
Page 209 of 228
Pairing procedure
Proceed as follows:
select theicon on the home
screen to display the “Settings” screen;
select theDevicestab;
selectBluetooth®
and turn the
Bluetooth®
setting on;
selectAdd New Deviceto display
the message and switch to the device
operation. Using your device, perform a
search for the
Bluetooth®
device
(peripheral device);
select “124 Spider” from the device
list searched by the device;
Device withBluetooth®
version
2.0 input the displayed 4-digit pairing
code into the device. Device with
Bluetooth®
version 2.1 or higher make
sure the displayed 6-digit code on the
audio is also displayed on the device,
and touch theYes. Connection
permission and phonebook access
permission for your mobile device may
be required depending on the mobile
device. If pairing is successful, the
functions of the device connected to
Bluetooth®
are displayed;
devices compatible with SMS
function SMS messages is downloaded
automatically. A download permission
operation for your device may be
required depending on the device.
After a device is registered, the system
automatically identifies the device.Device selection
If several devices have been paired, the
Bluetooth®
unit links the device last
paired. If you would like to link a
different paired device, it is necessary to
change the link. The order of device
priority after the link has been changed
is maintained even when the ignition is
switched off.
Connecting other devices
Proceed as follows:
select theicon on the home
screen to display the “Settings” screen;
select theDevicestab then select
Bluetooth®
. Turn theBluetooth®
setting on and select the name of the
device you would like to connect;
Phone And Audio selection
connects both devices as hands-free
and
Bluetooth®
audio.Phone Only
selectionconnects as a hands-free
device.Audio Only selection
connects as
Bluetooth®
audio.
Making a call
Making calls is possible using any of the
following six methods:
Phonebook downloaded from
Bluetooth®
device (mobile phone)
(voice recognition function can be
used);
Favourites;
Call record;
Dialing a telephone number (voice
recognition function can be used);
“Redial” - voice recognition
command for making a call to the latest
outgoing call record;
“Call back” - voice recognition
command for making a call to the latest
incoming call record.
Telephone calls can be made by saying
the contact name in the downloaded
phonebook or the name of a person
whose phone number has been
registered in the
Bluetooth®
hands-free.
Proceed as follows:
press the talk button;
wait for the beep sound;
say: “Call XXXXX... (Ex. “John”)
Mobile” (you can also say, “Home”,
“Work”, or “Other” instead of “Mobile”,
depending on how you set up your
contact information);
follow the voice guidance to make
the call, or simple press the pick-up
button on the steering switch during or
after the guidance to make the call.
Import contact (download
Phonebook)
Phonebook data from your device
(Mobile phone) can be sent and
registered to your
Bluetooth®
hands-free phonebook using
Bluetooth®
.
Automatic downloading: the “Auto
Download Contacts” setting must be
207
Page 218 of 228

Mopar Vehicle Protectionoffers a series of service contracts that are designed to give all our customers the
pleasure of driving their vehicle without any hitch's and concerns.
Our product portfolio consists of a wide and flexible range of extended warranty and maintenance plans
endorsed by FCA. Each with a series of different coverage tiers, in terms of durability and mileage, built to
accommodate you’re driving needs.
Service contracts are made by experts that know every part of your vehicle, and commit themselves
to maintain it in tip top conditions. Our knowledge and passion is tailored around designing
products that promises all our drivers “worry-free driving”.
Only with Mopar Vehicle Protection you are ensured that all service operations are performed
by highly qualified and specialized technicians in authorized FCA repair facilities, using the right tools,
equipment and only original parts, all over Europe.
Check which Service Contract plans are available on your market today and choose the
Service Contract that suits your driving habits best.
Ask your local dealer for further information.
MAINTAIN YOUR VEHICLE IN
TIP TOP CONDITIONS WITH
Page 223 of 228
INDEX
ABS system................73
Accessory socket.............39
Active bonnet precautions........74
Active safety systems...........73
Advanced Keyless Entry System....14
AFS (Adaptive Front Lighting
System)..................27
Attaching the tow hooks........159
Auto-wiper control............31
Automatic climate control system.......................36
Automatic lighting.............25
Automatic transmission.........119
Auxiliary driving systems.........77
Battery (maintenance).........172
Battery recharging............174
Bodywork (care and
maintenance).............177
Bonnet....................42
Boot lid...................40
Boot lid (opening).............40
Brake Assist................117
Brake/clutch fluid (level check). . . .171
Checking levels.............169
Child restraint system suitability
for various seat position.......91
Child seat installation position.....90
Child-restraint precautions.......86
Child-restraint system types......89Climate control system..........33
Coming Home light system.......25
Constant monitoring..........114
Control panel and instruments.....49
Convertible Top (lowering)........44
Convertible Top (Soft Top)........44
Cruise Control..............122
Dashboard..................8
Dead lock device.............16
Dimensions................187
Doors.....................16
Driver Air Bag...............102
DRL (Daytime Running Lights).....25
DSC system................73
Emergency flap opening.......128
Emergency stop signal system. . . .135
Emergency towing............161
Engine...................183
Engine compartment..........169
Engine coolant (level check)......170
Engine oil (level check).........170
Essential information............3
Exterior lights................24
Flash to pass...............25
Fluid capacities..............188
Fluids and lubricants..........189
Front fog lights...............25Fuel filler cap...............128
Fuse block (engine compartment)......................146
Fuse block (left side of the vehicle)......................149
Fuses (under the bonnet)........145
Fuses (vehicle's left side)........144
Gear lever positions..........119
Gear Shift Indicator............53
Hazard warning lights.........135
Hazard warning lights (control). . . .135
Head restraints...............21
Headlight washer.............32
Headlights..................24
Heated seats................19
Heavy-dute use of the vehicle
(scheduled servicing)........164
High beams.................25
HLA function................80
How the SRS Air bags work......102
How to use this manual..........3
Identification data............182
Ignition switch...............11
Immobilizer system............15
INFO switch.................52
Installing child restraint systems....95
Interiors..................180
Internal equipment............39
Jump starting..............157
Jump starting (procedure).......157
Fuel consumption and
CO2 emissions............192