width FIAT 124 SPIDER 2020 Owner handbook (in English)
[x] Cancel search | Manufacturer: FIAT, Model Year: 2020, Model line: 124 SPIDER, Model: FIAT 124 SPIDER 2020Pages: 228, PDF Size: 5.08 MB
Page 86 of 228
WARNING
83)Always wear your seat belt and make
sure all occupants are properly restrained.
Not wearing a seat belt is extremely
dangerous. During a collision, occupants
not wearing seat belts could hit someone
or things inside the vehicle or even be
thrown out of the vehicle. They could be
seriously injured or even killed. In the same
collision, occupants wearing seat belts
would be much safer.
84)Do not wear twisted seat belts. Twisted
seat belts are dangerous. In a collision, the
full width of the belt is not available to
absorb the impact. This puts more force on
the bones beneath the belt, which could
cause serious injury or death. So, if your
seat belt is twisted, you must straighten
the seat belt to remove any twists and to
allow the full width of the belt to be used.
85)Never use one seat belt on more than
one person at a time. Using one seat belt
for more than one person at a time is
dangerous. A seat belt used in this way
cannot spread the impact forces properly
and the two passengers could be crushed
together and seriously injured or even
killed. Never use one belt for more than
one person at a time and always operate
the vehicle with each occupant properly
restrained.86)Do not operate a vehicle with a
damaged seat belt. Using a damaged seat
belt is dangerous. An accident could
damage the belt webbing of the seat belt in
use. A damaged seat belt cannot provide
adequate protection in a collision. Contact
a Fiat Dealership to inspect all seat belt
systems in use during an accident before
they are used again.
87)Have your seat belts changed
immediately if the pretensioner or load
limiter has been expended. Always have an
expert repairer, we recommend a Fiat
Dealership immediately inspect the seat
belt pretensioners and air bags after any
collision. Like the air bags, the seat belt
pretensioners and load limiters will only
function once and must be replaced after
any collision that caused them to deploy. If
the seat belt pretensioners and load
limiters are not replaced, the risk of injury in
a collision will increase.
88)Positioning the shoulder portion of the
seat belt. Improper positioning of the
shoulder portion of the seat belt is
dangerous. Always make sure the shoulder
portion of the seat belt is positioned across
your shoulder and near your neck, but
never under your arm, on your neck, or on
your upper arm.
89)Positioning the lap portion of the seat
belt. The lap portion of the seat belt worn
too high is dangerous. In a collision, this
would concentrate the impact force directly
on the abdominal area, causing serious
injury. Wear the lap portion of the belt
snugly and as low as possible.90)Instructions for use of seat belt
assemblies. Seat belts are designed to
bear upon the bony structure of the body,
and should be worn low across the front of
the pelvis or the pelvis, chest and
shoulders, as applicable; wearing the lap
section of the belt across the abdominal
area must be avoided. Seat belts should
be adjusted as firmly as possible,
consistent with comfort, to provide the
protection for which they have been
designed. A slack belt will greatly reduce
the protection afforded to the wearer. Care
should be taken to avoid contamination of
the webbing with polishes, oils and
chemicals, and particularly battery acid.
Cleaning may safely be carried out using
mild soap and water. The belt should be
replaced if webbing becomes frayed,
contaminated or damaged. It is essential to
replace the entire assembly after it has
been worn in a severe impact even if
damage to the assembly is not obvious.
Belts should not be worn with straps
twisted. Each belt assembly must only be
used by one occupant; it is dangerous to
put a belt around a child being carried on
the occupant's lap.
91)No modifications or additions should
be made by the user which will either
prevent the seat belt adjusting devices
from operating to remove slack, or prevent
the seat belt assembly from being adjusted
to remove slack.
84
SAFETY
Page 133 of 228
VIEWING THE DISPLAY
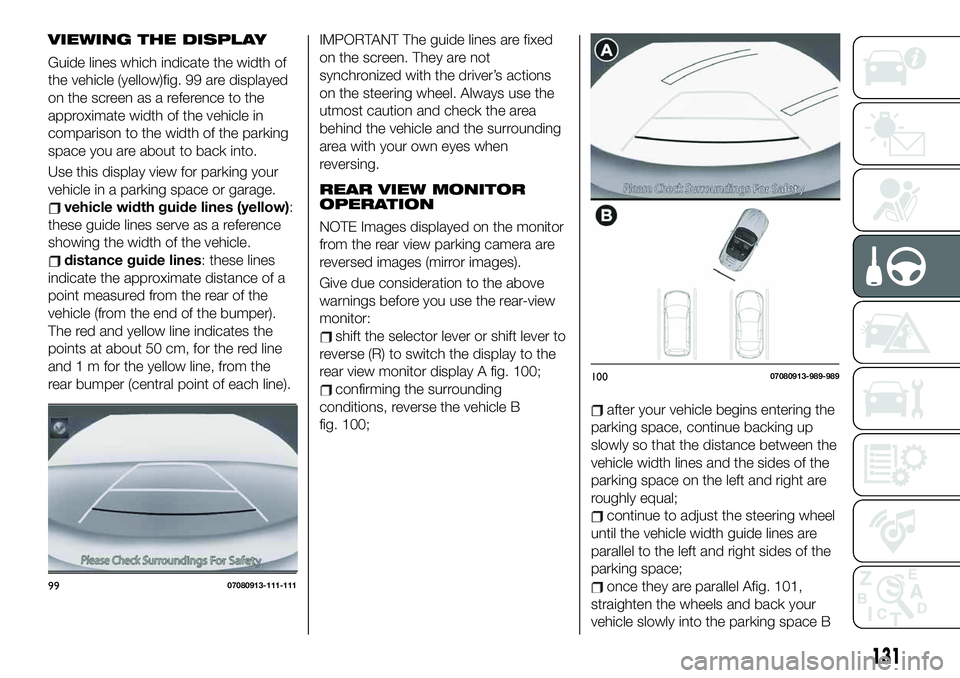
Guide lines which indicate the width of
the vehicle (yellow)fig. 99 are displayed
on the screen as a reference to the
approximate width of the vehicle in
comparison to the width of the parking
space you are about to back into.
Use this display view for parking your
vehicle in a parking space or garage.
vehicle width guide lines (yellow):
these guide lines serve as a reference
showing the width of the vehicle.
distance guide lines: these lines
indicate the approximate distance of a
point measured from the rear of the
vehicle (from the end of the bumper).
The red and yellow line indicates the
points at about 50 cm, for the red line
and 1 m for the yellow line, from the
rear bumper (central point of each line).
IMPORTANT The guide lines are fixed
on the screen. They are not
synchronized with the driver’s actions
on the steering wheel. Always use the
utmost caution and check the area
behind the vehicle and the surrounding
area with your own eyes when
reversing.
REAR VIEW MONITOR
OPERATION
NOTE Images displayed on the monitor
from the rear view parking camera are
reversed images (mirror images).
Give due consideration to the above
warnings before you use the rear-view
monitor:
shift the selector lever or shift lever to
reverse (R) to switch the display to the
rear view monitor display A fig. 100;
confirming the surrounding
conditions, reverse the vehicle B
fig. 100;
after your vehicle begins entering the
parking space, continue backing up
slowly so that the distance between the
vehicle width lines and the sides of the
parking space on the left and right are
roughly equal;
continue to adjust the steering wheel
until the vehicle width guide lines are
parallel to the left and right sides of the
parking space;
once they are parallel Afig. 101,
straighten the wheels and back your
vehicle slowly into the parking space B9907080913-111-111
10007080913-989-989
131
Page 134 of 228
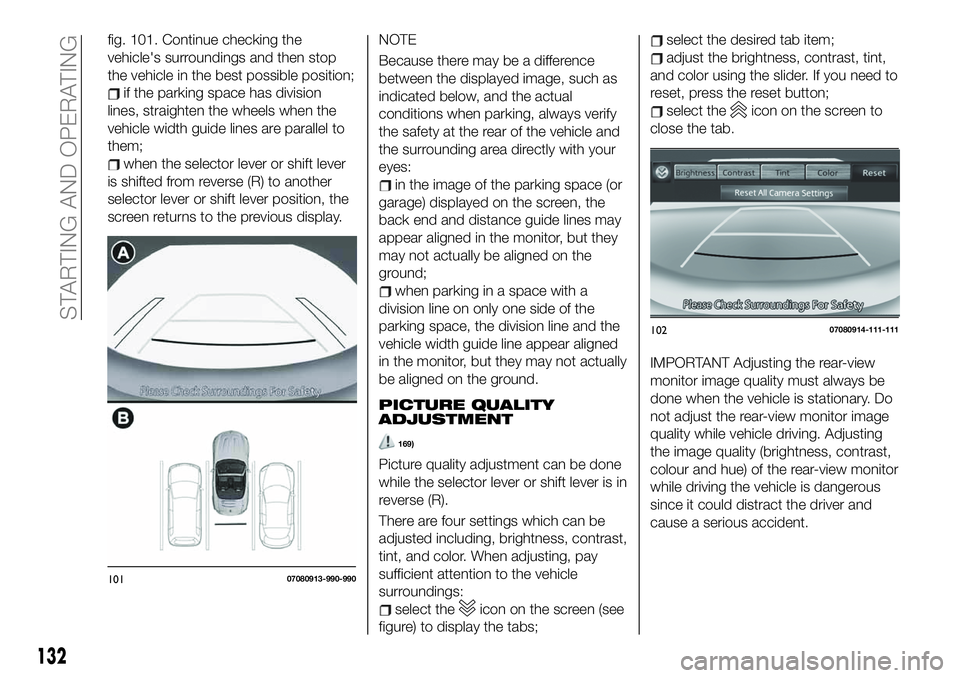
fig. 101. Continue checking the
vehicle's surroundings and then stop
the vehicle in the best possible position;
if the parking space has division
lines, straighten the wheels when the
vehicle width guide lines are parallel to
them;
when the selector lever or shift lever
is shifted from reverse (R) to another
selector lever or shift lever position, the
screen returns to the previous display.NOTE
Because there may be a difference
between the displayed image, such as
indicated below, and the actual
conditions when parking, always verify
the safety at the rear of the vehicle and
the surrounding area directly with your
eyes:
in the image of the parking space (or
garage) displayed on the screen, the
back end and distance guide lines may
appear aligned in the monitor, but they
may not actually be aligned on the
ground;
when parking in a space with a
division line on only one side of the
parking space, the division line and the
vehicle width guide line appear aligned
in the monitor, but they may not actually
be aligned on the ground.
PICTURE QUALITY
ADJUSTMENT
169)
Picture quality adjustment can be done
while the selector lever or shift lever is in
reverse (R).
There are four settings which can be
adjusted including, brightness, contrast,
tint, and color. When adjusting, pay
sufficient attention to the vehicle
surroundings:
select theicon on the screen (see
figure) to display the tabs;
select the desired tab item;
adjust the brightness, contrast, tint,
and color using the slider. If you need to
reset, press the reset button;
select theicon on the screen to
close the tab.
IMPORTANT Adjusting the rear-view
monitor image quality must always be
done when the vehicle is stationary. Do
not adjust the rear-view monitor image
quality while vehicle driving. Adjusting
the image quality (brightness, contrast,
colour and hue) of the rear-view monitor
while driving the vehicle is dangerous
since it could distract the driver and
cause a serious accident.
10107080913-990-990
10207080914-111-111
132
STARTING AND OPERATING
Page 178 of 228
initialization of the tire pressure
monitoring system is necessary to
make the system operate normally.
Refer to “Tire Pressure Monitoring
System Initialization” paragraph in
“Safety” chapter.
REPLACING A WHEEL
224)
A wrong-sized wheel may adversely
affect:
tire fit
wheel and bearing life;
ground clearance;
snow-chain clearance;
speedometer calibration;
headlight aim;
bumper height;
Tire Pressure Monitoring System.
IMPORTANT When replacing a wheel,
make sure the new one is the same as
the original factory wheel in diameter,
rim width, and offset (inset/outset). For
details contact a Fiat Dealership.
Proper tire balancing provides the best
riding comfort and helps reduce tread
wear. Out-of-balance tires can cause
vibration and uneven wear, such as
cupping and flat spots.
SNOW CHAINS
46)
The snow chains may be applied only
to the rear wheel tires. Check the
tension of the snow chains after the first
few metres have been driven.
IMPORTANT Using snow chains with
tires with non-original dimensions may
damage the vehicle.
IMPORTANT Using different size or type
(M+S, snow, etc.) tires between front
and rear axle may adversely affect
vehicle driveability, with the risk of losing
control of the vehicle and resulting
accidents.
TIRE ROTATION
RECOMMENDATIONS
IMPORTANT The following rotation
methods must NOT be used with
one-way tires! This type of tires can
only be switched from the front axle to
the rear axle and vice versa, keeping
them on the same side of the vehicle.
IMPORTANT Rotate tires periodically.
Irregular tire wear is dangerous. To
equalize tread wear for maintaining
good performance in handling and
braking, rotate the tires every 10,000
km, or sooner if irregular wear
develops.IMPORTANT Because your vehicle is
not equipped with a spare tire for tire
rotation contact Fiat Dealership.
After adjusting the tire pressure,
initialization of the tire pressure
monitoring system is necessary to
make the system operate normally.
Refer to “Tire Pressure Monitoring
System Initialization” paragraph in
“Safety” chapter.
IMPORTANT Rotate unidirectional tires
and radial tires that have an
asymmetrical tread pattern or studs
only from front to rear, not from side to
side. Tire performance will be reduced if
rotated from side to side.
With limited-slip differential
(where provided)
Do not use the following:
tires not of the designated size;
tires of different sizes or types at the
same time;
tires not sufficiently inflated.
If these instructions are not followed,
the rotation of the left and right wheels
will be different and will thus apply a
constant load on the limited-slip
differential. This will cause a
malfunction.
176
MAINTENANCE AND CARE
Page 211 of 228
Finds Places nearby. You can
search for Points Of Interest (POI) near
the vehicle position.
Displays the route parameters
and the route in its full length on the
map. You can also perform
route-related actions such as editing or
cancelling your route, picking route
alternatives, avoiding parts of the route,
simulating navigation or adding the
destination to your Favourites.
2D/3DChanges View mode. The
map view mode can be changed (2D
north up/2D heading up/3D).
Switches to the Settings screen
where you change navigation settings.
NOTE Some functions are not available
depending on some countries and
regions.NAVIGATING ON THE MAP
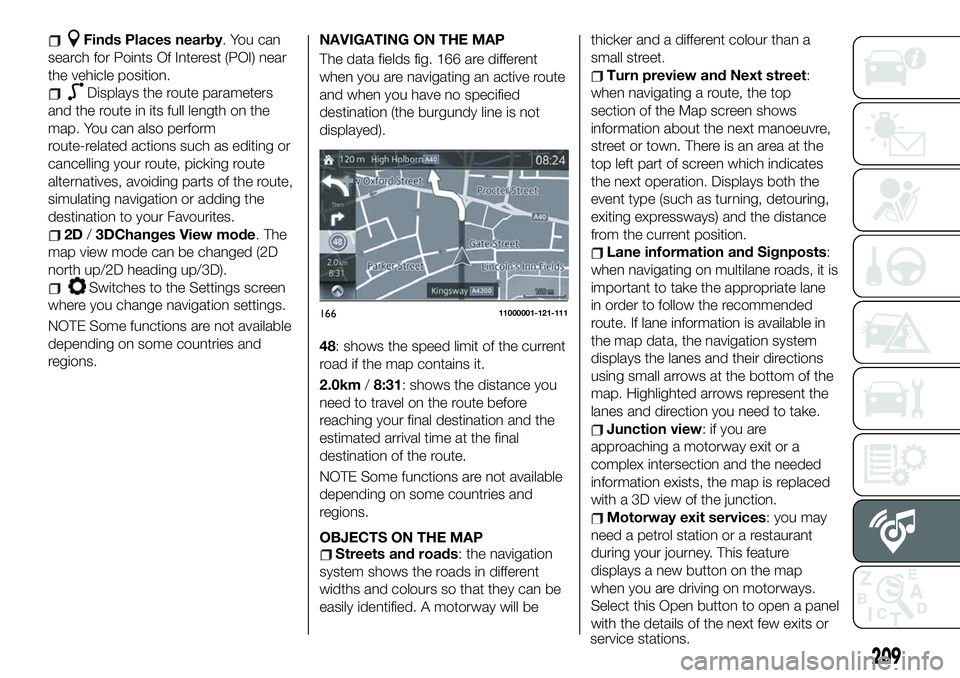
The data fields fig. 166 are different
when you are navigating an active route
and when you have no specified
destination (the burgundy line is not
displayed).
48: shows the speed limit of the current
road if the map contains it.
2.0km/8:31: shows the distance you
need to travel on the route before
reaching your final destination and the
estimated arrival time at the final
destination of the route.
NOTE Some functions are not available
depending on some countries and
regions.
OBJECTS ON THE MAP
Streets and roads: the navigation
system shows the roads in different
widths and colours so that they can be
easily identified. A motorway will bethicker and a different colour than a
small street.
Turn preview and Next street:
when navigating a route, the top
section of the Map screen shows
information about the next manoeuvre,
street or town. There is an area at the
top left part of screen which indicates
the next operation. Displays both the
event type (such as turning, detouring,
exiting expressways) and the distance
from the current position.
Lane information and Signposts:
when navigating on multilane roads, it is
important to take the appropriate lane
in order to follow the recommended
route. If lane information is available in
the map data, the navigation system
displays the lanes and their directions
using small arrows at the bottom of the
map. Highlighted arrows represent the
lanes and direction you need to take.
Junction view: if you are
approaching a motorway exit or a
complex intersection and the needed
information exists, the map is replaced
with a 3D view of the junction.
Motorway exit services: you may
need a petrol station or a restaurant
during your journey. This feature
displays a new button on the map
when you are driving on motorways.
Select this Open button to open a panel
with the details of the next few exits or
16611000001-121-111
209
service stations.