headlights FIAT 124 SPIDER 2021 Owner handbook (in English)
[x] Cancel search | Manufacturer: FIAT, Model Year: 2021, Model line: 124 SPIDER, Model: FIAT 124 SPIDER 2021Pages: 228, PDF Size: 5.08 MB
Page 69 of 228
Warning light What it means What to do
KEY INDICATOR LIGHT
Warning light flashing
When the push button start is pressed from
ON to ACC or OFF, the warning light may flash
for approximately 30 seconds indicating that
the remaining battery power of the key is low.Replace with a new battery before the key
becomes unusable.
Blue warning light
Warning light What it means What to do
MAIN BEAM HEADLIGHTS
The warning light switches on when the main
beam headlights are turned on.
LOW ENGINE COOLANT TEMPERATURE
INDICATOR LIGHT
(for versions/markets where provided)
The light illuminates continuously when the
engine coolant temperature is low and turns
off after the engine is warm.
If the low engine coolant temperature indicator
light remains illuminated after the engine has
been sufficiently warmed up, the temperature
sensor could have a malfunction.Contact a Dealership as soon as possible.
67
Page 138 of 228
REPLACING A BULB
GENERAL
INSTRUCTIONS
170) 171) 172) 173) 174)
30) 31)
Before replacing a bulb check the
contacts for oxidation;
replace blown bulbs with others of
the same type and power;
after replacing a headlight bulb,
always check its alignment;
to replace the bulb, contact a Fiat
Dealership;
use the protective cover and carton
for the replacement bulb to dispose of
the old bulb promptly and out of the
reach of children;
when a light is not working, check
that the corresponding fuse is intact
before replacing the bulb. For the
location of fuses, refer to the paragraph
“If a fuse blows” in this chapter.
IMPORTANT When removing the lens
or light unit using a flathead
screwdriver, make sure that the flathead
screwdriver does not contact the
interior terminal. If the flathead
screwdriver contacts the terminal, a
short circuit may occur.IMPORTANT When the weather is cold
or damp or after heavy rain or washing,
the surface of headlights or rear lights
may steam up and/or form drops of
condensation on the inside. This is a
natural phenomenon due to the
difference in temperature and humidity
between the inside and the outside of
the glass which does not indicate a
fault and does not compromise the
normal operation of lighting devices.
The mist disappears quickly when the
lights are turned on, starting from the
center of the diffuser, extending
progressively towards the edges.
136
IN CASE OF EMERGENCY
Page 139 of 228
Exterior light
Light bulbs Type Power
Front positions(versions with Full-LED
headlights)Full-LED(*)—
(versions with halogen headlights) W5W 5 W
High-beams(versions with Full-LED
headlights)Full-LED
(*)—
High-beam/Daytime Running
Lights (DRL)(versions with halogen headlights) H15 55/15 W
Daytime Running Lights (DRL)(versions with Full-LED
headlights)Full-LED
(*)—
Low beams(versions with Full-LED
headlights)Full-LED
(*)—
(versions with halogen headlights) H11 55 W
Front direction indicator lights WY21W 21 W
Side direction indicator lights
WY5W
(**)5W
Front fog lights H11 55 W
Rear position lights
Full-LED
(*)—
Stop lights
Full-LED
(*)—
3
rdstop
Full-LED(*)—
Rear direction indicator lights WY21W 21 W
Rear fog light W21W 21 W
Reverse light W21W 21 W
Number plate lights W5W 5 W
(*) LED is the abbreviation for Light Emitting Diode.
(**) Bulb replacement is not possible because it is built into the unit. Replace the unit.
137
Page 141 of 228
REPLACING EXTERIOR
LIGHT BULBS
Headlights (low beam)
(versions with halogen bulb)
Proceed as follows:
if you are changing the right bulb,
start the engine, turn the steering wheel
all the way to the right, and turn off
engine. If you are changing the left bulb,
turn the steering wheel to the left;
make sure the headlight switch is off;
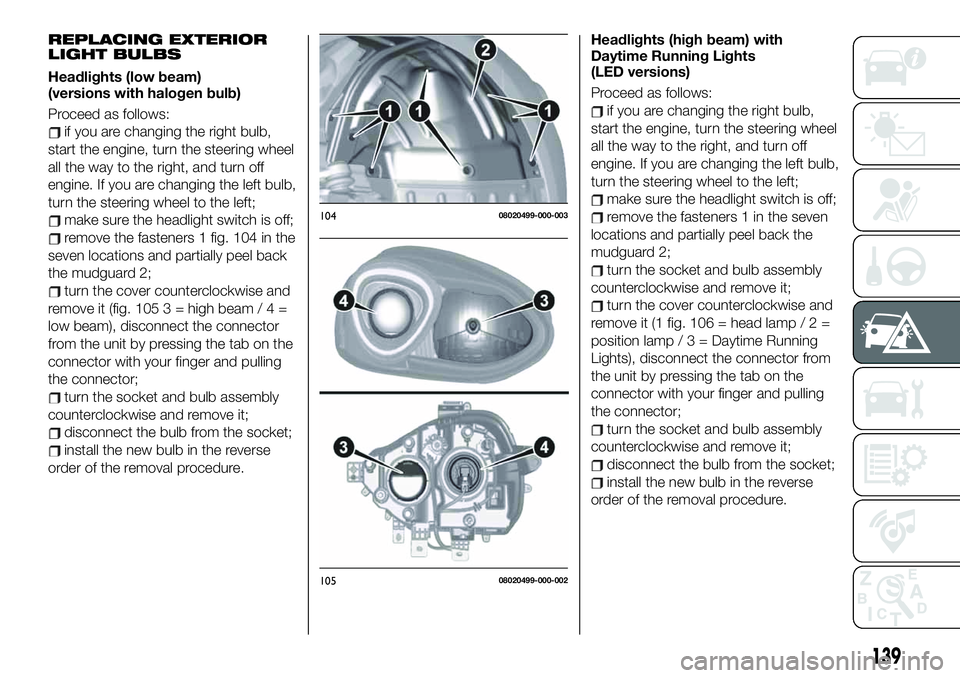
remove the fasteners 1 fig. 104 in the
seven locations and partially peel back
the mudguard 2;
turn the cover counterclockwise and
remove it (fig. 105 3 = high beam/4=
low beam), disconnect the connector
from the unit by pressing the tab on the
connector with your finger and pulling
the connector;
turn the socket and bulb assembly
counterclockwise and remove it;
disconnect the bulb from the socket;
install the new bulb in the reverse
order of the removal procedure.Headlights (high beam) with
Daytime Running Lights
(LED versions)
Proceed as follows:
if you are changing the right bulb,
start the engine, turn the steering wheel
all the way to the right, and turn off
engine. If you are changing the left bulb,
turn the steering wheel to the left;
make sure the headlight switch is off;
remove the fasteners 1 in the seven
locations and partially peel back the
mudguard 2;
turn the socket and bulb assembly
counterclockwise and remove it;
turn the cover counterclockwise and
remove it (1 fig. 106 = head lamp / 2 =
position lamp/3=Daytime Running
Lights), disconnect the connector from
the unit by pressing the tab on the
connector with your finger and pulling
the connector;
turn the socket and bulb assembly
counterclockwise and remove it;
disconnect the bulb from the socket;
install the new bulb in the reverse
order of the removal procedure.
10408020499-000-003
10508020499-000-002
139
Page 166 of 228
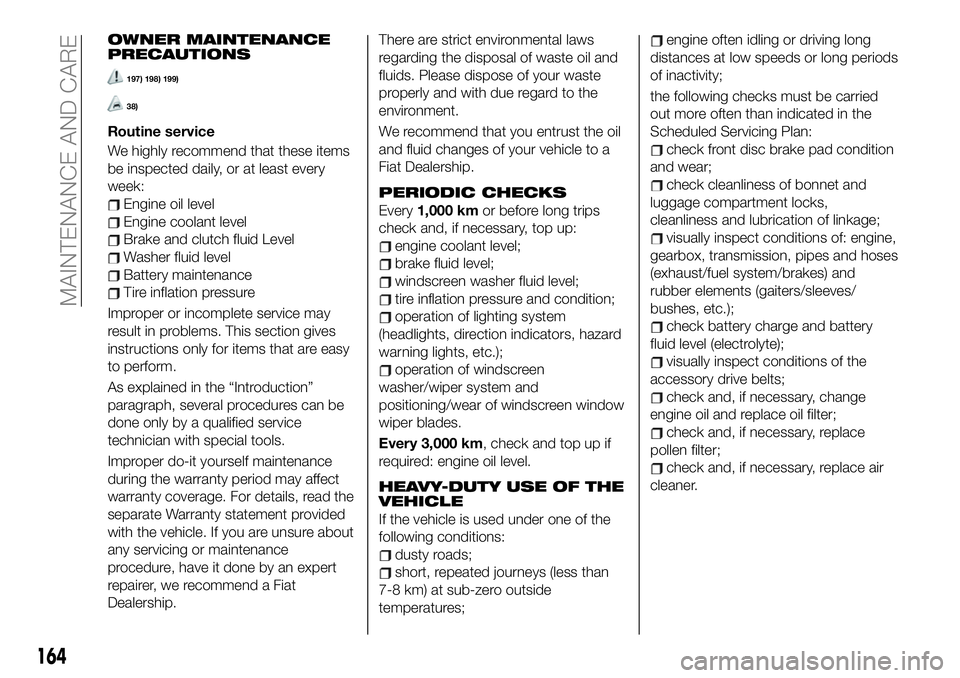
OWNER MAINTENANCE
PRECAUTIONS
197) 198) 199)
38)
Routine service
We highly recommend that these items
be inspected daily, or at least every
week:
Engine oil level
Engine coolant level
Brake and clutch fluid Level
Washer fluid level
Battery maintenance
Tire inflation pressure
Improper or incomplete service may
result in problems. This section gives
instructions only for items that are easy
to perform.
As explained in the “Introduction”
paragraph, several procedures can be
done only by a qualified service
technician with special tools.
Improper do-it yourself maintenance
during the warranty period may affect
warranty coverage. For details, read the
separate Warranty statement provided
with the vehicle. If you are unsure about
any servicing or maintenance
procedure, have it done by an expert
repairer, we recommend a Fiat
Dealership.There are strict environmental laws
regarding the disposal of waste oil and
fluids. Please dispose of your waste
properly and with due regard to the
environment.
We recommend that you entrust the oil
and fluid changes of your vehicle to a
Fiat Dealership.
PERIODIC CHECKS
Every1,000 kmor before long trips
check and, if necessary, top up:
engine coolant level;
brake fluid level;
windscreen washer fluid level;
tire inflation pressure and condition;
operation of lighting system
(headlights, direction indicators, hazard
warning lights, etc.);
operation of windscreen
washer/wiper system and
positioning/wear of windscreen window
wiper blades.
Every 3,000 km, check and top up if
required: engine oil level.
HEAVY-DUTY USE OF THE
VEHICLE
If the vehicle is used under one of the
following conditions:
dusty roads;
short, repeated journeys (less than
7-8 km) at sub-zero outside
temperatures;
engine often idling or driving long
distances at low speeds or long periods
of inactivity;
the following checks must be carried
out more often than indicated in the
Scheduled Servicing Plan:
check front disc brake pad condition
and wear;
check cleanliness of bonnet and
luggage compartment locks,
cleanliness and lubrication of linkage;
visually inspect conditions of: engine,
gearbox, transmission, pipes and hoses
(exhaust/fuel system/brakes) and
rubber elements (gaiters/sleeves/
bushes, etc.);
check battery charge and battery
fluid level (electrolyte);
visually inspect conditions of the
accessory drive belts;
check and, if necessary, change
engine oil and replace oil filter;
check and, if necessary, replace
pollen filter;
check and, if necessary, replace air
cleaner.
164
MAINTENANCE AND CARE
Page 167 of 228
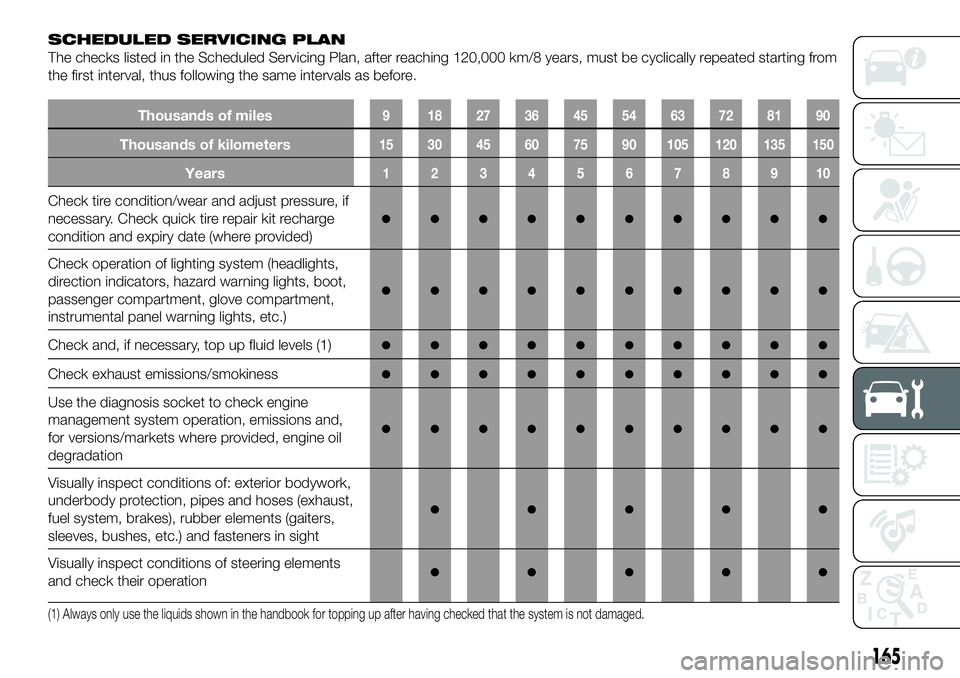
SCHEDULED SERVICING PLAN
The checks listed in the Scheduled Servicing Plan, after reaching 120,000 km/8 years, must be cyclically repeated starting from
the first interval, thus following the same intervals as before.
Thousands of miles9 182736455463728190
Thousands of kilometers15 30 45 60 75 90 105 120 135 150
Years12345678910
Check tire condition/wear and adjust pressure, if
necessary. Check quick tire repair kit recharge
condition and expiry date (where provided)
●●●●●●●●●●
Check operation of lighting system (headlights,
direction indicators, hazard warning lights, boot,
passenger compartment, glove compartment,
instrumental panel warning lights, etc.)
●●●●●●●●●●
Check and, if necessary, top up fluid levels (1)●●●●●●●●●●
Check exhaust emissions/smokiness●●●●●●●●●●
Use the diagnosis socket to check engine
management system operation, emissions and,
for versions/markets where provided, engine oil
degradation
●●●●●●●●●●
Visually inspect conditions of: exterior bodywork,
underbody protection, pipes and hoses (exhaust,
fuel system, brakes), rubber elements (gaiters,
sleeves, bushes, etc.) and fasteners in sight
●●●●●
Visually inspect conditions of steering elements
and check their operation●●●●●
(1) Always only use the liquids shown in the handbook for topping up after having checked that the system is not damaged.
165
Page 223 of 228
INDEX
ABS system................73
Accessory socket.............39
Active bonnet precautions........74
Active safety systems...........73
Advanced Keyless Entry System....14
AFS (Adaptive Front Lighting
System)..................27
Attaching the tow hooks........159
Auto-wiper control............31
Automatic climate control system.......................36
Automatic lighting.............25
Automatic transmission.........119
Auxiliary driving systems.........77
Battery (maintenance).........172
Battery recharging............174
Bodywork (care and
maintenance).............177
Bonnet....................42
Boot lid...................40
Boot lid (opening).............40
Brake Assist................117
Brake/clutch fluid (level check). . . .171
Checking levels.............169
Child restraint system suitability
for various seat position.......91
Child seat installation position.....90
Child-restraint precautions.......86
Child-restraint system types......89Climate control system..........33
Coming Home light system.......25
Constant monitoring..........114
Control panel and instruments.....49
Convertible Top (lowering)........44
Convertible Top (Soft Top)........44
Cruise Control..............122
Dashboard..................8
Dead lock device.............16
Dimensions................187
Doors.....................16
Driver Air Bag...............102
DRL (Daytime Running Lights).....25
DSC system................73
Emergency flap opening.......128
Emergency stop signal system. . . .135
Emergency towing............161
Engine...................183
Engine compartment..........169
Engine coolant (level check)......170
Engine oil (level check).........170
Essential information............3
Exterior lights................24
Flash to pass...............25
Fluid capacities..............188
Fluids and lubricants..........189
Front fog lights...............25Fuel filler cap...............128
Fuse block (engine compartment)......................146
Fuse block (left side of the vehicle)......................149
Fuses (under the bonnet)........145
Fuses (vehicle's left side)........144
Gear lever positions..........119
Gear Shift Indicator............53
Hazard warning lights.........135
Hazard warning lights (control). . . .135
Head restraints...............21
Headlight washer.............32
Headlights..................24
Heated seats................19
Heavy-dute use of the vehicle
(scheduled servicing)........164
High beams.................25
HLA function................80
How the SRS Air bags work......102
How to use this manual..........3
Identification data............182
Ignition switch...............11
Immobilizer system............15
INFO switch.................52
Installing child restraint systems....95
Interiors..................180
Internal equipment............39
Jump starting..............157
Jump starting (procedure).......157
Fuel consumption and
CO2 emissions............192