check oil FIAT 124 SPIDER ABARTH 2017 2.G Owners Manual
[x] Cancel search | Manufacturer: FIAT, Model Year: 2017, Model line: 124 SPIDER ABARTH, Model: FIAT 124 SPIDER ABARTH 2017 2.GPages: 292, PDF Size: 121.25 MB
Page 72 of 292
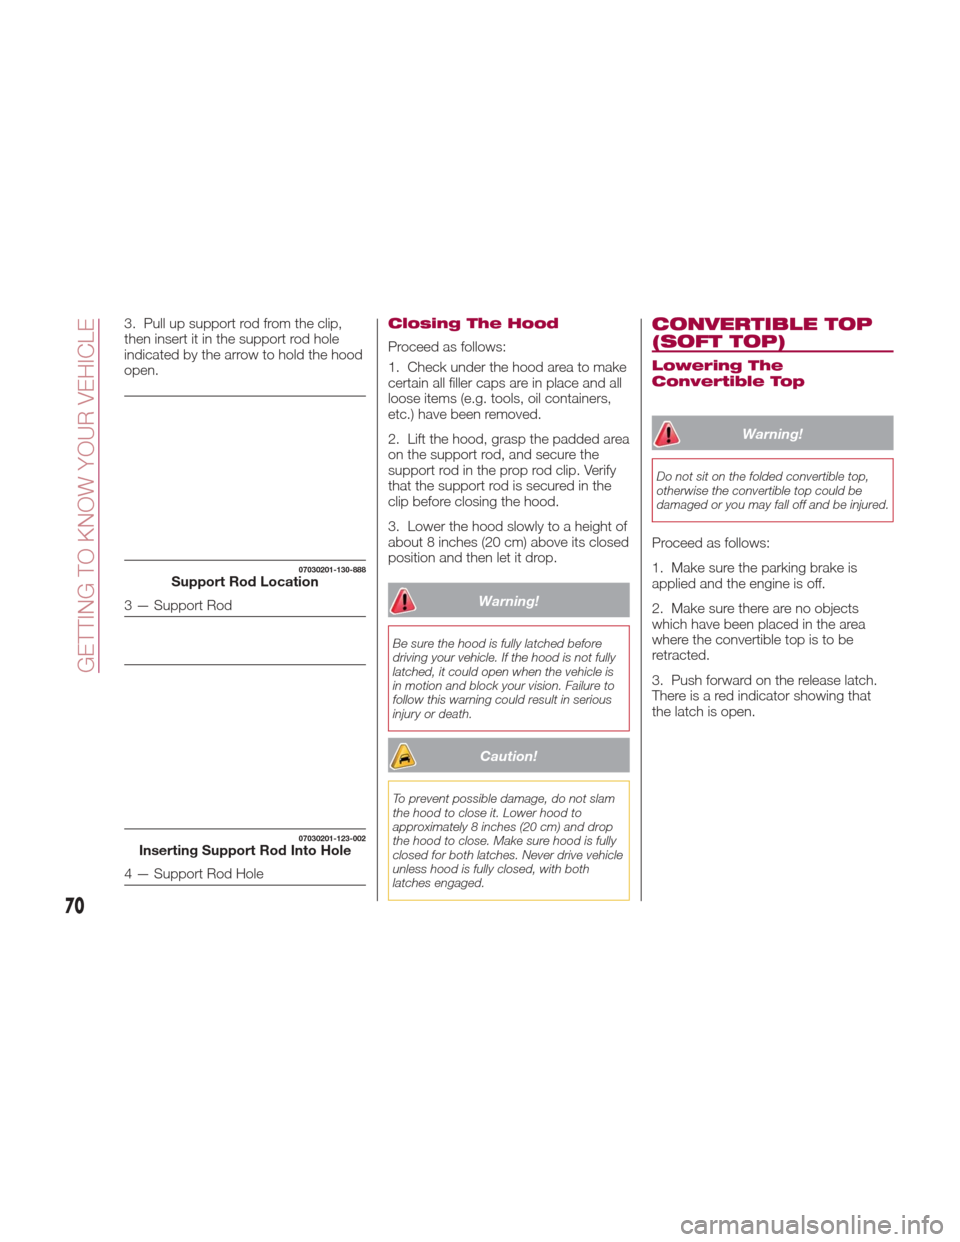
3. Pull up support rod from the clip,
then insert it in the support rod hole
indicated by the arrow to hold the hood
open.Closing The Hood
Proceed as follows:
1. Check under the hood area to make
certain all filler caps are in place and all
loose items (e.g. tools, oil containers,
etc.) have been removed.
2. Lift the hood, grasp the padded area
on the support rod, and secure the
support rod in the prop rod clip. Verify
that the support rod is secured in the
clip before closing the hood.
3. Lower the hood slowly to a height of
about 8 inches (20 cm) above its closed
position and then let it drop.
Warning!
Be sure the hood is fully latched before
driving your vehicle. If the hood is not fully
latched, it could open when the vehicle is
in motion and block your vision. Failure to
follow this warning could result in serious
injury or death.
Caution!
To prevent possible damage, do not slam
the hood to close it. Lower hood to
approximately 8 inches (20 cm) and drop
the hood to close. Make sure hood is fully
closed for both latches. Never drive vehicle
unless hood is fully closed, with both
latches engaged.
CONVERTIBLE TOP
(SOFT TOP)
Lowering The
Convertible Top
Warning!
Do not sit on the folded convertible top,
otherwise the convertible top could be
damaged or you may fall off and be injured.
Proceed as follows:
1. Make sure the parking brake is
applied and the engine is off.
2. Make sure there are no objects
which have been placed in the area
where the convertible top is to be
retracted.
3. Push forward on the release latch.
There is a red indicator showing that
the latch is open.
07030201-130-888Support Rod Location
3 — Support Rod
07030201-123-002Inserting Support Rod Into Hole
4 — Support Rod Hole
70
GETTING TO KNOW YOUR VEHICLE
Page 91 of 292
WARNING LIGHTS
AND MESSAGES
Warning Lights And
Messages
Note:
The warning light in the instrument
panel appears together with a
dedicated message and/or acoustic
signal when applicable. These
indications are indicative and
precautionary and as such must not be
considered as exhaustive and/or
alternative to the information contained
in the Owner’s Manual, which you are
advised to read carefully in all cases.
Always refer to the information in this
chapter in the event of a failure
indication.
Failure indications displayed are
divided into two categories: serious
and less serious failures. Serious
failures are indicated by a repeated
and prolonged warning "cycle". Less
serious failures are indicated by a
warning "cycle" with a shorter duration.
The display cycle of both categories
can be interrupted. The instrument
panel warning light will stay on until the
cause of the failure is eliminated. Vehicles With Fiat Connect 7.0
The warning contents can be verified
on the audio system.
Proceed as follows:
If the warning light is turned on,
selecticon on the home screen to
display the application screen.
Select “ Warning Guidance ”to
display the current warnings.
Select the applicable warning to view
the warning details.
For the following warning/indicator
lights:
Master Warning Light
Brake System Warning Light
ABS Warning Light
Charging System Warning Light
Engine Oil Warning Light
Electric Throttle Warning Light
Cold Start Warning Light
Check Engine Warning Light
Coolant Temperature Warning Light
Automatic Transmission Warning
Light
Power Steering Malfunction Indicator
Light
Air Bag/Seat Belt Pretensioner
System Warning Light
Check Fuel Cap Warning Light
Low Fuel Warning Light
Seat Belt Warning Light
Door Ajar Warning Light
Low Washer Fluid Level Warning
Light
Tire Pressure Monitoring System
Warning Light
KEY Warning Light
LED Headlight KEY Warning Light
BSM (Blind Spot Monitoring) OFF
Indicator Light
Wrench Indicator Light
TCS/DSC Indicator Light
DSC OFF Indicator Light
Security Indicator Light
Indicator Light
Passenger Air Bag Deactivation
Warning Light
The light turns on when the ignition is
switched on for an operation check,
and turns off a few seconds later or
when the engine is started. If the light
does not turn on or remains turned on,
have the vehicle inspected at an
Authorized Dealership.
Note:
Only for “Brake System Warning Light”:
the light turns on continuously when the
parking brake is applied.
89
Page 93 of 292
Warning LightWhat It Means
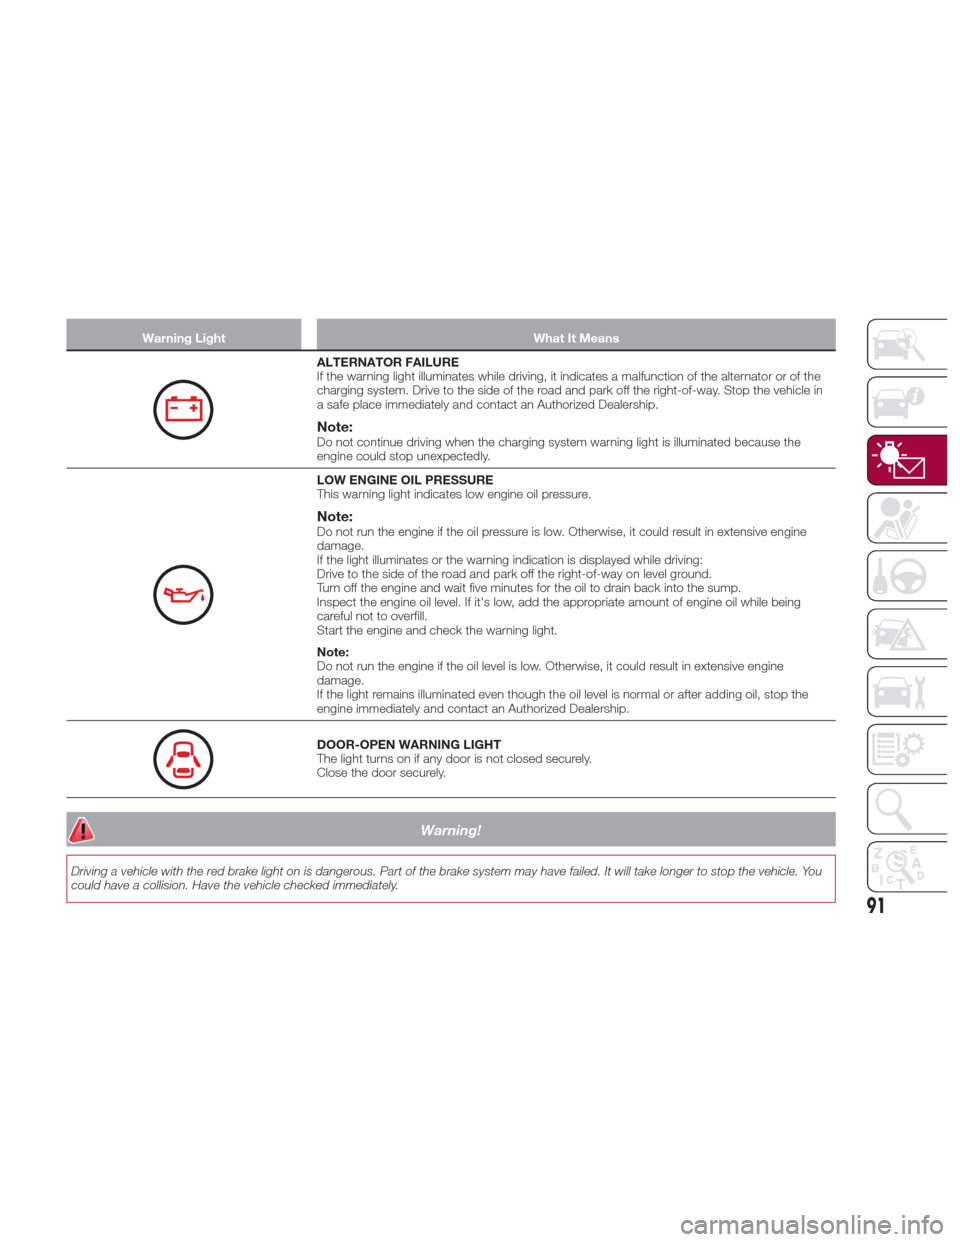
ALTERNATOR FAILURE
If the warning light illuminates while driving, it indicates a malfunction of the alternator or of the
charging system. Drive to the side of the road and park off the right-of-way. Stop the vehicle in
a safe place immediately and contact an Authorized Dealership.
Note:Do not continue driving when the charging system warning light is illuminated because the
engine could stop unexpectedly.
LOW ENGINE OIL PRESSURE
This warning light indicates low engine oil pressure.
Note:Do not run the engine if the oil pressure is low. Otherwise, it could result in extensive engine
damage.
If the light illuminates or the warning indication is displayed while driving:
Drive to the side of the road and park off the right-of-way on level ground.
Turn off the engine and wait five minutes for the oil to drain back into the sump.
Inspect the engine oil level. If it's low, add the appropriate amount of engine oil while being
careful not to overfill.
Start the engine and check the warning light.
Note:
Do not run the engine if the oil level is low. Otherwise, it could result in extensive engine
damage.
If the light remains illuminated even though the oil level is normal or after adding oil, stop the
engine immediately and contact an Authorized Dealership.
DOOR-OPEN WARNING LIGHT
The light turns on if any door is not closed securely.
Close the door securely.
Warning!
Driving a vehicle with the red brake light on is dangerous. Part of the brake system may have failed. It will take longer to stop the vehicle. You
could have a collision. Have the vehicle checked immediately.
91
Page 181 of 292
Contact an Authorized Dealer to check
the following:
Have the proper ratio of antifreeze in
the radiator.
Inspect the battery and its leads.
Cold reduces battery capacity.
Use an engine oil appropriate for the
lowest ambient temperatures that the
vehicle will be driven in.
Inspect the ignition system for
damage and loose connections.
Use winter windshield washer fluid
that will not freeze.
Note:
Remove snow before driving. Snow
left on the windshield is dangerous as
it could obstruct vision.
Drive slowly. Braking performance
can be adversely affected if snow or
ice adheres to the brake components.
If this situation occurs, drive the vehicle
slowly, releasing the accelerator pedal
and lightly applying the brakes several
times until the brake performance
returns to normal.
Do not open or close the soft top when
the temperature is 41 °F (5 °C) or less.
The material of the soft top could be
damaged by freezing.
Do not apply excessive force to a
window scraper when removing ice or
frozen snow on the mirror glass and
windshield. Never use warm or hot water for
removing snow or ice from windows
and mirrors as it could result in the
glass cracking.
Snow Tires
If your vehicle is equipped with the tire
pressure monitoring system (vehicle
with run-flat tires), the system may not
function correctly when using tires with
steel wire reinforcement in the
sidewalls.
Use Snow Tires on all Four Wheels
:
Do not exceed the maximum
permissible speed for your snow tires or
legal speed limits.
When snow tires are used, select the
specified size and pressure.
Tire Chains
Check local regulations before using tire
chains.
If your vehicle is equipped with the
TPMS system, the system may not
function correctly when using tire
chains.
Install the chains on the rear tires only.
Do not use chains on the front tires.
Note:
Chains may affect handling.
Do not go faster than 30 mph
(50 km/h) or the chain manufacturer's
recommended limit, whichever is lower.
Drive carefully and avoid bumps,
holes, and sharp turns.
Avoid locked-wheel braking.
Do not use chains on roads that are
free of snow or ice. The tires and
chains could be damaged.
Chains may scratch or chip
aluminium wheels.
Warning!
Using tires of different size and type (M+S,
Snow) between front and rear axles can
cause unpredictable handling. You could
lose control and have a collision.
179
Page 182 of 292
Caution!
To avoid damage to your vehicle or tires,
observe the following precautions:
Because of restricted traction device
clearance between tires and other
suspension components, it is important
that only traction devices in good condition
are used. Broken devices can cause
serious damage. Stop the vehicle
immediately if noise occurs that could
indicate device breakage. Remove the
damaged parts of the device before further
use.
Install device as tightly as possible and
then retighten after driving about ½ mile
(0.8 km).
Do not exceed 30 mph (48 km/h).
Drive cautiously and avoid severe turns
and large bumps, especially with a loaded
vehicle.
Do not drive for a prolonged period on
dry pavement.
Observe the traction device
manufacturer’s instructions on the method
of installation, operating speed, and
conditions for use. Always use the
suggested operating speed of the device
manufacturer’s if it is less than 30 mph
(48 km/h).
Do not use traction devices on a
compact spare tire.
Driving In Flooded Area
Note: Do not drive the vehicle on
flooded roads as it could cause short
circuit of electrical/electronic parts, or
water enters the engine and causes it
to lock up (hydro-lock) and stall. If the
vehicle has been immersed in water
contact your Authorized Dealer.
Although your vehicle is capable of
driving through shallow standing water,
consider the following Cautions and
Warnings before doing so.
Warning!
Driving through standing water limits
your vehicle’s traction capabilities. Do not
exceed 5 mph (8 km/h) when driving
through standing water.
Driving through standing water limits
your vehicle’s braking capabilities, which
increases stopping distances. Therefore,
after driving through standing water, drive
slowly and lightly press on the brake pedal
several times to dry the brakes.
Failure to follow these warnings may
result in injuries that are serious or fatal to
you, your passengers, and others around
you.
Caution!
Always check the depth of the standing
water before driving through it. Never drive
through standing water that is deeper than
the bottom of the tire rims mounted on the
vehicle.
Determine the condition of the road or
the path that is under water and if there are
any obstacles in the way before driving
through the standing water.
Do not exceed 5 mph (8 km/h) when
driving through standing water. This will
minimize wave effects.
Driving through standing water may
cause damage to your vehicle’s drivetrain
components. Always inspect your vehicle’s
fluids (i.e., engine oil, transmission, axle,
etc.) for signs of contamination (i.e., fluid
that is milky or foamy in appearance) after
driving through standing water. Do not
continue to operate the vehicle if any fluid
appears contaminated, as this may result
in further damage. Such damage is not
covered by the New Vehicle Limited
Warranty.
Getting water inside your vehicle’s
engine can cause it to lock up and stall out,
and cause serious internal damage to the
engine. Such damage is not covered by
the New Vehicle Limited Warranty.
180
STARTING AND OPERATING
Page 226 of 292
At least monthly perform inspection
of:
Tire inflation pressures
At least twice a year (for example,
every spring and fall) perform
inspection of:
Engine coolant
Engine oil
As explained in the “Introduction”
paragraph, several procedures can be
done only by a qualified service
technician with special tools.
For details, read the separate Warranty
Booklet provided with the vehicle. If you
are unsure about any servicing or
maintenance procedure, have it done
by an Authorized Dealer.
There are strict environmental laws
regarding the disposal of waste oil and
fluids. Please dispose of your waste
properly and with due regard to the
environment.
We recommend that you entrust the oil
and fluid changes of your vehicle to an
Authorized Dealer.
Periodic Checks
Every 620 miles (1,000 km) or before
long trips check and, if necessary, top
off:
Engine coolant level.
Brake fluid level.
Windshield washer fluid level.
Tire inflation pressure and condition.
Operation of lighting system
(headlights, direction indicators, hazard
warning lights, etc.).
Operation of windshield
washer/wiper system and
positioning/wear of windshield wiper
blades.
Every 1860 miles (3,000 km) check
and top off the engine oil level if
required.
Heavy-Duty Use Of The
Vehicle
If the vehicle is used under one of the
following conditions:
Dusty roads.
Short, repeated trips less than 4.4 -
5 miles (7-8km)atsub -zero outside
temperatures.
Engine idling for long periods of time
or driving long distances at low speeds
or long periods of inactivity.
The following checks must be carried
out more often than indicated in the
Scheduled Servicing Plan:
Check front disc brake pad condition
and wear.
Check cleanliness of underhood area
and all door and trunk locks, cleanliness
and lubrication of linkage.
Visually inspect conditions of the:
engine, transmission, lines and hoses (exhaust/fuel system/brakes) and
rubber elements (hoses/belts/etc.).
Check battery charge and battery
fluid level.
Visually inspect conditions of the
accessory drive belts.
Check and, if necessary, change
engine oil and replace oil filter.
Check and, if necessary, replace
cabin air filter.
Check and, if necessary, replace air
cleaner.
Severe Duty All Models
Change Engine Oil at 4,000 miles
(6,500 km) if the vehicle is operated in a
dusty and off road environment or is
operated predominately at idle or only
very low engine RPM’s. This type of
vehicle use is considered Severe Duty.
224
SERVICING AND MAINTENANCE
Page 232 of 292
ENGINE COMPARTMENT
Checking Levels
07030300-121-003-high.jpg
1 — Window Washer Fill4 — Engine Coolant Fill
2 — Engine Oil Dipstick 5 — Brake/Clutch Fluid Reservoir
3 — Engine Oil Cap 6 — Battery
230
SERVICING AND MAINTENANCE
Page 235 of 292
Overfilling the brake fluid reservoir can
result in spilling brake fluid on hot engine
parts, causing the brake fluid to catch fire.
Brake fluid can also damage painted and
vinyl surfaces, care should be taken to
avoid its contact with these surfaces.
Do not allow petroleum based fluid to
contaminate the brake fluid. Brake seal
components could be damaged, causing
partial or complete brake failure. This could
result in a collision.
Windshield And
Headlight Washer Fluid
Inspecting Washer Fluid Level
Inspect fluid level in the washer fluid
reservoir, open the cap and add fluid if
necessary.
Use plain water if washer fluid is
unavailable. But use only washer fluid in
cold weather to prevent it from freezing.
Automatic Transmission
Control Unit
The transmission oil level should only be
checked at your Authorized Dealer.
Battery Maintenance
To get the best service from a battery:
Keep it securely mounted.
Keep the top clean and dry.
Keep terminals and connections
clean, tight, and coated with petroleum
jelly or terminal grease.
Rinse off spilled electrolyte
immediately with a solution of water
and baking soda.
If the vehicle will not be used for an
extended time, disconnect the battery
leads and charge the battery every six
weeks.
Battery Replacement
Contact your Authorized Dealer to
purchase a replacement battery.
Warning!
Battery fluid is a corrosive acid solution
and can burn or even blind you. Do not
allow battery fluid to contact your eyes,
skin, or clothing. Do not lean over a battery
when attaching clamps. If acid splashes in
eyes or on skin, flush the area immediately
with large amounts of water. Refer to
“Jump-Starting” in “In Case Of Emergency”
for further information.
Battery gas is flammable and explosive.
Keep flame or sparks away from the
battery. Do not use a booster battery or
any other booster source with an output
greater than 12 Volts. Do not allow cable
clamps to touch each other.
Battery posts, terminals, and related
accessories contain lead and lead
compounds. Wash hands after handling.
07030901-121-001Windshield Washer Fluid Reservoir
233
Page 236 of 292
BATTERY
RECHARGING
BATTERY CHARGING
PROCEDURE
Warning!
Battery fluid is a corrosive acid solution
and can burn or even blind you. Do not
allow battery fluid to contact your eyes,
skin, or clothing. Do not lean over a battery
when attaching clamps. If acid splashes in
eyes or on skin, flush the area immediately
with large amounts of water. Refer to
“Jump-Starting” in “In Case Of Emergency”
for further information.
Battery gas is flammable and explosive.
Keep flame or sparks away from the
battery. Do not use a booster battery or
any other booster source with an output
greater than 12 Volts. Do not allow cable
clamps to touch each other.
Battery posts, terminals, and related
accessories contain lead and lead
compounds. Wash hands after handling.
Caution!
It is essential when replacing the cables
on the battery that the positive cable is
attached to the positive post and the
negative cable is attached to the negative
post. Battery posts are marked positive (+)
and negative (-) and are identified on the
battery case. Cable clamps should be tight
on the terminal posts and free of corrosion.
If a “fast charger” is used while the
battery is in the vehicle, disconnect both
vehicle battery cables before connecting
the charger to the battery. Do not use a
“fast charger” to provide starting voltage.
Charge battery as follows:
Before recharging the battery, turn off
all accessories and turn the engine off
by placing the ignition in the OFF mode.
Disconnect the negative battery
cable.
Connect the charger cables to the
battery terminals, observing the polarity
(+,–).
Turn on the charger.
When finished, turn the charger off
before disconnecting the battery.
Reconnect the negative battery
terminal.
MAINTENANCE
PROCEDURES
The following pages contain
instructions on the required
maintenance from the technical
personnel who designed the vehicle.
In addition to these specific
maintenance instructions specified for
routine scheduled servicing, there are
other components which may require
periodic maintenance or replacement
over the vehicle’s life cycle.
Body Lubrication
Ensure that the locks and bodywork
junction points, including components
such as the seat guides, door hinges
(and rollers), trunk and hood are
periodically lubricated with lithium
based grease to ensure correct, silent
operation and to protect them from rust
and wear.
Thoroughly clean the components,
eliminating every trace of dirt and dust.
After lubricating, eliminate excess oil
and grease. Also pay particular
attention to the hood closing devices,
to ensure correct operation.
During operations on the hood, be sure
to perform with the engine cold, also
remember to check, clean and lubricate
the locking, release and safety devices.
Make sure the hood's secondary latch
keeps the hood from opening when the
primary latch is released.
234
SERVICING AND MAINTENANCE
Page 262 of 292
Lap / Shoulder Belt
Warning!
A frayed or torn belt could rip apart in a
collision and leave you with no protection.
Inspect the belt system periodically,
checking for cuts, frays, or loose parts.
Damaged parts must be replaced
immediately. Do not disassemble or modify
the system. Seat belt assemblies must be
replaced after a collision if they have been
damaged (i.e., bent retractor, torn
webbing, etc.).
Clean the webbing with a mild soap
solution recommended for upholstery or
carpets. Follow instructions. Do not
bleach or dye the belts, this may
weaken them.
After cleaning the belts, thoroughly dry
the belt webbing and make sure there
is no remaining moisture before
retracting them.
Plastic And Coated
Parts
Clean interior plastic parts with a damp
cloth (if possible made from microfiber),
and a solution of water and neutral,
non-abrasive detergent.
To clean oily or persistent stains, use
specific products free from solvents and
designed to maintain the original
appearance and color of the
components.Remove any dust using a microfiber
cloth, if necessary moistened with
water. The use of paper tissues is not
recommended as these may leave
residues.
Instrument panel precautions
Prevent caustic solutions such as
perfume and cosmetic oils from
contacting the instrument panel. They
will damage and discolor the instrument
panel. If these solutions get on the
instrument panel, wipe them off
immediately.
Note:
Never use alcohol, gasoline and
derivatives to clean the instrument
panel lens.
Caution!
Do not use glazing agents. Glazing agents
contain ingredients which may cause
discoloration, wrinkling, cracks and peeling.
Instrument Panel Top
When cleaning, it is recommended that
you use a clean towel dampened in a
mild detergent to remove debris.
Caution!
If the surface is rubbed harshly, it could
result in the surface being damaged leaving
white scratch marks.
Window Interiors
If the windows become covered with an
oily, greasy, or waxy film, clean them
with glass cleaner. Follow the directions
on the container.
Note: Do not scrape or scratch the
inside of the window glass. It could
damage the thermal filaments.
Caution!
When washing the inside of the window
glass, use a soft cloth dampened in
lukewarm water, gently wiping the thermal
filaments. Use of glass cleaning products
could damage the thermal filaments.
260
SERVICING AND MAINTENANCE