steering FIAT 500 ABARTH 2012 2.G Owner's Manual
[x] Cancel search | Manufacturer: FIAT, Model Year: 2012, Model line: 500 ABARTH, Model: FIAT 500 ABARTH 2012 2.GPages: 76, PDF Size: 2.95 MB
Page 35 of 76
• When prompted by the mobile phone, enter the PIN number shown on theinstrument panel display using your mobile phone keypad. If pairing is successful,
the system will say “Connecting” and at the end the display will show as
confirmation message, the ID of the paired mobile phone.
• It is essential to wait until you see this confirmation message on the display. Pressing the PHONE/MAIN button on the steering wheel or the MUTE/ESC button before the
message is displayed may cancel the pairing process. If the pairing process fails, an
error message will be displayed: in this event repeat the pairing procedure.
• At first pairing, BLUE&ME™ will say “Welcome” immediately after connecting. This message will no longer be heard when your phone automatically connects to the
BLUE&ME™ system on future ignition cycles.
• BLUE&ME™ will ask if you would like to copy your paired phone phonebook to BLUE&ME™. It is recommended to copy it. To start copying the phonebook say
“Yes”, otherwise say “No”.
• For certain mobile phones the phonebook is not copied automatically, in this case you must transfer the phonebook contacts using your mobile phone keypad. If
BLUE&ME™ asks you to do this, then perform this procedure following the
instructions specific to your mobile phone and press the PHONE/MAIN button on
the steering wheel when you have finished.
Making a Phone Call • Assume that “John Smith” is one of the contacts stored in your phonebook.
• To call John Smith, proceed as follows:
• Press the steering wheel button PHONE/MAIN and pronounce “Call John Smith”.
• If the name is recognized, the system will display the recognized contact’s information on the display screen.
• If there is just one phone number for John Smith in your phonebook, the system will ask if you would like to call John Smith. To start the call say “Yes”, otherwise say
“No”.
• If John Smith has several phone numbers, the system will ask which phone number you would like to call (e.g.: “Call John Smith (at) Work or (at) Home?”). Answer with
the type of required phone number (e.g.: “(at) Home”).
• If John Smith has several phone numbers but the “location” (i.e.: the type of phone number like work, home, etc.) is missing, the system will display the selected
contact and a list of related phone numbers on the instrument cluster display. The
hands-free phone system will ask if you would like to call the phone number
displayed. To respond with “yes”, say “Yes”, otherwise say “No”. If this is the correct
contact but the wrong number, say “Forward” or “Backward” to navigate to the
phone number you’d like to call. To call the displayed phone number, pronounce
“Call”. You can also scroll through the phone number list manually by pressing the
buttons on the back of the steering wheel until you find the required number. Then,
press the PRESET UP/OK button on the rear of the steering wheel to start the call.
• To end the phone call, press the PHONE HANG UP button on the steering wheel.
• Refer to the BLUE&ME™ User's Manual on the DVD for more details.
ELECTRONICS
33
Page 38 of 76
PROGRAMMABLE FEATURES
Electronic Vehicle Information Center (EVIC)
• The EVIC can be used to program the following Personal Settings. Press andrelease the MENU ESC button until menu is displayed, then press the plus or minus
buttons to scroll through the settings.
• Once the menu setting is shown in the EVIC display press the MENU ESC button to access the setting and use the plus or minus buttons to change the current setting.
The menu includes the following functions:
• Dimmer • Language
• Speed Beep • Buzzer Volume
• Trip B Data • Button Volume
• Set Time • Belt Buzzer
• Set Date • Hill Start Assist
• See Radio (Repeat Audio Information) • GSI Shift Up
• Speed Display • Daytime Running Lamps
• Autoclose • Exit Menu
• Units
TRIP BUTTON
• The Trip button is located on the end of the wiper lever to the right of the
steering column. The trip button can be
used to display and reset the following
functions:
• Range
• Distance Travelled
• Average Consumption
• Instant Consumption
• Average Speed
• Travel Time
• Short press (less than 1 second) to display different functions.
• Long press (more than 1 second) to reset and start a new trip.
ELECTRONICS
36
Page 42 of 76
24-HOUR ROADSIDE ASSISTANCE
• If your Abarth requires jump start assistance, out of gas/fuel delivery, tire service,lockout service or towing due to a defect covered under the Basic Limited Warranty,
dial toll-free 1-888-242-6342. See your Warranty booklet for further details.
• Provide your name, vehicle identification number and license plate number.
• Provide your location, including telephone number, from which you are calling.
• Briefly describe the nature of the problem and answer a few simple questions.
• You will be given the name of the service provider and an estimated time of arrival. If you feel you are in an “unsafe situation”, please let us know. With your consent, we
will contact local police or safety authorities.
INSTRUMENT CLUSTER WARNING LIGHTS
- Generic Warning Light
• The Generic Warning Light will illuminate if any of the following conditions occur: OilChange Request, Engine Oil Pressure Sensor Failure, External Light Failure, Fuel
Cut-Off Intervention, Fuel Cut-Off Not Available, Parking Sensor Failure.
- Power Steering System Warning
• If the “POWER STEERING SYSTEM OVER TEMP” message and icon are displayedin the EVIC display, it indicates that extreme steering maneuvers have occurred,
which caused an over temperature condition in the power steering system. You will
lose power steering assistance momentarily until the over temperature condition no
longer exists. Once driving conditions are safe, pull over and let the vehicle idle. After
approximately five minutes, the system will cool and return to normal operation.
- Engine Temperature Warning Light
• This light warns of an overheated engine condition.
• If the light turns on or flashes continuously while driving, safely pull over and stop thevehicle. If the A/C system is on, turn it off. Also, shift the transmission into NEUTRAL
and idle the vehicle. If the temperature reading does not return to normal, turn the
engine off immediately.
• We recommend that you do not operate the vehicle or engine damage will occur. Have the vehicle serviced immediately.
WARNING!
A hot engine cooling system is dangerous. You or others could be badly burned
by steam or boiling coolant. You may want to call an authorized service center
for service if your vehicle overheats.
- Electronic Throttle Control (ETC) Light
• This light informs you of a problem with the Electronic Throttle Control (ETC) system.
• If a problem is detected, the light will come on while the engine is running. Cycle theignition when the vehicle has completely stopped; the light should turn off.
WHAT TO DO IN EMERGENCIES
40
Page 54 of 76
• Vehicle can be towed on a flatbed truck (all wheels off the ground).
NOTE: If it is necessary to use the accessories while being towed (wipers, defrosters,
etc.), the key must be in the ON/RUN position. Make certain the transmission remains in
NEUTRAL.
Without The Ignition Key
• Special care must be taken when the vehicle is towed with the ignition in the OFF/LOCK position. A dolly should be used under the front wheels if the rear wheels
are raised. Proper towing equipment is necessary to prevent damage to the vehicle.
CAUTION!
• Failure to follow these towing methods can cause severe transmissiondamage. Such damage is not covered by the New Vehicle Limited Warranty.
• If the vehicle being towed requires steering, the ignition switch must be in the ON/RUN position.
• Do not attempt to use sling-type equipment when towing. When securing the vehicle to a flatbed truck, do not attach to front or rear suspension
components. Damage to your vehicle may result from improper towing.
ENHANCED ACCIDENT RESPONSE SYSTEM
• In the event of an impact causing airbag deployment, if the communication networkremains intact, and the power remains intact, depending on the nature of the event
the ORC will determine whether to have the Enhanced Accident Response System
perform the following functions:
• Cut off fuel to the engine.
• Flash hazard lights as long as the battery has power or until the ignition key is turned off.
• Turn on the interior lights, which remain on as long as the battery has power or until the ignition key is removed.
• Unlock the doors automatically.
• After the event occurs, when the system is active, the message "Fuel Cutoff See Handbook" is displayed.
• Carefully check the vehicle for fuel leaks in the engine compartment and on the ground near the engine compartment and fuel tank before resetting the system and
starting the engine.
NOTE: In order to start the engine and move the vehicle to a safe location after an
impact, the System Reset Procedure must be completed.
System Reset Procedure
• After an impact causing airbag deployment, the left and right turn signal lights, located in the instrument panel cluster, will both be blinking, until the ignition is
turned off.
• In order to move your vehicle to the side of the road you must follow the system reset procedure.
WHAT TO DO IN EMERGENCIES
52
Page 55 of 76
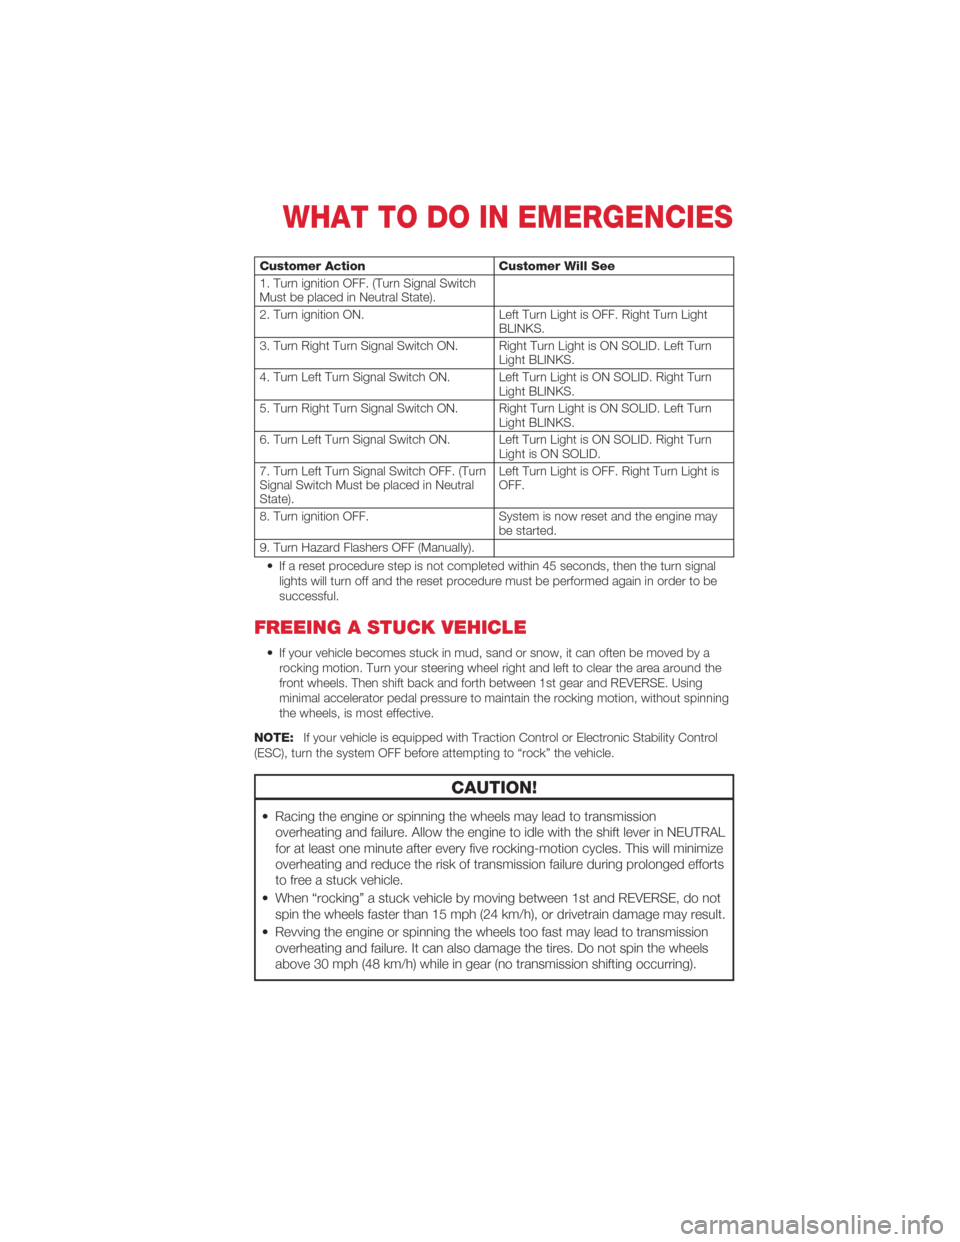
Customer ActionCustomer Will See
1. Turn ignition OFF. (Turn Signal Switch
Must be placed in Neutral State).
2. Turn ignition ON. Left Turn Light is OFF. Right Turn Light
BLINKS.
3. Turn Right Turn Signal Switch ON. Right Turn Light is ON SOLID. Left Turn Light BLINKS.
4. Turn Left Turn Signal Switch ON. Left Turn Light is ON SOLID. Right Turn Light BLINKS.
5. Turn Right Turn Signal Switch ON. Right Turn Light is ON SOLID. Left Turn Light BLINKS.
6. Turn Left Turn Signal Switch ON. Left Turn Light is ON SOLID. Right Turn Light is ON SOLID.
7. Turn Left Turn Signal Switch OFF. (Turn
Signal Switch Must be placed in Neutral
State). Left Turn Light is OFF. Right Turn Light is
OFF.
8. Turn ignition OFF. System is now reset and the engine may
be started.
9. Turn Hazard Flashers OFF (Manually).
• If a reset procedure step is not completed within 45 seconds, then the turn signal lights will turn off and the reset procedure must be performed again in order to be
successful.
FREEING A STUCK VEHICLE
• If your vehicle becomes stuck in mud, sand or snow, it can often be moved by arocking motion. Turn your steering wheel right and left to clear the area around the
front wheels. Then shift back and forth between 1st gear and REVERSE. Using
minimal accelerator pedal pressure to maintain the rocking motion, without spinning
the wheels, is most effective.
NOTE: If your vehicle is equipped with Traction Control or Electronic Stability Control
(ESC), turn the system OFF before attempting to “rock” the vehicle.
CAUTION!
• Racing the engine or spinning the wheels may lead to transmission overheating and failure. Allow the engine to idle with the shift lever in NEUTRAL
for at least one minute after every five rocking-motion cycles. This will minimize
overheating and reduce the risk of transmission failure during prolonged efforts
to free a stuck vehicle.
• When “rocking” a stuck vehicle by moving between 1st and REVERSE, do not spin the wheels faster than 15 mph (24 km/h), or drivetrain damage may result.
• Revving the engine or spinning the wheels too fast may lead to transmission overheating and failure. It can also damage the tires. Do not spin the wheels
above 30 mph (48 km/h) while in gear (no transmission shifting occurring).
WHAT TO DO IN EMERGENCIES
53
Page 62 of 76
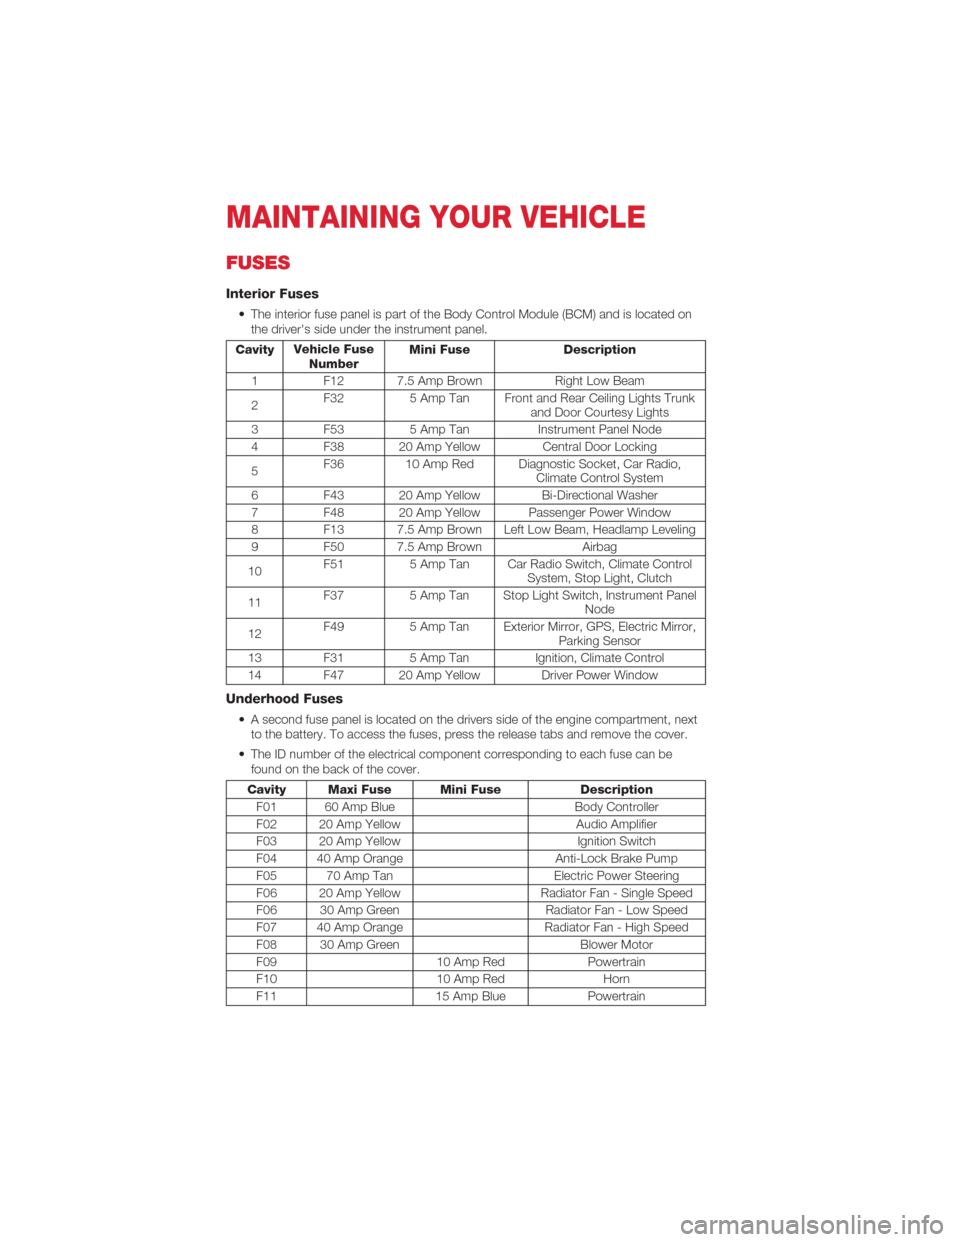
FUSES
Interior Fuses
• The interior fuse panel is part of the Body Control Module (BCM) and is located onthe driver's side under the instrument panel.
Cavity Vehicle Fuse
Number Mini Fuse Description
1 F12 7.5 Amp Brown Right Low Beam
2 F32
5 Amp Tan Front and Rear Ceiling Lights Trunk
and Door Courtesy Lights
3 F53 5 Amp Tan Instrument Panel Node
4 F38 20 Amp Yellow Central Door Locking
5 F36 10 Amp Red Diagnostic Socket, Car Radio,
Climate Control System
6 F43 20 Amp Yellow Bi-Directional Washer
7 F48 20 Amp Yellow Passenger Power Window
8 F13 7.5 Amp Brown Left Low Beam, Headlamp Leveling
9 F50 7.5 Amp Brown Airbag
10 F51
5 Amp Tan Car Radio Switch, Climate Control
System, Stop Light, Clutch
11 F37
5 Amp Tan Stop Light Switch, Instrument Panel
Node
12 F49
5 Amp Tan Exterior Mirror, GPS, Electric Mirror,
Parking Sensor
13 F31 5 Amp TanIgnition, Climate Control
14 F47 20 Amp Yellow Driver Power Window
Underhood Fuses
• A second fuse panel is located on the drivers side of the engine compartment, next to the battery. To access the fuses, press the release tabs and remove the cover.
• The ID number of the electrical component corresponding to each fuse can be found on the back of the cover.
Cavity Maxi Fuse Mini Fuse Description
F01 60 Amp Blue Body Controller
F02 20 Amp Yellow Audio Amplifier
F03 20 Amp Yellow Ignition Switch
F04 40 Amp Orange Anti-Lock Brake Pump
F05 70 Amp Tan Electric Power Steering
F06 20 Amp Yellow Radiator Fan - Single Speed
F06 30 Amp Green Radiator Fan - Low Speed
F07 40 Amp Orange Radiator Fan - High Speed
F08 30 Amp Green Blower Motor
F09 10 Amp RedPowertrain
F10 10 Amp RedHorn
F11 15 Amp BluePowertrain
MAINTAINING YOUR VEHICLE
60
Page 64 of 76
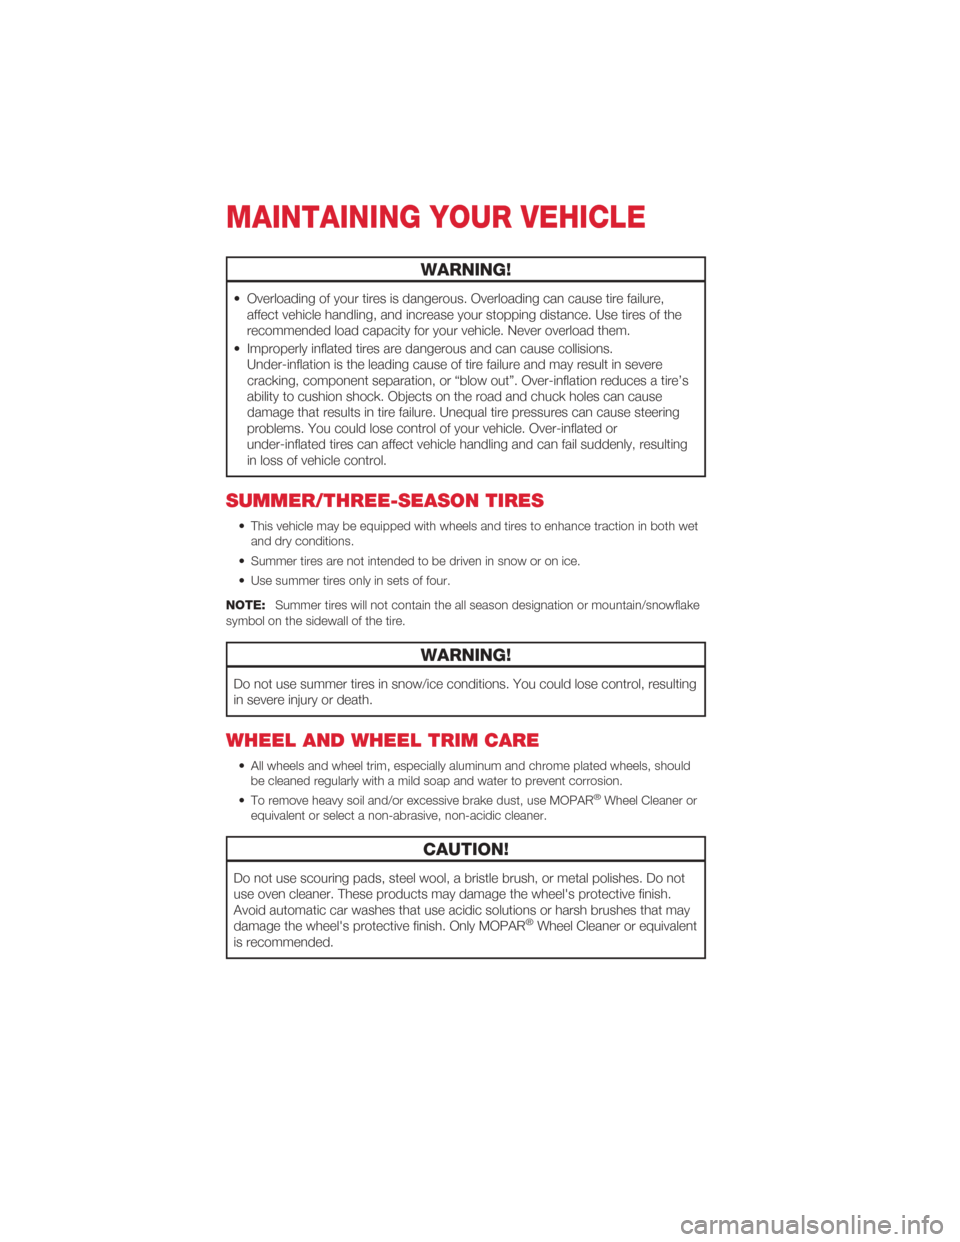
WARNING!
• Overloading of your tires is dangerous. Overloading can cause tire failure,affect vehicle handling, and increase your stopping distance. Use tires of the
recommended load capacity for your vehicle. Never overload them.
• Improperly inflated tires are dangerous and can cause collisions. Under-inflation is the leading cause of tire failure and may result in severe
cracking, component separation, or “blow out”. Over-inflation reduces a tire’s
ability to cushion shock. Objects on the road and chuck holes can cause
damage that results in tire failure. Unequal tire pressures can cause steering
problems. You could lose control of your vehicle. Over-inflated or
under-inflated tires can affect vehicle handling and can fail suddenly, resulting
in loss of vehicle control.
SUMMER/THREE-SEASON TIRES
• This vehicle may be equipped with wheels and tires to enhance traction in both wetand dry conditions.
• Summer tires are not intended to be driven in snow or on ice.
• Use summer tires only in sets of four.
NOTE: Summer tires will not contain the all season designation or mountain/snowflake
symbol on the sidewall of the tire.
WARNING!
Do not use summer tires in snow/ice conditions. You could lose control, resulting
in severe injury or death.
WHEEL AND WHEEL TRIM CARE
• All wheels and wheel trim, especially aluminum and chrome plated wheels, should be cleaned regularly with a mild soap and water to prevent corrosion.
• To remove heavy soil and/or excessive brake dust, use MOPAR
®Wheel Cleaner or
equivalent or select a non-abrasive, non-acidic cleaner.
CAUTION!
Do not use scouring pads, steel wool, a bristle brush, or metal polishes. Do not
use oven cleaner. These products may damage the wheel's protective finish.
Avoid automatic car washes that use acidic solutions or harsh brushes that may
damage the wheel's protective finish. Only MOPAR
®Wheel Cleaner or equivalent
is recommended.
MAINTAINING YOUR VEHICLE
62
Page 70 of 76
LATCH (Lower Anchors and
Tether for CHildren)...........10
Lights Engine Temperature Warning . . . . 40
Turn Signal ..............15
Warning (Instrument Cluster
Description) ..............6
Maintenance Record ..........59
Maintenance Schedule .........58
Malfunction Indicator Light
(Check Engine) .............43
Manual Transmission ..........22
Mirrors Heated ............... 20,21
MOPAR
®Accessories .........66
New Vehicle Break-In Period . . . . . 15
Oil Pressure Light ............43
Oil, Engine Capacity ................57
Outlet Power .................38
Overheating, Engine ..........44
Placard, Tire and Loading
Information ...............61
Power Outlet (Auxiliary Electrical Outlet) . . 38
Sunroof ................23
Programmable Electronic Features . . 36
Rear Seat, Folding ...........13
Recreational Towing ..........39
Replacement Bulbs ...........63
Restraints, Child ............10
Seat Belts .................8
Seats ...................12
Adjustment ..............12 Rear Folding . .
...........13
Setting the Clock ............29
Signals, Turn . . . ...........15
Spark Plugs ...............57
Speed Control (Cruise Control) . . . . 18
Sport Mode ...............22
Starting Cold Weather . . ...........25
Steering Tilt Column . . . ...........14
Steering Wheel Audio Controls . . 30,32
Store Radio Presets ..........29
Stuck, Freeing ..............53
Sun Roof .................23
Supplemental Restraint
System - Airbag . . ...........9
Tilt Steering Column ..........14
TIREFIT .................44
Tires Air Pressure . . . . ..........61
Pressure Warning Light . . .....41
Towing . .................39
24-Hour Towing Assistance .....40
Disabled Vehicle ...........51
Recreational . . ...........39
Trailer Towing ..............39
Transmission Fluid ..................57
Turn Signals . . . . ...........15
USB Port . . . . . ...........34
Washer Rear . . . . ..............17
Washers, Windshield . . . . . .....17
Wheel and Wheel Trim Care . .....62
Wind Buffeting .............24
Windshield Washers ..........17
Windshield Wipers . . . . .......17
Wiper, Rear ...............17
INDEX
68
Page 71 of 76
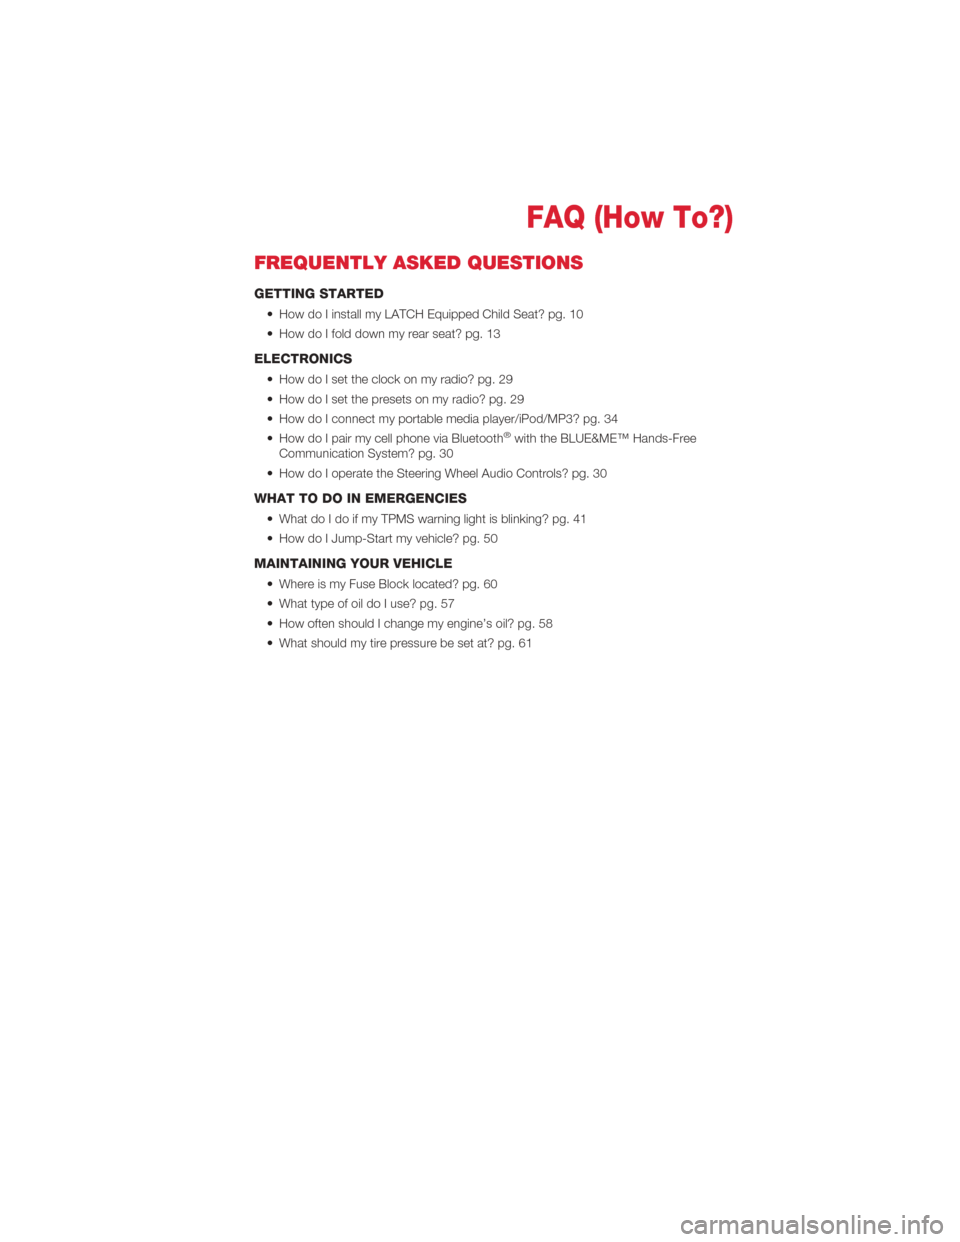
FREQUENTLY ASKED QUESTIONS
GETTING STARTED
• How do I install my LATCH Equipped Child Seat? pg. 10
• How do I fold down my rear seat? pg. 13
ELECTRONICS
• How do I set the clock on my radio? pg. 29
• How do I set the presets on my radio? pg. 29
• How do I connect my portable media player/iPod/MP3? pg. 34
• How do I pair my cell phone via Bluetooth
®with the BLUE&ME™ Hands-Free
Communication System? pg. 30
• How do I operate the Steering Wheel Audio Controls? pg. 30
WHAT TO DO IN EMERGENCIES
• What do I do if my TPMS warning light is blinking? pg. 41
• How do I Jump-Start my vehicle? pg. 50
MAINTAINING YOUR VEHICLE
• Where is my Fuse Block located? pg. 60
• What type of oil do I use? pg. 57
• How often should I change my engine’s oil? pg. 58
• What should my tire pressure be set at? pg. 61
FAQ (How To?)
69