ECU FIAT 500 ABARTH 2015 2.G User Guide
[x] Cancel search | Manufacturer: FIAT, Model Year: 2015, Model line: 500 ABARTH, Model: FIAT 500 ABARTH 2015 2.GPages: 108, PDF Size: 2.63 MB
Page 3 of 108
INTRODUCTION/WELCOME
WELCOME FROM FIAT............. 2
CONTROLS AT A GLANCE
DRIVER COCKPIT................ 4INSTRUMENT CLUSTER............ 6
GETTING STARTED
KEY FOB . . . . . . . . . . . . . . . . . . . . . 8VEHICLE SECURITY ALARM. . . . . . . . . 10POWER DOOR LOCKS. . . . . . . . . . . . 10SEAT BELT SYSTEMS. . . . . . . . . . . . . 10SUPPLEMENTAL RESTRAINT SYSTEM (SRS)— AIR BAGS. . . . . . . . . . . . . . . . . . 11CHILD RESTRAINTS. . . . . . . . . . . . . . 14HEAD RESTRAINTS. . . . . . . . . . . . . . 19FRONT SEATS. . . . . . . . . . . . . . . . . 20REAR SEATS. . . . . . . . . . . . . . . . . . 22TILT STEERING COLUMN. . . . . . . . . . 23
OPERATING YOUR VEHICLE
ENGINE BREAK-IN RECOMMENDATIONS. . . 24TURN SIGNAL/LIGHTS/HIGH BEAM LEVER. . 25WIPER/WASHER LEVER. . . . . . . . . . . . 26ELECTRONIC SPEED CONTROL. . . . . . 27POWER WINDOWS. . . . . . . . . . . . . . . 29MANUAL CLIMATE CONTROLS. . . . . . . 30AUTOMATIC TEMPERATURE CONTROLS(ATC). . . . . . . . . . . . . . . . . . . . . . . 31SPORT MODE. . . . . . . . . . . . . . . . . . 32MANUAL TRANSMISSION. . . . . . . . . . 32POWER SUNROOF. . . . . . . . . . . . . . . 33POWER CONVERTIBLE TOP. . . . . . . . . 34WIND BUFFETING. . . . . . . . . . . . . . . 37ENGINE BLOCK HEATER. . . . . . . . . . . 37
ELECTRONICS
YOUR VEHICLE'S SOUND SYSTEM. . . . 38AM/FM RADIO WITH CD PLAYER ANDSiriusXM SATELLITE RADIO. . . . . . . . . . 40STEERING WHEEL AUDIO CONTROLS . . 42BLUE&ME™ HANDS-FREECOMMUNICATION. . . . . . . . . . . . . . . 43iPod®/USB/MP3 CONTROL. . . . . . . . . 49ELECTRONIC VEHICLE INFORMATION CEN-TER (EVIC). . . . . . . . . . . . . . . . . . . . 50PROGRAMMABLE FEATURES. . . . . . . . 51TRIP BUTTON. . . . . . . . . . . . . . . . . . 51POWER OUTLET. . . . . . . . . . . . . . . . 53
UTILITY
TRAILER TOWING WEIGHTS (MAXIMUMTRAILER WEIGHT RATINGS). . . . . . . . . 54RECREATIONAL TOWING (BEHIND MOTOR-HOME, ETC.). . . . . . . . . . . . . . . . . . 54
WHAT TO DO IN EMERGENCIES
ROADSIDE ASSISTANCE. . . . . . . . . . . 55INSTRUMENT CLUSTER WARNINGLIGHTS. . . . . . . . . . . . . . . . . . . . . 55INSTRUMENT CLUSTER INDICATORLIGHTS. . . . . . . . . . . . . . . . . . . . . 60IF YOUR ENGINE OVERHEATS. . . . . . . 62TIRE SERVICE KIT. . . . . . . . . . . . . . . 63JUMP-STARTING PROCEDURE. . . . . . . 69TOWING A DISABLED VEHICLE. . . . . . . 72ENHANCED ACCIDENT RESPONSESYSTEM. . . . . . . . . . . . . . . . . . . . . 73FREEING A STUCK VEHICLE. . . . . . . . . 75EVENT DATA RECORDER (EDR). . . . . . . 76
MAINTAINING YOUR VEHICLEOPENING THE HOOD. . . . . . . . . . . . . 77ENGINE COMPARTMENT. . . . . . . . . . 78FLUID CAPACITIES. . . . . . . . . . . . . . . 80FLUIDS, LUBRICANTS AND GENUINEPARTS. . . . . . . . . . . . . . . . . . . . . . 80MAINTENANCE PROCEDURES. . . . . . . 81MAINTENANCE SCHEDULE. . . . . . . . . 82FUSES. . . . . . . . . . . . . . . . . . . . . . 87TIRE PRESSURES. . . . . . . . . . . . . . . 89SUMMER/THREE-SEASON TIRES. . . . . . 90SPARE TIRES — IF EQUIPPED. . . . . . . . 90WHEEL AND WHEEL TRIM CARE. . . . . . 92REPLACEMENT BULBS. . . . . . . . . . . . 92
CONSUMER ASSISTANCEFIAT CUSTOMER CENTER. . . . . . . . . . 93FIAT CANADA CUSTOMER CENTER. . . . 93ASSISTANCE FOR THE HEARINGIMPAIRED. . . . . . . . . . . . . . . . . . . . 93PUBLICATIONS ORDERING. . . . . . . . . 93REPORTING SAFETY DEFECTS INTHE UNITED STATES. . . . . . . . . . . . . 94
MOPAR® ACCESSORIESAUTHENTIC ACCESSORIES BYMOPAR®. . . . . . . . . . . . . . . . . . . . 95
FREQUENTLY ASKED QUESTIONSFREQUENTLY ASKED QUESTIONS. . . . . 96
INDEX. . . . . . . . . . . . . . . . . . . . . 97
TABLE OF CONTENTS
1
Page 12 of 108
VEHICLE SECURITY ALARM
The Vehicle Security Alarm monitors the vehicle doors for unauthorized entry and
the Keyless Enter-N-Go™ START/STOP button for unauthorized operation. While
the Vehicle Security Alarm is armed, interior switches for door locks and decklid
release are disabled. If something triggers the alarm, the Vehicle Security Alarm will
provide the following audible and visible signals: the horn will pulse, the park lamps
and/or turn signals will flash, and the Vehicle Security Light in the instrument cluster
will flash.
To Arm:
Push the Key Fob LOCK button.
To Disarm The System:
Push the Key Fob UNLOCK button or cycle the ignition to the ON/RUN position.
The Vehicle Security Alarm is designed to protect your vehicle. However, you can
create conditions where the Vehicle Security Alarm will give you a false alarm. If one
of the previously described arming sequences has occurred, the Vehicle Security
Alarm will arm regardless of whether you are in the vehicle or not. If you remain in
the vehicle and open a door, the alarm will sound. If this occurs, disarm the Vehicle
Security Alarm.
If the Vehicle Security Alarm is armed and the battery becomes disconnected, the
Vehicle Security Alarm will remain armed when the battery is reconnected. The ex-
terior lights will flash, and the horn will sound. If this occurs, disarm the Vehicle Se-
curity Alarm.
POWER DOOR LOCKS
The vehicles power door locks are activated by moving the inside door handles.
Push or pull the driver’s door handle to lock or unlock the doors and liftgate when
the doors are closed.
SEAT BELT SYSTEMS
Lap/Shoulder Belts
• All seating positions in your vehicle are equipped with lap/shoulder belts.
• Be sure everyone in your vehicle is in a seat and using a seat belt properly.
• Position the lap belt so that it is snug and lies low across your hips, below your
abdomen. To remove slack in the lap belt portion, pull up on the shoulder belt. To
loosen the lap belt if it is too tight, tilt the latch plate and pull on the lap belt. A
snug seat belt reduces the risk of sliding under the seat belt in a collision.
• Position the shoulder belt across the shoulder and chest with minimal, if any slack
so that it is comfortable and not resting on your neck. The retractor will withdraw
any slack in the shoulder belt.
GETTING STARTED
10
Page 16 of 108
WARNING!
• Side Air Bags need room to inflate. Do not lean against the door or window.
Sit upright in the center of the seat.
• Being too close to the Side Air Bags during deployment could cause you to
be severely injured or killed.
• Relying on the Side Air Bags alone could lead to more severe injuries in a
collision. The Side Air Bags work with your seat belt to restrain you properly.
In some collisions, Side Air Bags won’t deploy at all. Always wear your seat
belt even though you have Side Air Bags.
• This vehicle is equipped with left and right Supplemental Side Air Bag Inflat-
able Curtains (SABICs). Do not stack luggage or other cargo up high enough
to block the deployment of the SABICs. The trim covering above the side
windows where the SABIC and its deployment path are located should re-
main free from any obstructions.
• This vehicle is equipped with SABICs. In order for the SABICs to work as
intended, do not install any accessory items in your vehicle which could alter
the roof. Do not add an aftermarket sunroof to your vehicle. Do not add roof
racks that require permanent attachments (bolts or screws) for installation on
the vehicle roof. Do not drill into the roof of the vehicle for any reason.
• Do not use accessory seat covers or place objects between you and the
Side Air Bags; the performance could be adversely affected and/or objects
could be pushed into you, causing serious injury.
CHILD RESTRAINTS
Children 12 years or younger should ride properly buckled up in a rear seat, if avail-
able. According to crash statistics, children are safer when properly restrained in the
rear seats rather than in the front.
Every state in the United States and all Canadian provinces require that small chil-
dren ride in proper restraint systems. This is the law, and you can be prosecuted for
ignoring it.
NOTE:
• For additional information, refer to www.Seatcheck.org or call 1-866-
SEATCHECK.
• Canadian residents should refer to Transport Canada’s website for additional in-
formation:
http://www.tc.gc.ca/eng/motorvehiclesafety/safedrivers-childsafety-index-53.htm
GETTING STARTED
14
Page 20 of 108
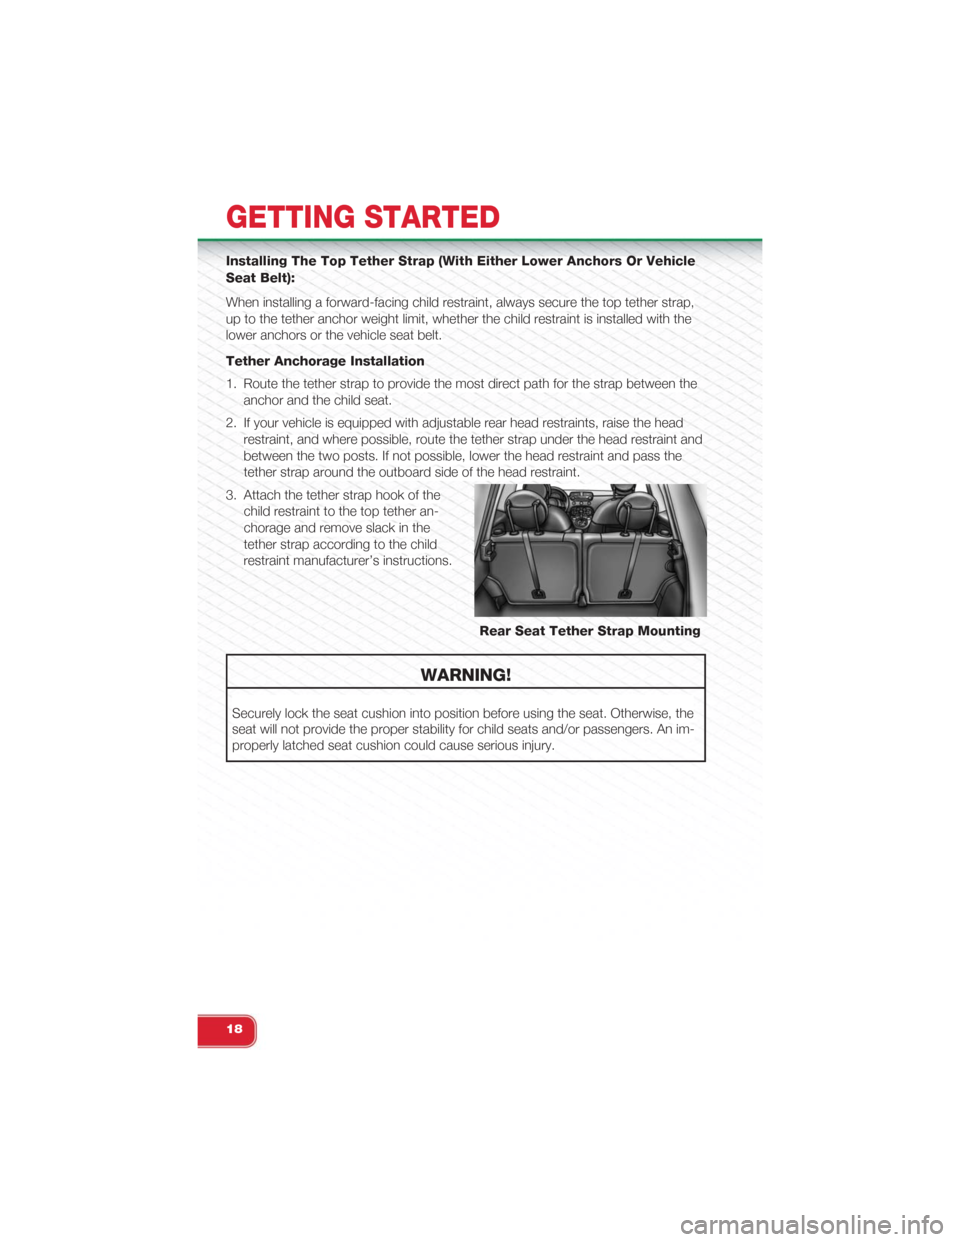
Installing The Top Tether Strap (With Either Lower Anchors Or Vehicle
Seat Belt):
When installing a forward-facing child restraint, always secure the top tether strap,
up to the tether anchor weight limit, whether the child restraint is installed with the
lower anchors or the vehicle seat belt.
Tether Anchorage Installation
1. Route the tether strap to provide the most direct path for the strap between the
anchor and the child seat.
2. If your vehicle is equipped with adjustable rear head restraints, raise the head
restraint, and where possible, route the tether strap under the head restraint and
between the two posts. If not possible, lower the head restraint and pass the
tether strap around the outboard side of the head restraint.
3. Attach the tether strap hook of the
child restraint to the top tether an-
chorage and remove slack in the
tether strap according to the child
restraint manufacturer’s instructions.
WARNING!
Securely lock the seat cushion into position before using the seat. Otherwise, the
seat will not provide the proper stability for child seats and/or passengers. An im-
properly latched seat cushion could cause serious injury.
Rear Seat Tether Strap Mounting
GETTING STARTED
18
Page 21 of 108
WARNING!
• In a collision, an unrestrained child, even a tiny baby, can become a projec-
tile inside the vehicle. The force required to hold even an infant on your lap
could become so great that you could not hold the child, no matter how
strong you are. The child and others could be severely injured or killed. Any
child riding in your vehicle should be in a proper restraint for the child's size.
• Rearward-facing child seats must never be used in the front seat of a vehicle
with a front passenger air bag. An air bag deployment could cause severe
injury or death to infants in this position.
• Only use a rearward-facing child restraint in a vehicle with a rear seat.
• Improper installation of a child restraint to the LATCH anchorages can lead
to failure of an infant or child restraint. The child could be severely injured or
killed. Follow the manufacturer’s directions exactly when installing an infant
or child restraint.
• An incorrectly anchored tether strap could lead to increased head motion
and possible injury to the child. Use only the anchor positions directly behind
the child seat to secure a child restraint top tether strap.
• If your vehicle is equipped with a split rear seat, make sure the tether strap
does not slip into the opening between the seatbacks as you remove slack
in the strap.
HEAD RESTRAINTS
Head restraints are designed to reduce the risk of injury by restricting head move-
ment in the event of a rear-impact. Head restraints should be adjusted so that the
top of the head restraint is located above the top of your ear.
WARNING!
The head restraints for all occupants must be properly adjusted prior to operating
the vehicle or occupying a seat. Head restraints should never be adjusted while
the vehicle is in motion. Driving a vehicle with the head restraints improperly ad-
justed or removed could cause serious injury or death in the event of a collision.
Rear Head Restraints
To raise the head restraint, pull upward on the head restraint. To lower the head
restraint, push the adjustment button, located at the base of the head restraint, and
push downward on the head restraint. Refer to “Occupant Restraints” in “Things To
Know Before Starting Your Vehicle” in your Owner’s Manual on the DVD for further
information on tether routing.
GETTING STARTED
19
Page 35 of 108
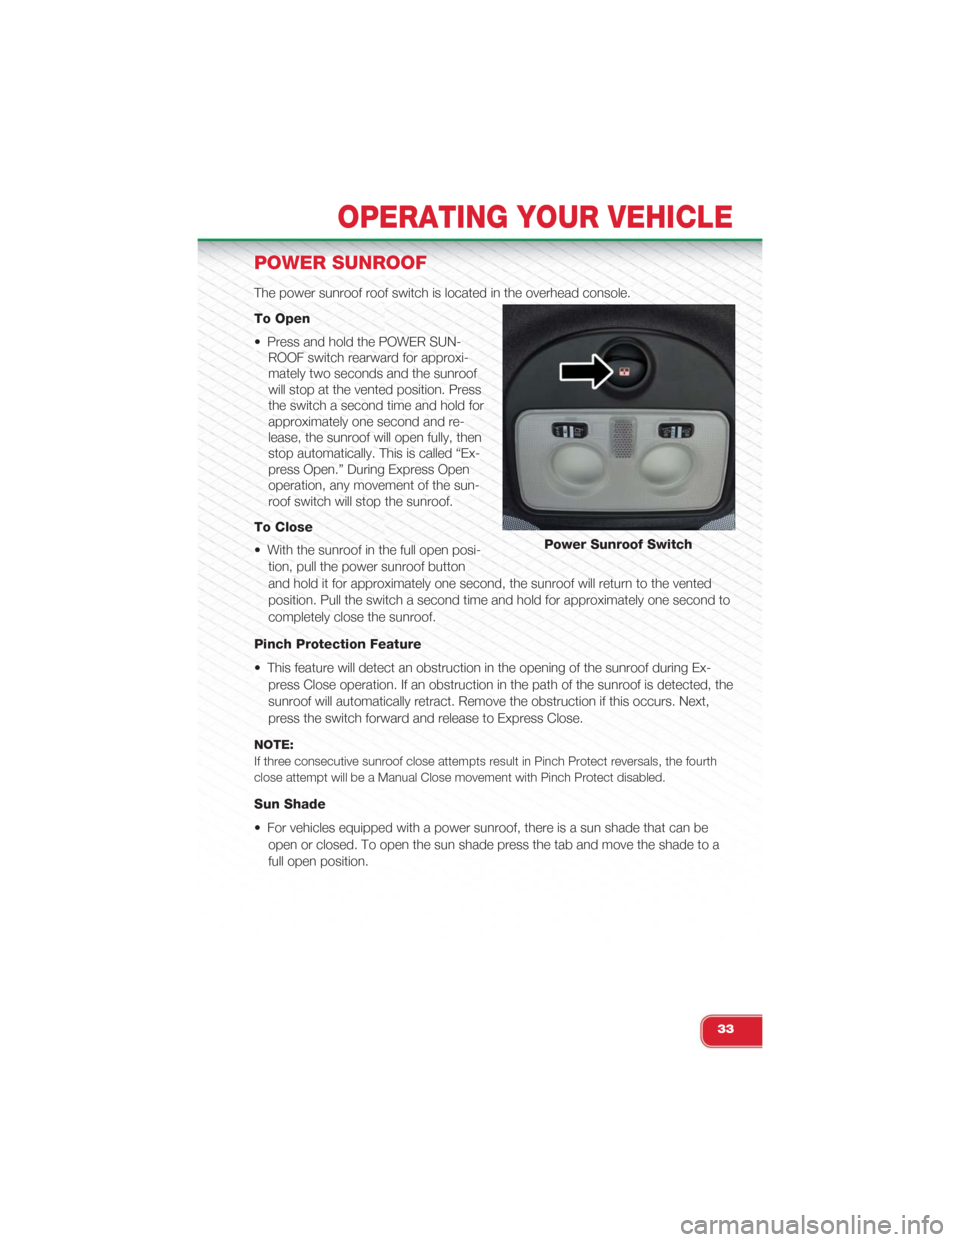
POWER SUNROOF
The power sunroof roof switch is located in the overhead console.
To Open
• Press and hold the POWER SUN-
ROOF switch rearward for approxi-
mately two seconds and the sunroof
will stop at the vented position. Press
the switch a second time and hold for
approximately one second and re-
lease, the sunroof will open fully, then
stop automatically. This is called “Ex-
press Open.” During Express Open
operation, any movement of the sun-
roof switch will stop the sunroof.
To Close
• With the sunroof in the full open posi-
tion, pull the power sunroof button
and hold it for approximately one second, the sunroof will return to the vented
position. Pull the switch a second time and hold for approximately one second to
completely close the sunroof.
Pinch Protection Feature
• This feature will detect an obstruction in the opening of the sunroof during Ex-
press Close operation. If an obstruction in the path of the sunroof is detected, the
sunroof will automatically retract. Remove the obstruction if this occurs. Next,
press the switch forward and release to Express Close.
NOTE:
If three consecutive sunroof close attempts result in Pinch Protect reversals, the fourth
close attempt will be a Manual Close movement with Pinch Protect disabled.
Sun Shade
• For vehicles equipped with a power sunroof, there is a sun shade that can be
open or closed. To open the sun shade press the tab and move the shade to a
full open position.
Power Sunroof Switch
OPERATING YOUR VEHICLE
33
Page 36 of 108
WARNING!
• Do not let children play with the sunroof, or leave children unattended in the
vehicle, and do not leave the key in or near the vehicle (or in a location ac-
cessible to children). Occupants, particularly unattended children, can be-
come entrapped by the power sunroof while operating the power sunroof
switch. Such entrapment may result in serious injury or death.
• In a collision, there is a greater risk of being thrown from a vehicle with an
open sunroof. You could also be seriously injured or killed. Always fasten
your seat belt properly and make sure all passengers are properly secured.
• Do not allow small children to operate the sunroof. Never allow your fingers,
other body parts, or any object to project through the sunroof opening. Injury
may result.
POWER CONVERTIBLE TOP
On vehicles equipped with a power convertible top, the power convertible top
switch is located on the overhead console. The switch contains two buttons. The
passenger side button, is used to open the power top, and the driver side button, is
used to close the power top.
NOTE:
• The power top buttons will operate when the ignition switch is turned to the ACC/
ON/RUN position.
• The power top can be remotely operated with the key fob. Refer to “Opening
Power Top Remote Function” in “Things To Know Before Starting” in the Owner’s
Manual on the DVD for more information.
Lowering The Power Top
Auto Open
Push the top open button approximately one second for the three-quarter open/
spoiler position. Push the top open button for approximately one second a second
time to fully open the convertible top.
Manual Open
For manual open, push and hold the open button until desired roof position or until
spoiler position.
NOTE:
Vertical movement only operates in auto open/close mode.
OPERATING YOUR VEHICLE
34
Page 62 of 108
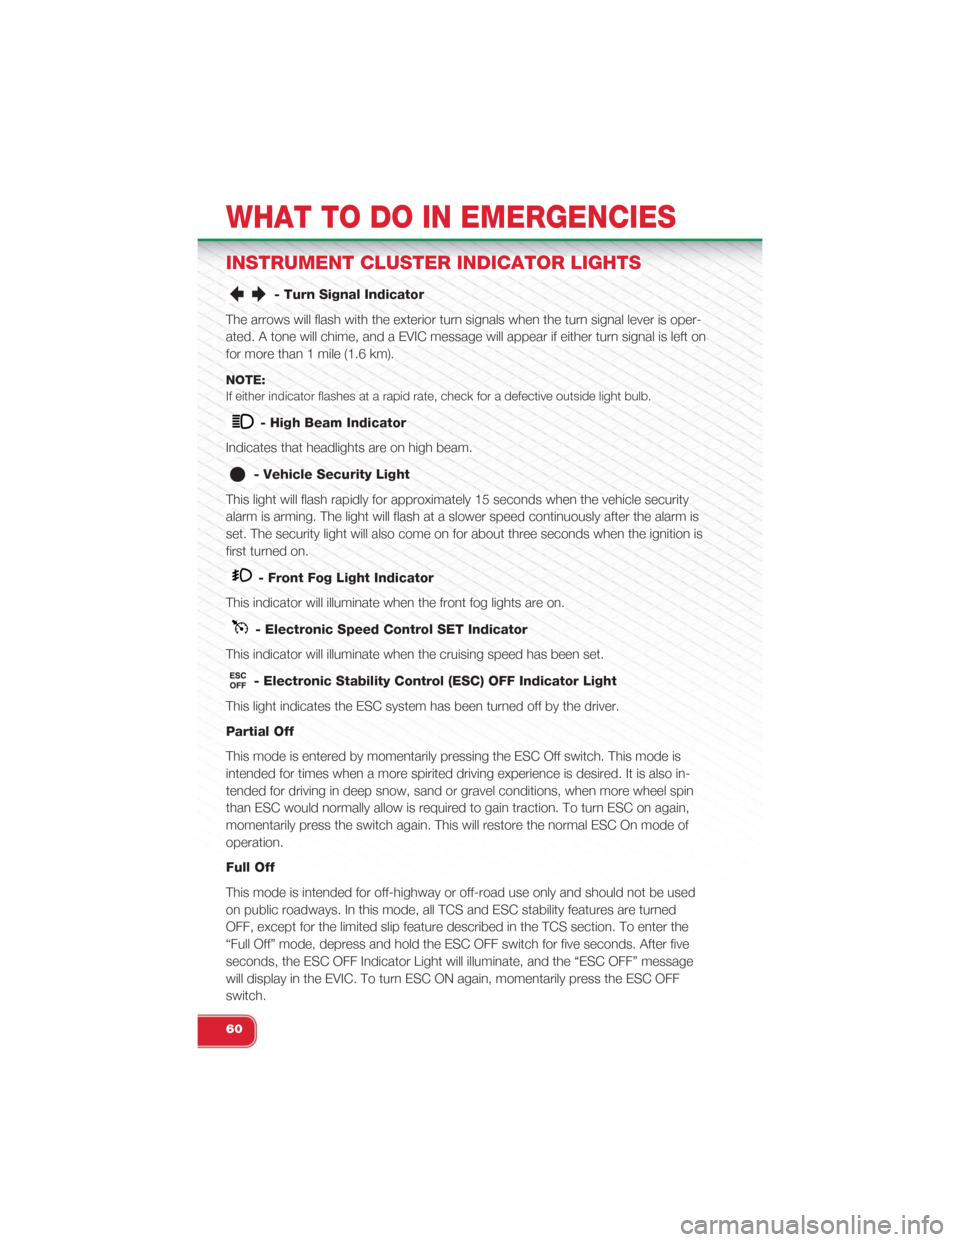
INSTRUMENT CLUSTER INDICATOR LIGHTS
- Turn Signal Indicator
The arrows will flash with the exterior turn signals when the turn signal lever is oper-
ated. A tone will chime, and a EVIC message will appear if either turn signal is left on
for more than 1 mile (1.6 km).
NOTE:
If either indicator flashes at a rapid rate, check for a defective outside light bulb.
- High Beam Indicator
Indicates that headlights are on high beam.
- Vehicle Security Light
This light will flash rapidly for approximately 15 seconds when the vehicle security
alarm is arming. The light will flash at a slower speed continuously after the alarm is
set. The security light will also come on for about three seconds when the ignition is
first turned on.
- Front Fog Light Indicator
This indicator will illuminate when the front fog lights are on.
- Electronic Speed Control SET Indicator
This indicator will illuminate when the cruising speed has been set.
- Electronic Stability Control (ESC) OFF Indicator Light
This light indicates the ESC system has been turned off by the driver.
Partial Off
This mode is entered by momentarily pressing the ESC Off switch. This mode is
intended for times when a more spirited driving experience is desired. It is also in-
tended for driving in deep snow, sand or gravel conditions, when more wheel spin
than ESC would normally allow is required to gain traction. To turn ESC on again,
momentarily press the switch again. This will restore the normal ESC On mode of
operation.
Full Off
This mode is intended for off-highway or off-road use only and should not be used
on public roadways. In this mode, all TCS and ESC stability features are turned
OFF, except for the limited slip feature described in the TCS section. To enter the
“Full Off” mode, depress and hold the ESC OFF switch for five seconds. After five
seconds, the ESC OFF Indicator Light will illuminate, and the “ESC OFF” message
will display in the EVIC. To turn ESC ON again, momentarily press the ESC OFF
switch.
WHAT TO DO IN EMERGENCIES
60
Page 96 of 108
REPORTING SAFETY DEFECTS IN THE UNITED
STATES
If you believe that your vehicle has a defect that could cause a collision or cause
injury or death, you should immediately inform the National Highway Traffic Safety
Administration (NHTSA) in addition to notifying the manufacturer.
If NHTSA receives similar complaints, it may open an investigation, and if it finds
that a safety defect exists in a group of vehicles, it may order a recall and remedy
campaign. However, NHTSA cannot become involved in individual problems be-
tween you, your authorized dealer and the manufacturer.
To contact NHTSA, you may either call the Auto Safety Hotline toll free at 1–888–
327–4236 (TTY: 1–800–424–9153), or go to http://www.safercar.gov; or write to:
Administrator, NHTSA, 1200 New Jersey Avenue, SE., West Building, Washington,
D.C. 20590. You can also obtain other information about motor vehicle safety from
http://www.safercar.gov.
In Canada
If you believe that your vehicle has a safety defect, you should contact the Cus-
tomer Service Department immediately. Canadian customers who wish to report a
safety defect to the Canadian government should contact Transport Canada, Motor
Vehicle Defect Investigations and Recalls at 1-800-333-0510 or go to
http://www.tc.gc.ca/roadsafety/.
French Canadian customers who wish to report a safety defect to the Canadian
government should contact Transport Canada, Motor Vehicle Defect Investigations
and Recalls at 1-800-333-0510 or go to http://www.tc.gc.ca/securiteroutiere/ .
CONSUMER ASSISTANCE
94
Page 99 of 108
Adding Engine Coolant (Antifreeze) . . .81Adding Washer Fluid. . . . . . . . . . .81Air BagAdvanced Front Air Bag . . . . . . .12Advance Front Air Bag. . . . . . . .11Air Bags. . . . . . . . . . . . . . . .11Air Bag Warning Light. . . . . . . . .11Driver Knee Air Bag. . . . . . . . . .13Front Air Bag. . . . . . . . . . . . .11Passenger Knee Air Bag . . . . . . .13Rollover. . . . . . . . . . . . . . . . .11Side Impacts. . . . . . . . . . . . . .11Air bag Light. . . . . . . . . . . . . . . .55Air Cleaner, Engine (Engine Air CleanerFilter). . . . . . . . . . . . . . . . . . .81Air Conditioner Maintenance . .. . . . .81Air Conditioning Refrigerant. . . . . . . .81Air Conditioning System. . . . . . . . .81AlarmDisarm The System. . . . . . . . . .10Vehicle Security Alarm .. . . . . . .10Alarm (Security Alarm)........10, 60Antifreeze (Engine Coolant) . .. . . .80, 81Capacities. . . . . . . . . . . . . . .80Disposal. . . . . . . . . . . . . . . .81Anti-Lock Warning Light. . . . . . . . .55Appearance Care. . . . . . . . . . . . .81Automatic Temperature Control (ATC). . .31Automatic TransmissionFluid Type. . . . . . . . . . . . . . .81
Battery. . . . . . . . . . . . . . . . . . .81BLUE&ME™ Hands-FreeCommunication. . . . . . . . . . . .43Body Mechanism Lubrication. . . . . .81Brake Fluid...............80, 81Brakes. . . . . . . . . . . . . . . . . . .81Brake System. . . . . . . . . . . . . . .81Master Cylinder. . . . . . . . . . . .81Warning Light. . . . . . . . . . . . .58Break-In Recommendations, NewVehicle. . . . . . . . . . . . . . . . .24Bulb Replacement. . . . . . . . . . . . .92Bulbs, Light. . . . . . . . . . . . . . . .92
Capacities, Antifreeze (Engine Coolant). .80Capacities, Fluid. . . . . . . . . . . . . .80
Caps, FillerOil (Engine) . .. . . . . . . . . . . .81Car Washes . .. . . . . . . . . . . . . .81Charging System Light . .. . . . . . . .55Child Restraint . . .. . . . . . . . . . . .14Child RestraintsInstalling Child Restraints Using TheVehicle Seat Belt . .. . . . . . . . . .16Lower Anchors And Tethers ForChildren. . . . . . . . . . . . . . . .16Using The Top Tether Anchorage . .16CleaningWheels. . . . . . . . . . . . . . . . .81Windshield Wiper Blades. . . . . . .81Climate Control . .. . . . . . . . . . . .30Automatic. . . . . . . . . . . . . . .31Manual. . . . . . . . . . . . . . . . .30Cluster Warning/Indicator LightsAnti-Lock Brake (ABS) Light. . . . .55Brake Warning Light . .. . . . . . . .58Charging System Light . . .. . . . .55Electronic Speed Control SETIndicator . .. . . . . . . . . . . . . .60Electronic Throttle Control (ETC)Indicator Light. . . . . . . . . . . . .59Engine Temperature Warning Light. .57Front Fog Light Indicator. . . . . . .60High Beam Indicator. . . . . . . . .60Malfunction Indicator Light (MIL) . . .59Oil Pressure Warning Light. . . . . .55Park/Headlight ON Indicator. . . . .61Tire Pressure Monitoring System(TPMS) Light. . . . . . . . . . . . .56Turn Signal Indicator. . . . . . . . .60Vehicle Security Light . .. . . . . . .60Clutch.. . . . . . . . . . . . . . . . . . .81Clutch Fluid .. . . . . . . . . . . . . . .81Compact Spare Tire . . . . . . .. . . . .90Coolant (Antifreeze) . .. . . . . . . . . .80Cooling System . . .. . . . . . . . . . .81Adding Coolant (Antifreeze). . . . .81Coolant Level .. . . . . . . . . . . .81Disposal of Used Coolant. . . . . .81Drain, Flush, and Refill . . .. . . . .81Inspection. . . . . . . . . . . . . . .81Points to Remember . .. . . . . . .81Pressure Cap . .. . . . . . . . . . .81
INDEX
97