warning light FIAT 500C 2019 Owner's Guide
[x] Cancel search | Manufacturer: FIAT, Model Year: 2019, Model line: 500C, Model: FIAT 500C 2019Pages: 332, PDF Size: 3.17 MB
Page 138 of 332
Customer ActionCustomer Will See
NOTE: Each step MUST
BE held for at least two
seconds
12. Turn ignition MAR/
ACC/ON/RUN. (Entire
sequence needs to be
completed within one
minute or sequence will
need to be repeated). System is now reset and
the engine may be started.
Turn hazard flashers OFF
(Manually).
If a reset procedure step is not completed within 60
seconds, then the turn signal lights will blink and the reset
procedure must be performed again in order to be success-
ful.
Maintaining Your Air Bag System
WARNING!
• Modifications to any part of the air bag system could
cause it to fail when you need it. You could be
injured if the air bag system is not there to protect
you. Do not modify the components or wiring, in-
cluding adding any kind of badges or stickers to the
steering wheel hub trim cover or the upper passenger
side of the instrument panel. Do not modify the front
bumper, vehicle body structure, or add aftermarket
side steps or running boards.
• It is dangerous to try to repair any part of the air bag
system yourself. Be sure to tell anyone who works on
your vehicle that it has an air bag system.
• Do not attempt to modify any part of your air bag
system. The air bag may inflate accidentally or may
not function properly if modifications are made.
Take your vehicle to an authorized dealer for any air
bag system service. If your seat, including your trim
cover and cushion, needs to be serviced in any way
(including removal or loosening/tightening of seat
attachment bolts), take the vehicle to an authorized
(Continued)
136 SAFETY
Page 157 of 332
Whenever a change is noticed in the sound of the exhaust
system, when exhaust fumes can be detected inside the
vehicle, or when the underside or rear of the vehicle is
damaged, have a competent mechanic inspect the complete
exhaust system and adjacent body areas for broken, dam-
aged, deteriorated, or mispositioned parts. Open seams or
loose connections could permit exhaust fumes to seep into
the passenger compartment. In addition, inspect the ex-
haust system each time the vehicle is raised for lubrication
or oil change. Replace as required.
Safety Checks You Should Make Inside The Vehicle
Seat Belts
Inspect the seat belt system periodically, checking for cuts,
frays, and loose parts. Damaged parts must be replaced
immediately. Do not disassemble or modify the system.
Front seat belt assemblies must be replaced after a collision.
Rear seat belt assemblies must be replaced after a collision
if they have been damaged (i.e., bent retractor, torn web-
bing, etc.). If there is any question regarding seat belt or
retractor condition, replace the seat belt.
Air Bag Warning Light
The Air Bag warning lightwill turn on for four to
eight seconds as a bulb check when the ignition switch is first turned to ON/RUN. If the light is either not on
during starting, stays on, or turns on while driving,
have the system inspected at an authorized dealer as
soon as possible. After the bulb check, this light will
illuminate with a single chime when a fault with the Air
Bag System has been detected. It will stay on until the
fault is removed. If the light comes on intermittently or
remains on while driving, have an authorized dealer
service the vehicle immediately.
Refer to “Occupant Restraint Systems” in “Safety” for
further information.
Defroster
Check operation by selecting the defrost mode and place
the blower control on high speed. You should be able to
feel the air directed against the windshield. See an autho-
rized dealer for service if your defroster is inoperable.
Floor Mat Safety Information
Always use floor mats designed to fit your vehicle. Only
use a floor mat that does not interfere with the operation of
the accelerator, brake or clutch pedals. Only use a floor mat
that is securely attached using the floor mat fasteners so it
5
SAFETY 155
Page 158 of 332

cannot slip out of position and interfere with the accelera-
tor, brake or clutch pedals or impair safe operation of your
vehicle in other ways.
WARNING!
An improperly attached, damaged, folded, or stacked
floor mat, or damaged floor mat fasteners may cause
your floor mat to interfere with the accelerator, brake,
or clutch pedals and cause a loss of vehicle control. To
prevent SERIOUS INJURY or DEATH:
•ALWAYS securely attach
your floor mat using the
floor mat fasteners. DO NOT install your floor mat
upside down or turn your floor mat over. Lightly pull
to confirm mat is secured using the floor mat fasten-
ers on a regular basis.
• ALWAYS REMOVE THE EXISTING FLOOR MAT
FROM THE VEHICLE
before installing any other
floor mat. NEVER install or stack an additional floor
mat on top of an existing floor mat.
• ONLY install floor mats designed to fit your vehicle.
NEVER install a floor mat that cannot be properly
attached and secured to your vehicle. If a floor mat
needs to be replaced, only use a FCA approved floor
(Continued)
WARNING! (Continued)
mat for the specific make, model, and year of your
vehicle.
• ONLY use the driver ’s side floor mat on the driver ’s
side floor area. To check for interference, with the
vehicle properly parked with the engine off, fully
depress the accelerator, the brake, and the clutch
pedal (if present) to check for interference. If your
floor mat interferes with the operation of any pedal,
or is not secure to the floor, remove the floor mat
from the vehicle and place the floor mat in your
trunk.
• ONLY use the passenger ’s side floor mat on the
passenger ’s side floor area.
• ALWAYS make sure objects cannot fall or slide into
the driver ’s side floor area when the vehicle is
moving. Objects can become trapped under accelera-
tor, brake, or clutch pedals and could cause a loss of
vehicle control.
• NEVER place any objects under the floor mat (e.g.,
towels, keys, etc.). These objects could change the
position of the floor mat and may cause interference
with the accelerator, brake, or clutch pedals.
(Continued)
156 SAFETY
Page 159 of 332
WARNING!(Continued)
•If the vehicle carpet has been removed and re-
installed, always properly attach carpet to the floor
and check the floor mat fasteners are secure to the
vehicle carpet. Fully depress each pedal to check for
interference with the accelerator, brake, or clutch
pedals then re-install the floor mats.
• It is recommended to only use mild soap and water
to clean your floor mats. After cleaning, always check
your floor mat has been properly installed and is
secured to your vehicle using the floor mat fasteners
by lightly pulling mat.
Periodic Safety Checks You Should Make Outside
The Vehicle
Tires
Examine tires for excessive tread wear and uneven wear
patterns. Check for stones, nails, glass, or other objects
lodged in the tread or sidewall. Inspect the tread for cuts
and cracks. Inspect sidewalls for cuts, cracks, and bulges.
Check the wheel nuts for tightness. Check the tires (includ-
ing spare) for proper cold inflation pressure.
Lights
Have someone observe the operation of brake lights and
exterior lights while you work the controls. Check turn
signal and high beam indicator lights on the instrument
panel.
Door Latches
Check for proper closing, latching, and locking.
Fluid Leaks
Check area under the vehicle after overnight parking for
fuel, coolant, oil, or other fluid leaks. Also, if gasoline
fumes are detected or if fuel, or brake fluid leaks are
suspected. The cause should be located and corrected
immediately.
5
SAFETY 157
Page 166 of 332
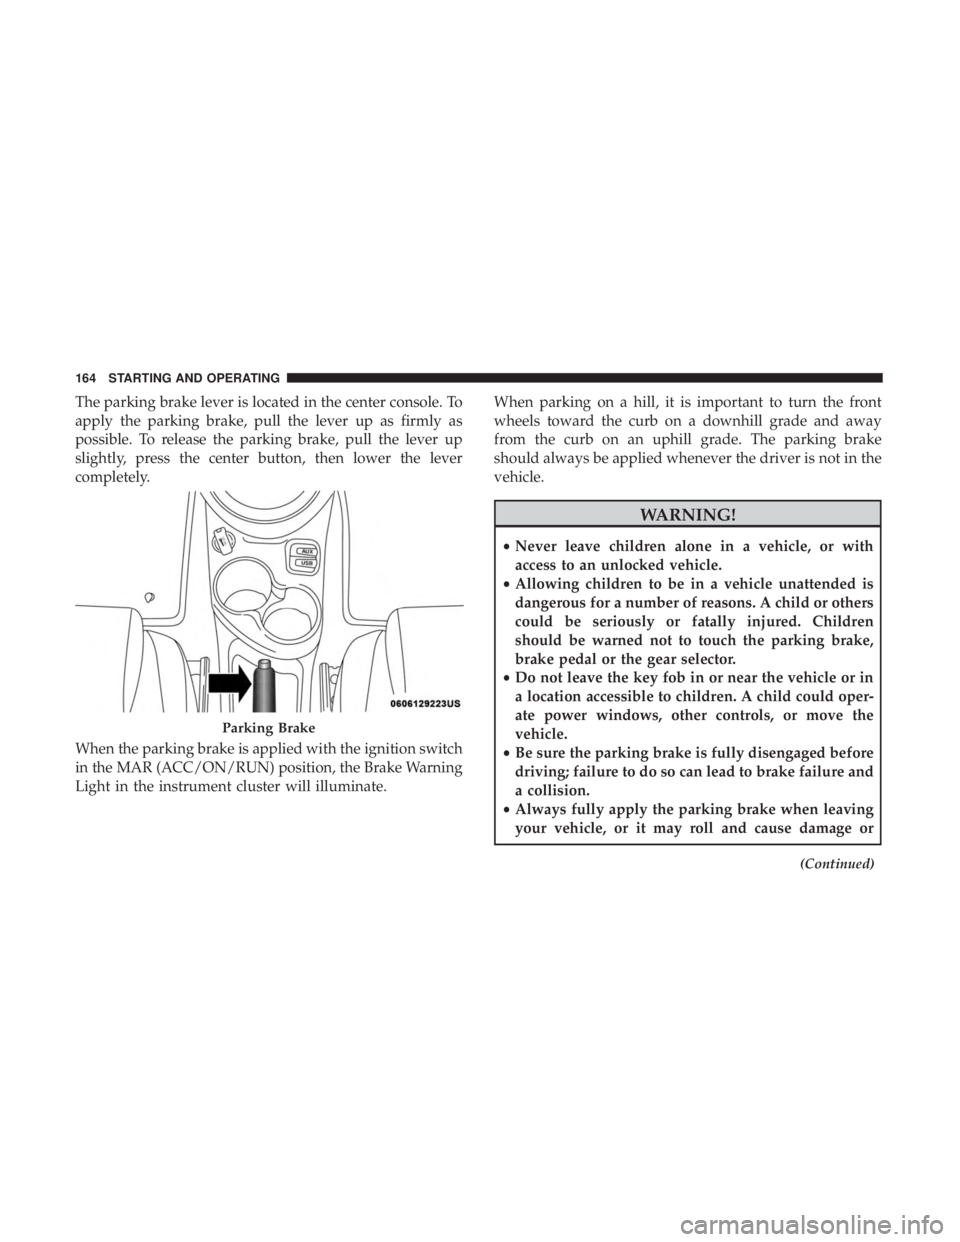
The parking brake lever is located in the center console. To
apply the parking brake, pull the lever up as firmly as
possible. To release the parking brake, pull the lever up
slightly, press the center button, then lower the lever
completely.
When the parking brake is applied with the ignition switch
in the MAR (ACC/ON/RUN) position, the Brake Warning
Light in the instrument cluster will illuminate.When parking on a hill, it is important to turn the front
wheels toward the curb on a downhill grade and away
from the curb on an uphill grade. The parking brake
should always be applied whenever the driver is not in the
vehicle.
WARNING!
•
Never leave children alone in a vehicle, or with
access to an unlocked vehicle.
• Allowing children to be in a vehicle unattended is
dangerous for a number of reasons. A child or others
could be seriously or fatally injured. Children
should be warned not to touch the parking brake,
brake pedal or the gear selector.
• Do not leave the key fob in or near the vehicle or in
a location accessible to children. A child could oper-
ate power windows, other controls, or move the
vehicle.
• Be sure the parking brake is fully disengaged before
driving; failure to do so can lead to brake failure and
a collision.
• Always fully apply the parking brake when leaving
your vehicle, or it may roll and cause damage or
(Continued)
Parking Brake
164 STARTING AND OPERATING
Page 167 of 332
WARNING!(Continued)
injury. Also be certain to leave a manual transmis-
sion in FIRST gear or REVERSE gear. Failure to do so
may allow the vehicle to roll and cause damage or
injury.
CAUTION!
If the Brake Warning Light remains on with the park-
ing brake released, a brake system malfunction is
indicated. Have the brake system serviced by an au-
thorized dealer immediately.
MANUAL TRANSMISSION — IF EQUIPPED
Five-Speed Manual Transmission
WARNING!
You or others could be injured if you leave the vehicle
unattended without having the parking brake fully
applied. The parking brake should always be applied
when the driver is not in the vehicle, especially on an
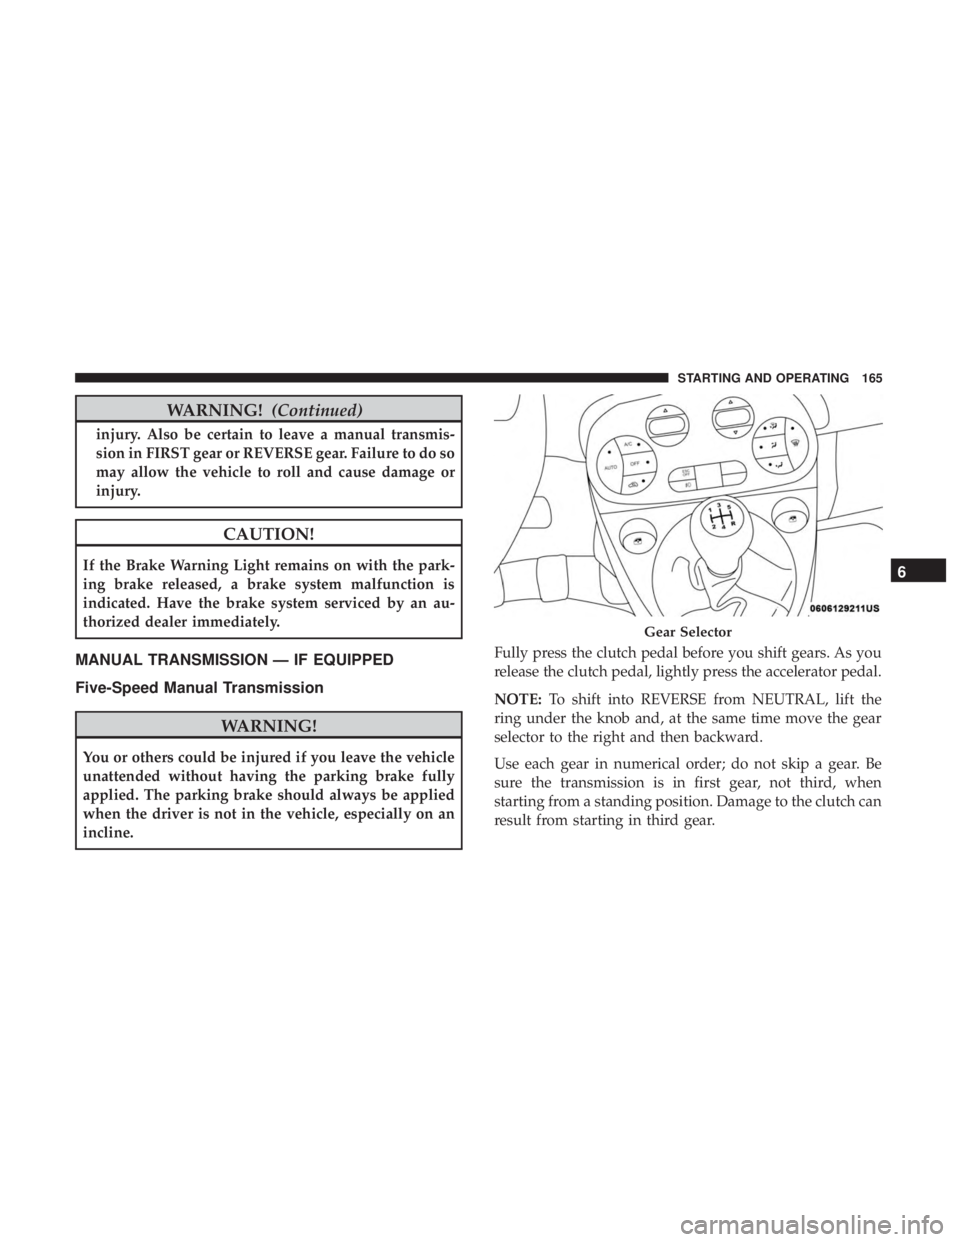
incline. Fully press the clutch pedal before you shift gears. As you
release the clutch pedal, lightly press the accelerator pedal.
NOTE:
To shift into REVERSE from NEUTRAL, lift the
ring under the knob and, at the same time move the gear
selector to the right and then backward.
Use each gear in numerical order; do not skip a gear. Be
sure the transmission is in first gear, not third, when
starting from a standing position. Damage to the clutch can
result from starting in third gear.
Gear Selector
6
STARTING AND OPERATING 165
Page 177 of 332
•Avoid using speed control when AutoStick is engaged
because the transmission will not shift automatically.
• Transmission shifting will be more noticeable when
AutoStick is enabled.
• The system may revert to automatic shift mode if a fault
or overheat condition is detected.
To disengage AutoStick mode, return the gear selector to
the DRIVE position. You can shift in or out of the AutoStick
position at any time without taking your foot off the
accelerator pedal.
WARNING!
Do not downshift for additional engine braking on a
slippery surface. The drive wheels could lose their grip
and the vehicle could skid, causing a collision or
personal injury.
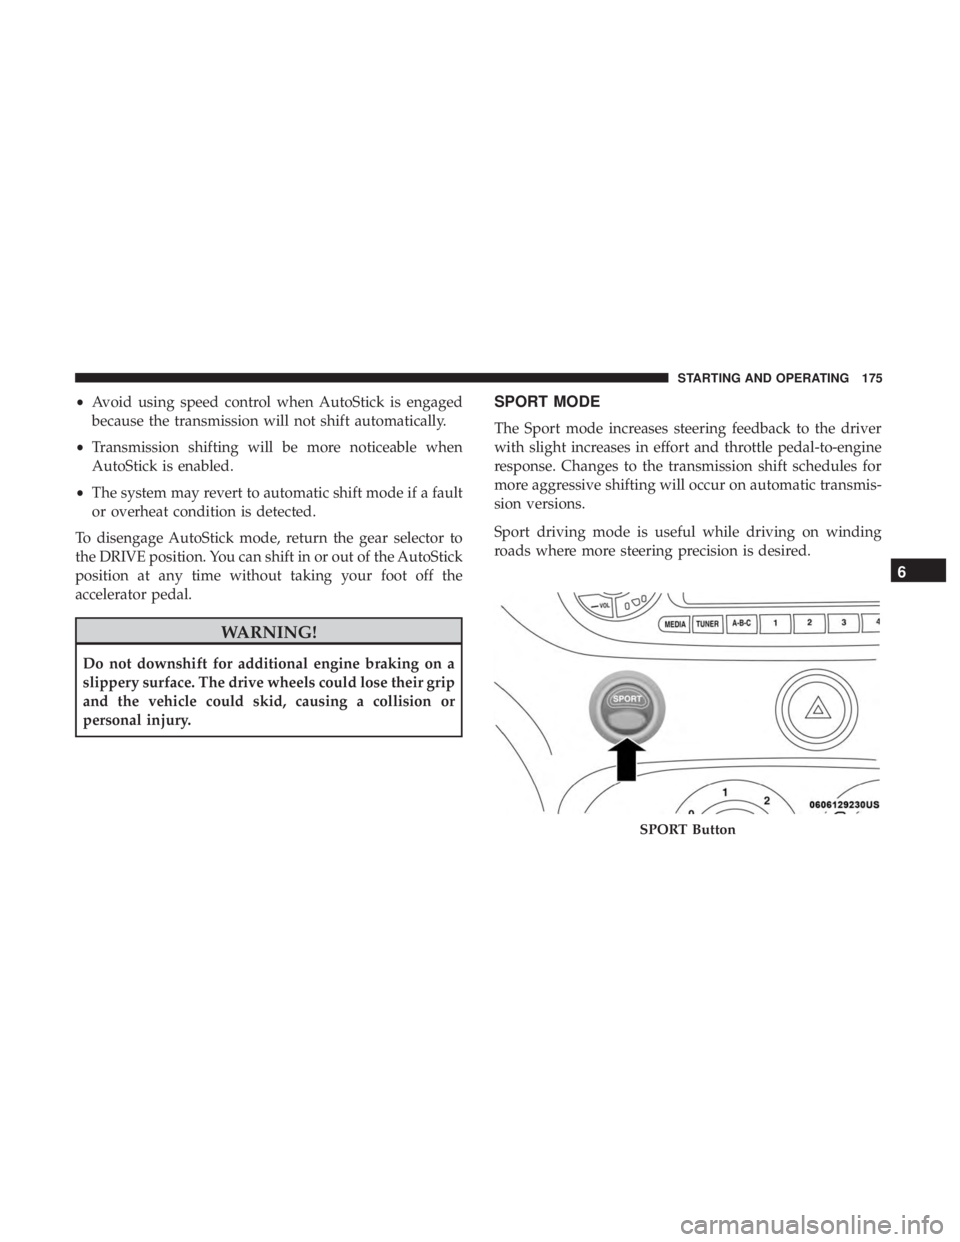
SPORT MODE
The Sport mode increases steering feedback to the driver
with slight increases in effort and throttle pedal-to-engine
response. Changes to the transmission shift schedules for
more aggressive shifting will occur on automatic transmis-
sion versions.
Sport driving mode is useful while driving on winding
roads where more steering precision is desired.
SPORT Button
6
STARTING AND OPERATING 175
Page 178 of 332
Manual Transmission — If Equipped
1. Push the SPORT button, located above the climatecontrols to activate SPORT mode.
NOTE: Once activated, a SPORT message will be dis-
played in the instrument cluster.
2. Momentarily release the accelerator pedal.
3. Press the accelerator pedal again to activate.
4. Push the SPORT button again to return to the standard driving mode.
Automatic Transmission — If Equipped
1. Push the SPORT button, located above the climate controls to activate SPORT mode.
NOTE: Once SPORT mode is activated, a “SPORT” mes-
sage will be displayed in the instrument cluster. The
“SPORT” message may change to italicfont and only
display for a few seconds on some models.
2. Push the SPORT button again to return to the standard driving mode.POWER STEERING
The electric power steering system will give you good
vehicle response and increased ease of maneuverability in
tight spaces. The system will vary its assist to provide light
efforts while parking and good feel while driving. If the
electric steering system experiences a fault that prevents it
from providing assist, you will still have the ability to steer
the vehicle manually.
WARNING!
Continued operation with reduced or no power steer-
ing assist could pose a safety risk to yourself and
others. Service should be obtained as soon as possible.
If the Steering icon is flashing, it indicates that the vehicle
needs to be taken to an authorized dealer for service. It is
likely the vehicle has lost power steering assistance.
If the Steering icon is displayed and the “SERVICE POWER
STEERING” message is displayed on the instrument clus-
ter screen, they indicate that extreme steering maneuvers
may have occurred which caused an over temperature
condition in the power steering system. Once driving
conditions are safe, pull over and let the vehicle idle for a
176 STARTING AND OPERATING
Page 180 of 332
To Activate
Push the ON/OFF button. The Cruise Indicator Light in
the instrument cluster display will illuminate. To turn the
system off, push the ON/OFF button a second time. The
Cruise Indicator Light will turn off. The system should be
turned off when not in use.
WARNING!
Leaving the Speed Control system on when not in use
is dangerous. You could accidentally set the system or
cause it to go faster than you want. You could lose
control and have an accident. Always leave the system
off when you are not using it.
To Set A Desired Speed
Turn the Speed Control on. When the vehicle has reached
the desired speed, push the SET (-) button and release.
Release the accelerator and the vehicle will operate at the
selected speed.
NOTE:The vehicle should be traveling at a steady speed
and on level ground before pushing the SET (-) button.
To Vary The Speed Setting
To Increase Speed
When the Speed Control is set, you can increase speed by
pushing the RES (+) button.
The driver ’s preferred units can be selected through the
instrument panel settings if equipped. Refer to “Getting To
Know Your Instrument Panel” for more information. The
speed decrement shown is dependant on the chosen speed
unit of U.S. (mph) or Metric (km/h):
U.S. Speed (mph)
• Pushing the RES (+) button once will result in a 1 mph
increase in set speed. Each subsequent tap of the button
results in an increase of 1 mph.
• If the button is continually pushed, the set speed will
continue to increase until the button is released, then the
new set speed will be established.
Metric Speed (km/h)
• Pushing the RES (+) button once will result in a 1 km/h
increase in set speed. Each subsequent tap of the button
results in an increase of 1 km/h.
178 STARTING AND OPERATING
Page 181 of 332
•If the button is continually pushed, the set speed will
continue to increase until the button is released, then the
new set speed will be established.
To Decrease Speed
When the Speed Control is set, you can decrease speed by
pushing the SET (-) button.
The driver ’s preferred units can be selected through the
instrument panel settings if equipped. Refer to “Getting To
Know Your Instrument Panel” for more information. The
speed decrement shown is dependant on the chosen speed
unit of U.S. (mph) or Metric (km/h):
U.S. Speed (mph)
• Pushing the SET (-) button once will result in a 1 mph
decrease in set speed. Each subsequent tap of the button
results in a decrease of 1 mph.
• If the button is continually pushed, the set speed will
continue to decrease until the button is released, then the
new set speed will be established.
Metric Speed (km/h)
• Pushing the SET (-) button once will result in a 1 km/h
decrease in set speed. Each subsequent tap of the button
results in a decrease of 1 km/h. •
If the button is continually pushed, the set speed will
continue to decrease until the button is released, then the
new set speed will be established.
To Accelerate For Passing
Press the accelerator as you would normally. When the
pedal is released, the vehicle will return to the set speed.
Using Speed Control On Hills
The transmission may downshift on hills to maintain the
vehicle set speed.
NOTE: The Speed Control system maintains speed up and
down hills. A slight speed change on moderate hills is
normal.
On steep hills, a greater speed loss or gain may occur so it
may be preferable to drive without Speed Control.
WARNING!
Speed Control can be dangerous where the system
cannot maintain a constant speed. Your vehicle could
go too fast for the conditions, and you could lose
control and have an accident. Do not use Speed Control
in heavy traffic or on roads that are winding, icy,
snow-covered or slippery.
6
STARTING AND OPERATING 179