FIAT 500C 2019 Service Manual
Manufacturer: FIAT, Model Year: 2019, Model line: 500C, Model: FIAT 500C 2019Pages: 332, PDF Size: 3.17 MB
Page 41 of 332
Parking Lights
To turn on the parking lights, remove the key or
turn the ignition to OFF/LOCK position and
turn on the headlights.
Follow Me Home/Headlight Delay
When this feature is selected, the driver can choose to have
the headlights remain on for a preset period of time.
Activation
Remove the key or turn the ignition to the STOP (OFF/
LOCK) position, and pull the multifunction lever toward
the steering wheel within two minutes. Each time the lever
is pulled, the activation of the lights will be extended by 30
seconds. The activation of the lights can be extended to a
maximum of 210 seconds.
Deactivation
Pull the multifunction lever toward the steering wheel and
hold it for more than two seconds.
Fog Lights — If Equipped
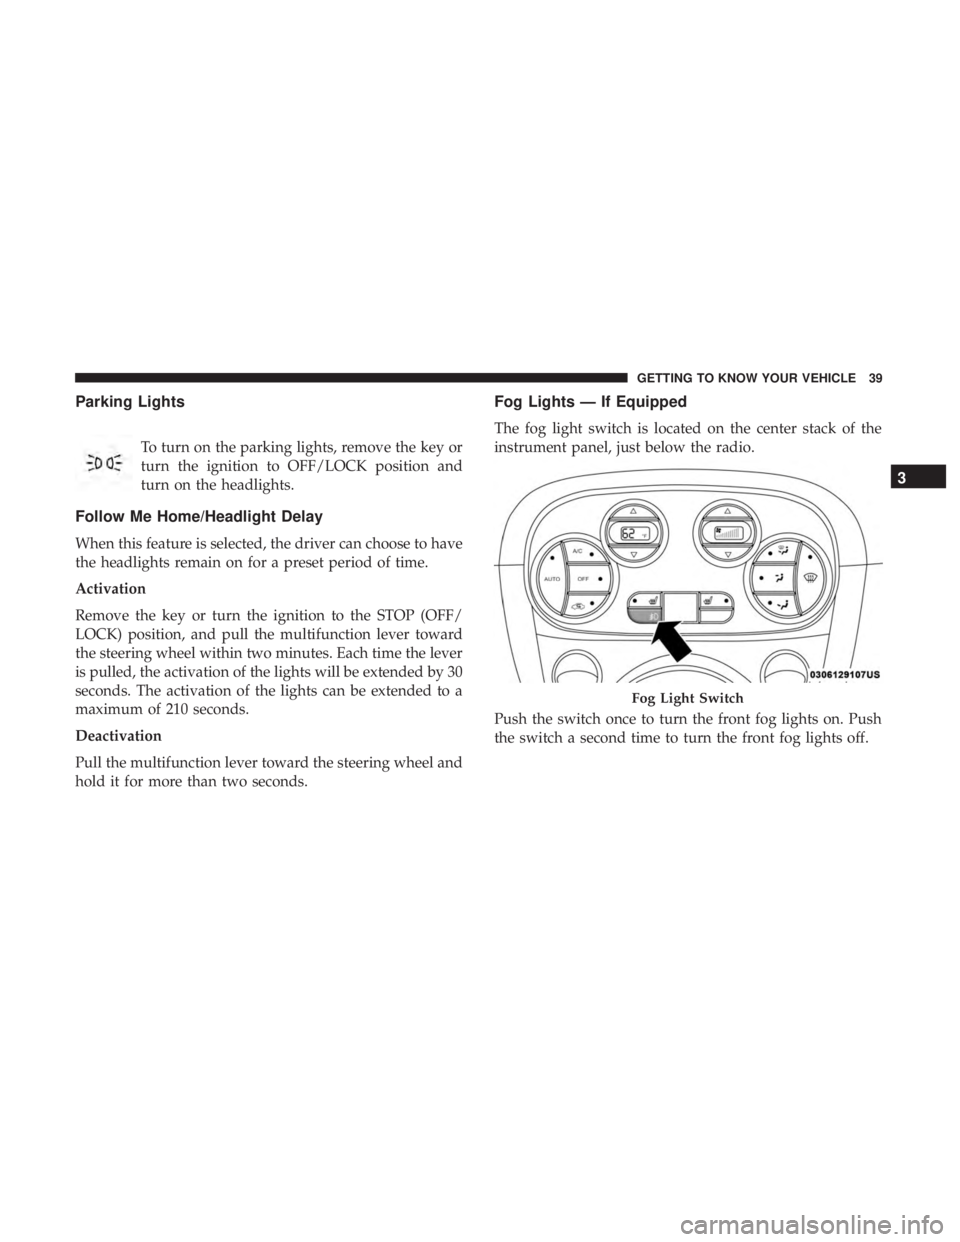
The fog light switch is located on the center stack of the
instrument panel, just below the radio.
Push the switch once to turn the front fog lights on. Push
the switch a second time to turn the front fog lights off.
Fog Light Switch
3
GETTING TO KNOW YOUR VEHICLE 39
Page 42 of 332
Turn Signals
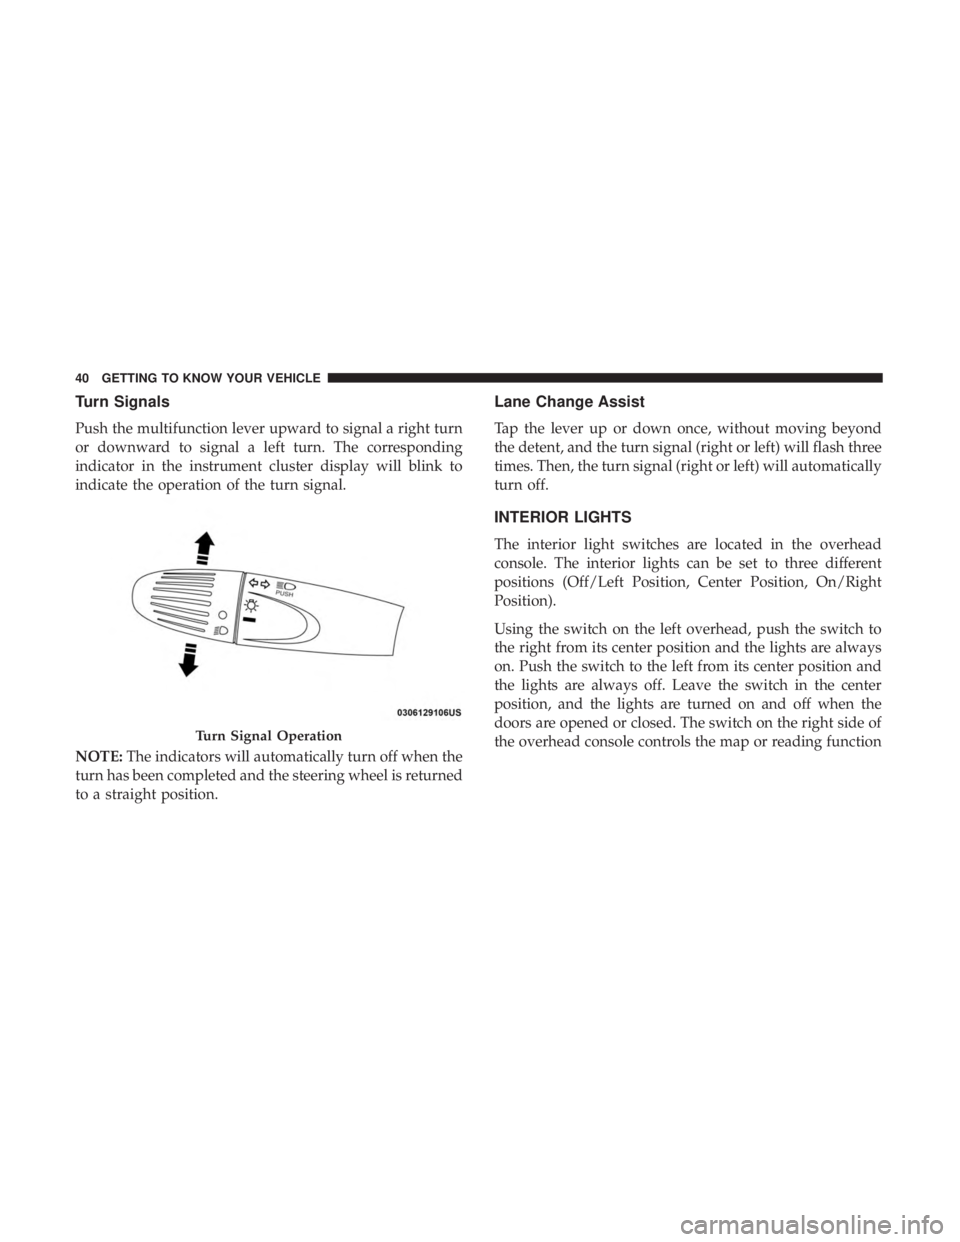
Push the multifunction lever upward to signal a right turn
or downward to signal a left turn. The corresponding
indicator in the instrument cluster display will blink to
indicate the operation of the turn signal.
NOTE:The indicators will automatically turn off when the
turn has been completed and the steering wheel is returned
to a straight position.
Lane Change Assist
Tap the lever up or down once, without moving beyond
the detent, and the turn signal (right or left) will flash three
times. Then, the turn signal (right or left) will automatically
turn off.
INTERIOR LIGHTS
The interior light switches are located in the overhead
console. The interior lights can be set to three different
positions (Off/Left Position, Center Position, On/Right
Position).
Using the switch on the left overhead, push the switch to
the right from its center position and the lights are always
on. Push the switch to the left from its center position and
the lights are always off. Leave the switch in the center
position, and the lights are turned on and off when the
doors are opened or closed. The switch on the right side of
the overhead console controls the map or reading function
Turn Signal Operation
40 GETTING TO KNOW YOUR VEHICLE
Page 43 of 332
of the lights. Push the switch to the right to turn on the
right light and push the switch to the left to turn on the left
light.
CAUTION!
Before getting out of the vehicle be sure that the switch
is in the center position or that the lights are off to
avoid draining the battery.
Interior Light Timing (Center Position)
There are four different modes of operation that can be
activated in this position:
•When one door is opened, a three minute timer is
activated.
• When the key is removed from the ignition (within two
minutes of the ignition being turned OFF), a 10 second
timer is activated.
• When the doors are unlocked with the key fob, a 10
second timer is activated.
• When the doors are locked with the key fob, the lights
will turn off.
Interior Light Timing (On/Right Position)
When all doors are closed a 15-minute timer is activated.
NOTE: The timer is deactivated when the key is moved
into the ON/RUN position.
Cargo Area Lights
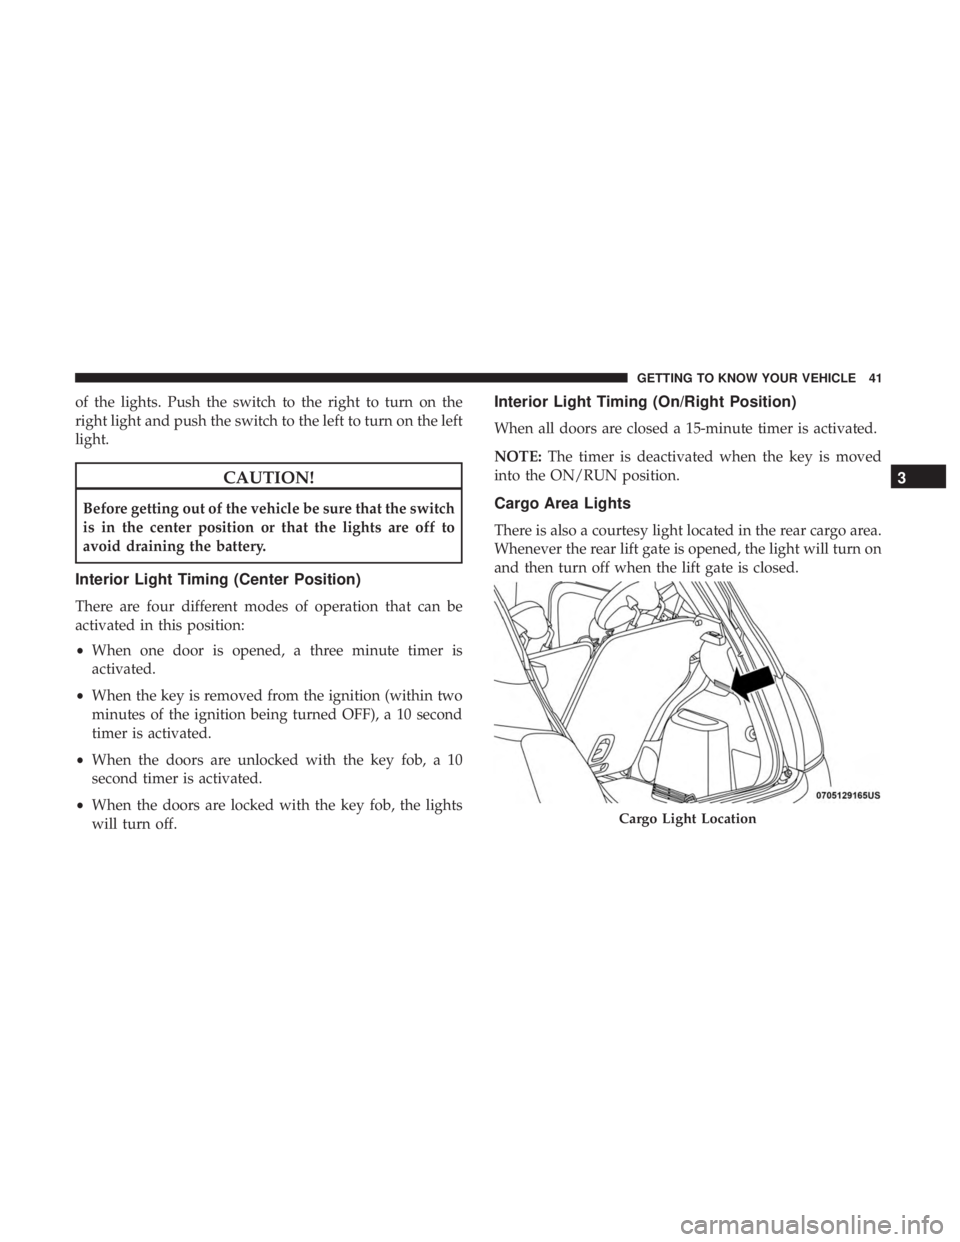
There is also a courtesy light located in the rear cargo area.
Whenever the rear lift gate is opened, the light will turn on
and then turn off when the lift gate is closed.
Cargo Light Location
3
GETTING TO KNOW YOUR VEHICLE 41
Page 44 of 332
WIPERS AND WASHERS
The windshield wiper/washer lever is located on the right
side of the steering column.
NOTE:The windshield wipers/washers will only operate
with the ignition in the ON/RUN position.
Front Windshield Wiper Operation
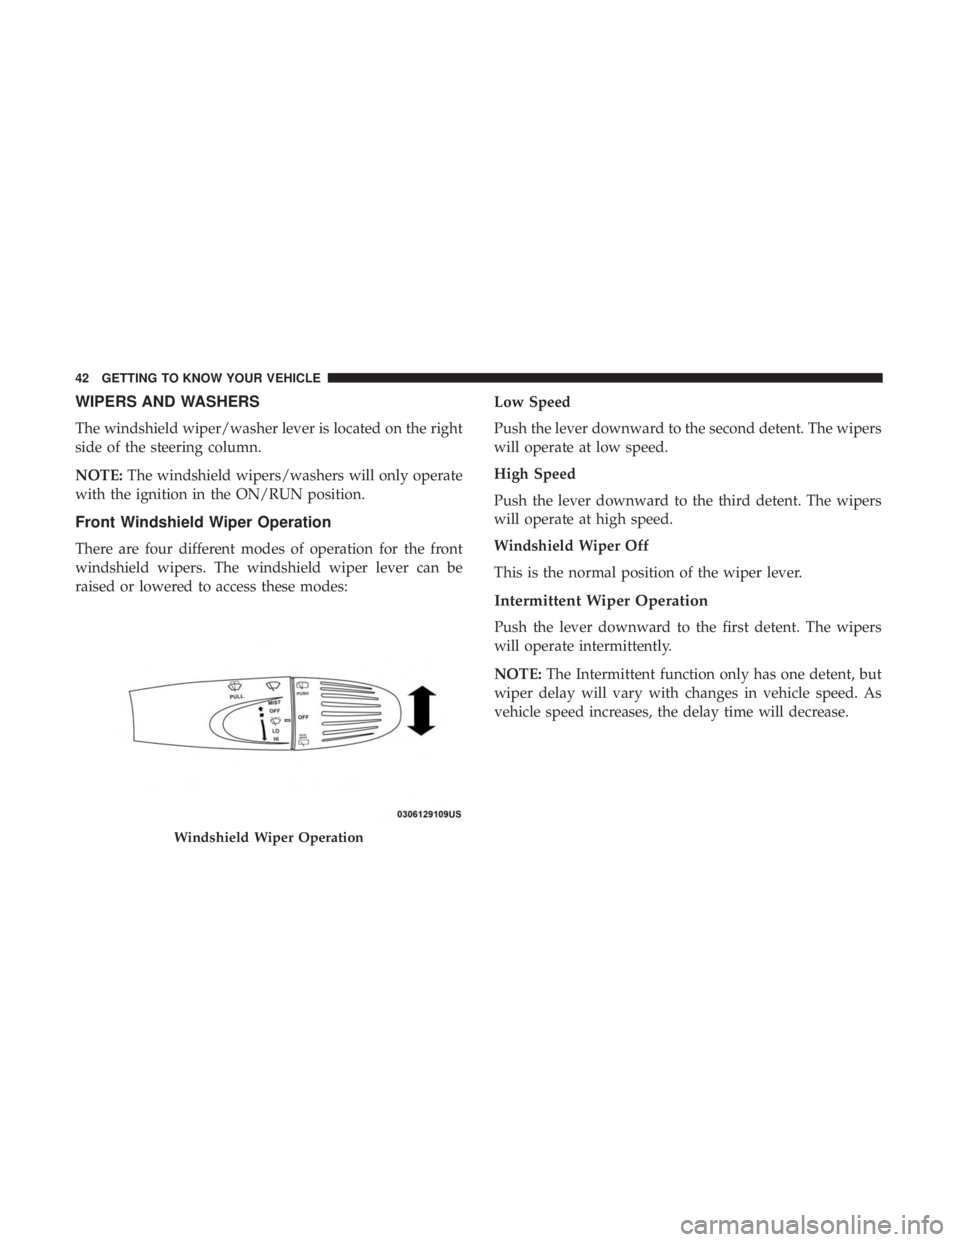
There are four different modes of operation for the front
windshield wipers. The windshield wiper lever can be
raised or lowered to access these modes: Low Speed
Push the lever downward to the second detent. The wipers
will operate at low speed.
High Speed
Push the lever downward to the third detent. The wipers
will operate at high speed.
Windshield Wiper Off
This is the normal position of the wiper lever.
Intermittent Wiper Operation
Push the lever downward to the first detent. The wipers
will operate intermittently.
NOTE:
The Intermittent function only has one detent, but
wiper delay will vary with changes in vehicle speed. As
vehicle speed increases, the delay time will decrease.
Windshield Wiper Operation
42 GETTING TO KNOW YOUR VEHICLE
Page 45 of 332
Front Windshield Washer Operation
Pull the windshield wiper/washer lever toward the steer-
ing wheel to activate the washers. The wipers will activate
automatically for three cycles after the lever is released.
CAUTION!
•Turn the windshield wipers off when driving
through an automatic car wash. Damage to the wind-
shield wipers may result if the wiper control is left in
any position other than off.
• In cold weather, always turn off the wiper switch and
allow the wipers to return to the park position before
turning off the engine. If the wiper switch is left on
and the wipers freeze to the windshield, damage to
the wiper motor may occur when the vehicle is
restarted.
• Always remove any buildup of snow that prevents
the windshield wiper blades from returning to the
off position. If the windshield wiper control is
turned off and the blades cannot return to the off
position, damage to the wiper motor may occur.
Manual High Speed/Mist
Push the lever upward from the off position. The wipers
will operate at high speed to clear off road mist or spray
from a passing vehicle. This operation will continue until
the lever is released. When the lever is released, the wipers
will return to the off position and automatically shut off.
Rear Windshield Wiper
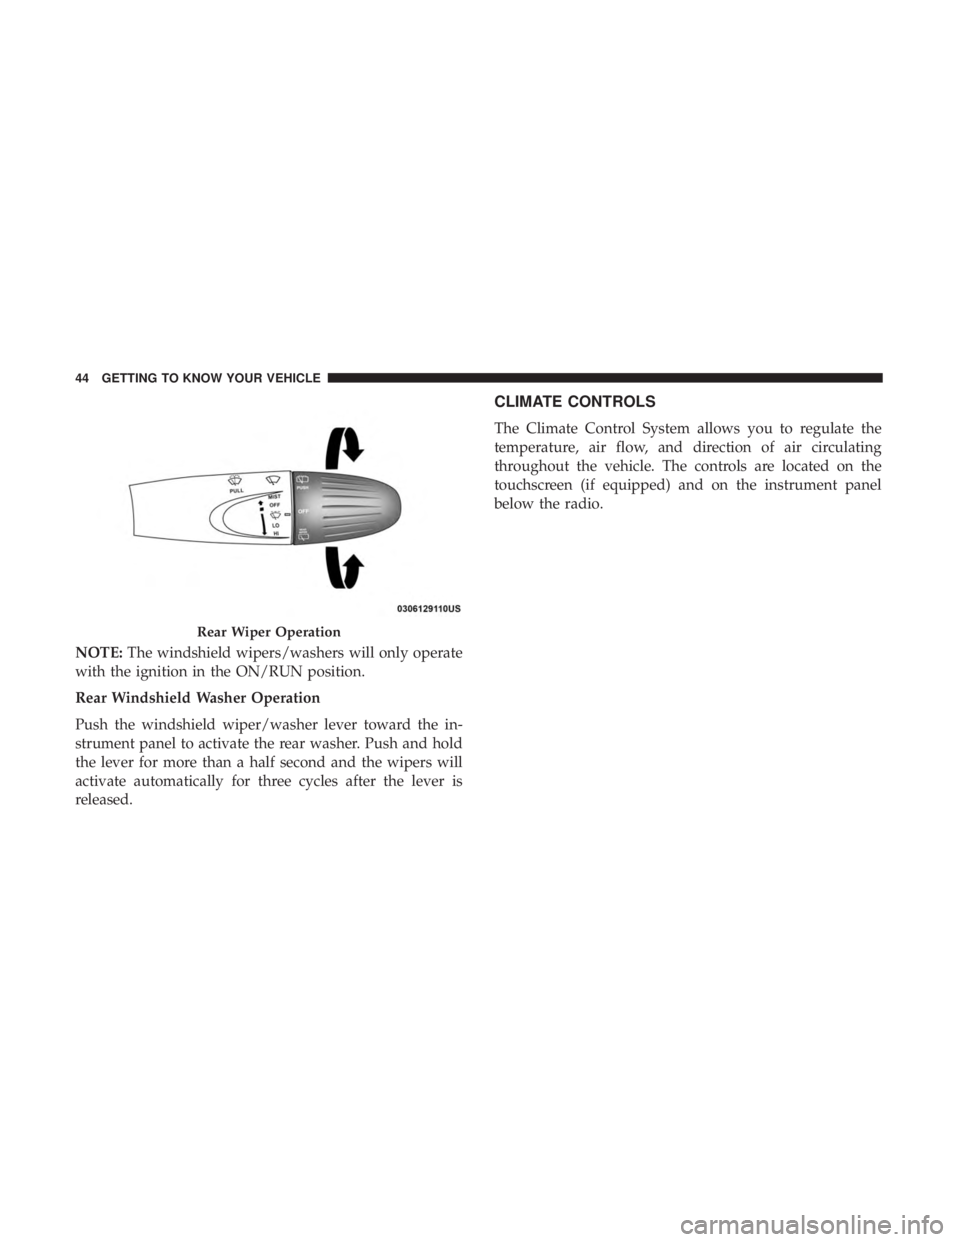
Rotate the end of the windshield wiper/washer lever
upward to the first detent past the intermittent settings for
intermittent wipe operation. With the front windshield
wiper active, rotate the end of the windshield wiper/
washer lever upward. The rear wiper will operate in the
same mode as the front windshield wipers, but at half the
frequency. When the transmission is shifted into REVERSE,
the rear wiper will automatically operate at low speed and
return to normal operation when the transmission is
shifted out of REVERSE.
3
GETTING TO KNOW YOUR VEHICLE 43
Page 46 of 332
NOTE:The windshield wipers/washers will only operate
with the ignition in the ON/RUN position.
Rear Windshield Washer Operation
Push the windshield wiper/washer lever toward the in-
strument panel to activate the rear washer. Push and hold
the lever for more than a half second and the wipers will
activate automatically for three cycles after the lever is
released.
CLIMATE CONTROLS
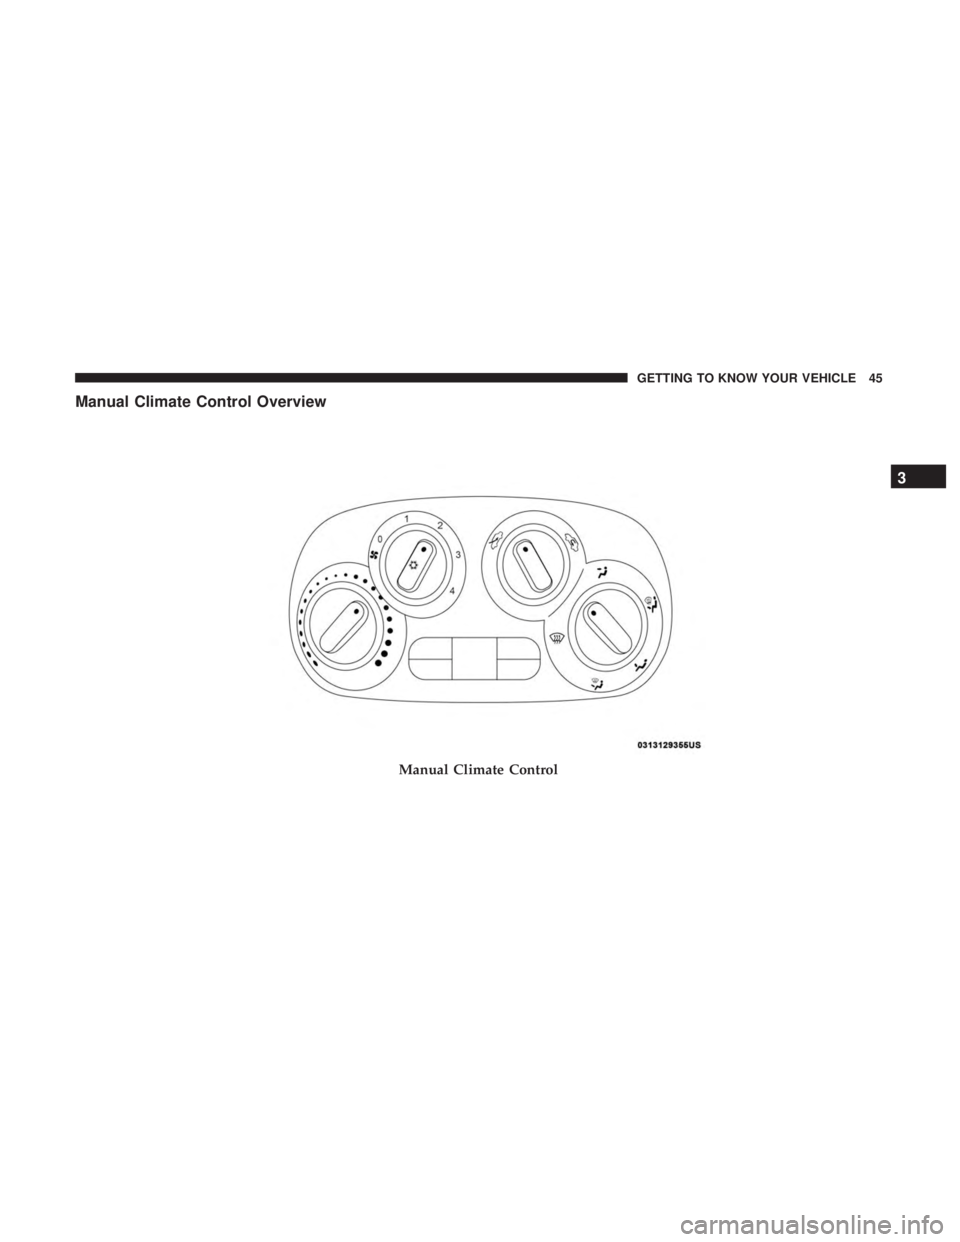
The Climate Control System allows you to regulate the
temperature, air flow, and direction of air circulating
throughout the vehicle. The controls are located on the
touchscreen (if equipped) and on the instrument panel
below the radio.
Rear Wiper Operation
44 GETTING TO KNOW YOUR VEHICLE
Page 47 of 332
Manual Climate Control Overview
Manual Climate Control
3
GETTING TO KNOW YOUR VEHICLE 45
Page 48 of 332
Manual Climate Control Descriptions
IconDescription
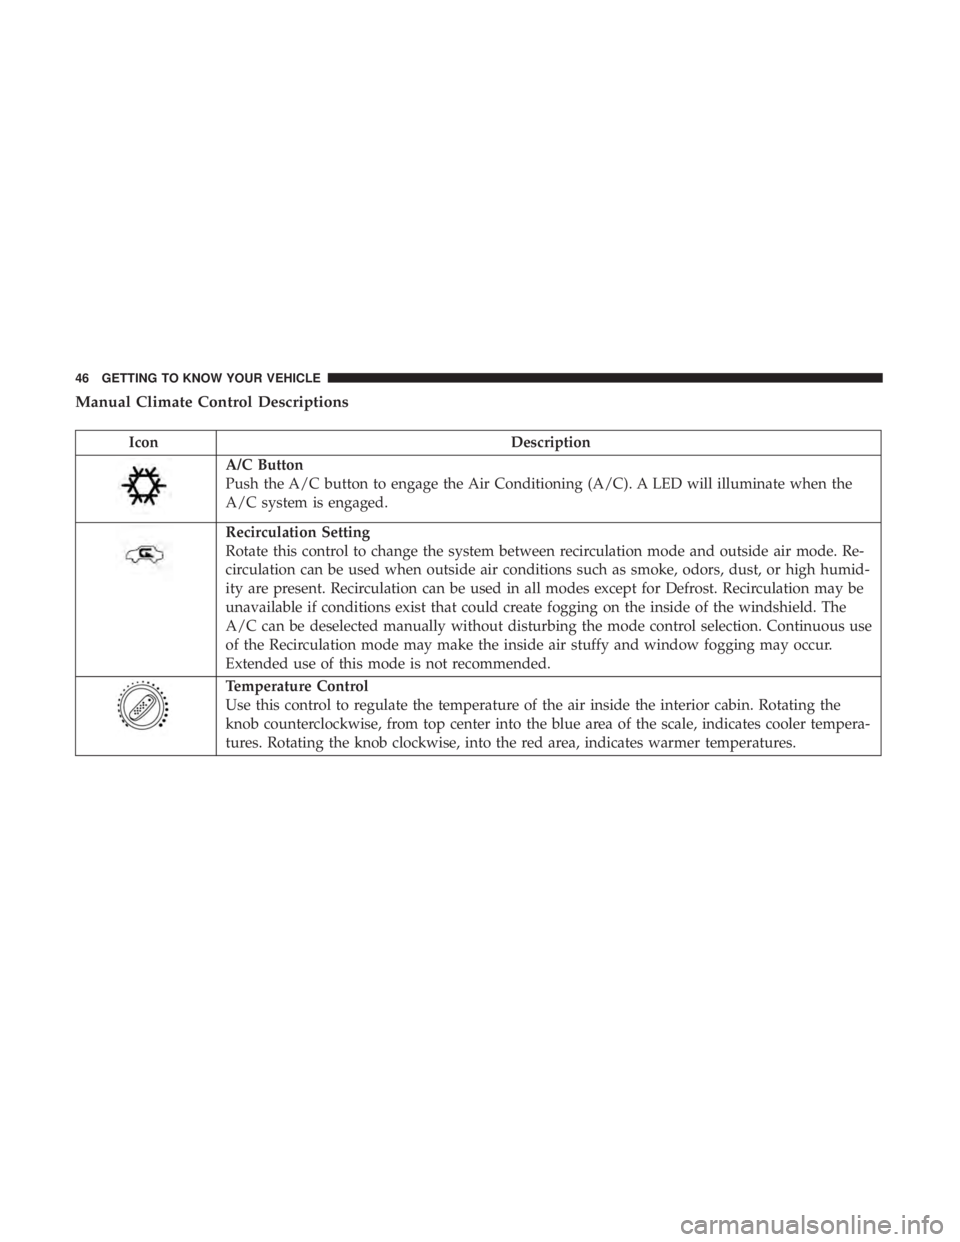
A/C Button
Push the A/C button to engage the Air Conditioning (A/C). A LED will illuminate when the
A/C system is engaged.
Recirculation Setting
Rotate this control to change the system between recirculation mode and outside air mode. Re-
circulation can be used when outside air conditions such as smoke, odors, dust, or high humid-
ity are present. Recirculation can be used in all modes except for Defrost. Recirculation may be
unavailable if conditions exist that could create fogging on the inside of the windshield. The
A/C can be deselected manually without disturbing the mode control selection. Continuous use
of the Recirculation mode may make the inside air stuffy and window fogging may occur.
Extended use of this mode is not recommended.
Temperature Control
Use this control to regulate the temperature of the air inside the interior cabin. Rotating the
knob counterclockwise, from top center into the blue area of the scale, indicates cooler tempera-
tures. Rotating the knob clockwise, into the red area, indicates warmer temperatures.
46 GETTING TO KNOW YOUR VEHICLE
Page 49 of 332
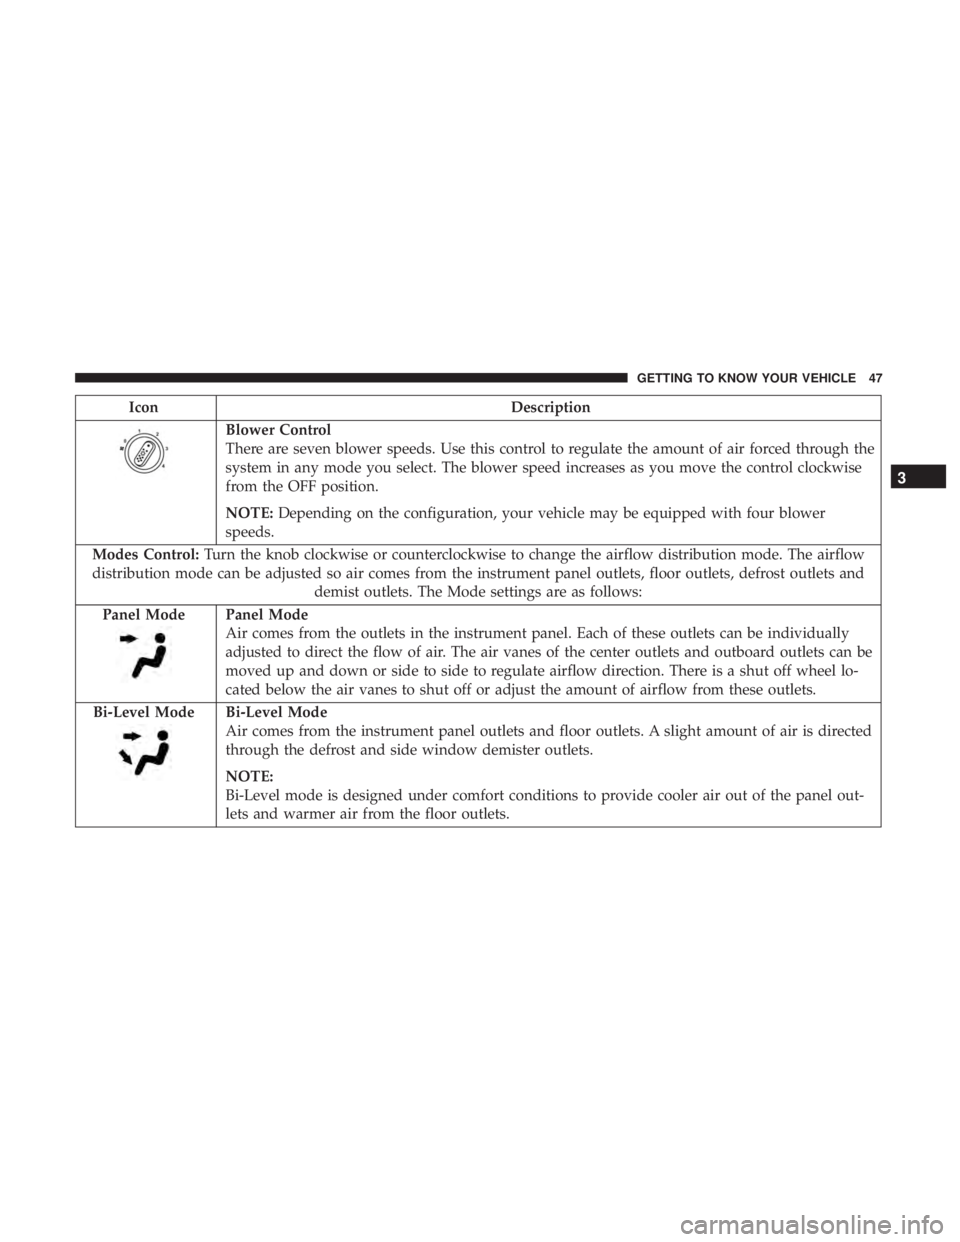
IconDescription
Blower Control
There are seven blower speeds. Use this control to regulate the amount of air forced through the
system in any mode you select. The blower speed increases as you move the control clockwise
from the OFF position.
NOTE:Depending on the configuration, your vehicle may be equipped with four blower
speeds.
Modes Control: Turn the knob clockwise or counterclockwise to change the airflow distribution mode. The airflow
distribution mode can be adjusted so air comes from the instrument panel outlets, floor outlets, defrost outlets and demist outlets. The Mode settings are as follows:
Panel Mode
Panel Mode
Air comes from the outlets in the instrument panel. Each of these outlets can be individually
adjusted to direct the flow of air. The air vanes of the center outlets and outboard outlets can be
moved up and down or side to side to regulate airflow direction. There is a shut off wheel lo-
cated below the air vanes to shut off or adjust the amount of airflow from these outlets.
Bi-Level Mode
Bi-Level Mode
Air comes from the instrument panel outlets and floor outlets. A slight amount of air is directed
through the defrost and side window demister outlets.
NOTE:
Bi-Level mode is designed under comfort conditions to provide cooler air out of the panel out-
lets and warmer air from the floor outlets.
3
GETTING TO KNOW YOUR VEHICLE 47
Page 50 of 332

IconDescription
Floor Mode
Floor Mode
Air comes from the floor outlets. A slight amount of air is directed through the defrost and side
window demister outlets.
Mix Mode
Mix Mode
Air is directed through the floor, defrost, and side window demister outlets. This setting works
best in cold or snowy conditions that require extra heat to the windshield. This setting is good
for maintaining comfort while reducing moisture on the windshield.
Front Defrost Mode
Front Defrost Mode
Turn the knob clockwise to change the current airflow setting to Defrost mode. Air comes from
the windshield and side window demist outlets. When the defrost button is selected, the blower
level increases. Use Defrost mode with maximum temperature settings for best windshield and
side window defrosting and defogging.
Rear Defrost Button
Rear Defrost Button
Push and release the Rear Defrost Control button to turn on the rear window defroster and the
heated outside mirrors (if equipped). An indicator illuminates when the rear window defroster
is on. The rear window defroster automatically turns off after a short period of time.
48 GETTING TO KNOW YOUR VEHICLE