key FIAT 500E 2013 2.G User Guide
[x] Cancel search | Manufacturer: FIAT, Model Year: 2013, Model line: 500E, Model: FIAT 500E 2013 2.GPages: 84, PDF Size: 1.56 MB
Page 1 of 84

Download a free Vehicle Information App
by visiting your application store, Keyword (My FIAT), or scanning the
Microsoft Tag. To put Microsoft Tags to work for you, use your mobile phone’s
browser or App store to download a Microsoft Tag reader, like the free one at
www.gettag.mobi. Then follow the directions to scan the code.
Download a FREE electronic copy
of the Owner’s Manual or Warranty Booklet by visiting the Owner’s tab at:
www.fiatusa.com (U.S.)
13BEV24-926-AA
Third EditionUser Guide
2 013 U s ER GUIDE
U.s. Only
1380029_13c_500e_UserGuide_050613.indd 15/6/13 11:54 AM
Page 3 of 84
INTRODUCTION/WELCOMEWELCOME FROM FIAT...............2
IMPORTANT VEHICLE INFORMATION ......4
CONTROLS AT A GLANCEDRIVER COCKPIT .................. 6
INSTRUMENT CLUSTER ...............8
GETTING STARTEDELECTRIC VEHICLE FEATURES ..........10
ELECTRIC SYSTEM OPERATION .........13
CHARGING THE HIGH VOLTAGE BATTERY ...16
STARTING YOUR 500e ............... 18
KEY FOB ....................... 19
THEFT ALARM ................... 19
POWER DOOR LOCKS ..............20
SEAT BELT ...................... 20
SUPPLEMENTAL RESTRAINT SYSTEM (SRS) -
AIR BAGS ...................... 21
CHILD RESTRAINTS ................ 22
FRONT SEATS .................... 24
REAR SEATS ..................... 26
TILT STEERING ................... 26
HEATED SEATS ................... 27
OPERATING YOUR VEHICLEEXTENDING YOUR DRIVING RANGE PER
CHARGE....................... 28
TURN SIGNAL/LIGHTS/HIGH BEAM LEVER ...30
WIPER/WASHER LEVER ..............32
SPEED CONTROL .................. 33
POWER WINDOWS ................ 34
AUTOMATIC TEMPERATURE
CONTROLS (ATC) ................. 35
REAR PARK ASSIST ................. 36
POWER SUNROOF ................. 36
WIND BUFFETING ................. 37
ELECTRONICSYOUR VEHICLE'S SOUND SYSTEM ........38
AM/FM RADIO WITH CD PLAYER AND
SiriusXM SATELLITE RADIO ............40
BLUE&ME™ HANDS-FREE OPERATION .....42
iPod®/USB/MP3 CONTROL ............46
ELECTRONIC VEHICLE INFORMATION
CENTER (EVIC) ................... 47
PROGRAMMABLE FEATURES ...........47
TRIP BUTTON .................... 48
POWER OUTLET .................. 49
UTILITY
TRAILER TOWING................. 50
RECREATIONAL TOWING (BEHIND
MOTORHOME, ETC .)............... 50
WHAT TO DO IN EMERGENCIES
24-HOUR ROADSIDE ASSISTANCE ........51INSTRUMENT CLUSTER WARNING LIGHTS...51
TIREFIT KIT ..................... 54
JUMP-STARTING PROCEDURE — 12 VOLT
BATTERY ....................... 60
MANUAL PARK RELEASE .............62
TOWING A DISABLED VEHICLE .........63
ENHANCED ACCIDENT RESPONSE
SYSTEM ....................... 64
FREEING A STUCK VEHICLE ............64
EVENT DATA RECORDER (EDR) .........65
MAINTAINING YOUR VEHICLE
OPENING THE HOOD ..............66
UNDERHOOD COMPARTMENT .........67
FLUIDS AND CAPACITIES .............68
MAINTENANCE SCHEDULE ...........69
FUSES ......................... 71
TIRE PRESSURES .................. 73
TIRE ROTATION RECOMMENDATIONS ....74
WHEEL AND WHEEL TRIM CARE ........75
EXTERIOR BULBS ................. 75
CUSTOMER ASSISTANCE
FIAT CUSTOMER CENTER.............76ASSISTANCE FOR THE HEARING IMPAIRED...76
PUBLICATIONS ORDERING ...........76
REPORTING SAFETY DEFECTS IN THE
UNITED STATES ................... 77
MOPAR ACCESSORIES
AUTHENTIC ACCESSORIES BY MOPAR® ...78
INDEX....................... 79
FAQ(HowTo?)
FREQUENTLY ASKED QUESTIONS........80
TABLE OF CONTENTS
1
Page 12 of 84
ELECTRIC VEHICLE FEATURES
Auto Park
•The Auto Park features automatically places the transmission into PARK if there is any
indication that the driver may leave the vehicle while the transmission is in D (DRIVE),
N (NEUTRAL) or R (REVERSE).
• Auto Park is enabled under the following conditions:
• Key On (12 Volt ON and High Voltage OFF) or READY mode (12 Volt ON and High
Voltage ON).
• Vehicle speed is below 2 mph (3 km/h).
NOTE:
Auto Park is disabled above 2 mph (3 km/h) and transmission range will be maintained.
• The instrument cluster will display an Auto shift to park message and chime once when
Auto Park action occurs.
Mode of operation with key ON
• Auto Park will be engaged when the transmission is in DRIVE, NEUTRAL or REVERSE
and the following conditions are detected:
• Seat Belt is unlatched
• Brake pedal is released
• Driver's door is ajar
Mode of operation with key OFF
• Auto Park will be engaged when the transmission is in D (DRIVE), N (NEUTRAL) or
R (REVERSE) and the vehicle speed is less than 2 mph (3 km/h).
Audible Pedestrian Warning System
• Your vehicle is equipped with an Audible Pedestrian Warning System. The Audible
Pedestrian Warning System uses distinct sounds to alert pedestrians that your vehicle is
approaching.
• The audible warning system uses an in-car sound synthesizer with a speaker located in
the underhood compartment. The warning system is automatically activated when
selecting D (DRIVE) or R (REVERSE).
• In D (DRIVE) range, the system will remain active until the vehicle reaches a speed of
approximately 22 mph (35.5 km/h). At approximately 22 mph (35.5 km/h) the warning
system is deactivated and will automatically be active when the vehicle returns to
approximately 20 mph (32 km/h).
GETTING STARTED
10
Page 20 of 84
STARTING YOUR 500e
•Before starting your vehicle, adjust your seat, adjust both inside and outside mirrors, and
fasten your seat belts .
WARNING!
•Never leave children alone in a vehicle, or with access to an unlocked vehicle .
• Allowing children to be in a vehicle unattended is dangerous for a number of
reasons. A child or others could be seriously or fatally injured. Children should be
warned not to touch the parking brake, brake pedal or the shift lever .
• Do not leave the key fob in or near the vehicle (or in a location accessible to
children), and do not leave the ignition in the ACC or ON/RUN position. A child
could operate power windows, other controls, or move the vehicle .
• Turn the key to the START position while your vehicle is in PARK. When the ignition key
is turned to the START and then the RUN position, the “READY” indicator in the Elec-
tronic Vehicle Information Center (EVIC) will illuminate to indicate the 500e's Electric
Drive System has started.
• When the “READY” indicator is illuminated your 500e is ready to be driven.
• If the “READY” indicator fails to illuminate
after you have followed the normal start-
ing procedure contact your authorized
studio .
NOTE:
You must press the brake pedal before
shifting out of PARK.
GETTING STARTED
18
Page 21 of 84
KEY FOB
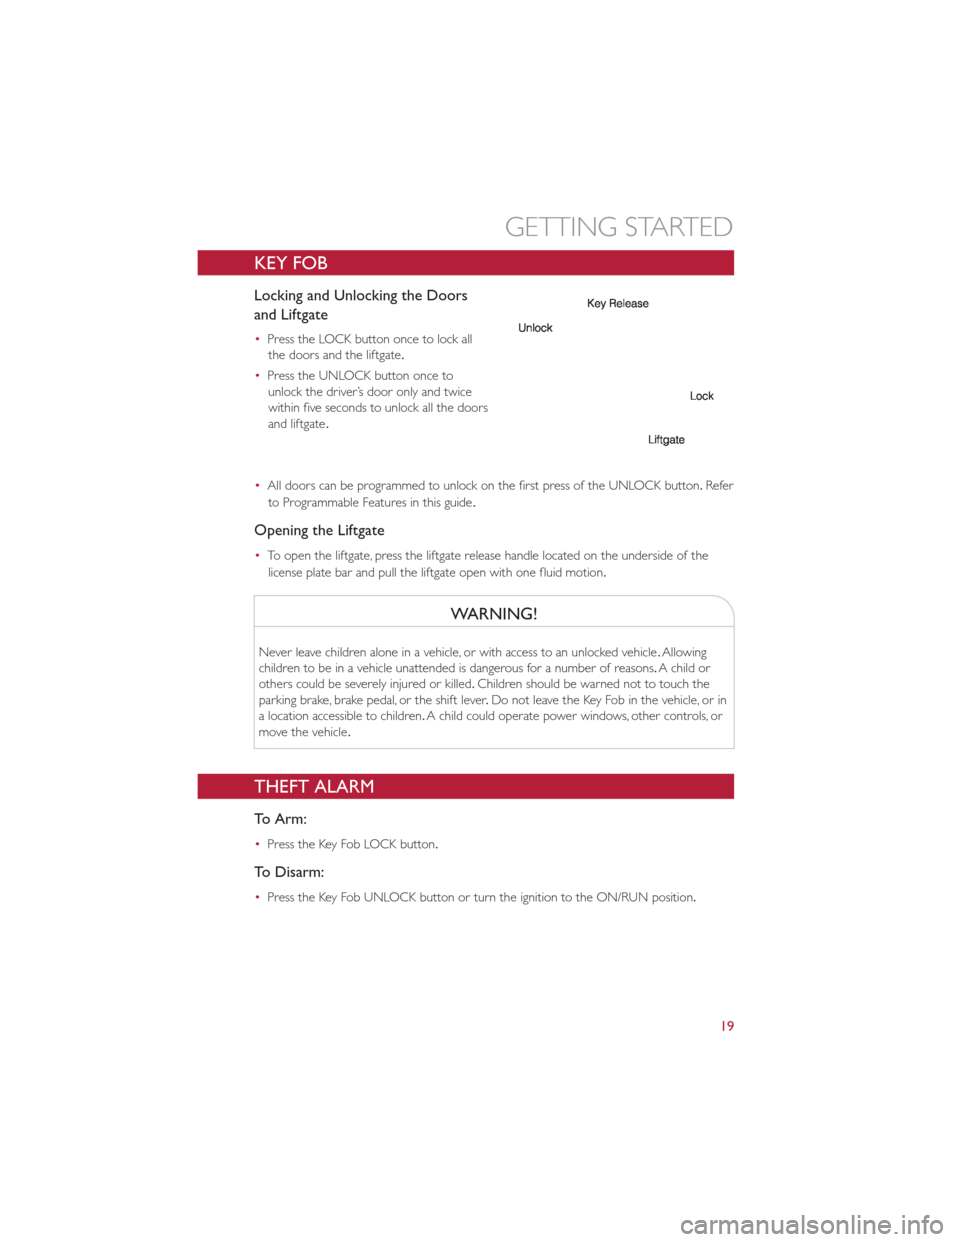
Locking and Unlocking the Doors
and Liftgate
•Press the LOCK button once to lock all
the doors and the liftgate .
• Press the UNLOCK button once to
unlock the driver’s door only and twice
within five seconds to unlock all the doors
and liftgate .
• All doors can be programmed to unlock on the first press of the UNLOCK button. Refer
to Programmable Features in this guide .
Opening the Liftgate
•To open the liftgate, press the liftgate release handle located on the underside of the
license plate bar and pull the liftgate open with one fluid motion.
WARNING!
Never leave children alone in a vehicle, or with access to an unlocked vehicle .Allowing
children to be in a vehicle unattended is dangerous for a number of reasons. A child or
others could be severely injured or killed. Children should be warned not to touch the
parking brake, brake pedal, or the shift lever .Do not leave the Key Fob in the vehicle, or in
a location accessible to children. A child could operate power windows, other controls, or
move the vehicle .
THEFT ALARM
To Arm:
•Press the Key Fob LOCK button.
To Disarm:
•Press the Key Fob UNLOCK button or turn the ignition to the ON/RUN position.
GETTING STARTED
19
Page 33 of 84
Flash To Pass
•Pull the lever toward you to activate the high beams. The high beams will remain on until
the lever is released.
Headlight Delay (Follow Me Home)
•Within two minutes of the ignition switch being turned to the OFF/LOCK position or the igni- tion key being removed from the ignition, pull the turn signal lever toward the steering wheel .
•Each movement of the lever toward the steering wheel will increase the illumination
period by 30 seconds, up to a maximum of 210 seconds.
• To deactivate, pull the multifunction lever toward the steering wheel and hold it for more
than two seconds.
NOTE:
Activation of Follow Me Home is only enabled once per key cycle and steps must be
repeated each time you want to activate it.
Fog Lights
• Push the fog light button, located on the climate controls, once to turn on the fog lights.
• Push the button a second time to turn the fog lights off.
OPERATING YOUR VEHICLE
31
Page 39 of 84
Pinch Protection Feature
•This feature will detect an obstruction in the opening of the sunroof during Express
Close operation. If an obstruction in the path of the sunroof is detected, the sunroof
will automatically retract. Remove the obstruction if this occurs. Next, press the switch
forward and release to Express Close .
NOTE:
If three consecutive sunroof close attempts result in Pinch Protect reversals, the fourth
close attempt will be a Manual Close movement with Pinch Protect disabled.
Sun Shade
• For vehicles equipped with either a power sunroof or a fixed glass roof, there is a sun
shade that can be open or closed. To open the sun shade press the tab and move the
shade to a full open position.
WARNING!
• Do not let children play with the sunroof, or leave children unattended in the ve-
hicle, and do not leave the key in or near the vehicle (or in a location accessible to
children). Occupants, particularly unattended children, can become entrapped by the
power sunroof while operating the power sunroof switch. Such entrapment may
result in serious injury or death.
• In a collision, there is a greater risk of being thrown from a vehicle with an open
sunroof. You could also be seriously injured or killed. Always fasten your seat belt
properly and make sure all passengers are properly secured.
• Do not allow small children to operate the sunroof. Never allow your fingers, other
body parts, or any object to project through the sunroof opening .Injury may result.
WIND BUFFETING
• Wind buffeting can be described as a helicopter-type percussion sound. If buffeting
occurs with the windows down, or top down (convertible models), adjust one or both
windows up or down slightly .
OPERATING YOUR VEHICLE
37
Page 46 of 84
Steering Wheel Audio Controls
•The right hand control on the rear of the steering wheel is a rocker type switch with a
pushbutton in the center .Press the switch up for Volume +. Press the switch down for
Volume –. The button in the center is the SRC button used to change audio sources
(e .g. AM, FM, CD, Media Player).
• The left hand control on the rear of the steering wheel is also a rocker type switch with
a pushbutton in the center .Press the top of the switch to Scan Up .Press the bottom of
the switch to Scan Down. The button in the center is the PRESET UP/OK button.
BLUE&ME™ Hands-Free Communication
•To use the hands-free feature, you need a Bluetooth® wireless technology enabled
mobile phone .This hands-free feature gives you the possibility of interacting vocally with
your mobile phone while driving, even if your mobile device does not feature this capabil-
ity .You can also interact with your mobile phone manually and visually using the steering
wheel controls and the instrument panel EVIC display .
• To get started with BLUE&ME™ hands-free feature with voice recognition, you have to
simply pair your Bluetooth® wireless technology enabled mobile phone with the system.
Pair Your Mobile Phone
• Press VR steering wheel button and “Settings” then, at the end of the BLUE&ME™
message say “Pairing” .
• The system will show the phone pairing PIN number on the EVIC display .For the
next two steps, consult your mobile phone owner’s manual about Bluetooth® pairing
procedures for your phone .
• On your mobile phone, search for devices equipped with Bluetooth® wireless technol-
ogy (the setting on your mobile phone might be called Discover or New Device). In this
list you will find BLUE&ME™ (name identifying the BLUE&ME™ system on your car):
select it.
• When prompted by the mobile phone, enter the PIN number shown on the instrument
panel display using your mobile phone keypad. If pairing is successful, the system will say
“Connecting” and at the end the display will show as confirmation message, the ID of
the paired mobile phone .
• It is essential to wait until you see this confirmation message on the display .Pressing
PHONE/MENU button on the steering wheel or MUTE/ESC button before the message
is displayed may cancel the pairing process. If the pairing process fails, an error message
will be displayed: in this event repeat the pairing procedure .
• At first pairing, BLUE&ME™ will say “Welcome” immediately after connecting.
This message will no longer be heard when your phone automatically connects to
the BLUE&ME™ system on future ignition cycles.
• BLUE&ME™ will ask if you would like to copy your paired phone phonebook to
BLUE&ME™. It is recommended to copy it. To start copying the phonebook say “Yes”,
otherwise say “No” .
ELECTRONICS
44
Page 47 of 84
•For certain mobile phones the phonebook is not copied automatically, in this case you
must transfer the phonebook contacts using your mobile phone keypad .If BLUE&ME™
asks you to do this, then perform this procedure following the instructions specific to
your mobile phone and press PHONE/MENU button on the steering wheel when you
have finished.
Making a Phone Call
• Assume that “John Smith” is one of the contacts stored in your phonebook .
• To call John Smith, proceed as follows:
• Press the VR steering wheel button and pronounce “Call John Smith” .
• If the name is recognized, the system will display the recognized contact’s information on
the display screen.
• If there is just one phone number for John Smith in your phonebook, the system will ask
if you would like to call John Smith. To start the call say “Yes”, otherwise say “No” .
• If John Smith has several phone numbers, the system will ask which phone number you
would like to call (e .g.: “Call John Smith (at) Work or (at) Home?”). Answer with the type
of required phone number (e .g.: “(at) Home”).
•
If John Smith has several phone numbers but the “location” (i .e.: the type of phone number
like work, home, etc .) is missing, the system will display the selected contact and a list of re-
lated phone numbers on the instrument cluster display .The hands-free phone system will
ask if you would like to call the phone number displayed .To respond with “Yes”, pronounce
“Yes”, otherwise say “No” .If this is the correct contact but the wrong number, say “Forward”
or “Backward” to navigate to the phone number you’d like to call .To call the displayed phone
number, pronounce “Call” .You can also scroll through the phone number list manually by
pressing the buttons on the back of the steering wheel until you find the required number .
Then, press PRESET UP/OK button on the rear of the steering wheel to start the call .
•To end the phone call, press the PHONE HANG UP button on the steering wheel.
Media Player
•With the BLUE&ME™ media player you can play, via the car sound system, the digital
audio files stored on a USB device by simply connecting it to the USB port located in the
glove box of the car .
• The MEDIA PLAYER menu enables the following:
– Display tracks stored on your USB stick/iPod®.
– Play audio files stored on your USB stick/iPod®.
How To Connect The USB Stick/iPod® To BLUE&ME™
• To connect your USB stick/iPod® to BLUE&ME™, proceed as follows:
• Copy tracks on your USB stick/iPod® (BLUE&ME™ recognizes .wma,.mp3 and .wav,.aac
formats for audio files and .wpl and.m3u for playlists) .
• USB devices without USB wire: just connect the USB stick/iPod® (directly or by an
extension lead) to the USB port on the car .
ELECTRONICS
45
Page 48 of 84
•USB stick/iPod® with USB wire: use the wire to connect the USB stick/iPod® to the USB
port on the car .
• Turn the ignition key to ON. BLUE&ME™ will start automatically to play your digital
tracks selecting them from the library built at the moment the USB stick/iPod® is
connected.
• If AUTOPLAY is set to “ON”, BLUE&ME™ will start playback automatically .
• Refer to the iPod®/USB/MP3 CONTROL section in this manual and the BLUE&ME™
User's Manual on the DVD for more details.
WARNING!
Driving while distracted can result in loss of vehicle control, accident and injury .It is
strongly recommended that you use extreme caution when using any device or feature
that may take your focus off the road or your hands off the steering wheel. Your primary
responsibility is the safe operation of your vehicle .
iPod®/USB/MP3 CONTROL
•The USB port located within the glove
box, allows you to plug an iPod® or USB
device into the vehicle's sound system.
• To hear audio from devices connected to
this port press the MEDIA button on the
radio faceplate .
• When connected to this feature:
• The iPod® or USB device audio can be
played on the vehicle’s sound system.
• The iPod® can be controlled using the
radio buttons to Play, Browse, and List
the iPod® or external devices contents .Refer to the BLUE&ME™ Manual on the DVD
for details.
• The iPod® battery charges when plugged into the USB port (if supported by the
specific audio device).
• Compatible iPod® devices may also be controllable using voice commands. Refertothe
BLUE&ME™ Manual on the DVD for details.
NOTE:
The USB port supports certain Mini, Classic, Nano, Touch, and iPhone® devices .The USB port
also supports playing music from compatible external USB Mass Storage Class memory devices .
For supported audio file formats, refer to the USB Port section on the Owner's Manual on the
DVD .Some iPod® software versions may not fully support the USB port features .Please visit
Apple’s website for iPod® software updates .
ELECTRONICS
46