child lock FIAT 500E 2015 2.G User Guide
[x] Cancel search | Manufacturer: FIAT, Model Year: 2015, Model line: 500E, Model: FIAT 500E 2015 2.GPages: 100, PDF Size: 2.97 MB
Page 3 of 100
INTRODUCTION/WELCOMEWELCOME FROM FIAT...............2IMPORTANT VEHICLE INFORMATION......4
CONTROLS AT A GLANCEDRIVER COCKPIT..................6INSTRUMENT CLUSTER..............8
GETTING STARTEDELECTRIC VEHICLE FEATURES..........10ELECTRIC SYSTEM OPERATION.........13CHARGING THE HIGH VOLTAGE BATTERY...16STARTING YOUR 500e...............18KEY FOB......................19VEHICLE SECURITY ALARM...........20POWER DOOR LOCKS..............20SEAT BELT SYSTEMS................20SUPPLEMENTAL RESTRAINT SYSTEM (SRS) —AIR BAGS......................21CHILD RESTRAINTS................24HEAD RESTRAINTS.................28FRONT SEATS....................30REAR SEATS.....................32HEATED SEATS...................33TILT STEERING...................34
OPERATING YOUR VEHICLEEXTENDING YOUR DRIVING RANGE PERCHARGE.......................35TURN SIGNAL/LIGHTS/HIGH BEAM LEVER...36WIPER/WASHER LEVER..............37ELECTRONIC SPEED CONTROL.........38POWER WINDOWS................40AUTOMATIC TEMPERATURECONTROLS (ATC).................41REAR PARK ASSIST.................42POWER SUNROOF.................42WIND BUFFETING.................43
ELECTRONICSYO U R V E H I C L E ' S S O U N D S YS T E M........44AM/FM RADIO WITH CD PLAYER ANDSiriusXM SATELLITE RADIO............46BLUE&ME™ HANDS-FREE OPERATION.....48iPod®/USB/MP3 CONTROL — IF EQUIPPED..53ELECTRONIC VEHICLE INFORMATIONCENTER (EVIC)...................54PROGRAMMABLE FEATURES...........55TRIP BUTTON....................56POWER OUTLET..................57
UTILITY
TRAILER TOWING WEIGHTS (MAXIMUMTRAILER WEIGHT RATINGS)...........58RECREATIONAL TOWING (BEHINDMOTORHOME, ETC.)...............58
WHAT TO DO IN EMERGENCIES
ROADSIDE ASSISTANCE..............59INSTRUMENT CLUSTER WARNING LIGHTS..59INSTRUMENT CLUSTER INDICATORLIGHTS.......................63TIRE SERVICE KIT..................63JUMP-STARTING PROCEDURE — 12 VOLTBATTERY.......................70MANUAL PARK RELEASE.............72TOW I N G A D I S A B L E D V E H I C L E.........73ENHANCED ACCIDENT RESPONSESYSTEM.......................73FREEING A STUCK VEHICLE............73EVENT DATA RECORDER (EDR).........74
MAINTAINING YOUR VEHICLEOPENING THE HOOD..............75UNDERHOOD COMPARTMENT.........76FLUID CAPACITIES.................78FLUIDS, LUBES, AND GENUINE PARTS......78MAINTENANCE PROCEDURES..........79MAINTENANCE SCHEDULE...........79FUSES.........................83TIRE PRESSURES..................85TIRE ROTATION RECOMMENDATIONS....86SPARE TIRES — IF EQUIPPED...........87WHEEL AND WHEEL TRIM CARE........88REPLACEMENT BULBS..............89
CUSTOMER ASSISTANCEFIAT CUSTOMER CENTER.............90ASSISTANCE FOR THE HEARING IMPAIRED..90PUBLICATIONS ORDERING...........90REPORTING SAFETY DEFECTS IN THEUNITED STATES...................91
MOPAR® ACCESSORIESAUTHENTIC ACCESSORIES BY MOPAR®...92
FAQ ’sFREQUENTLY ASKED QUESTIONS........93
INDEX.......................94
TABLE OF CONTENTS
1
Page 5 of 100
WARNING!
•Pedals that cannot move freely can cause loss of vehicle control and increase the
risk of serious personal injury.
•Always make sure that objects cannot fall into the driver foot well while the ve-
hicle is moving.Objects can become trapped under the brake pedal and accelera-
tor pedal causing a loss of vehicle control.
•Failure to properly follow floor mat installation or mounting can cause interference
with the brake pedal and accelerator pedal operation causing loss of control of
the vehicle.
•Never leave children alone in a vehicle, or with access to an unlocked vehicle.Al-
lowing children to be in a vehicle unattended is dangerous for a number of rea-
sons.A child or others could be seriously or fatally injured.Children should be
warned not to touch the parking brake, brake pedal or the shift buttons.
•Do not leave the key fob in or near the vehicle, or in a location accessible to chil-
dren.A child could operate power windows, other controls, or move the vehicle.
•Never use the ‘PARK’ position as a substitute for the parking brake.Always apply
the parking brake fully when parked to guard against vehicle movement and pos-
sible injury or damage.
•Refer to your Owner's Manual on the DVD for further details.
USE OF AFTERMARKET PRODUCTS (ELECTRONICS)
The use of aftermarket devices including cell phones, MP3 players, GPS systems, or char-
gers may affect the performance of on-board wireless features.If you are experiencing
difficulties with any of your wireless features, try disconnecting your aftermarket devices
to see if the situation improves.If your symptoms persist, please see an authorized dealer.
CHRYSLER, DODGE, JEEP, RAM, MOPAR and Uconnect are registered trademarks of
Chrysler Group LLC.
COPYRIGHT ©2014 CHRYSLER GROUP LLC
INTRODUCTION/WELCOME
3
Page 20 of 100
STARTING YOUR 500e
•Before starting your vehicle, adjust your seat, adjust both inside and outside mirrors,
and fasten your seat belts.
WARNING!
•Never leave children alone in a vehicle, or with access to an unlocked vehicle.
•Allowing children to be in a vehicle unattended is dangerous for a number of rea-
sons.A child or others could be seriously or fatally injured.Children should be
warned not to touch the parking brake, brake pedal or the shift buttons.
•Do not leave the key fob in or near the vehicle (or in a location accessible to chil-
dren).A child could operate power windows, other controls, or move the vehicle.
NOTE:
Make sure the EVSE is not plugged into the vehicle.
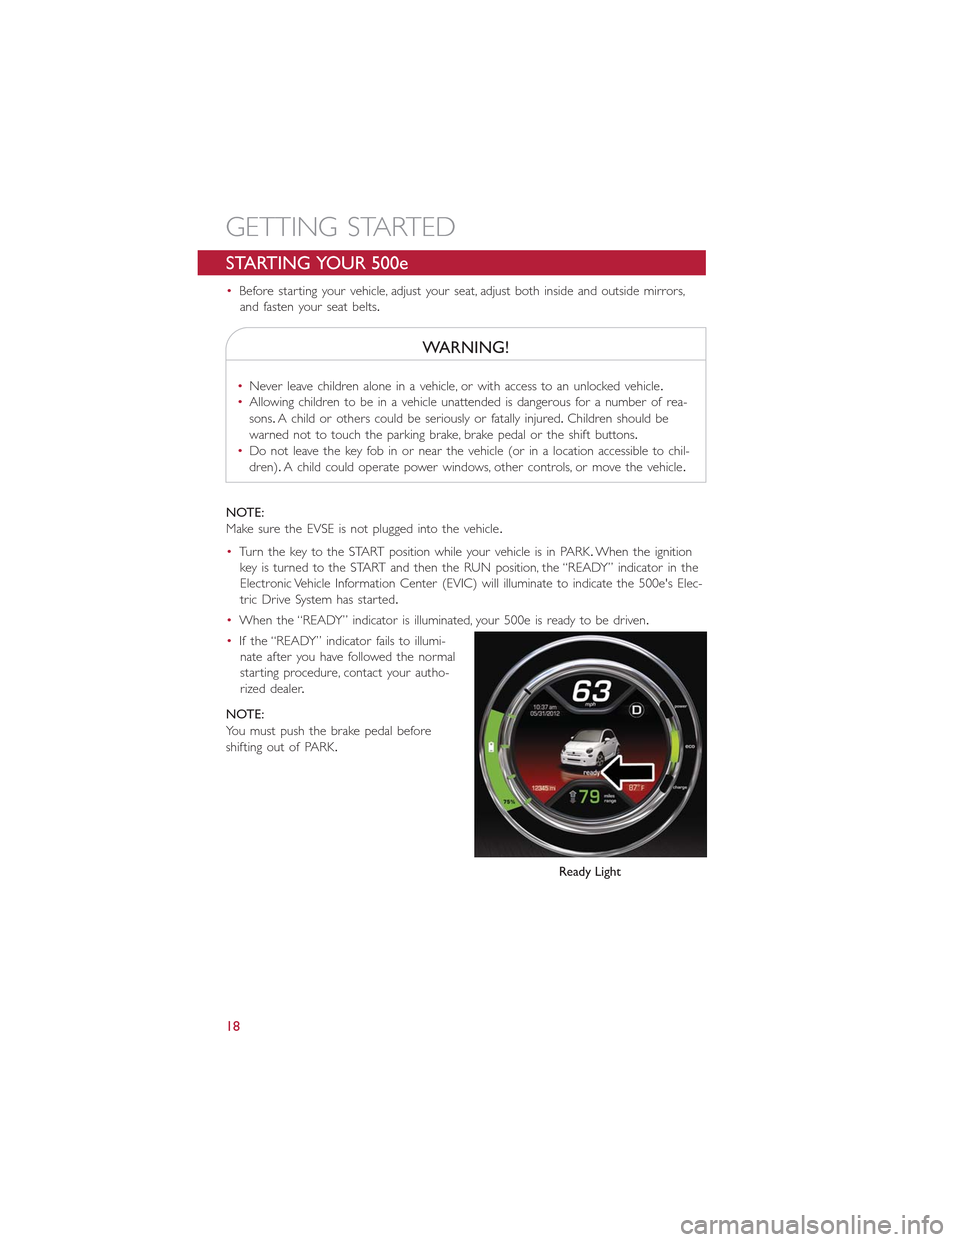
•Turn the key to the START position while your vehicle is in PARK.When the ignition
key is turned to the START and then the RUN position, the “READY” indicator in the
Electronic Vehicle Information Center (EVIC) will illuminate to indicate the 500e's Elec-
tric Drive System has started.
•When the “READY” indicator is illuminated, your 500e is ready to be driven.
•If the “READY” indicator fails to illumi-
nate after you have followed the normal
starting procedure, contact your autho-
rized dealer.
NOTE:
You must push the brake pedal before
shifting out of PARK.
Ready Light
GETTING STARTED
18
Page 21 of 100
KEY FOB
Locking And Unlocking The Doors
And Liftgate
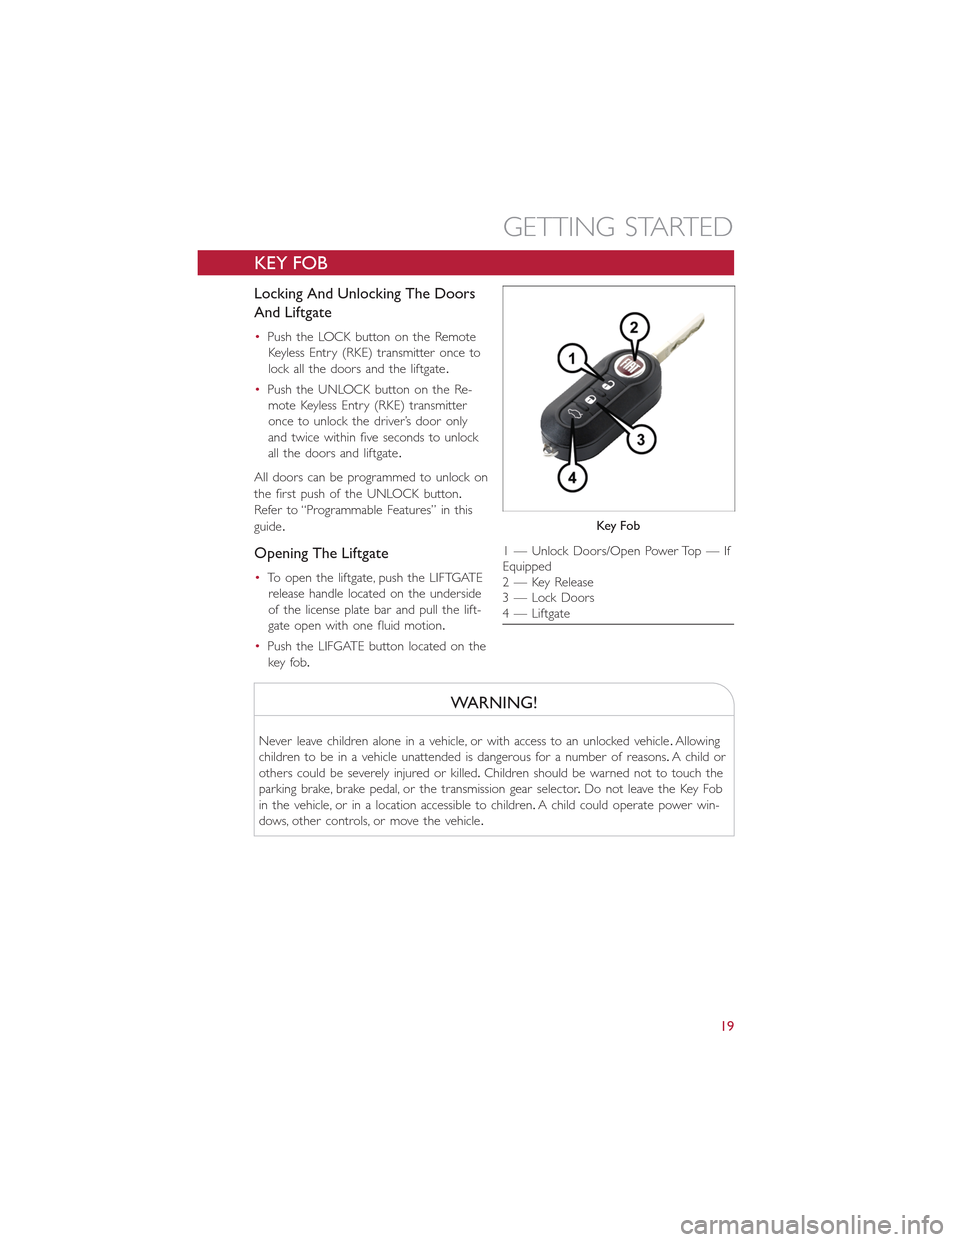
•Push the LOCK button on the Remote
Keyless Entry (RKE) transmitter once to
lock all the doors and the liftgate.
•Push the UNLOCK button on the Re-
mote Keyless Entry (RKE) transmitter
once to unlock the driver’s door only
and twice within five seconds to unlock
all the doors and liftgate.
All doors can be programmed to unlock on
the first push of the UNLOCK button.
Refer to “Programmable Features” in this
guide.
Opening The Liftgate
•To open the liftgate, push the LIFTGATE
release handle located on the underside
of the license plate bar and pull the lift-
gate open with one fluid motion.
•Push the LIFGATE button located on the
key fob.
WARNING!
Never leave children alone in a vehicle, or with access to an unlocked vehicle.Allowing
children to be in a vehicle unattended is dangerous for a number of reasons.A child or
others could be severely injured or killed.Children should be warned not to touch the
parking brake, brake pedal, or the transmission gear selector.Do not leave the Key Fob
in the vehicle, or in a location accessible to children.A child could operate power win-
dows, other controls, or move the vehicle.
Key Fob
1 — Unlock Doors/Open Power Top — IfEquipped2 — Key Release3 — Lock Doors4 — Liftgate
GETTING STARTED
19
Page 26 of 100
WARNING!
•Side Air Bags need room to inflate.Do not lean against the door or window.Sit
upright in the center of the seat.
•Being too close to the Side Air Bags during deployment could cause you to be
severely injured or killed.
•Relying on the Side Air Bags alone could lead to more severe injuries in a collision.
The Side Air Bags work with your seat belt to restrain you properly.In some colli-
sions, Side Air Bags won’t deploy at all.Always wear your seat belt even though
you have Side Air Bags.
•This vehicle is equipped with left and right Supplemental Side Air Bag Inflatable
Curtains (SABICs).Do not stack luggage or other cargo up high enough to block
the deployment of the SABICs.The trim covering above the side windows where
the SABIC and its deployment path are located should remain free from any ob-
structions.
•This vehicle is equipped with SABICs.In order for the SABICs to work as in-
tended, do not install any accessory items in your vehicle which could alter the
roof.Do not add an aftermarket sunroof to your vehicle.Do not add roof racks
that require permanent attachments (bolts or screws) for installation on the ve-
hicle roof.Do not drill into the roof of the vehicle for any reason.
•Do not use accessory seat covers or place objects between you and the Side Air
Bags; the performance could be adversely affected and/or objects could be pushed
into you, causing serious injury.
CHILD RESTRAINTS
Children 12 years or younger should ride properly buckled up in a rear seat, if available.
According to crash statistics, children are safer when properly restrained in the rear seats
rather than in the front.
Every state in the United States and all Canadian provinces require that small children ride in
proper restraint systems.This is the law, and you can be prosecuted for ignoring it.
NOTE:
•For additional information, refer to www.Seatcheck.org or call 1-866-SEATCHECK.
•Canadian residents should refer to Transport Canada’s website for additional informa-
tion: http://www.tc.gc.ca/eng/motorvehiclesafety/safedrivers-childsafety-index-53.htm
GETTING STARTED
24
Page 28 of 100
Center Seat LATCH
WARNING!
This vehicle does not have a center seating position.Do not use the center lower
LATCH anchorages to install a child seat in the center of the back seat.
Installing The Child Restraint Using The LATCH Lower Anchors
NOTE:
Never“share” a LATCH anchorage with two or more child restraints.
1.Loosen the adjusters on the lower straps and on the tether strap of the child seat so
that you can more easily attach the hooks or connectors to the vehicle anchorages.
2.Attach the lower hooks or connectors of the child restraint to the lower anchorages
in the selected seating position.
3.If the child restraint has a tether strap, connect it to the top tether anchorage.
See below for directions to attach a tether anchor.
4.Tighten all of the straps as you push the child restraint rearward and downward into
the seat.Remove slack in the straps according to the child restraint manufacturer’s
instructions.
5.Test that the child restraint is installed tightly by pulling back and forth on the child seat
at the belt path.It should not move more than 1 inch (25.4 mm) in any direction.
Installing The Child Restraint Using The Vehicle Seat Belts
The seat belts in the passenger seating positions are equipped with a Switchable Auto-
matic Locking Retractor (ALR) that is designed to keep the lap portion of the seat belt
tight around the child restraint.Any seat belt system will loosen with time, so check the
belt occasionally, and pull it tight if necessary.
Tether Weight Limit
Always use the tether anchor when using the seat belt to install a forward facing child
restraint, up to the recommended weight limit of the child restraint.
To Install A Child Seat Using An ALR:
1.Pull enough of the seat belt webbing from the retractor to pass it through the belt
path of the child restraint.Do not twist the belt webbing in the belt path.
2.Slide the latch plate into the buckle until you hear a “click.”
3.Pull on the webbing to make the lap portion tight against the child seat.
GETTING STARTED
26
Page 29 of 100
4.To lock the seat belt, pull down on the shoulder part of the belt until you have pulled
all the seat belt webbing out of the retractor.Then, allow the webbing to retract back
into the retractor.As the webbing retracts, you will hear a clicking sound.This means
the seat belt is now in the Automatic Locking mode.
5.Try to pull the webbing out of the retractor.If it is locked, you should not be able to
pull out any webbing.If the retractor is not locked, repeat the last step.
6.Finally, pull up on any extra webbing to tighten the lap portion around the child re-
straint while you push the child restraint rearward and downward into the vehicle
seat.
7.If the child restraint has a top tether strap and the seating position has a top tether
anchorage, connect the tether strap to the anchorage and tighten the tether strap.
See below for directions to attach a tether anchor.
8.Test that the child restraint is installed tightly by pulling back and forth on the child seat
at the belt path.It should not move more than 1 inch (25.4 mm) in any direction.
Installing The Top Tether Strap (With Either Lower Anchors Or Vehicle
Seat Belt):
When installing a forward-facing child restraint, always secure the top tether strap, up to
the tether anchor weight limit, whether the child restraint is installed with the lower an-
chors or the vehicle seat belt.
Tether Anchorage Installation
1.Route the tether strap to provide the most direct path for the strap between the
anchor and the child seat.
2.If your vehicle is equipped with adjustable rear head restraints, raise the head restraint,
and where possible, route the tether strap under the head restraint and between the
two posts.If not possible, lower the head restraint and pass the tether strap around
the outboard side of the head restraint.
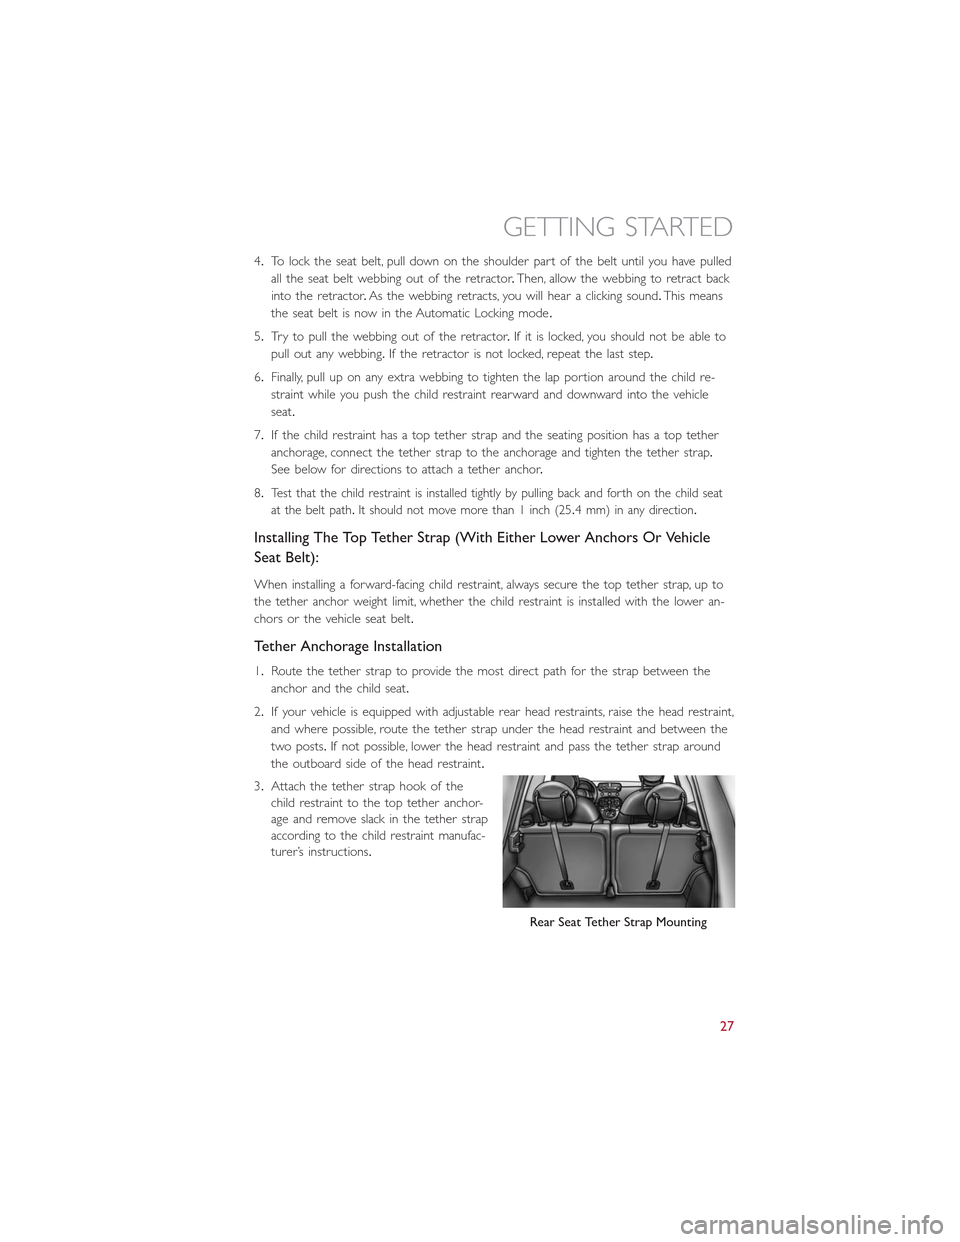
3.Attach the tether strap hook of the
child restraint to the top tether anchor-
age and remove slack in the tether strap
according to the child restraint manufac-
turer’s instructions.
Rear Seat Tether Strap Mounting
GETTING STARTED
27
Page 95 of 100
FREQUENTLY ASKED QUESTIONS
GETTING STARTED
•How do I charge my vehicle? pg.16
•How do I install my LATCH Equipped Child Seat? pg.24
•How do I fold down my rear seat? pg.32
ELECTRONICS
•What Sound System do I have? pg.44
•How do I set the general settings? pg.54
•How do I set the presets on my radio? pg.47
•How do I connect my portable media player/iPod/MP3? pg.53
•How do I pair my cell phone via Bluetooth® with the BLUE&ME™ Hands-Free Com-
munication System? pg.51
WHAT TO DO IN EMERGENCIES
•What do I do if my TPMS warning light is blinking? pg.61
•How do I Jump-Start my vehicle? pg.70
MAINTAINING YOUR VEHICLE
•Where is my underhood fuse block located? pg.83
•Where is my interior fuse block located? pg.83
•What should my tire pressure be set at? pg.85
FAQ’s
93
Page 96 of 100
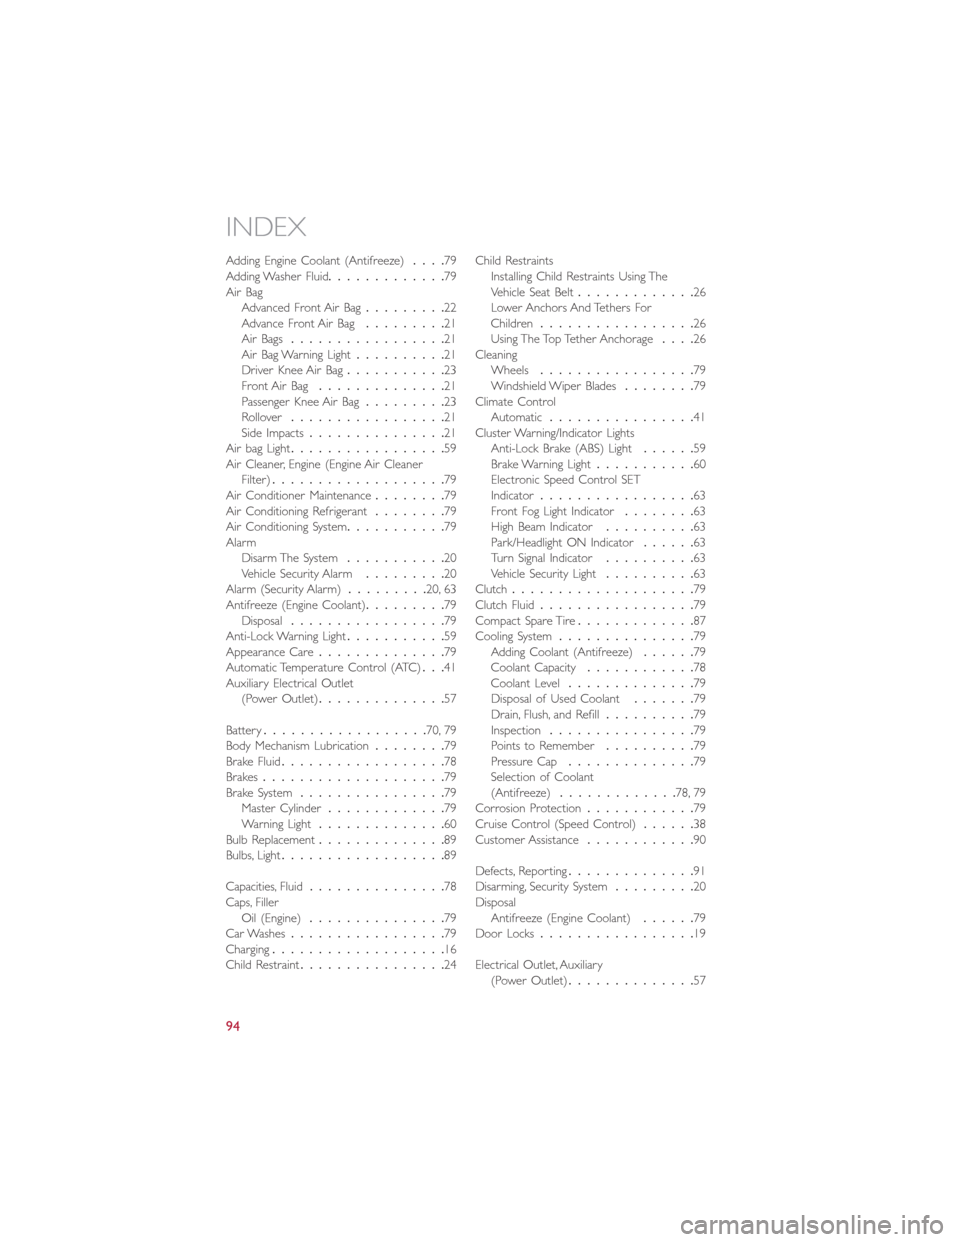
Adding Engine Coolant (Antifreeze)....79Adding Washer Fluid.............79Air BagAdvanced Front Air Bag.........22Advance Front Air Bag.........21Air Bags.................21Air Bag Warning Light..........21Driver Knee Air Bag...........23Front Air Bag..............21Passenger Knee Air Bag.........23Rollover.................21Side Impacts...............21Air bag Light.................59Air Cleaner, Engine (Engine Air CleanerFilter)...................79Air Conditioner Maintenance........79Air Conditioning Refrigerant........79Air Conditioning System...........79AlarmDisarm The System...........20Vehicle Security Alarm.........20Alarm (Security Alarm).........20, 63Antifreeze (Engine Coolant).........79Disposal.................79Anti-Lock Warning Light...........59Appearance Care..............79Automatic Temperature Control (ATC)...41Auxiliary Electrical Outlet(Power Outlet)..............57
Battery..................70, 79Body Mechanism Lubrication........79Brake Fluid..................78Brakes....................79Brake System................79Master Cylinder.............79Warning Light..............60Bulb Replacement..............89Bulbs, Light..................89
Capacities, Fluid...............78Caps, FillerOil (Engine)...............79Car Washes.................79Charging...................16Child Restraint................24
Child RestraintsInstalling Child Restraints Using TheVehicle Seat Belt.............26Lower Anchors And Tethers ForChildren.................26Using The Top Tether Anchorage....26CleaningWheels.................79Windshield Wiper Blades........79Climate ControlAutomatic................41Cluster Warning/Indicator LightsAnti-Lock Brake (ABS) Light......59Brake Warning Light...........60Electronic Speed Control SETIndicator.................63Front Fog Light Indicator........63High Beam Indicator..........63Park/Headlight ON Indicator......63Turn Signal Indicator..........63Vehicle Security Light..........63Clutch....................79Clutch Fluid.................79Compact Spare Tire.............87Cooling System...............79Adding Coolant (Antifreeze)......79Coolant Capacity............78Coolant Level..............79Disposal of Used Coolant.......79Drain, Flush, and Refill..........79Inspection................79Points to Remember..........79Pressure Cap..............79Selection of Coolant(Antifreeze).............78, 79Corrosion Protection............79Cruise Control (Speed Control)......38Customer Assistance............90
Defects, Reporting..............91Disarming, Security System.........20DisposalAntifreeze (Engine Coolant)......79Door Locks.................19
Electrical Outlet, Auxiliary(Power Outlet)..............57
INDEX
94
Page 97 of 100
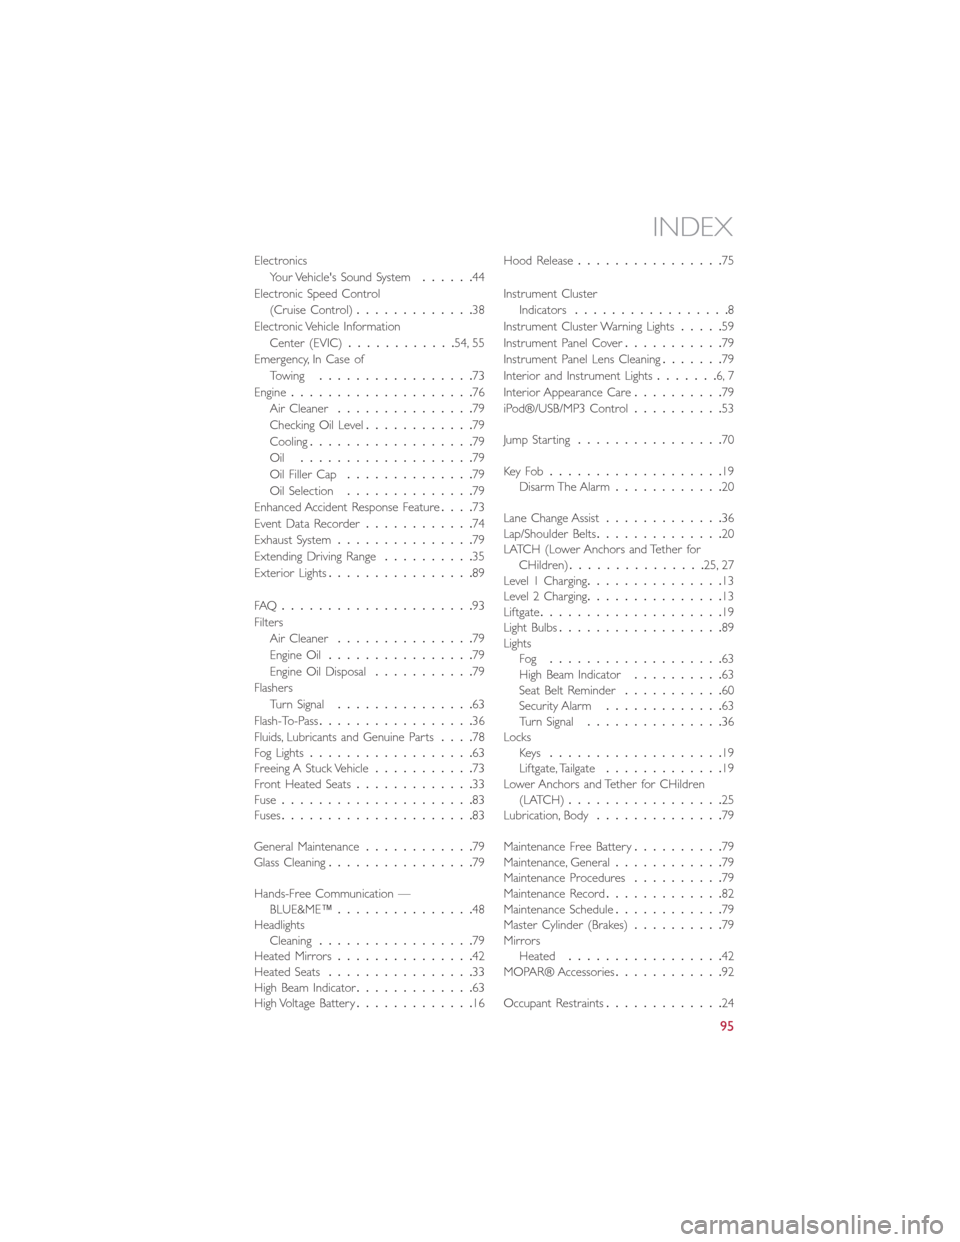
Electronics
Your Vehicle's Sound System......44
Electronic Speed Control
(Cruise Control).............38
Electronic Vehicle Information
Center (EVIC)............54, 55
Emergency, In Case of
Towing.................73
Engine....................76
Air Cleaner...............79
Checking Oil Level............79
Cooling..................79
Oil...................79
Oil Filler Cap..............79
Oil Selection..............79
Enhanced Accident Response Feature....73
Event Data Recorder............74
Exhaust System...............79
Extending Driving Range..........35
Exterior Lights................89
FAQ.....................93
Filters
Air Cleaner...............79
Engine Oil................79
Engine Oil Disposal...........79
Flashers
Turn Signal...............63
Flash-To-Pass.................36
Fluids, Lubricants and Genuine Parts....78Fog Lights..................63Freeing A Stuck Vehicle...........73Front Heated Seats.............33Fuse.....................83Fuses.....................83
General Maintenance............79Glass Cleaning................79
Hands-Free Communication —BLUE&ME™...............48HeadlightsCleaning.................79Heated Mirrors...............42Heated Seats................33High Beam Indicator.............63High Voltage Battery.............16
Hood Release................75
Instrument Cluster
Indicators.................8
Instrument Cluster Warning Lights.....59
Instrument Panel Cover...........79
Instrument Panel Lens Cleaning.......79
Interior and Instrument Lights.......6, 7
Interior Appearance Care..........79
iPod®/USB/MP3 Control..........53
Jump Starting................70
Key Fob...................19Disarm The Alarm............20
Lane Change Assist.............36Lap/Shoulder Belts..............20LATCH (Lower Anchors and Tether forCHildren)...............25, 27Level 1 Charging...............13Level 2 Charging...............13Liftgate....................19Light Bulbs..................89LightsFog...................63High Beam Indicator..........63Seat Belt Reminder...........60Security Alarm.............63Turn Signal...............36LocksKeys...................19Liftgate, Tailgate.............19Lower Anchors and Tether for CHildren(LATCH).................25Lubrication, Body..............79
Maintenance Free Battery..........79Maintenance, General............79Maintenance Procedures..........79Maintenance Record.............82Maintenance Schedule............79Master Cylinder (Brakes)..........79MirrorsHeated.................42MOPAR® Accessories............92
Occupant Restraints.............24
INDEX
95