radio FIAT 500E 2015 2.G User Guide
[x] Cancel search | Manufacturer: FIAT, Model Year: 2015, Model line: 500E, Model: FIAT 500E 2015 2.GPages: 100, PDF Size: 2.97 MB
Page 3 of 100
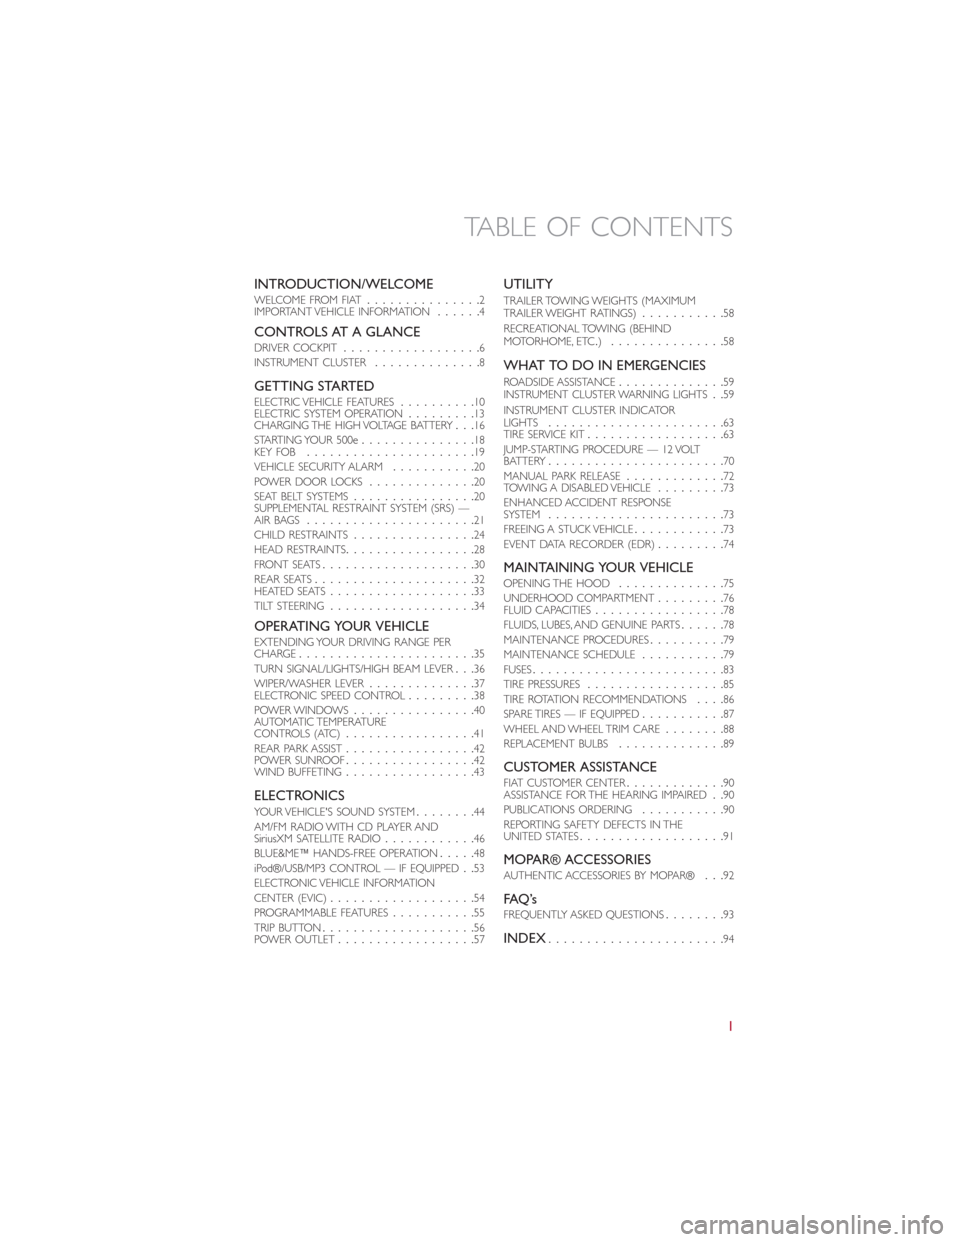
INTRODUCTION/WELCOMEWELCOME FROM FIAT...............2IMPORTANT VEHICLE INFORMATION......4
CONTROLS AT A GLANCEDRIVER COCKPIT..................6INSTRUMENT CLUSTER..............8
GETTING STARTEDELECTRIC VEHICLE FEATURES..........10ELECTRIC SYSTEM OPERATION.........13CHARGING THE HIGH VOLTAGE BATTERY...16STARTING YOUR 500e...............18KEY FOB......................19VEHICLE SECURITY ALARM...........20POWER DOOR LOCKS..............20SEAT BELT SYSTEMS................20SUPPLEMENTAL RESTRAINT SYSTEM (SRS) —AIR BAGS......................21CHILD RESTRAINTS................24HEAD RESTRAINTS.................28FRONT SEATS....................30REAR SEATS.....................32HEATED SEATS...................33TILT STEERING...................34
OPERATING YOUR VEHICLEEXTENDING YOUR DRIVING RANGE PERCHARGE.......................35TURN SIGNAL/LIGHTS/HIGH BEAM LEVER...36WIPER/WASHER LEVER..............37ELECTRONIC SPEED CONTROL.........38POWER WINDOWS................40AUTOMATIC TEMPERATURECONTROLS (ATC).................41REAR PARK ASSIST.................42POWER SUNROOF.................42WIND BUFFETING.................43
ELECTRONICSYO U R V E H I C L E ' S S O U N D S YS T E M........44AM/FM RADIO WITH CD PLAYER ANDSiriusXM SATELLITE RADIO............46BLUE&ME™ HANDS-FREE OPERATION.....48iPod®/USB/MP3 CONTROL — IF EQUIPPED..53ELECTRONIC VEHICLE INFORMATIONCENTER (EVIC)...................54PROGRAMMABLE FEATURES...........55TRIP BUTTON....................56POWER OUTLET..................57
UTILITY
TRAILER TOWING WEIGHTS (MAXIMUMTRAILER WEIGHT RATINGS)...........58RECREATIONAL TOWING (BEHINDMOTORHOME, ETC.)...............58
WHAT TO DO IN EMERGENCIES
ROADSIDE ASSISTANCE..............59INSTRUMENT CLUSTER WARNING LIGHTS..59INSTRUMENT CLUSTER INDICATORLIGHTS.......................63TIRE SERVICE KIT..................63JUMP-STARTING PROCEDURE — 12 VOLTBATTERY.......................70MANUAL PARK RELEASE.............72TOW I N G A D I S A B L E D V E H I C L E.........73ENHANCED ACCIDENT RESPONSESYSTEM.......................73FREEING A STUCK VEHICLE............73EVENT DATA RECORDER (EDR).........74
MAINTAINING YOUR VEHICLEOPENING THE HOOD..............75UNDERHOOD COMPARTMENT.........76FLUID CAPACITIES.................78FLUIDS, LUBES, AND GENUINE PARTS......78MAINTENANCE PROCEDURES..........79MAINTENANCE SCHEDULE...........79FUSES.........................83TIRE PRESSURES..................85TIRE ROTATION RECOMMENDATIONS....86SPARE TIRES — IF EQUIPPED...........87WHEEL AND WHEEL TRIM CARE........88REPLACEMENT BULBS..............89
CUSTOMER ASSISTANCEFIAT CUSTOMER CENTER.............90ASSISTANCE FOR THE HEARING IMPAIRED..90PUBLICATIONS ORDERING...........90REPORTING SAFETY DEFECTS IN THEUNITED STATES...................91
MOPAR® ACCESSORIESAUTHENTIC ACCESSORIES BY MOPAR®...92
FAQ ’sFREQUENTLY ASKED QUESTIONS........93
INDEX.......................94
TABLE OF CONTENTS
1
Page 44 of 100
Heated Mirrors
•The mirrors are heated to melt frost or ice.This feature is activated when you turn on
the rear window defroster, which is located in the center of the instrument panel, be-
low the radio.
REAR PARK ASSIST
•If an object is detected behind the rear bumper while the vehicle is in REVERSE, a chime
will sound.The chime rate will change depending on the distance of the object, getting
faster as the object gets closer to the bumper.The chime will become continuous when
the distance between the vehicle and the obstacle is less than 12 inches (30 cm).
POWER SUNROOF
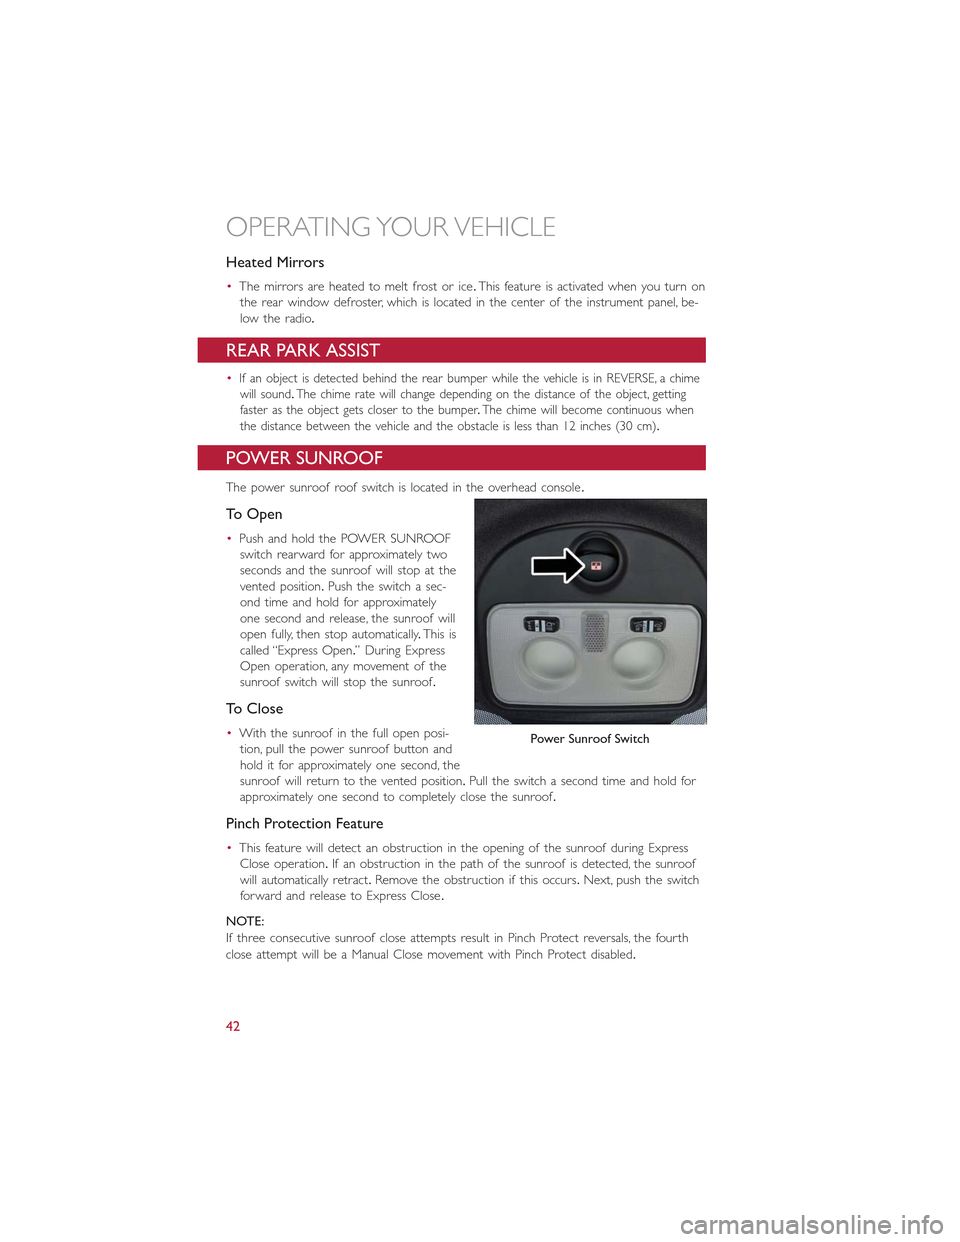
The power sunroof roof switch is located in the overhead console.
To Open
•Push and hold the POWER SUNROOF
switch rearward for approximately two
seconds and the sunroof will stop at the
vented position.Push the switch a sec-
ond time and hold for approximately
one second and release, the sunroof will
open fully, then stop automatically.This is
called “Express Open.” During Express
Open operation, any movement of the
sunroof switch will stop the sunroof.
To Close
•With the sunroof in the full open posi-
tion, pull the power sunroof button and
hold it for approximately one second, the
sunroof will return to the vented position.Pull the switch a second time and hold for
approximately one second to completely close the sunroof.
Pinch Protection Feature
•This feature will detect an obstruction in the opening of the sunroof during Express
Close operation.If an obstruction in the path of the sunroof is detected, the sunroof
will automatically retract.Remove the obstruction if this occurs.Next, push the switch
forward and release to Express Close.
NOTE:
If three consecutive sunroof close attempts result in Pinch Protect reversals, the fourth
close attempt will be a Manual Close movement with Pinch Protect disabled.
Power Sunroof Switch
OPERATING YOUR VEHICLE
42
Page 47 of 100
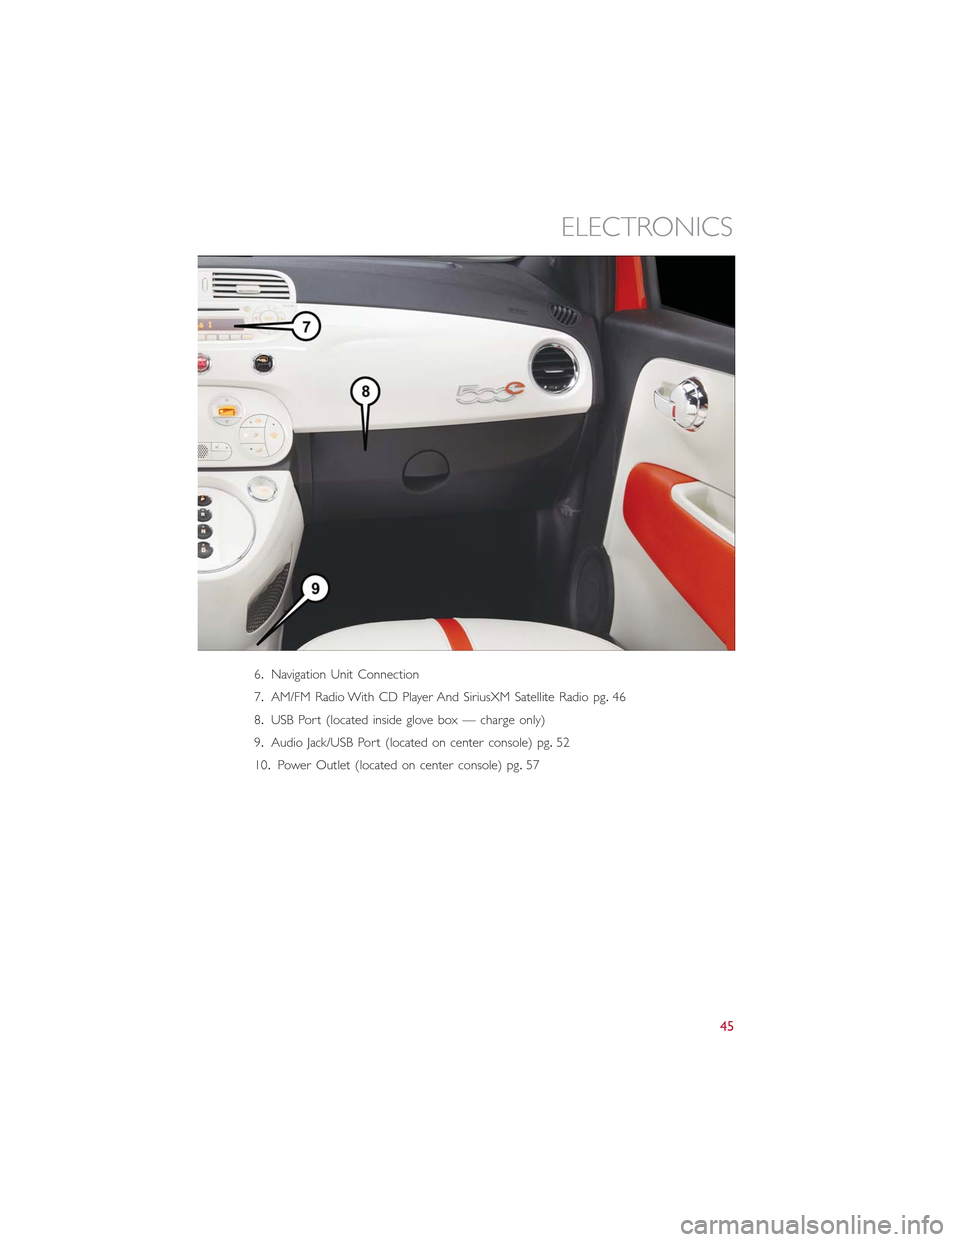
6.Navigation Unit Connection
7.AM/FM Radio With CD Player And SiriusXM Satellite Radio pg.46
8.USB Port (located inside glove box — charge only)
9.Audio Jack/USB Port (located on center console) pg.52
10.Power Outlet (located on center console) pg.57
ELECTRONICS
45
Page 48 of 100
AM/FM RADIO WITH CD PLAYER AND SiriusXM
SATELLITE RADIO
Seek Up/Down Buttons
•Push the Right or Left arrows to seek through radio stations in AM or FM bands or
seek through tracks in a CD.
•Hold either button to bypass stations or CD tracks without stopping.
Tune Up/Down Buttons
•Push the Up or Down arrows to manually search through radio stations in AM or FM
bands.Use these buttons to Fast Forward or Fast Rewind through a CD track.
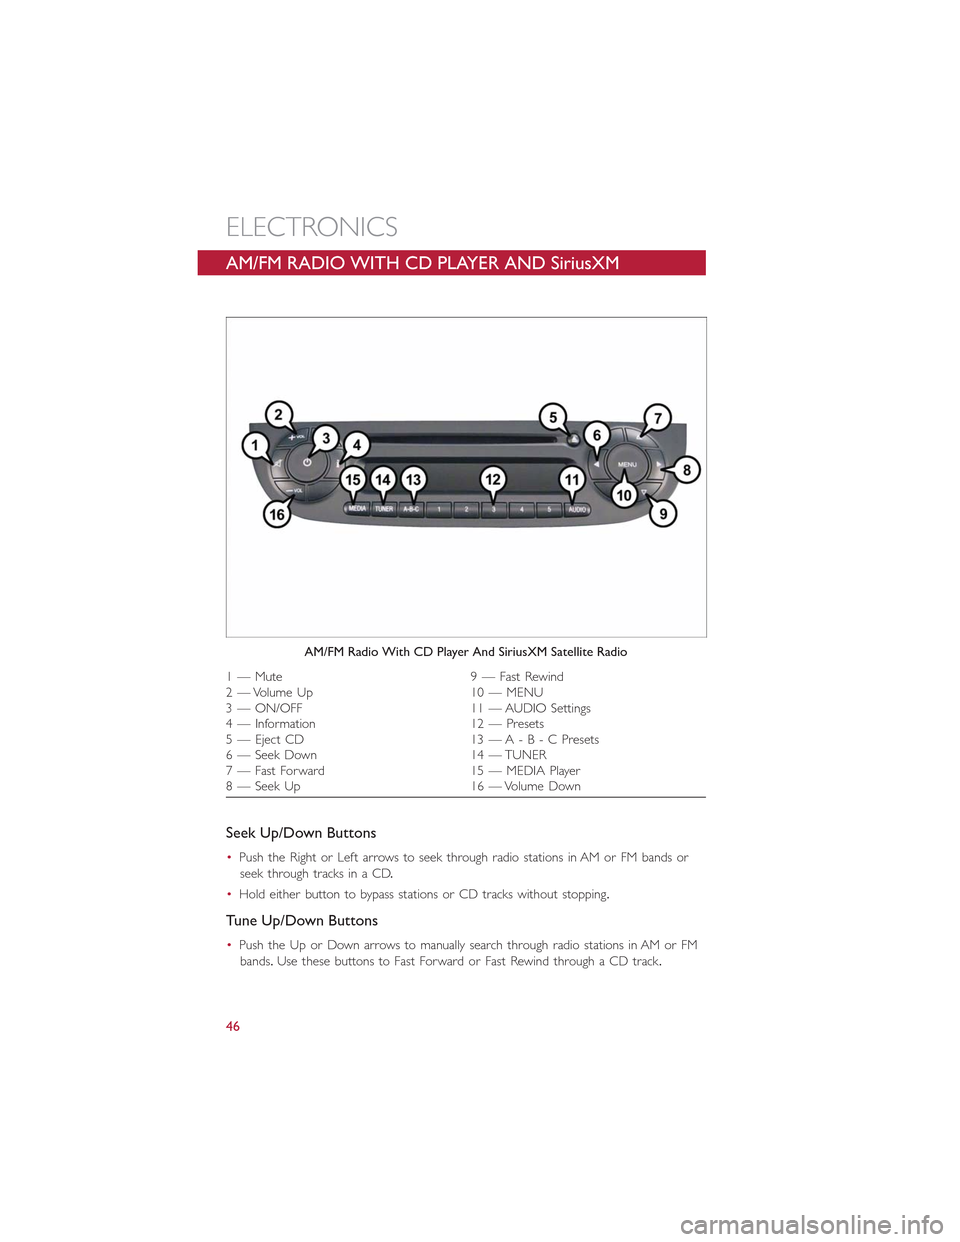
AM/FM Radio With CD Player And SiriusXM Satellite Radio
1 — Mute 9 — Fast Rewind2 — Volume Up 10 — MENU3 — ON/OFF 11 — AUDIO Settings4 — Information 12 — Presets5 — Eject CD 13 —A - B - C Presets6 — Seek Down 14 — TUNER7 — Fast Forward 15 — MEDIA Player8 — Seek Up 16 — Volume Down
ELECTRONICS
46
Page 49 of 100
Audio Settings
•Push the AUDIO button, then press the Up and Down arrows to select BASS, TREBLE,
BALANCE and FADE.To adjust a setting, use the right and left arrows.
Tuner
•Push the TUNER button to select between AM, FM, SAT (SiriusXM Satellite Radio)
modes.
Info
•Push the INFO button to view Song, Artist, Album, Genre, Playlist, Folder information
(if available) in CD, Media Player and SiriusXM Satellite Radio (if so equipped).Also use
the Info button to toggle RDS information in FM.
Menu
•Push the MENU button and one of the following options will appear on the Radio
display.Use the Up and Down arrows to scroll through the options; use the Left and
Right arrows to change a selection setting.
•Speech Volume•SiriusXM Telephone Number
•Aux Audio Offset•System Reset
•Radio Off•Speed Volume
•Sat ID•On Volume Limit
Station Presets
•To store a tuned station, find the station to store by either pushing the Right and Left
arrow (Seek) buttons or by pushing Up or Down arrow (Manual Tune) buttons.
•Once the station is found, push and hold one of the PRESET buttons, until you hear a
confirmation beep (Preset Saved will be shown in the radio display).A total of 15 FM,
10 AM and 15 SiriusXM Satellite Radio stations can be preset by pushing the A-B-C
button.
A-B-C Button
•Push the A-B-C button to choose between the presets stored in the AM, FM or SAT
modes.The mode (AM, FM, SAT), station preset (A, B, C) and preset button number
(P 1-5) will be displayed in the middle of the radio display.
ELECTRONICS
47
Page 50 of 100
BLUE&ME™ HANDS-FREE OPERATION
•FIAT’s Windows Mobile™ based BLUE&ME™ Hands-Free Communication is a personal
telematics system that incorporates communication and entertainment applications that
are specifically designed for use in your car.
•The BLUE&ME™ Hands-Free Communication package installed in your car is equipped
with integral hands-free functionality, message reader, and media player.BLUE&ME™ is
designed to support the future installation of additional services.
•The BLUE&ME™ Hands-Free Communication package features integrated voice recogni-
tion, steering wheel controls and a multifunction electronic display that allows you to use
your Bluetooth® enabled wireless technology enabled mobile phone without having to
take your eyes off the road.You can even keep your phone in a pocket or a bag.You are
not required to train the voice recognition system to recognize your voice.The system is
“speaker independent” and performs equally well for different users.
•Bluetooth® wireless technology enables wireless connection between your mobile
phone and the hands-free kit installed on your car.
•To use the hands-free kit, you need a Bluetooth® wireless technology enabled mobile
phone.This hands-free kit gives you the possibility of interacting vocally with your mobile
phone while driving, even if your mobile device does not feature Voice Recognition.You
can also interact with your mobile phone manually and visually using the steering wheel
controls and the instrument panel multifunction display.Please refer to the Fiat Blue & Me
Radio Supplement for further information.
WARNING!
Driving while distracted can result in loss of vehicle control, accident and injury.It is
strongly recommended that you use extreme caution when using any device or feature
that may take your focus off the road or your hands off the steering wheel.Your pri-
mary responsibility is the safe operation of your vehicle.We recommend against the
use of any handheld device while driving, encourage the use of voice-operated systems
when possible and that you become aware of applicable laws that may affect the use of
electronic devices while driving.
ELECTRONICS
48
Page 52 of 100
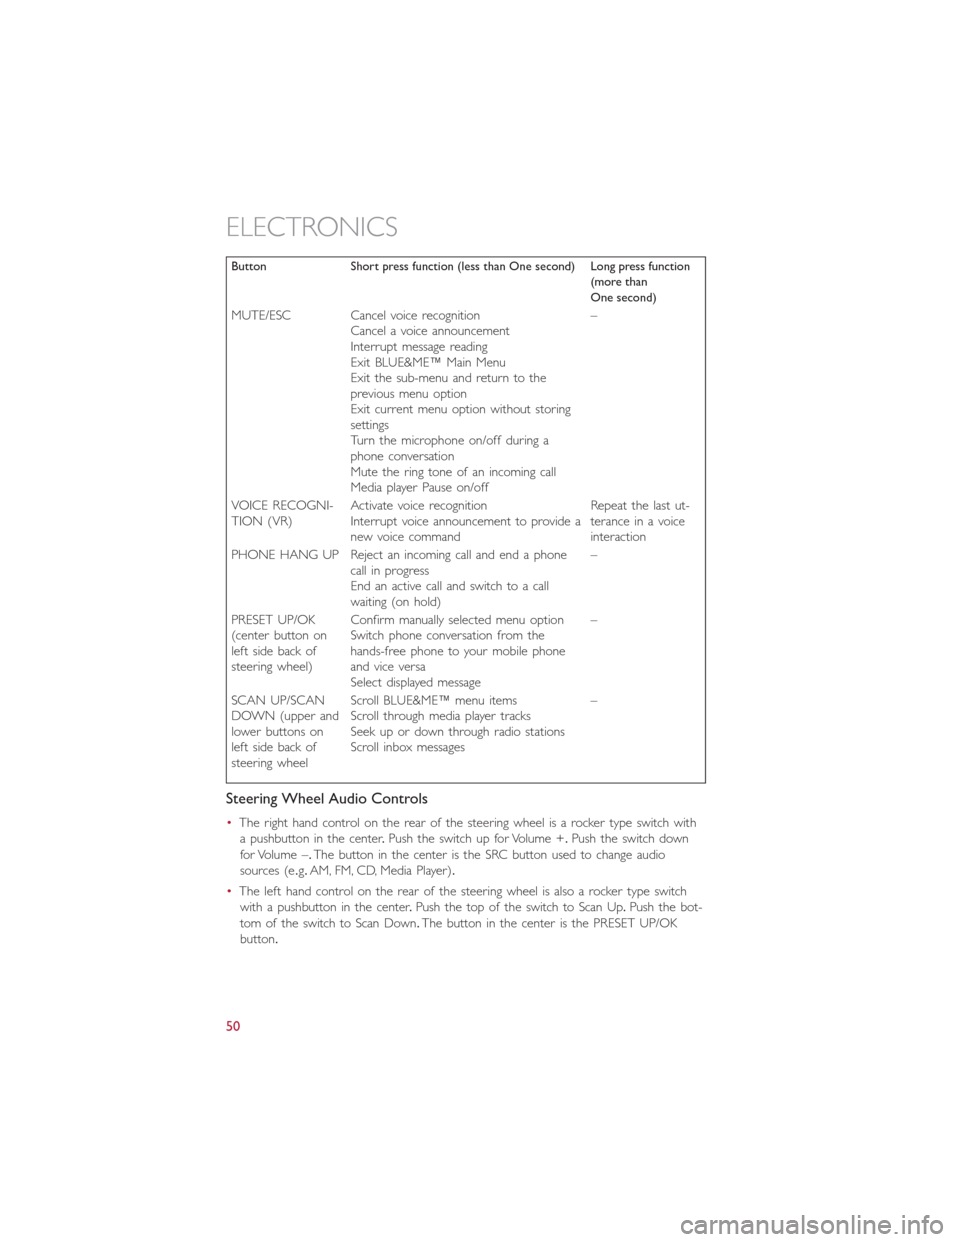
Button Short press function (less than One second) Long press function(more thanOne second)
MUTE/ESC Cancel voice recognitionCancel a voice announcementInterrupt message readingExit BLUE&ME™ Main MenuExit the sub-menu and return to theprevious menu optionExit current menu option without storingsettingsTurn the microphone on/off during aphone conversationMute the ring tone of an incoming callMedia player Pause on/off
–
VOICE RECOGNI-TION (VR)Activate voice recognitionInterrupt voice announcement to provide anew voice command
Repeat the last ut-terance in a voiceinteraction
PHONE HANG UP Reject an incoming call and end a phonecall in progressEnd an active call and switch to a callwaiting (on hold)
–
PRESET UP/OK(center button onleft side back ofsteering wheel)
Confirm manually selected menu optionSwitch phone conversation from thehands-free phone to your mobile phoneand vice versaSelect displayed message
–
SCAN UP/SCANDOWN (upper andlower buttons onleft side back ofsteering wheel
Scroll BLUE&ME™ menu itemsScroll through media player tracksSeek up or down through radio stationsScroll inbox messages
–
Steering Wheel Audio Controls
•The right hand control on the rear of the steering wheel is a rocker type switch with
a pushbutton in the center.Push the switch up for Volume +.Push the switch down
for Volume –.The button in the center is the SRC button used to change audio
sources (e.g.AM, FM, CD, Media Player).
•The left hand control on the rear of the steering wheel is also a rocker type switch
with a pushbutton in the center.Push the top of the switch to Scan Up.Push the bot-
tom of the switch to Scan Down.The button in the center is the PRESET UP/OK
button.
ELECTRONICS
50
Page 55 of 100
How To Connect The USB Stick/iPod® To BLUE&ME™
•To connect your USB stick/iPod® to BLUE&ME™, proceed as follows:
•USB devices without USB wire: just connect the USB stick/iPod® (directly or by an
extension lead) to the USB port on the car.
•USB stick/iPod® with USB wire: use the wire to connect the USB stick/iPod® to
the USB port on the car.
•Turn the ignition key to ON.BLUE&ME™ will start automatically to play your digital
tracks selecting them from the library built at the moment the USB stick/iPod® is
connected.
•If AUTOPLAY is set to “ON,” BLUE&ME™ will start playback automatically.
•Refer to the iPod®/USB/MP3 CONTROL section in this manual and the BLUE&ME™
User's Manual on the DVD for more details.
WARNING!
Driving while distracted can result in loss of vehicle control, accident and injury.It is
strongly recommended that you use extreme caution when using any device or feature
that may take your focus off the road or your hands off the steering wheel.Your pri-
mary responsibility is the safe operation of your vehicle.We recommend against the
use of any handheld device while driving, encourage the use of voice-operated systems
when possible and that you become aware of applicable laws that may affect the use of
electronic devices while driving.
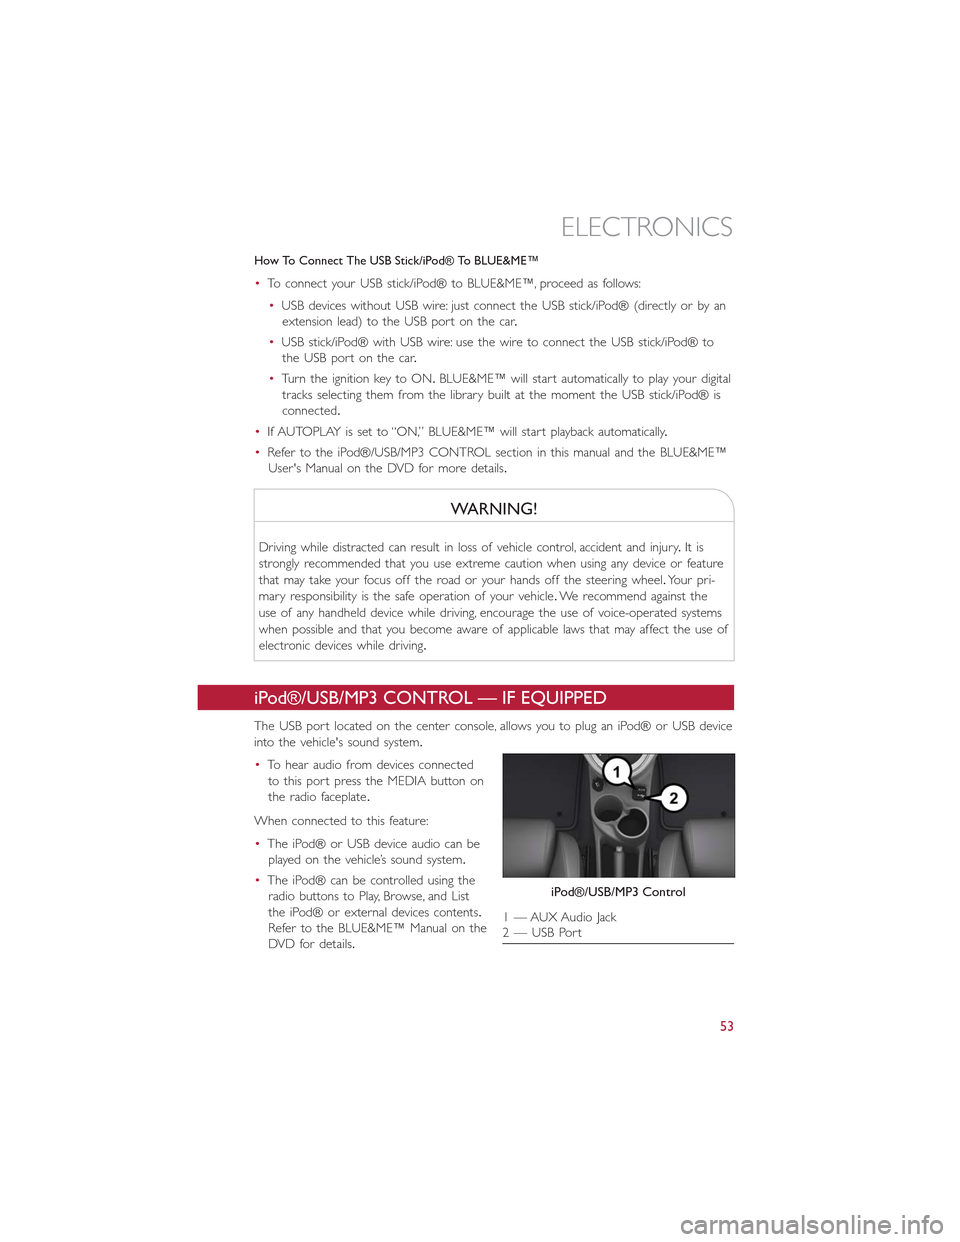
iPod®/USB/MP3 CONTROL — IF EQUIPPED
The USB port located on the center console, allows you to plug an iPod® or USB device
into the vehicle's sound system.
•To hear audio from devices connected
to this port press the MEDIA button on
the radio faceplate.
When connected to this feature:
•The iPod® or USB device audio can be
played on the vehicle’s sound system.
•The iPod® can be controlled using the
radio buttons to Play, Browse, and List
the iPod® or external devices contents.
Refer to the BLUE&ME™ Manual on the
DVD for details.
iPod®/USB/MP3 Control
1 — AUX Audio Jack2 — USB Port
ELECTRONICS
53
Page 72 of 100
JUMP-STARTING PROCEDURE — 12 VOLT BATTERY
•If your vehicle has a discharged 12 Volt battery, it can be jump-started using a set of
jumper cables and a battery in another vehicle or by using a portable battery booster
pack.Jump-starting can be dangerous if done improperly so please follow the proce-
dures in this section carefully.
NOTE:
When using a portable battery booster pack, follow the manufacturer’s operating instruc-
tions and precautions.
Preparations For Jump-Start
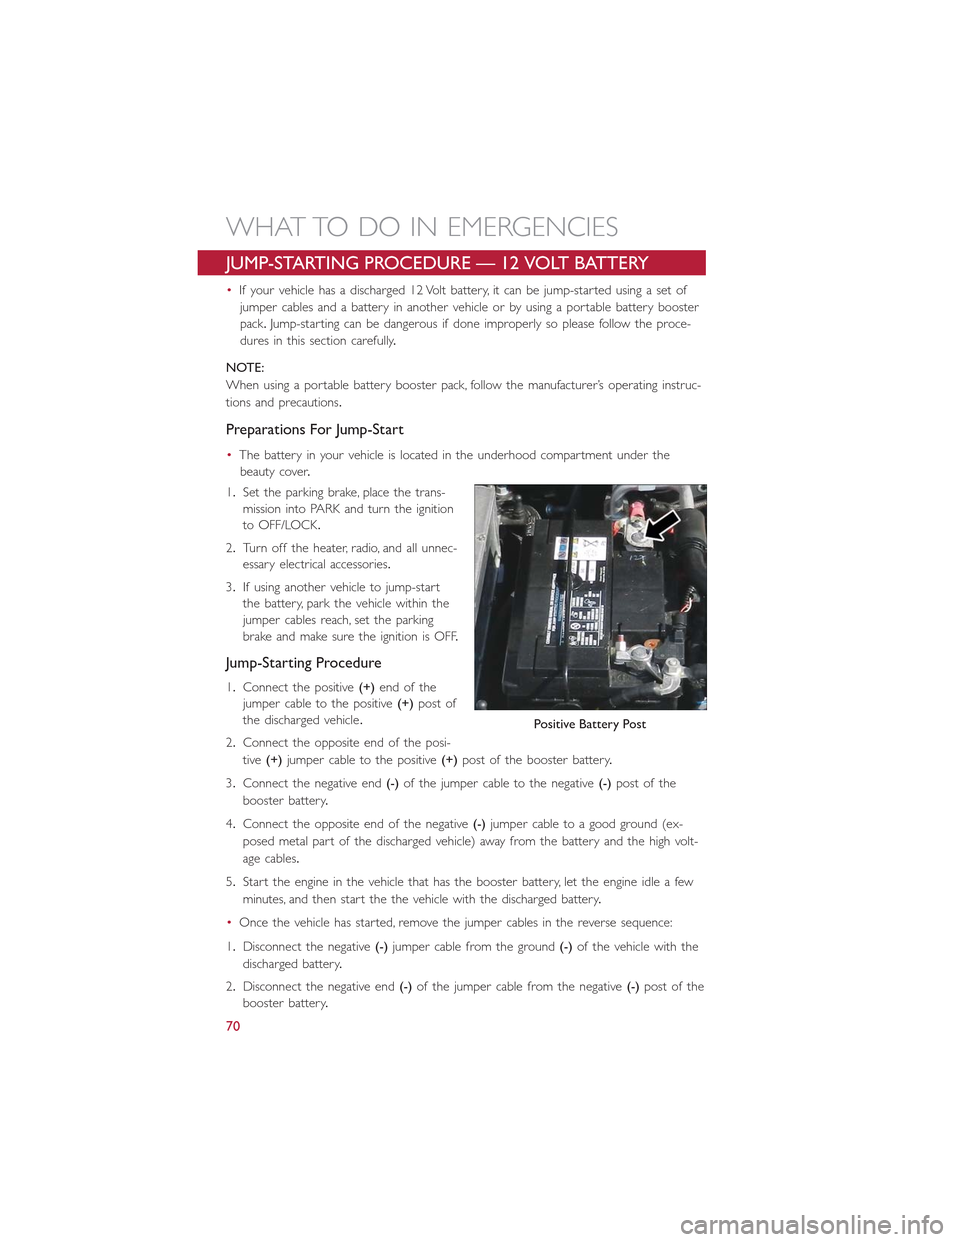
•The battery in your vehicle is located in the underhood compartment under the
beauty cover.
1.Set the parking brake, place the trans-
mission into PARK and turn the ignition
to OFF/LOCK.
2.Turn off the heater, radio, and all unnec-
essary electrical accessories.
3.If using another vehicle to jump-start
the battery, park the vehicle within the
jumper cables reach, set the parking
brake and make sure the ignition is OFF.
Jump-Starting Procedure
1.Connect the positive(+)end of the
jumper cable to the positive(+)post of
the discharged vehicle.
2.Connect the opposite end of the posi-
tive(+)jumper cable to the positive(+)post of the booster battery.
3.Connect the negative end(-)of the jumper cable to the negative(-)post of the
booster battery.
4.Connect the opposite end of the negative(-)jumper cable to a good ground (ex-
posed metal part of the discharged vehicle) away from the battery and the high volt-
age cables.
5.Start the engine in the vehicle that has the booster battery, let the engine idle a few
minutes, and then start the the vehicle with the discharged battery.
•Once the vehicle has started, remove the jumper cables in the reverse sequence:
1.Disconnect the negative(-)jumper cable from the ground(-)of the vehicle with the
discharged battery.
2.Disconnect the negative end(-)of the jumper cable from the negative(-)post of the
booster battery.
Positive Battery Post
WHAT TO DO IN EMERGENCIES
70
Page 85 of 100
FUSES
Interior Fuses
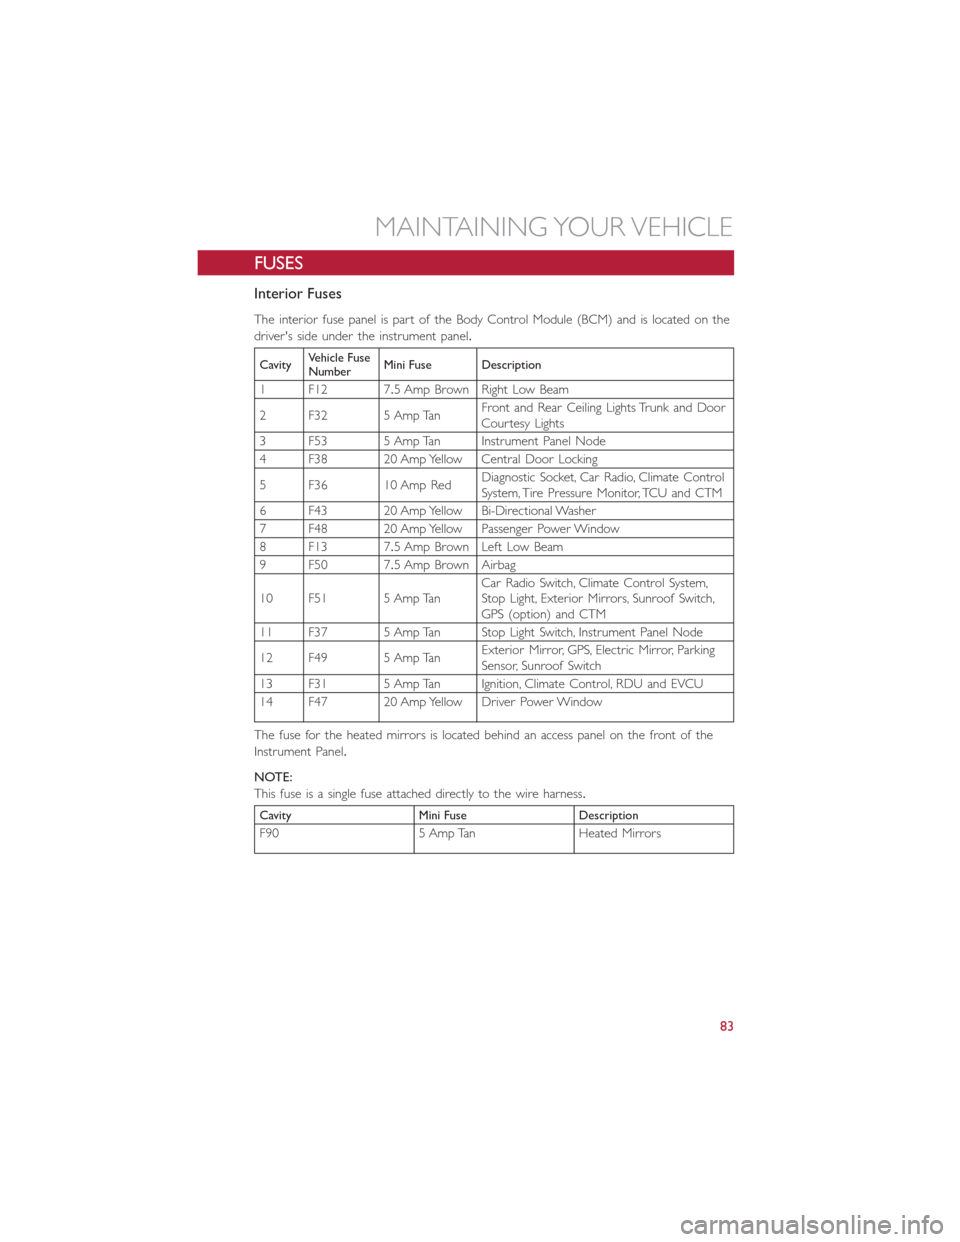
The interior fuse panel is part of the Body Control Module (BCM) and is located on the
driver's side under the instrument panel.
CavityVehicle FuseNumberMini Fuse Description
1 F12 7.5 Amp Brown Right Low Beam
2 F32 5 Amp TanFront and Rear Ceiling Lights Trunk and DoorCourtesy Lights
3 F53 5 Amp Tan Instrument Panel Node
4 F38 20 Amp Yellow Central Door Locking
5 F36 10 Amp RedDiagnostic Socket, Car Radio, Climate ControlSystem, Tire Pressure Monitor, TCU and CTM
6 F43 20 Amp Yellow Bi-Directional Washer
7 F48 20 Amp Yellow Passenger Power Window
8 F13 7.5 Amp Brown Left Low Beam
9 F50 7.5 Amp Brown Airbag
10 F51 5 Amp TanCar Radio Switch, Climate Control System,Stop Light, Exterior Mirrors, Sunroof Switch,GPS (option) and CTM
11 F37 5 Amp Tan Stop Light Switch, Instrument Panel Node
12 F49 5 Amp TanExterior Mirror, GPS, Electric Mirror, ParkingSensor, Sunroof Switch
13 F31 5 Amp Tan Ignition, Climate Control, RDU and EVCU
14 F47 20 Amp Yellow Driver Power Window
The fuse for the heated mirrors is located behind an access panel on the front of the
Instrument Panel.
NOTE:
This fuse is a single fuse attached directly to the wire harness.
Cavity Mini Fuse Description
F90 5 Amp Tan Heated Mirrors
MAINTAINING YOUR VEHICLE
83