wheel FIAT 500E 2016 2.G Owner's Manual
[x] Cancel search | Manufacturer: FIAT, Model Year: 2016, Model line: 500E, Model: FIAT 500E 2016 2.GPages: 132, PDF Size: 4.59 MB
Page 94 of 132
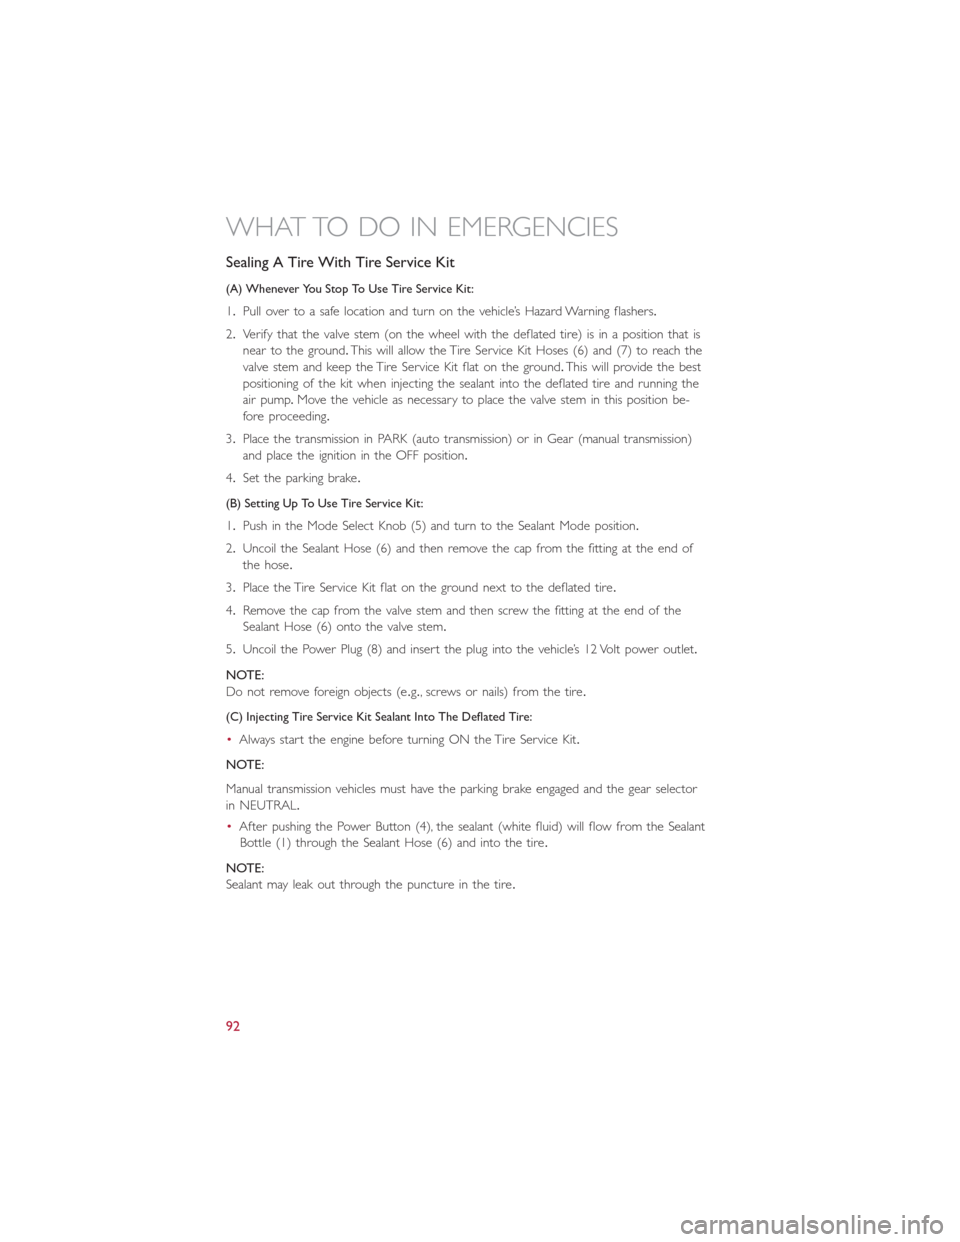
Sealing A Tire With Tire Service Kit
(A) Whenever You Stop To Use Tire Service Kit:
1.Pull over to a safe location and turn on the vehicle’s Hazard Warning flashers.
2.Verify that the valve stem (on the wheel with the deflated tire) is in a position that is
near to the ground.This will allow the Tire Service Kit Hoses (6) and (7) to reach the
valve stem and keep the Tire Service Kit flat on the ground.This will provide the best
positioning of the kit when injecting the sealant into the deflated tire and running the
air pump.Move the vehicle as necessary to place the valve stem in this position be-
fore proceeding.
3.Place the transmission in PARK (auto transmission) or in Gear (manual transmission)
and place the ignition in the OFF position.
4.Set the parking brake.
(B) Setting Up To Use Tire Service Kit:
1.Push in the Mode Select Knob (5) and turn to the Sealant Mode position.
2.Uncoil the Sealant Hose (6) and then remove the cap from the fitting at the end of
the hose.
3.Place the Tire Service Kit flat on the ground next to the deflated tire.
4.Remove the cap from the valve stem and then screw the fitting at the end of the
Sealant Hose (6) onto the valve stem.
5.Uncoil the Power Plug (8) and insert the plug into the vehicle’s 12 Volt power outlet.
NOTE:
Do not remove foreign objects (e.g., screws or nails) from the tire.
(C) Injecting Tire Service Kit Sealant Into The Deflated Tire:
•Always start the engine before turning ON the Tire Service Kit.
NOTE:
Manual transmission vehicles must have the parking brake engaged and the gear selector
in NEUTRAL.
•After pushing the Power Button (4), the sealant (white fluid) will flow from the Sealant
Bottle (1) through the Sealant Hose (6) and into the tire.
NOTE:
Sealant may leak out through the puncture in the tire.
WHAT TO DO IN EMERGENCIES
92
Page 102 of 132
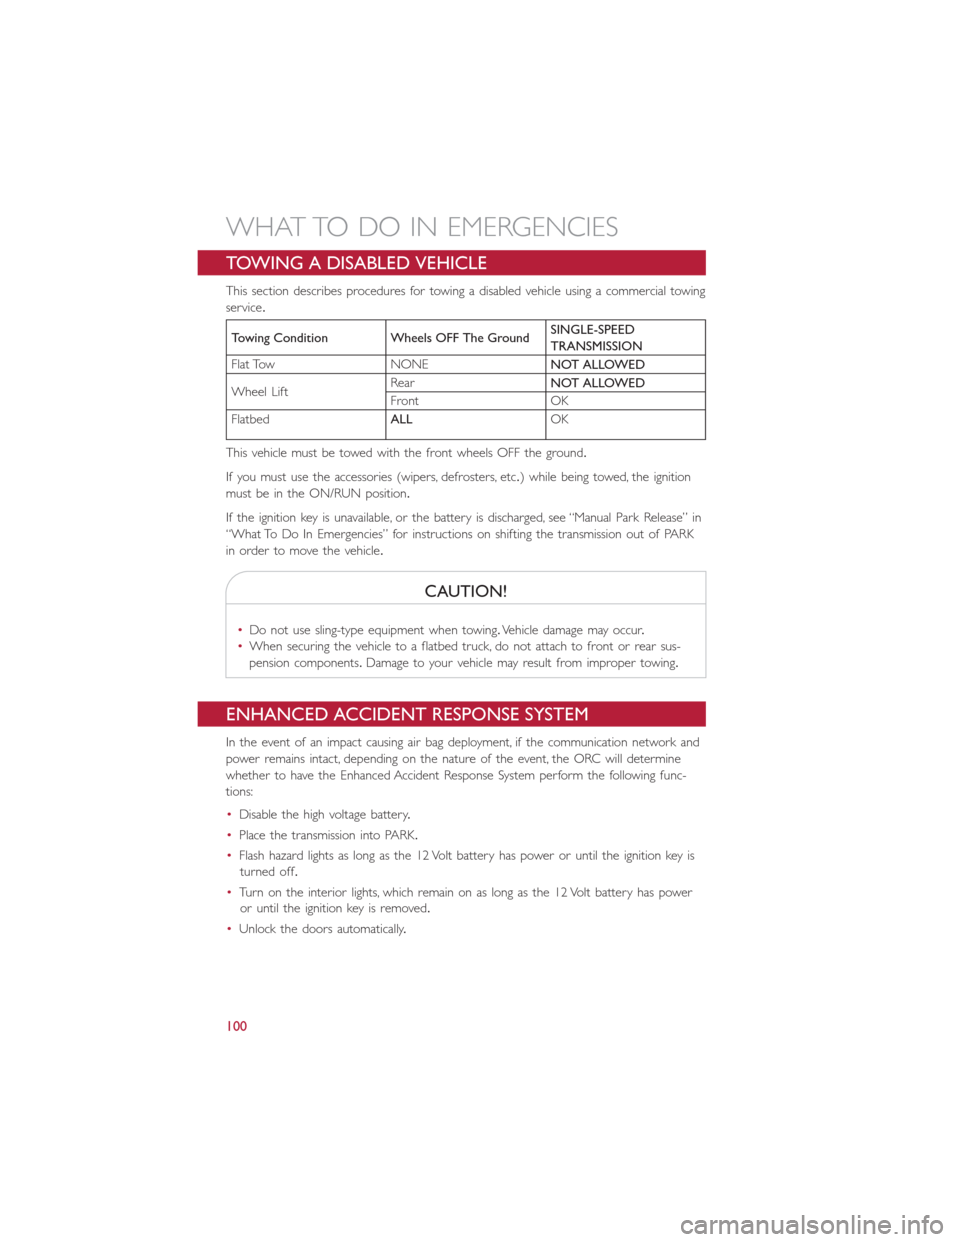
TOWING A DISABLED VEHICLE
This section describes procedures for towing a disabled vehicle using a commercial towing
service.
Towing Condition Wheels OFF The GroundSINGLE-SPEED
TRANSMISSION
Flat Tow NONE
NOT ALLOWED
Wheel LiftRear
NOT ALLOWED
Front OK
Flatbed
ALLOK
This vehicle must be towed with the front wheels OFF the ground.
If you must use the accessories (wipers, defrosters, etc.) while being towed, the ignition
must be in the ON/RUN position.
If the ignition key is unavailable, or the battery is discharged, see “Manual Park Release” in
“What To Do In Emergencies” for instructions on shifting the transmission out of PARK
in order to move the vehicle.
CAUTION!
•Do not use sling-type equipment when towing.Vehicle damage may occur.
•When securing the vehicle to a flatbed truck, do not attach to front or rear sus-
pension components.Damage to your vehicle may result from improper towing.
ENHANCED ACCIDENT RESPONSE SYSTEM
In the event of an impact causing air bag deployment, if the communication network and
power remains intact, depending on the nature of the event, the ORC will determine
whether to have the Enhanced Accident Response System perform the following func-
tions:
•Disable the high voltage battery.
•Place the transmission into PARK.
•Flash hazard lights as long as the 12 Volt battery has power or until the ignition key is
turned off.
•Turn on the interior lights, which remain on as long as the 12 Volt battery has power
or until the ignition key is removed.
•Unlock the doors automatically.
WHAT TO DO IN EMERGENCIES
100
Page 103 of 132
In order to move your vehicle to the side of the road the transmission must be in NEU-
TRAL and the 12 Volt system must be functional.To place the transmission into NEU-
TRAL you must turn the ignition OFF and then back to the RUN position (cycle the igni-
tion) then push the NEUTRAL button.
NOTE:
The high voltage battery will remain disabled after an Enhanced Accident Response Event
and must be reset by your authorized dealership.
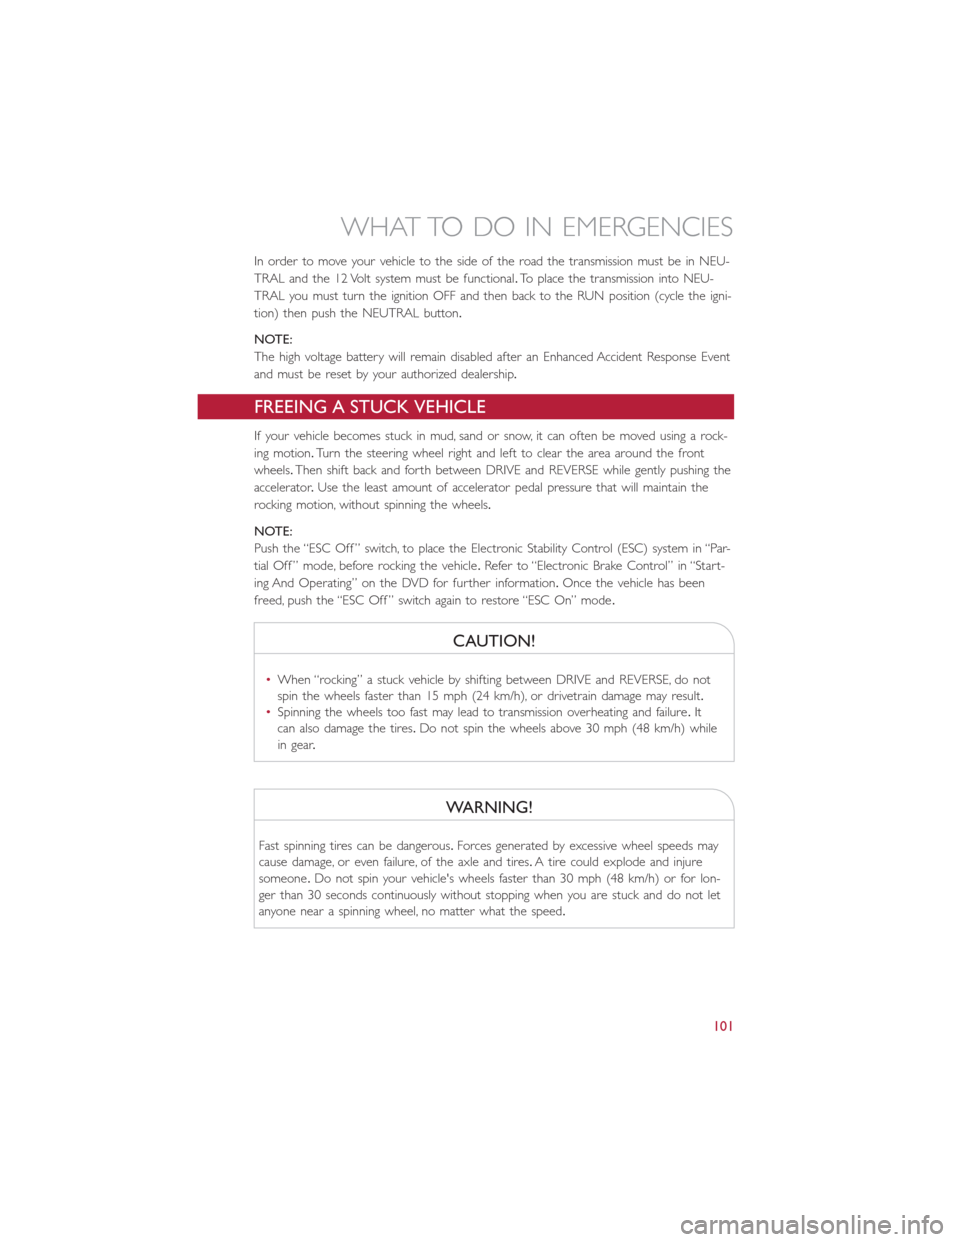
FREEING A STUCK VEHICLE
If your vehicle becomes stuck in mud, sand or snow, it can often be moved using a rock-
ing motion.Turn the steering wheel right and left to clear the area around the front
wheels.Then shift back and forth between DRIVE and REVERSE while gently pushing the
accelerator.Use the least amount of accelerator pedal pressure that will maintain the
rocking motion, without spinning the wheels.
NOTE:
Push the “ESC Off ” switch, to place the Electronic Stability Control (ESC) system in “Par-
tial Off ” mode, before rocking the vehicle.Refer to “Electronic Brake Control” in “Start-
ing And Operating” on the DVD for further information.Once the vehicle has been
freed, push the “ESC Off ” switch again to restore “ESC On” mode.
CAUTION!
•When “rocking” a stuck vehicle by shifting between DRIVE and REVERSE, do not
spin the wheels faster than 15 mph (24 km/h), or drivetrain damage may result.
•Spinning the wheels too fast may lead to transmission overheating and failure.It
can also damage the tires.Do not spin the wheels above 30 mph (48 km/h) while
in gear.
WARNING!
Fast spinning tires can be dangerous.Forces generated by excessive wheel speeds may
cause damage, or even failure, of the axle and tires.A tire could explode and injure
someone.Do not spin your vehicle's wheels faster than 30 mph (48 km/h) or for lon-
ger than 30 seconds continuously without stopping when you are stuck and do not let
anyone near a spinning wheel, no matter what the speed.
WHAT TO DO IN EMERGENCIES
101
Page 116 of 132
CAUTION!
Because of the reduced ground clearance, do not take your vehicle through an auto-
matic car wash with a compact or limited-use temporary spare installed.Damage to the
vehicle may result.
Spare Tire Matching Original Equipped Tire And Wheel — If Equipped
Your vehicle may be equipped with a spare tire and wheel equivalent in look and func-
tion to the original equipment tire and wheel found on the front or rear axle of your
vehicle.This spare tire may be used in the tire rotation for your vehicle.If your vehicle
has this option, refer to an authorized tire dealer for the recommended tire rotation
pattern.
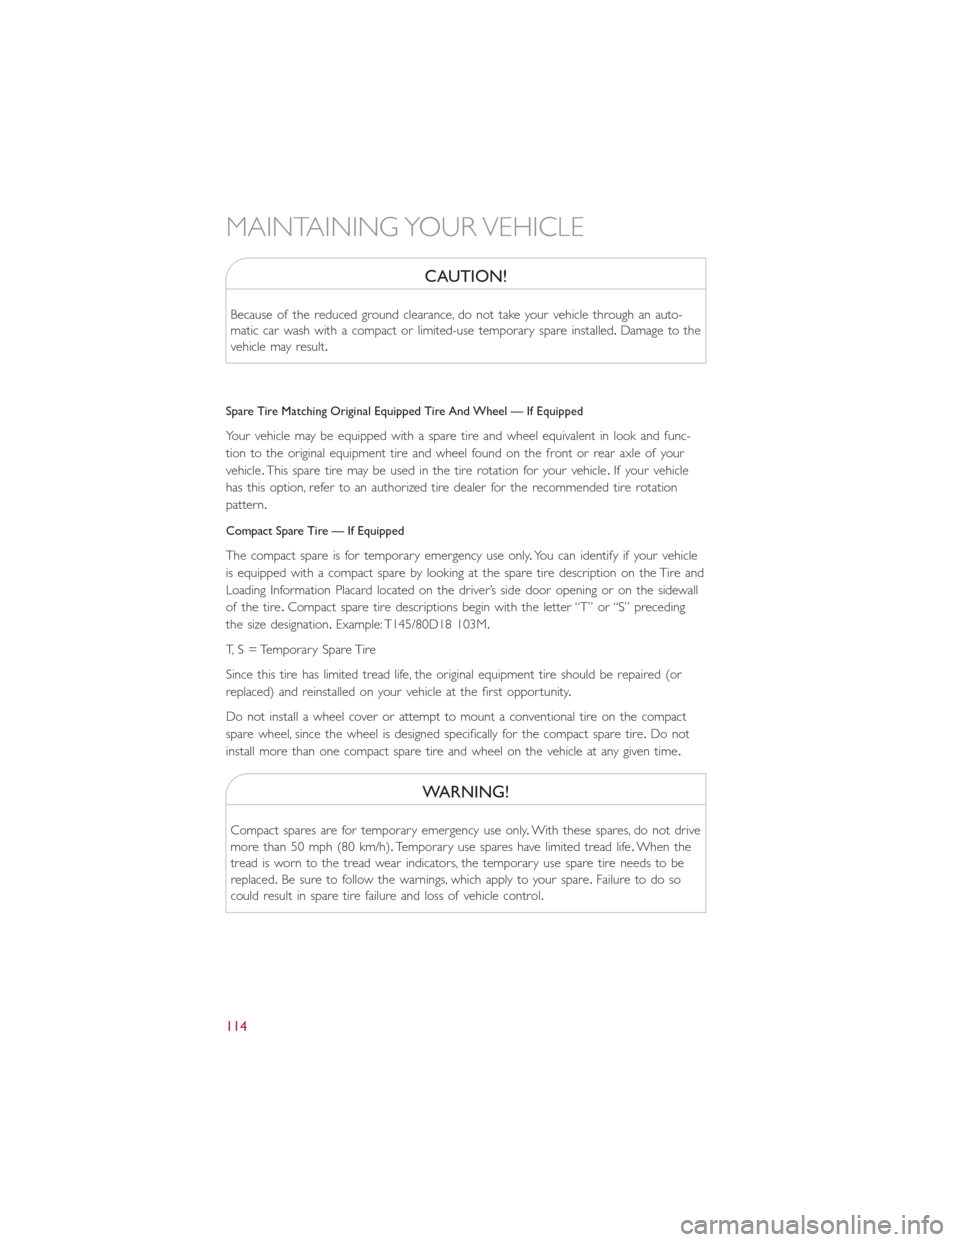
Compact Spare Tire — If Equipped
The compact spare is for temporary emergency use only.You can identify if your vehicle
is equipped with a compact spare by looking at the spare tire description on the Tire and
Loading Information Placard located on the driver’s side door opening or on the sidewall
of the tire.Compact spare tire descriptions begin with the letter “T” or “S” preceding
the size designation.Example: T145/80D18 103M.
T, S = Temporary Spare Tire
Since this tire has limited tread life, the original equipment tire should be repaired (or
replaced) and reinstalled on your vehicle at the first opportunity.
Do not install a wheel cover or attempt to mount a conventional tire on the compact
spare wheel, since the wheel is designed specifically for the compact spare tire.Do not
install more than one compact spare tire and wheel on the vehicle at any given time.
WARNING!
Compact spares are for temporary emergency use only.With these spares, do not drive
more than 50 mph (80 km/h).Temporary use spares have limited tread life.When the
tread is worn to the tread wear indicators, the temporary use spare tire needs to be
replaced.Be sure to follow the warnings, which apply to your spare.Failure to do so
could result in spare tire failure and loss of vehicle control.
MAINTAINING YOUR VEHICLE
114
Page 117 of 132
Full Size Spare — If Equipped
The full size spare is for temporary emergency use only.This tire may look like the origi-
nally equipped tire on the front or rear axle of your vehicle, but it is not.This spare tire
may have limited tread life.When the tread is worn to the tread wear indicators, the
temporary use full size spare tire needs to be replaced.Since it is not the same as your
original equipment tire, replace (or repair) the original equipment tire and reinstall on the
vehicle at the first opportunity.
Limited Use Spare — If Equipped
The limited-use spare tire is for temporary emergency use only.This tire is identified by a
label located on the limited-use spare wheel.This label contains the driving limitations for
this spare.This tire may look like the original equipped tire on the front or rear axle of
your vehicle, but it is not.Installation of this limited-use spare tire affects vehicle handling.
Since it is not the same as your original equipment tire, replace (or repair) the original
equipment tire and reinstall on the vehicle at the first opportunity.
WARNING!
Limited-use spares are for emergency use only.Installation of this limited-use spare tire
affects vehicle handling.With this tire, do not drive more than the speed listed on the
limit-use spare wheel.Keep inflated to the cold tire inflation pressures listed on your
Tire and Loading Information Placard located on the driver’s side B-Pillar or the rear
edge of the driver’s side door.Replace (or repair) the original equipment tire at the
first opportunity and reinstall it on your vehicle.Failure to do so could result in loss of
vehicle control.
MAINTAINING YOUR VEHICLE
115
Page 118 of 132
Wheel And Wheel Trim Care
All wheels and wheel trim, especially aluminum and chrome plated wheels, should be
cleaned regularly with a mild soap and water to prevent corrosion.
To remove heavy soil and/or excessive brake dust, use MOPAR Wheel Cleaner or equiva-
lent or select a non-abrasive, non-acidic cleaner.
CAUTION!
Do not use scouring pads, steel wool, a bristle brush, or metal polishes.Do not use
oven cleaner.These products may damage the wheel's protective finish.Avoid automatic
car washes that use acidic solutions or harsh brushes that may damage the wheel's pro-
tective finish.Only MOPAR Wheel Cleaner or equivalent is recommended.
TIRE ROTATION RECOMMENDATIONS
NOTE:
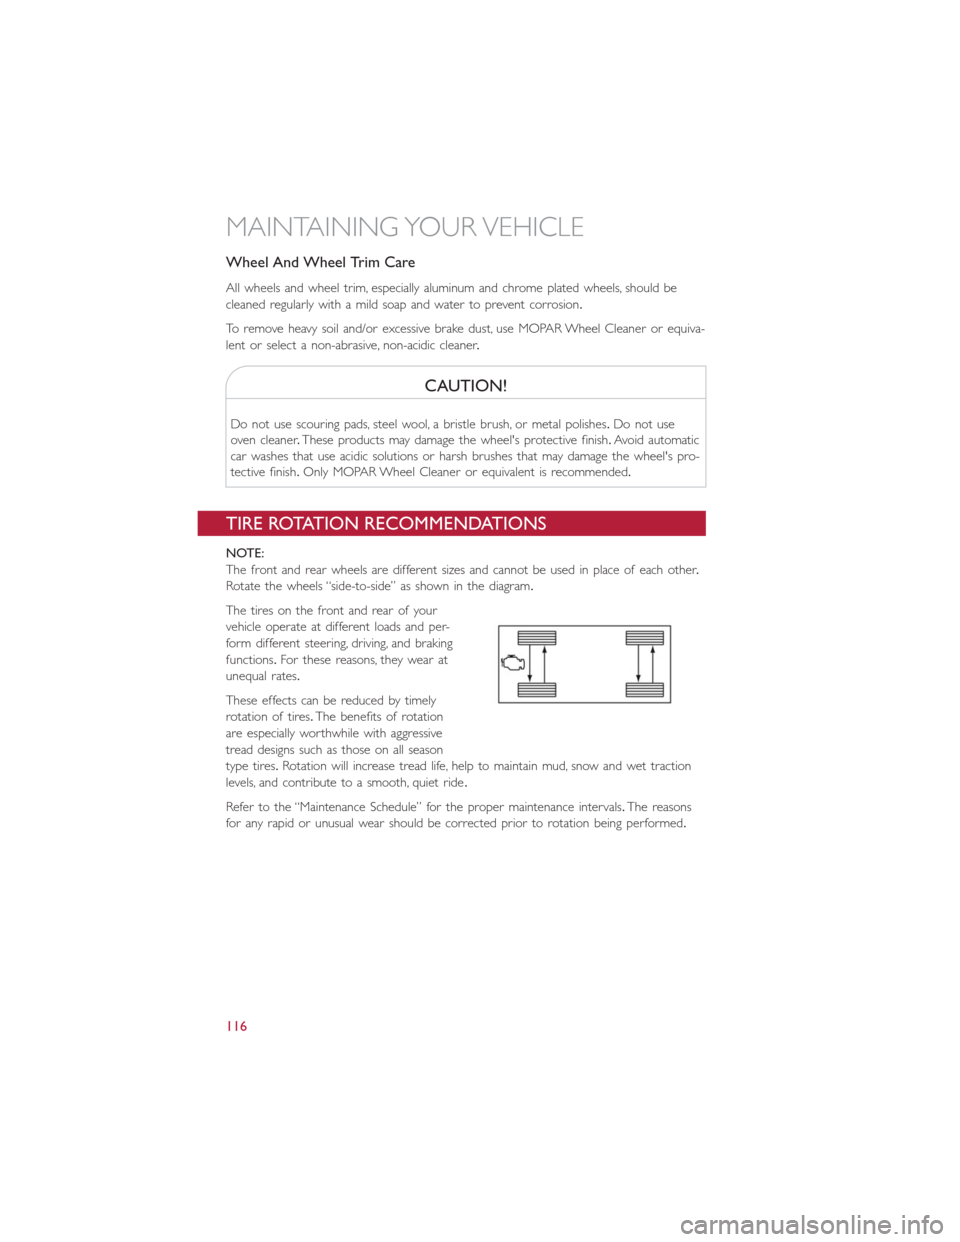
The front and rear wheels are different sizes and cannot be used in place of each other.
Rotate the wheels “side-to-side” as shown in the diagram.
The tires on the front and rear of your
vehicle operate at different loads and per-
form different steering, driving, and braking
functions.For these reasons, they wear at
unequal rates.
These effects can be reduced by timely
rotation of tires.The benefits of rotation
are especially worthwhile with aggressive
tread designs such as those on all season
type tires.Rotation will increase tread life, help to maintain mud, snow and wet traction
levels, and contribute to a smooth, quiet ride.
Refer to the “Maintenance Schedule” for the proper maintenance intervals.The reasons
for any rapid or unusual wear should be corrected prior to rotation being performed.
MAINTAINING YOUR VEHICLE
116
Page 121 of 132
AUTHENTIC ACCESSORIES BY MOPAR
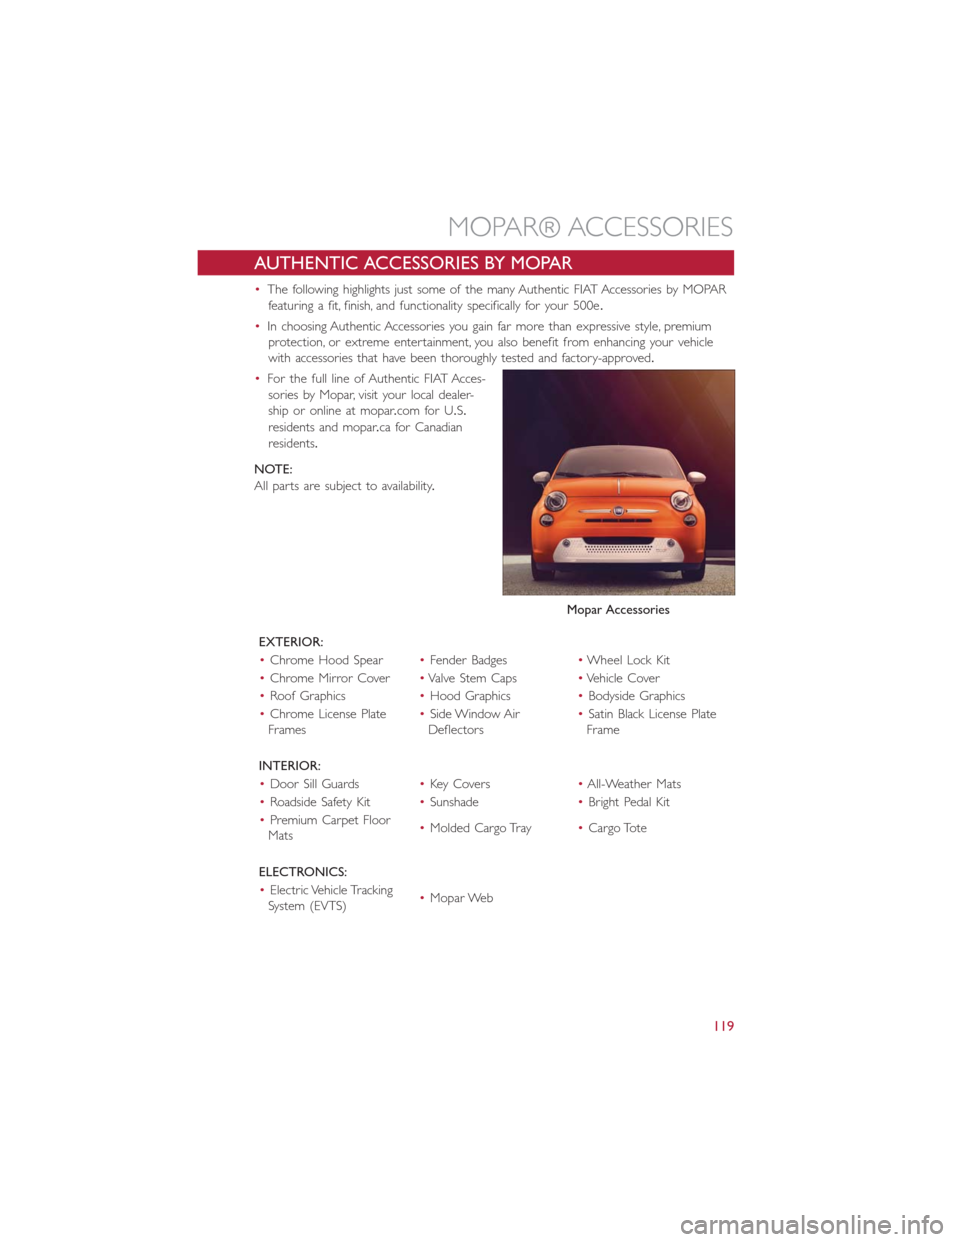
•The following highlights just some of the many Authentic FIAT Accessories by MOPAR
featuring a fit, finish, and functionality specifically for your 500e.
•In choosing Authentic Accessories you gain far more than expressive style, premium
protection, or extreme entertainment, you also benefit from enhancing your vehicle
with accessories that have been thoroughly tested and factory-approved.
•For the full line of Authentic FIAT Acces-
sories by Mopar, visit your local dealer-
ship or online at mopar.com for U.S.
residents and mopar.ca for Canadian
residents.
NOTE:
All parts are subject to availability.
EXTERIOR:
•Chrome Hood Spear•Fender Badges•Wheel Lock Kit
•Chrome Mirror Cover•ValveStemCaps•Vehicle Cover
•Roof Graphics•Hood Graphics•Bodyside Graphics
•Chrome License Plate
Frames•Side Window Air
Deflectors•Satin Black License Plate
Frame
INTERIOR:
•Door Sill Guards•Key Covers•All-Weather Mats
•Roadside Safety Kit•Sunshade•Bright Pedal Kit
•Premium Carpet Floor
Mats•Molded Cargo Tray•Cargo Tote
ELECTRONICS:
•Electric Vehicle Tracking
System (EVTS)•Mopar Web
Mopar Accessories
MOPAR® ACCESSORIES
119
Page 123 of 132
Adding Washer Fluid............107
Air Bag
Advanced Front Air Bag.........23
Advance Front Air Bag.........23
Air Bags.................23
Air Bag Warning Light........23, 26
Driver Knee Air Bag...........24
Enhanced Accident Response......25
Event Data Recorder (EDR)......26
Front Air Bag..............23
Passenger Knee Air Bag.........24
Rollover.................23
Side Impacts...............23
Air Bag Light...............26, 84
Air Conditioner Maintenance.......107
Air Conditioning Refrigerant........107
Air Conditioning System..........107
Alarm
Disarm The System...........21
Vehicle Security Alarm.........21
Alarm (Security Alarm).........21, 88
Anti-Lock Warning Light...........84
Appearance Care.............107
Audio Systems (Radio)...........58
Automatic Temperature Control (ATC)...48
Battery...................107
Body Mechanism Lubrication........107
Brake Fluid.................106
Brakes...................107
Brake System................107
Master Cylinder............107
Warning Light..............85
Bulb Replacement.............117
Bulbs, Light.................117
Capacities, Fluid...............106
Car Washes................107
Charging...................16
Child Restraints...............27
Installing Child Restraints Using The
Vehicle Seat Belt.............29
Lower Anchors And Tethers For
Children.................29
Using The Top Tether Anchorage....29
Child Seat Installation............27
Cleaning
Wheels................107Windshield Wiper Blades.......107
Climate Control
Automatic................48
Clock....................57
Clock Setting................57
Cluster Warning/Indicator Lights
Anti-Lock Brake (ABS) Light......84
Brake Warning Light...........85
Electronic Speed Control SET
Indicator.................88
Front Fog Light Indicator........88
High Beam Indicator..........88
Park/Headlight ON Indicator......88
Turn Signal Indicator..........88
Vehicle Security Light..........88
Compact Spare Tire............114
Cooling System...............107
Adding Coolant (Antifreeze).....107
Coolant Capacity...........106
Coolant Level.............107
Disposal Of Used Coolant......107
Drain, Flush, And Refill.........107
Inspection...............107
Points To Remember.........107
Pressure Cap.............107
Selection Of Coolant
(Antifreeze)...........106, 107
Corrosion Protection...........107
Customer Assistance............
118
Customer Programmable Features.....79
Daytime Running Lights...........40
Defects, Reporting.............118
Disarming, Security System.........21
Door Locks.................20
Electronics
Your Vehicle's Sound System......52
Electronic Speed Control
(Cruise Control).............44
Electronic Vehicle Information Center
(EVIC)................77, 78
Emergency, In Case Of
Towing.................100
Engine...................104
Enhanced Accident Response
Feature...............25, 100
Event Data Recorder............102
INDEX
121
Page 125 of 132
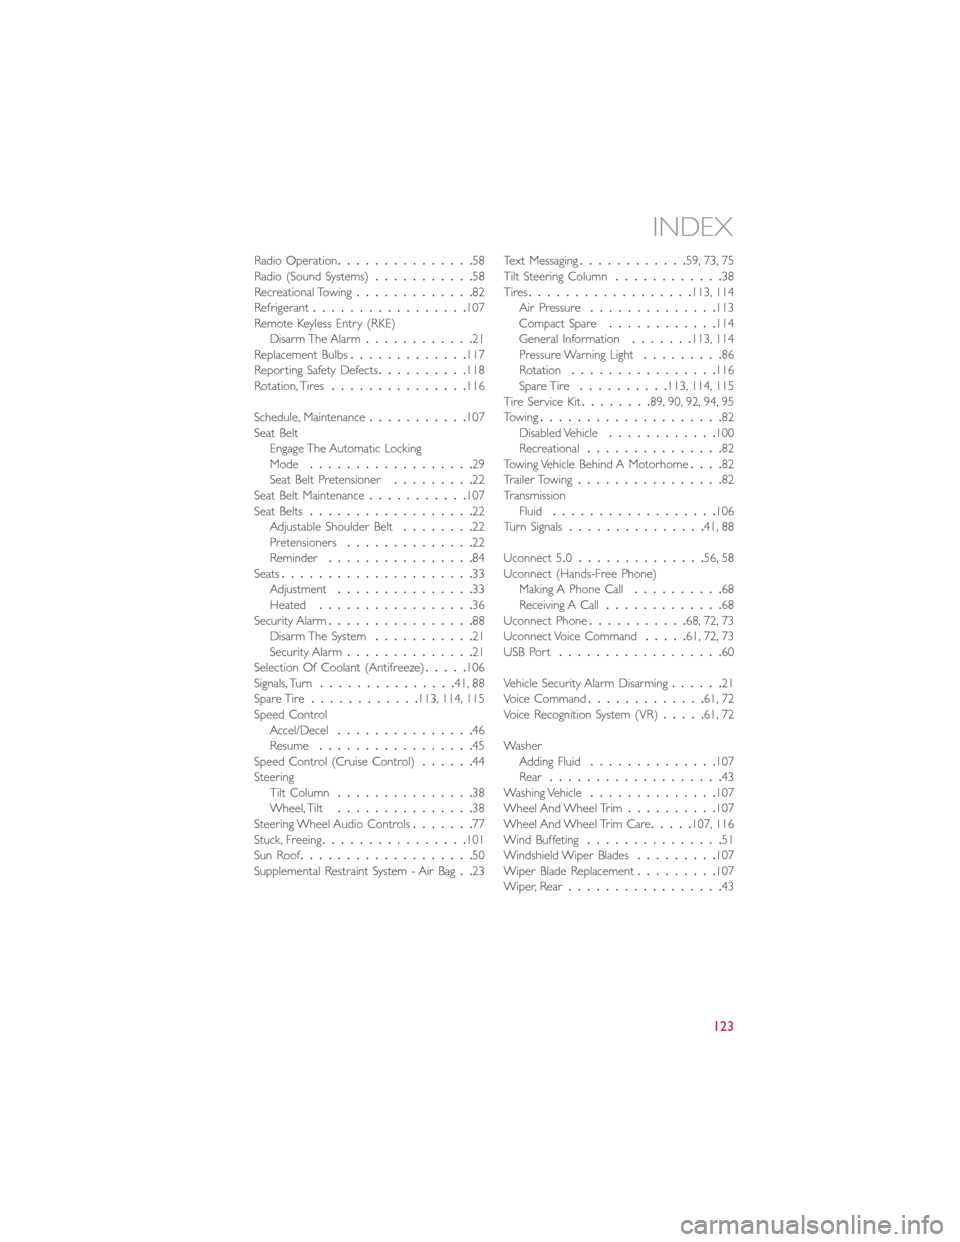
Radio Operation...............58
Radio (Sound Systems)...........58
Recreational Towing.............82
Refrigerant.................107
Remote Keyless Entry (RKE)
Disarm The Alarm............21
Replacement Bulbs.............117
Reporting Safety Defects..........118
Rotation, Tires...............116
Schedule, Maintenance...........107
Seat Belt
Engage The Automatic Locking
Mode..................29
Seat Belt Pretensioner.........22
Seat Belt Maintenance...........107
Seat Belts..................22
Adjustable Shoulder Belt........22
Pretensioners..............22
Reminder................84
Seats.....................33
Adjustment...............33
Heated.................36
Security Alarm................88
Disarm The System...........21
Security Alarm..............21
Selection Of Coolant (Antifreeze).....106
Signals, Turn...............41, 88
Spare Tire............113, 114, 115
Speed Control
Accel/Decel...............46
Resume.................45
Speed Control (Cruise Control)......44
Steering
Tilt Column...............38
Wheel, Tilt...............38
Steering Wheel Audio Controls.......77
Stuck, Freeing................101
Sun Roof
...................50
Supplemental Restraint System - Air Bag..23Text Messaging............59, 73, 75
Tilt Steering Column............38
Tires..................113, 114
Air Pressure..............113
Compact Spare............114
General Information.......113, 114
Pressure Warning Light.........86
Rotation................116
Spare Tire..........113, 114, 115
Tire Service Kit........89, 90, 92, 94, 95
Towing....................82
Disabled Vehicle............100
Recreational...............82
Towing Vehicle Behind A Motorhome....82
Trailer Towing................82
Transmission
Fluid..................106
Turn Signals...............41, 88
Uconnect 5.0..............56, 58
Uconnect (Hands-Free Phone)
Making A Phone Call..........68
Receiving A Call.............68
Uconnect Phone...........68, 72, 73
Uconnect Voice Command.....61, 72, 73
USB Port..................60
Vehicle Security Alarm Disarming......21
Voice Command.............61, 72
Voice Recognition System (VR).....61, 72
Washer
Adding Fluid..............107
Rear...................43
Washing Vehicle..............107
Wheel And Wheel Trim..........107
Wheel And Wheel Trim Care
.....107, 116
Wind Buffeting...............51
Windshield Wiper Blades.........107
Wiper Blade Replacement.........107
Wiper, Rear.................43
INDEX
123