start stop button FIAT 500E 2016 2.G User Guide
[x] Cancel search | Manufacturer: FIAT, Model Year: 2016, Model line: 500E, Model: FIAT 500E 2016 2.GPages: 132, PDF Size: 4.59 MB
Page 19 of 132

NOTE:
•The vehicle will initiate the charging cycle automatically when all the conditions are
satisfied.
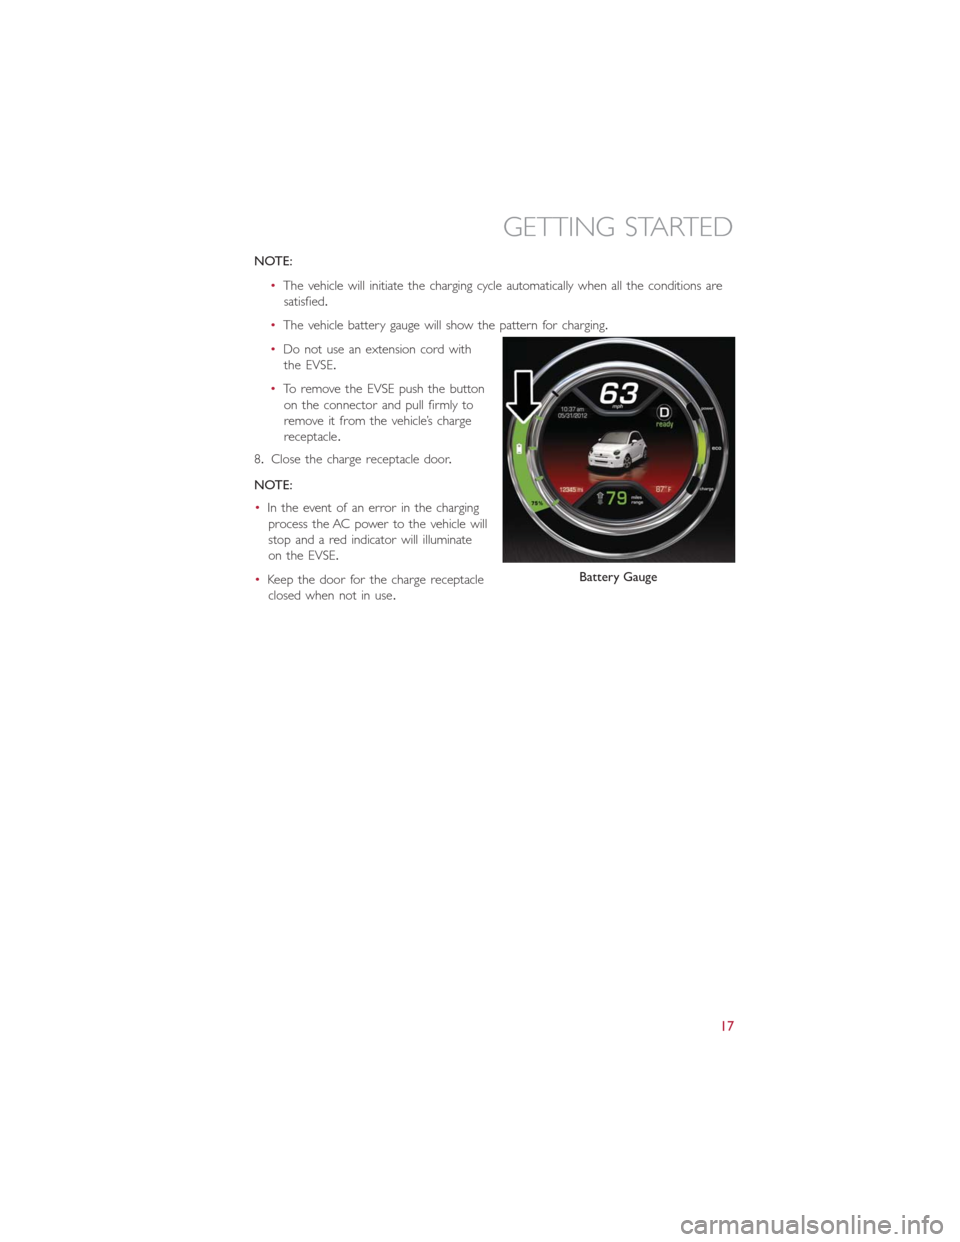
•The vehicle battery gauge will show the pattern for charging.
•Do not use an extension cord with
the EVSE.
•To remove the EVSE push the button
on the connector and pull firmly to
remove it from the vehicle’s charge
receptacle.
8.Close the charge receptacle door.
NOTE:
•In the event of an error in the charging
process the AC power to the vehicle will
stop and a red indicator will illuminate
on the EVSE.
•Keep the door for the charge receptacle
closed when not in use.
Battery Gauge
GETTING STARTED
17
Page 34 of 132

Reactive Head Restraints — Front Seats
The front driver and passenger seats are equipped with Reactive Head Restraints.In the
event of a rear impact the Reactive Head Restraints will automatically extend forward
minimizing the gap between the back of the occupant's head and the Reactive Head Re-
straint.
To raise the head restraint, pull upward on the head restraint.To lower the head re-
straint, push the adjustment button, located at the base of the head restraint, and push
downward on the head restraint.
The Reactive Head Restraints will automatically return to their normal position following a
rear impact.If the Reactive Head Restraints do not return to their normal position, see
your authorized dealership immediately.
NOTE:
The head restraints should only be removed by qualified technicians, for service purposes
only.If either of the head restraints require removal, see your authorized dealership.
WARNING!
•A loose head restraint thrown forward in a collision or hard stop could cause seri-
ous injury or death to occupants of the vehicle.Always securely stow removed
head restraints in a location outside the occupant compartment.
•ALL the head restraints MUST be reinstalled in the vehicle to properly protect
the occupants.Follow the re-installation instructions above prior to operating the
vehicle or occupying a seat.
•Do not place items over the top of the Reactive Head Restraint, such as coats,
seat covers or portable DVD players.These items may interfere with the opera-
tion of the Reactive Head Restraint in the event of a collision and could result in
serious injury or death.
Rear Head Restraints
To raise the head restraint, pull upward on the head restraint.To lower the head re-
straint, push the adjustment button, located at the base of the head restraint, and push
downward on the head restraint.Refer to “Occupant Restraints” in “Things To Know Be-
fore Starting Your Vehicle” in your Owner’s Manual on the DVD for further information
on tether routing.
NOTE:
To remove the head restraint, raise it as far as it can go then push the release button and
the adjustment button at the base of each post while pulling the head restraint up.To
reinstall the head restraint, put the head restraint posts into the holes and push down-
ward.Then adjust the head restraint to the appropriate height.
GETTING STARTED
32
Page 94 of 132

Sealing A Tire With Tire Service Kit
(A) Whenever You Stop To Use Tire Service Kit:
1.Pull over to a safe location and turn on the vehicle’s Hazard Warning flashers.
2.Verify that the valve stem (on the wheel with the deflated tire) is in a position that is
near to the ground.This will allow the Tire Service Kit Hoses (6) and (7) to reach the
valve stem and keep the Tire Service Kit flat on the ground.This will provide the best
positioning of the kit when injecting the sealant into the deflated tire and running the
air pump.Move the vehicle as necessary to place the valve stem in this position be-
fore proceeding.
3.Place the transmission in PARK (auto transmission) or in Gear (manual transmission)
and place the ignition in the OFF position.
4.Set the parking brake.
(B) Setting Up To Use Tire Service Kit:
1.Push in the Mode Select Knob (5) and turn to the Sealant Mode position.
2.Uncoil the Sealant Hose (6) and then remove the cap from the fitting at the end of
the hose.
3.Place the Tire Service Kit flat on the ground next to the deflated tire.
4.Remove the cap from the valve stem and then screw the fitting at the end of the
Sealant Hose (6) onto the valve stem.
5.Uncoil the Power Plug (8) and insert the plug into the vehicle’s 12 Volt power outlet.
NOTE:
Do not remove foreign objects (e.g., screws or nails) from the tire.
(C) Injecting Tire Service Kit Sealant Into The Deflated Tire:
•Always start the engine before turning ON the Tire Service Kit.
NOTE:
Manual transmission vehicles must have the parking brake engaged and the gear selector
in NEUTRAL.
•After pushing the Power Button (4), the sealant (white fluid) will flow from the Sealant
Bottle (1) through the Sealant Hose (6) and into the tire.
NOTE:
Sealant may leak out through the puncture in the tire.
WHAT TO DO IN EMERGENCIES
92
Page 103 of 132

In order to move your vehicle to the side of the road the transmission must be in NEU-
TRAL and the 12 Volt system must be functional.To place the transmission into NEU-
TRAL you must turn the ignition OFF and then back to the RUN position (cycle the igni-
tion) then push the NEUTRAL button.
NOTE:
The high voltage battery will remain disabled after an Enhanced Accident Response Event
and must be reset by your authorized dealership.
FREEING A STUCK VEHICLE
If your vehicle becomes stuck in mud, sand or snow, it can often be moved using a rock-
ing motion.Turn the steering wheel right and left to clear the area around the front
wheels.Then shift back and forth between DRIVE and REVERSE while gently pushing the
accelerator.Use the least amount of accelerator pedal pressure that will maintain the
rocking motion, without spinning the wheels.
NOTE:
Push the “ESC Off ” switch, to place the Electronic Stability Control (ESC) system in “Par-
tial Off ” mode, before rocking the vehicle.Refer to “Electronic Brake Control” in “Start-
ing And Operating” on the DVD for further information.Once the vehicle has been
freed, push the “ESC Off ” switch again to restore “ESC On” mode.
CAUTION!
•When “rocking” a stuck vehicle by shifting between DRIVE and REVERSE, do not
spin the wheels faster than 15 mph (24 km/h), or drivetrain damage may result.
•Spinning the wheels too fast may lead to transmission overheating and failure.It
can also damage the tires.Do not spin the wheels above 30 mph (48 km/h) while
in gear.
WARNING!
Fast spinning tires can be dangerous.Forces generated by excessive wheel speeds may
cause damage, or even failure, of the axle and tires.A tire could explode and injure
someone.Do not spin your vehicle's wheels faster than 30 mph (48 km/h) or for lon-
ger than 30 seconds continuously without stopping when you are stuck and do not let
anyone near a spinning wheel, no matter what the speed.
WHAT TO DO IN EMERGENCIES
101