key FIAT 500L 2015 2.G User Guide
[x] Cancel search | Manufacturer: FIAT, Model Year: 2015, Model line: 500L, Model: FIAT 500L 2015 2.GPages: 148, PDF Size: 3.77 MB
Page 3 of 148
INTRODUCTION/WELCOMEWELCOME FROM FIAT...............2
CONTROLS AT A GLANCEDRIVER COCKPIT..................4INSTRUMENT CLUSTER...............6
GETTING STARTEDKEY FOB.......................8VEHICLE SECURITY ALARM............9POWER DOOR LOCKS...............9SEAT BELT SYSTEMS................11SUPPLEMENTAL RESTRAINT SYSTEM (SRS) —AIR BAGS......................12CHILD RESTRAINTS................15HEAD RESTRAINTS.................19FRONT SEATS....................22REAR SEATS.....................23HEATED SEATS...................24TILT/TELESCOPING STEERING COLUMN...25
OPERATING YOUR VEHICLEENGINE BREAK-IN RECOMMENDATIONS...26TURN SIGNAL/LIGHTS/HIGH BEAM LEVER...26WIPER/WASHER LEVER..............28ELECTRONIC SPEED CONTROL.........29MANUAL CLIMATE CONTROLS.........31AUTOMATIC TEMPERATURE CONTROLS(ATC).........................32REAR PARK ASSIST.................33POWER SUNROOF.................33EURO TWIN CLUTCH SIX-SPEEDTRANSMISSION...................34ADDING FUEL...................37ELECTRONIC STABILITY CONTROL (ESC)...38
ELECTRONICSYO U R V E H I C L E ' S S O U N D S YS T E M.......40IDENTIFYING YOUR RADIO............42Uconnect® 5.0...................43Uconnect® 6.5N..................55Uconnect® PHONE.................74STEERING WHEEL AUDIO CONTROLS.....84ELECTRONIC VEHICLE INFORMATIONCENTER (EVIC)...................84PROGRAMMABLE FEATURES...........85UNIVERSAL GARAGE DOOR OPENER(HomeLink®)....................86POWER INVERTER — IF EQUIPPED.......88
POWER OUTLET..................89
UTILITY
TRAILER TOWING.................90RECREATIONAL TOWING (BEHINDMOTORHOME, ETC.)...............90
WHAT TO DO IN EMERGENCIES
ROADSIDE ASSISTANCE..............92INSTRUMENT CLUSTER WARNING LIGHTS..92INSTRUMENT CLUSTER INDICATOR LIGHTS..96IF YOUR ENGINE OVERHEATS..........98JACKING AND TIRE CHANGING.........99TIRE SERVICE KIT.................107JUMP-STARTING PROCEDURE..........113SHIFT LEVER OVERRIDE.............116TOW I N G A D I S A B L E D V E H I C L E.........116FREEING A STUCK VEHICLE...........118EVENT DATA RECORDER (EDR)........120CAP-LESS FUEL FILL FUNNEL..........120
MAINTAINING YOUR VEHICLEOPENING THE HOOD..............121ENGINE COMPARTMENT............122FLUID CAPACITIES................124FLUIDS, LUBRICANTS AND GENUINEPA RT S.......................124MAINTENANCE PROCEDURES.........126MAINTENANCE SCHEDULE...........126FUSES........................130TIRE PRESSURES.................133SPARE TIRES — IF EQUIPPED..........134WHEEL AND WHEEL TRIM CARE.......135REPLACEMENT BULBS..............136
CONSUMER ASSISTANCEFIAT CUSTOMER CENTER............137FIAT CANADA CUSTOMER CENTER......137ASSISTANCE FOR THE HEARING IMPAIRED..137PUBLICATIONS ORDERING...........137REPORTING SAFETY DEFECTS IN THEUNITED STATES..................138
MOPAR ACCESSORIESAUTHENTIC ACCESSORIES BY MOPAR®...139
FREQUENTLY ASKED QUESTIONSFREQUENTLY ASKED QUESTIONS.......140
INDEX......................141
TABLE OF CONTENTS
1
Page 5 of 148
VEHICLES SOLD IN CANADA
With respect to any vehicles sold in Canada, the name FCA US LLC shall be deemed to
be deleted and the name Chrysler Canada Inc.used in substitution (excluding legal lines).
WARNING!
•Pedals that cannot move freely can cause loss of vehicle control and increase the
risk of serious personal injury.
•Always make sure that objects cannot fall into the driver foot well while the ve-
hicle is moving.Objects can become trapped under the brake pedal and accelera-
tor pedal causing a loss of vehicle control.
•Failure to properly follow floor mat installation or mounting can cause interference
with the brake pedal and accelerator pedal operation causing loss of control of
the vehicle.
•Never leave children alone in a vehicle, or with access to an unlocked vehicle.Al-
lowing children to be in a vehicle unattended is dangerous for a number of rea-
sons.A child or others could be seriously or fatally injured.Children should be
warned not to touch the parking brake, brake pedal or the shift lever/transmission
gear selector.
•Do not leave the key fob in or near the vehicle, or in a location accessible to chil-
dren, and do not leave the ignition of a vehicle equipped with Keyless Enter-N-Go
in the ACC or ON/RUN mode.A child could operate power windows, other con-
trols, or move the vehicle.
•Never use the “PARK” position as a substitute for the parking brake.Always apply
the parking brake fully when parked to guard against vehicle movement and pos-
sible injury or damage.
•Refer to your Owner's Manual on the DVD for further details.
Use Of Aftermarket Products (Electronics)
The use of aftermarket devices including cell phones, MP3 players, GPS systems, or char-
gers may affect the performance of on-board wireless features.If you are experiencing
difficulties with any of your wireless features, try disconnecting your aftermarket devices
to see if the situation improves.If your symptoms persist, please see an authorized dealer.
FIAT is a registered trademark of FIAT Group Marketing & Corporate Communication
SpA, used under license by FCA US LLC.
COPYRIGHT ©2014 FCA US LLC
INTRODUCTION/WELCOME
3
Page 10 of 148
KEY FOB
Locking And Unlocking The Doors
And Liftgate
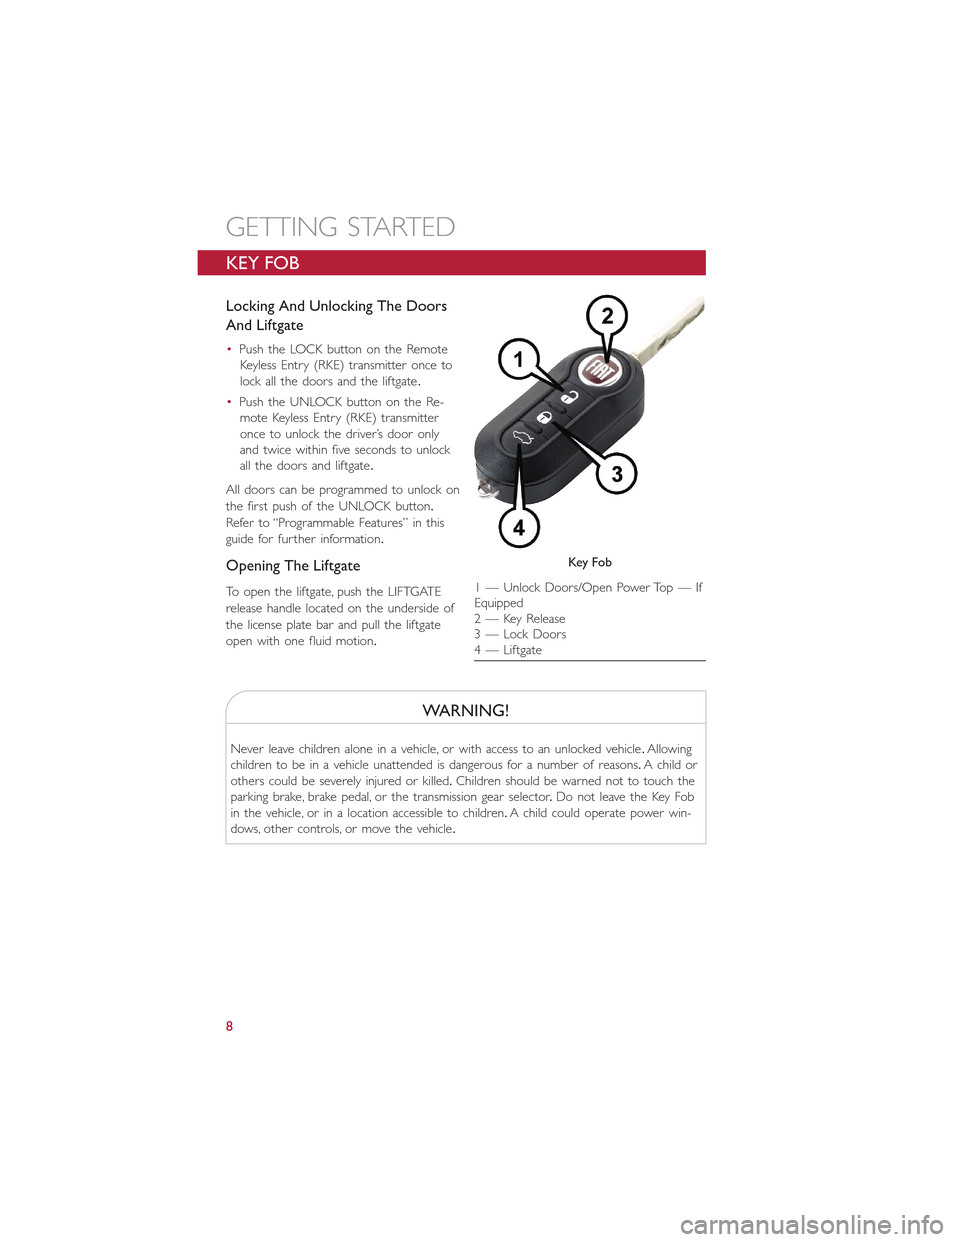
•Push the LOCK button on the Remote
Keyless Entry (RKE) transmitter once to
lock all the doors and the liftgate.
•Push the UNLOCK button on the Re-
mote Keyless Entry (RKE) transmitter
once to unlock the driver’s door only
and twice within five seconds to unlock
all the doors and liftgate.
All doors can be programmed to unlock on
the first push of the UNLOCK button.
Refer to “Programmable Features” in this
guide for further information.
Opening The Liftgate
To open the liftgate, push the LIFTGATE
release handle located on the underside of
the license plate bar and pull the liftgate
open with one fluid motion.
WARNING!
Never leave children alone in a vehicle, or with access to an unlocked vehicle.Allowing
children to be in a vehicle unattended is dangerous for a number of reasons.A child or
others could be severely injured or killed.Children should be warned not to touch the
parking brake, brake pedal, or the transmission gear selector.Do not leave the Key Fob
in the vehicle, or in a location accessible to children.A child could operate power win-
dows, other controls, or move the vehicle.
Key Fob
1 — Unlock Doors/Open Power Top — IfEquipped2 — Key Release3 — Lock Doors4 — Liftgate
GETTING STARTED
8
Page 11 of 148
VEHICLE SECURITY ALARM
The Vehicle Security Alarm monitors the vehicle doors for unauthorized entry and the
Keyless Enter-N-Go™ START/STOP button for unauthorized operation.While the Vehicle
Security Alarm is armed, interior switches for door locks and decklid release are disabled.
If something triggers the alarm, the Vehicle Security Alarm will provide the following au-
dible and visible signals: the horn will pulse, the park lamps and/or turn signals will flash,
and the Vehicle Security Light in the instrument cluster will flash.
To Arm The System:
Push the Key Fob LOCK button.
To Disarm The System:
Push the Key Fob UNLOCK button or cycle the ignition to the ON/RUN position.
The Vehicle Security Alarm is designed to protect your vehicle.However, you can create
conditions where the Vehicle Security Alarm will give you a false alarm.If one of the pre-
viously described arming sequences has occurred, the Vehicle Security Alarm will arm re-
gardless of whether you are in the vehicle or not.If you remain in the vehicle and open
a door, the alarm will sound.If this occurs, disarm the Vehicle Security Alarm.
If the Vehicle Security Alarm is armed and the battery becomes disconnected, the Vehicle
Security Alarm will remain armed when the battery is reconnected.The exterior lights
will flash, and the horn will sound.If this occurs, disarm the Vehicle Security Alarm.
POWER DOOR LOCKS
•Push the central LOCK/UNLOCK button located on the instrument panel, in the
switch bank below the radio.The button has an LED that indicates whether the doors
are locked or unlocked.
•LED ON:doors locked.Pushing the central LOCK/UNLOCK button once will unlock
all doors.The LED will switch off once the doors are unlocked.
•LED OFF:doors unlocked.Pushing the central LOCK/UNLOCK button once will lock
all doors.The LED will switch on once the doors are locked.
•Once the doors have been locked with the RKE transmitter, it will no longer be pos-
sible to unlock them by pushing central LOCK/UNLOCK button.
NOTE:
With central locking active (LED ON), opening one of the front doors, it is possible to
perform a central unlocking (LED OFF).With central locking active (LED ON), in order
to open one of the rear passenger doors, it is necessary pulling the internal door handle
twice.With one of the rear door open (LED OFF), the unlocking is performed only for
that door, not for all the vehicle.
•To unlock the front doors, pull the inside door handle to the first detent.If the rear
doors are locked, you must pull the door handle once to unlock the door and pull the
door handle a second time to open the door.
GETTING STARTED
9
Page 12 of 148
CAUTION!
An unlocked vehicle is an invitation to thieves.Always remove the key from the ignition
and lock all of the doors when leaving the vehicle unattended.
WARNING!
•Do not leave children or animals inside parked vehicles in hot weather.Interior
heat build-up may cause serious injury or death.
•For personal security and safety in the event of an collision, lock the vehicle doors
as you drive as well as when you park and leave the vehicle.
•Before exiting a vehicle, always turn the vehicle OFF, apply the parking brake, shift
the Euro Twin Clutch transmission into PARK or the manual transmission into RE-
VERSE, and remove the Key Fob from the ignition.When leaving the vehicle, al-
ways lock your vehicle.
•Never leave children alone in a vehicle, or with access to an unlocked vehicle.
•Allowing children to be in a vehicle unattended is dangerous for a number of rea-
sons.A child or others could be seriously or fatally injured.Children should be
warned not to touch the parking brake, brake pedal or the transmission gear se-
lector.
•Do not leave the Key Fob in or near the vehicle, or in a location accessible to
child.A child could operate power windows, other controls, or move the vehicle.
Doors Lock With One Or More Doors Open
•It is possible to lock the vehicle through the RKE, internal button or external key pawl,
or if one or more doors are open.At lock command request, LED is switched ON.At
closing of the last door, the vehicle maintains the central locking status if key is not
inserted in Ignition Device; otherwise the vehicle will be unlocked, and the LED will be
switched OFF.
NOTE:
If the key is not inserted in the ignition switch but is inside the vehicle, the system does
not recognize the presence of the key and after the closing of last door, the vehicle re-
mains locked.
GETTING STARTED
10
Page 29 of 148
High Beams
•Pull the lever rearward to activate the high beams.
•A high beam symbol will illuminate in the cluster to indicate the high beams are on.
NOTE:
For safe driving, turn off the high beams when oncoming traffic is present to prevent
headlight glare and as a courtesy to other motorists.
Flash To Pass
•Pull the lever toward you to activate the high beams.The high beams will remain on
until the lever is released.
Headlight Delay (Follow Me Home)
•Within two minutes of the ignition switch being turned to the OFF/LOCK position or
the ignition key being removed from the ignition, pull the turn signal lever toward the
steering wheel.
•Each movement of the lever toward the steering wheel will increase the illumination
period by 30 seconds, up to a maximum of 210 seconds.
•To deactivate, pull the multifunction lever toward the steering wheel and hold it for
more than two seconds.
NOTE:
Activation of Follow Me Home is only enabled once per key cycle and the steps outlined
above must be repeated each time you want to activate it.
Fog Lights
•Push the fog light button, located on the center stack of the instrument panel just be-
low the radio, once to turn on the fog lights.
•Push the button a second time to turn the fog lights off.
OPERATING YOUR VEHICLE
27
Page 35 of 148
Heated Mirrors
•The mirrors are heated to melt frost or ice.This feature is activated whenever you
turn on the rear window defroster.
REAR PARK ASSIST
If an object is detected behind the rear bumper while the vehicle is in REVERSE, a visual
warning will display in the instrument cluster and an audible tone will sound.The audible
tone rate will change depending on the distance of the object, getting faster as the object
gets closer to the bumper.The audible tone will become continuous when the distance
between the vehicle and the obstacle is less than 12 inches (30 cm).
POWER SUNROOF
The sunroof has two glass panels (the front one is operational and the rear one fixed)
and is equipped with an electrically operated sun blind.
The power sunroof and the power sun blind can be operated only with the ignition key
turned to the ON/RUN position.
The power sunroof and power sun blind switches are located in the overhead console.
WARNING!
•Never leave children alone in a vehicle, or with access to an unlocked vehicle.
Never leave the Key Fob in or near the vehicle or in a location accessible to chil-
dren.Occupants, particularly unattended children, can become entrapped by the
power sunroof while operating the power sunroof switch.Such entrapment may
result in serious injury or death.
•In a collision, there is greater risk of being thrown from a vehicle with an open
sunroof.You could also be seriously injured or killed.Always fasten your seat belt
properly and make sure all passengers are properly secured too.
•Do not allow small children to operate the sunroof.Never allow your fingers,
other body parts, or any object to project through the sunroof opening.Injury
may result.
To Open
•Pull the power sunroof switch for approximately one second and the sunroof will stop
at the vented position.Pull the power sunroof switch a second time for approximately
one second and release, the sunroof will open fully, then stop automatically.This is
called “Express Open”.
NOTE:
During Express Open operation, any movement of the sunroof switch will stop the sun-
roof.
OPERATING YOUR VEHICLE
33
Page 50 of 148
Uconnect® 5.0 VOICE RECOGNITION QUICK TIPS
Introducing Uconnect®
Start using Uconnect® Voice Recognition with these helpful quick tips.It provides the key
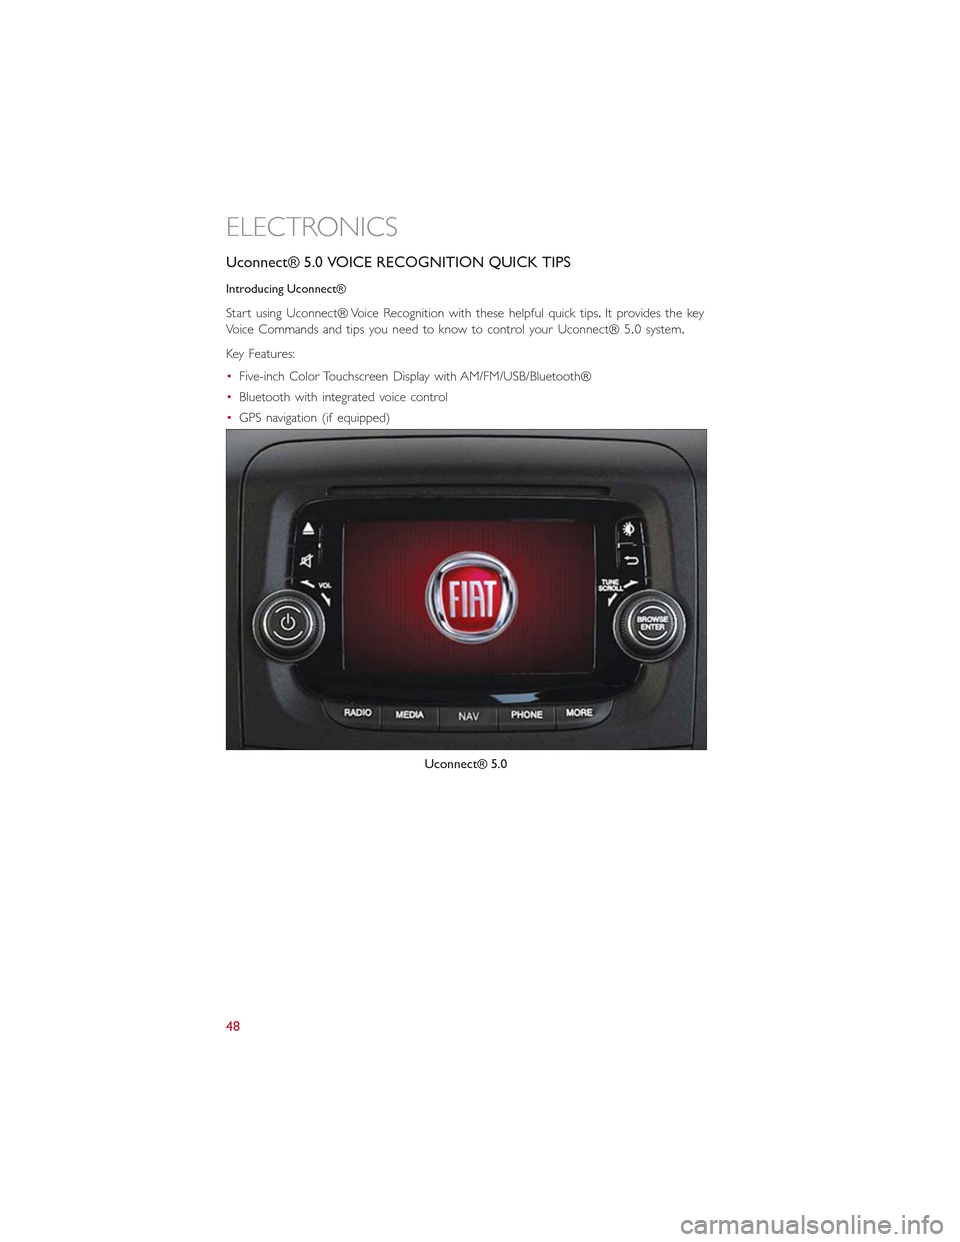
Voice Commands and tips you need to know to control your Uconnect® 5.0 system.
Key Features:
•Five-inch Color Touchscreen Display with AM/FM/USB/Bluetooth®
•Bluetooth with integrated voice control
•GPS navigation (if equipped)
Uconnect® 5.0
ELECTRONICS
48
Page 68 of 148
Taking A Detour
To take a detour you must be navigating a route:
•Press the “Detour” button on the touchscreen.
NOTE:
If the route you are currently taking is the only reasonable option, the device might not
calculate a detour.
•For more information, see your Uconnect® 6.5N Owner’s Manual Supplement.
Uconnect® 6.5A/6.5AN VOICE RECOGNITION QUICK TIPS
Introducing Uconnect®
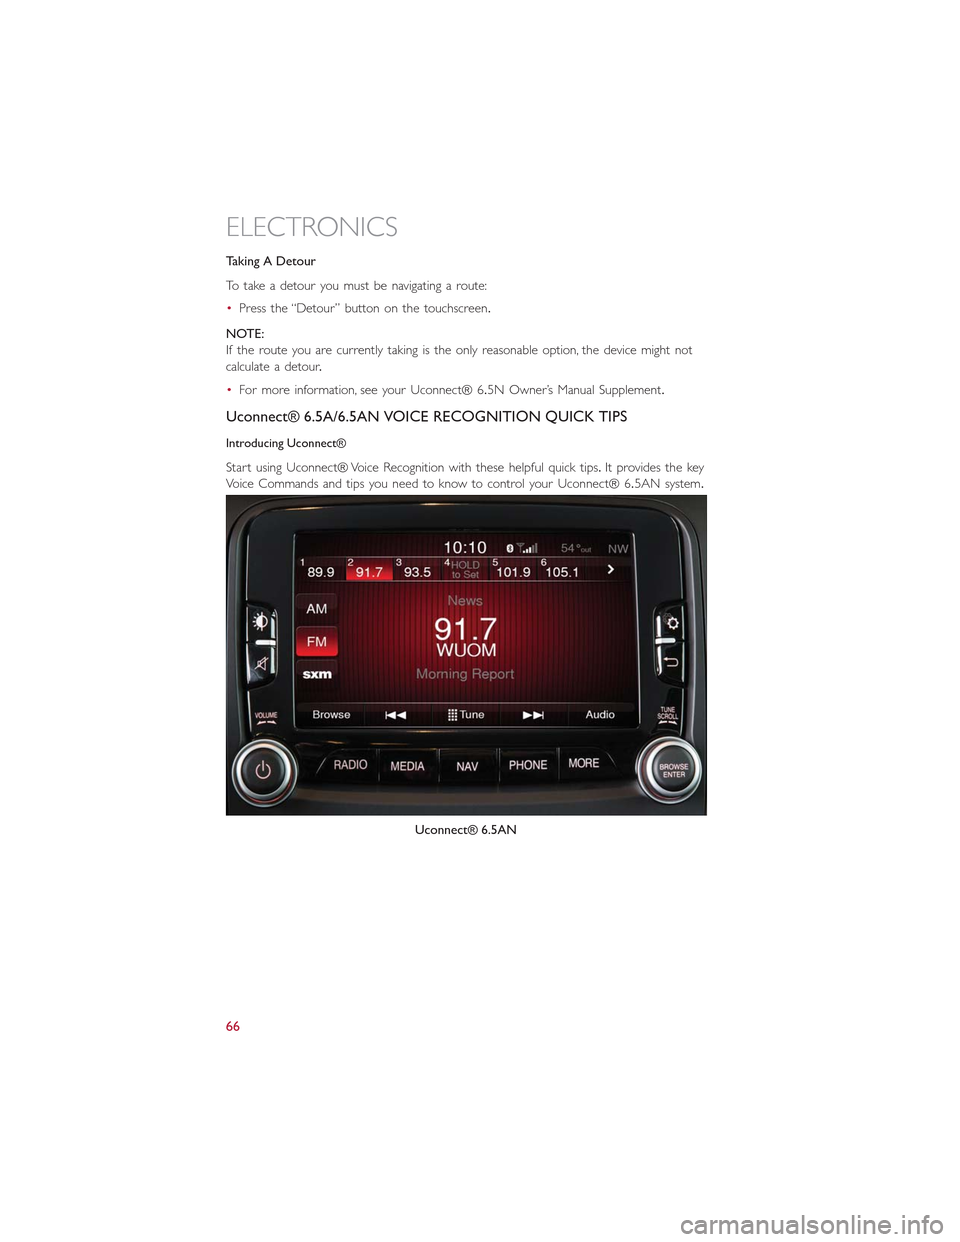
Start using Uconnect® Voice Recognition with these helpful quick tips.It provides the key
Voice Commands and tips you need to know to control your Uconnect® 6.5AN system.
Uconnect® 6.5AN
ELECTRONICS
66
Page 81 of 148
Complete The Android Pairing Procedure:
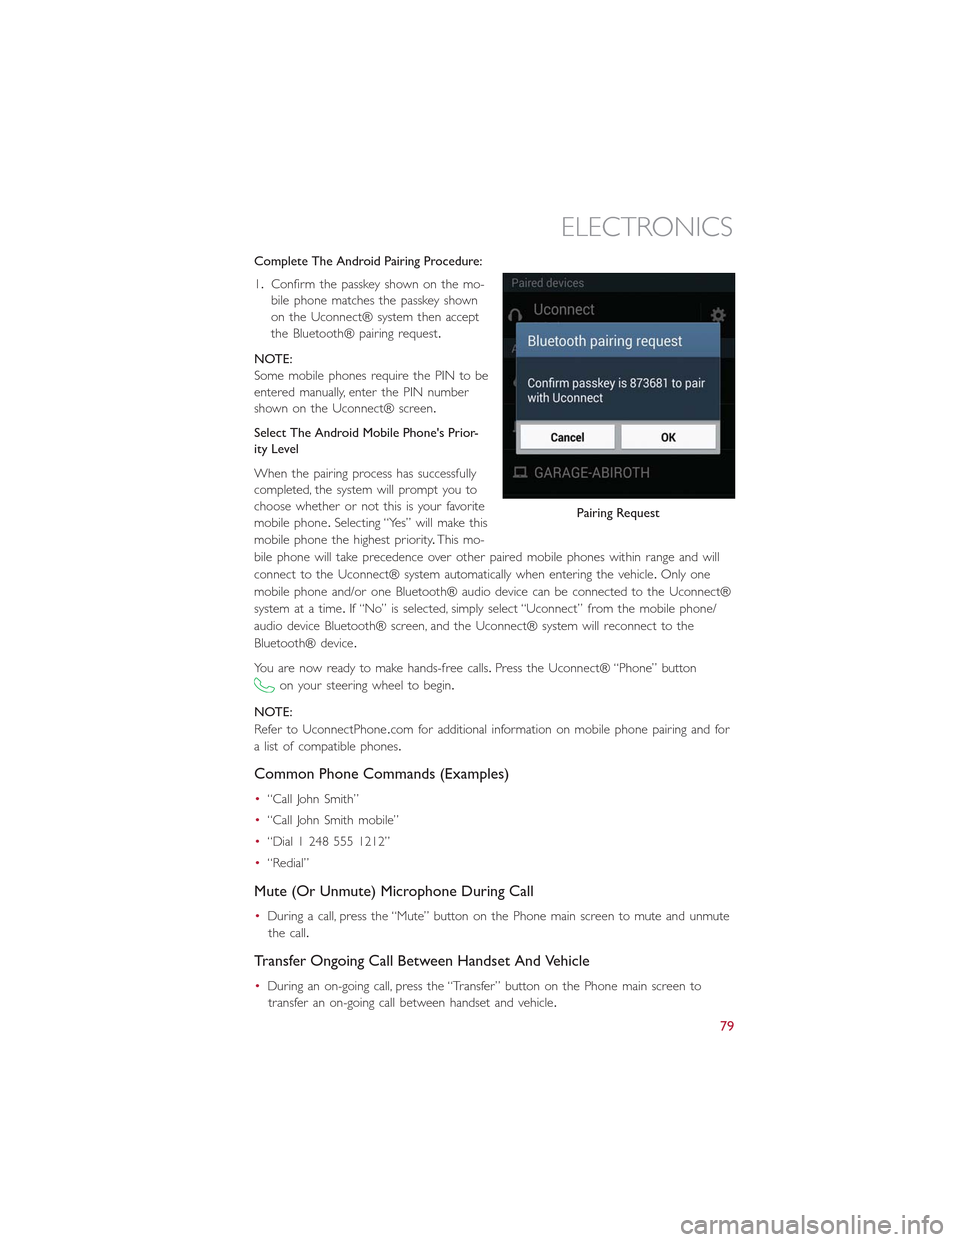
1.Confirm the passkey shown on the mo-
bile phone matches the passkey shown
on the Uconnect® system then accept
the Bluetooth® pairing request.
NOTE:
Some mobile phones require the PIN to be
entered manually, enter the PIN number
shown on the Uconnect® screen.
Select The Android Mobile Phone's Prior-
ity Level
When the pairing process has successfully
completed, the system will prompt you to
choose whether or not this is your favorite
mobile phone.Selecting “Yes” will make this
mobile phone the highest priority.This mo-
bile phone will take precedence over other paired mobile phones within range and will
connect to the Uconnect® system automatically when entering the vehicle.Only one
mobile phone and/or one Bluetooth® audio device can be connected to the Uconnect®
system at a time.If “No” is selected, simply select “Uconnect” from the mobile phone/
audio device Bluetooth® screen, and the Uconnect® system will reconnect to the
Bluetooth® device.
You are now ready to make hands-free calls.Press the Uconnect® “Phone” button
on your steering wheel to begin.
NOTE:
Refer to UconnectPhone.com for additional information on mobile phone pairing and for
a list of compatible phones.
Common Phone Commands (Examples)
•“Call John Smith”
•“Call John Smith mobile”
•“Dial 1 248 555 1212”
•“Redial”
Mute (Or Unmute) Microphone During Call
•During a call, press the “Mute” button on the Phone main screen to mute and unmute
the call.
Transfer Ongoing Call Between Handset And Vehicle
•During an on-going call, press the “Transfer” button on the Phone main screen to
transfer an on-going call between handset and vehicle.
Pairing Request
ELECTRONICS
79