ECU FIAT 500L LIVING 2014 2.G Owners Manual
[x] Cancel search | Manufacturer: FIAT, Model Year: 2014, Model line: 500L LIVING, Model: FIAT 500L LIVING 2014 2.GPages: 420, PDF Size: 9.77 MB
Page 40 of 420
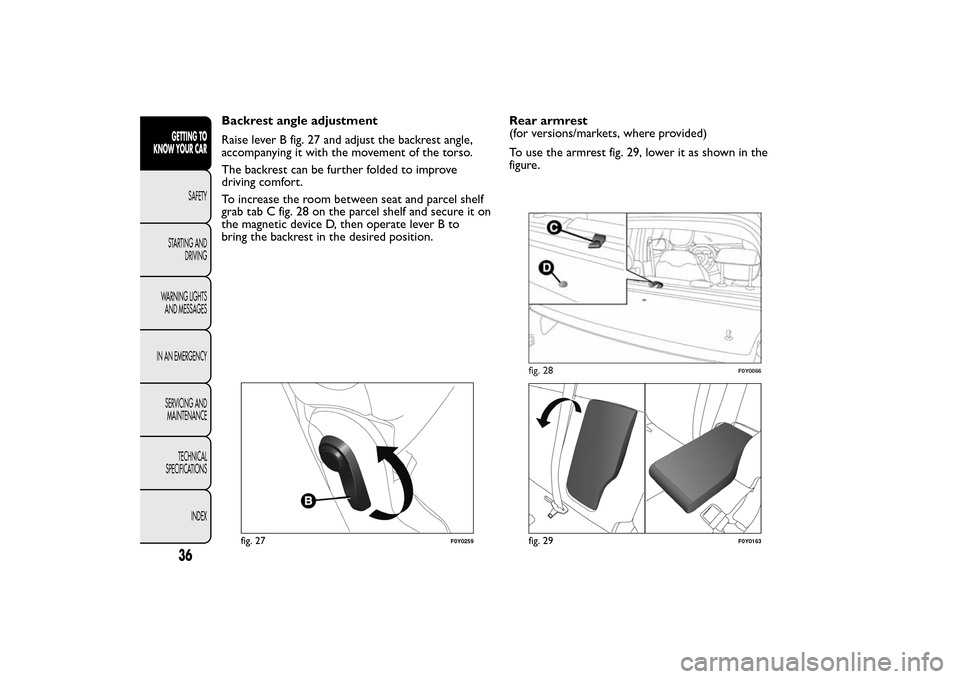
Backrest angle adjustment
Raise lever B fig. 27 and adjust the backrest angle,
accompanying it with the movement of the torso.
The backrest can be further folded to improve
driving comfort.
To increase the room between seat and parcel shelf
grab tab C fig. 28 on the parcel shelf and secure it on
the magnetic device D, then operate lever B to
bring the backrest in the desired position.Rear armrest
(for versions/markets, where provided)
To use the armrest fig. 29, lower it as shown in the
figure.
fig. 27
F0Y0259
fig. 28
F0Y0066
fig. 29
F0Y0163
36GETTING TO
KNOW YOUR CAR
SAFETY
STARTING AND
DRIVING
WARNING LIGHTS
AND MESSAGES
IN AN EMERGENCY
SERVICING AND
MAINTENANCE
TECHNICAL
SPECIFICATIONS
INDEX
Page 70 of 420
"Smart washing" function
Pull the lever towards the steering wheel (unstable
position) to activate the windscreen washer.
Keeping the stalk pulled for more than half a second,
with just one movement it is possible to operate
the washer jet and the wiper at the same time.
The wiper stops working three strokes after the
stalk is released.
A further stroke after approximately six seconds
completes the wiping cycle (for versions/markets,
where provided).
RAIN SENSOR
(for versions/markets, where provided)
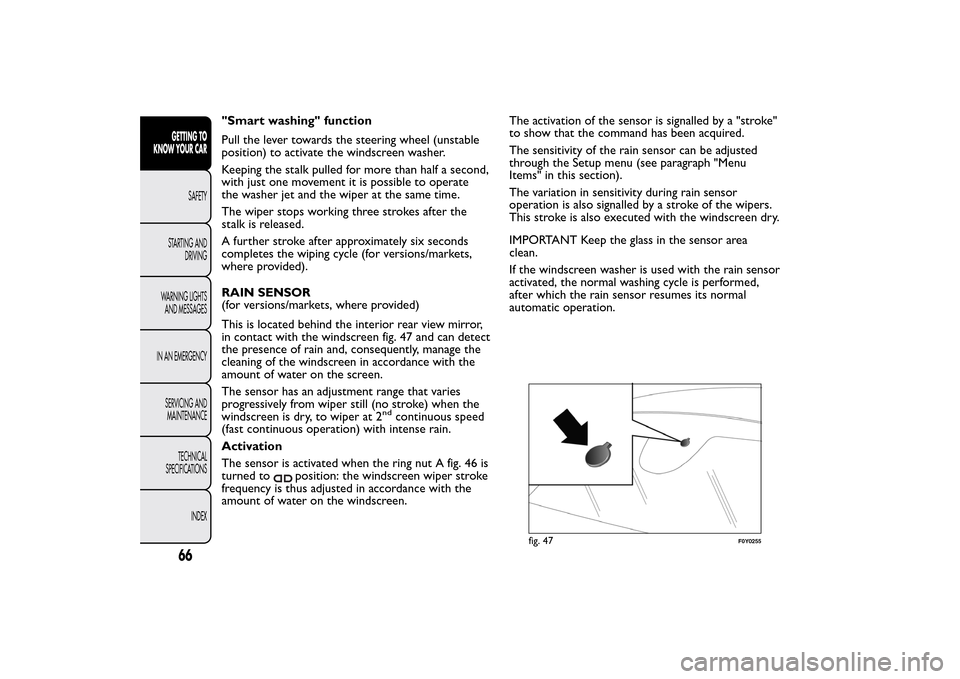
This is located behind the interior rear view mirror,
in contact with the windscreen fig. 47 and can detect
the presence of rain and, consequently, manage the
cleaning of the windscreen in accordance with the
amount of water on the screen.
The sensor has an adjustment range that varies
progressively from wiper still (no stroke) when the
windscreen is dry, to wiper at 2
nd
continuous speed
(fast continuous operation) with intense rain.
Activation
The sensor is activated when the ring nut A fig. 46 is
turned to
position: the windscreen wiper stroke
frequency is thus adjusted in accordance with the
amount of water on the windscreen.The activation of the sensor is signalled by a "stroke"
to show that the command has been acquired.
The sensitivity of the rain sensor can be adjusted
through the Setup menu (see paragraph "Menu
Items" in this section).
The variation in sensitivity during rain sensor
operation is also signalled by a stroke of the wipers.
This stroke is also executed with the windscreen dry.
IMPORTANT Keep the glass in the sensor area
clean.
If the windscreen washer is used with the rain sensor
activated, the normal washing cycle is performed,
after which the rain sensor resumes its normal
automatic operation.
fig. 47
F0Y0255
66GETTING TO
KNOW YOUR CAR
SAFETY
STARTING AND
DRIVING
WARNING LIGHTS
AND MESSAGES
IN AN EMERGENCY
SERVICING AND
MAINTENANCE
TECHNICAL
SPECIFICATIONS
INDEX
Page 99 of 420
Anti-crush safety device
(for versions/markets, where provided)
The car is equipped with an anti-crush safety device
for the raising of the front and rear windows.
This safety system detects the presence of an
obstacle during the window closing travel and
intervenes by stopping and reversing the window
travel, depending on its position.
This device is also useful if the windows are activated
accidentally by children on board the car.
The anti-pinch function is active both during manual
and automatic operation of the electric windows.
Following the intervention of the anti-pinch system,
the window travel is immediately interrupted and
subsequently reversed until the lower end of travel is
reached. The window cannot be operated in any
way during this time.
IMPORTANT If the anti-crush protection intervenes
3 consecutive times within 1 minute or is faulty,
the automatic closing operation of the window is
inhibited, only allowing it in steps of half a second;
the button is released for the subsequent
manoeuvre. In order to restore the correct
operation of the system, the relevant window must
be lowered.Window remote opening/closing by means of
a key with remote control.
(for versions/markets, where provided)
The window can be lowered/lifted holding down the
unlocking (
)/locking (
) button respectively.
The windows move simultaneously as far as the
corresponding button is held down; they will stop
when reaching the upper or lower end of travel
position, or releasing the button.
Electric window system initialisation
If power supply is interrupted when the window is
moving, the electric window automatic operation
must be reinitialised.
The initialisation procedure must be carried out with
the doors closed and for each door, as described
below:
❒fully close the window to be initialised, with
manual operation;
❒after the window has reached the upper end of
travel, hold the up button pressed for at least
one second.
95GETTING TO
KNOW YOUR CARSAFETY
STARTING AND
DRIVING
WARNING LIGHTS
AND MESSAGES
IN AN EMERGENCY
SERVICING AND
MAINTENANCE
TECHNICAL
SPECIFICATIONS
INDEX
Page 104 of 420
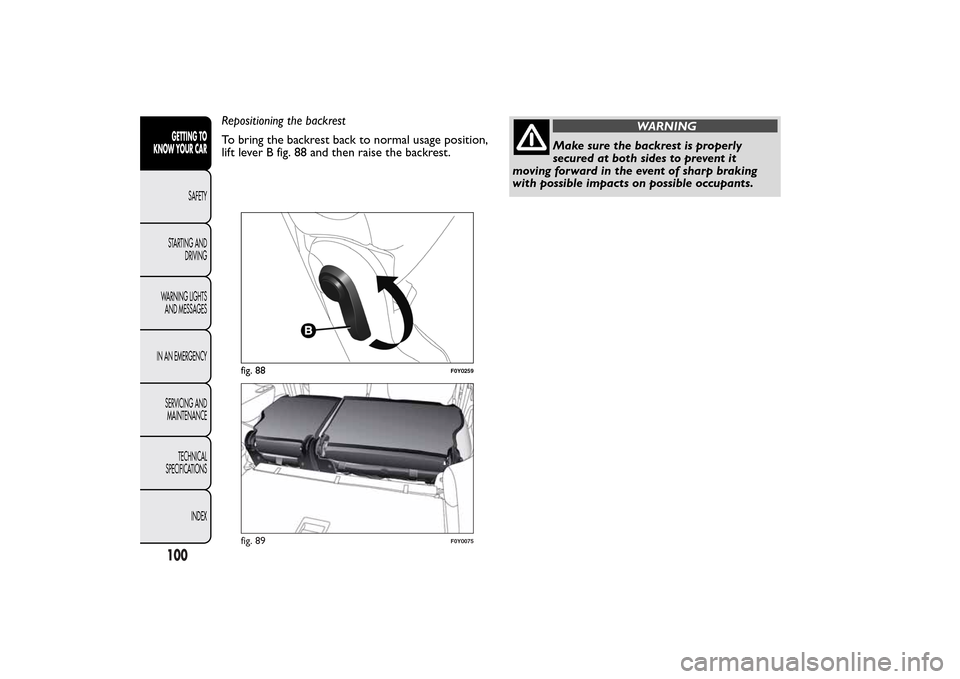
Repositioning the backrest
To bring the backrest back to normal usage position,
lift lever B fig. 88 and then raise the backrest.
WARNING
Make sure the backrest is properly
secured at both sides to prevent it
moving forward in the event of sharp braking
with possible impacts on possible occupants.
fig. 88
F0Y0259
fig. 89
F0Y0075
100GETTING TO
KNOW YOUR CAR
SAFETY
STARTING AND
DRIVING
WARNING LIGHTS
AND MESSAGES
IN AN EMERGENCY
SERVICING AND
MAINTENANCE
TECHNICAL
SPECIFICATIONS
INDEX
Page 106 of 420
Repositioning the rear seat
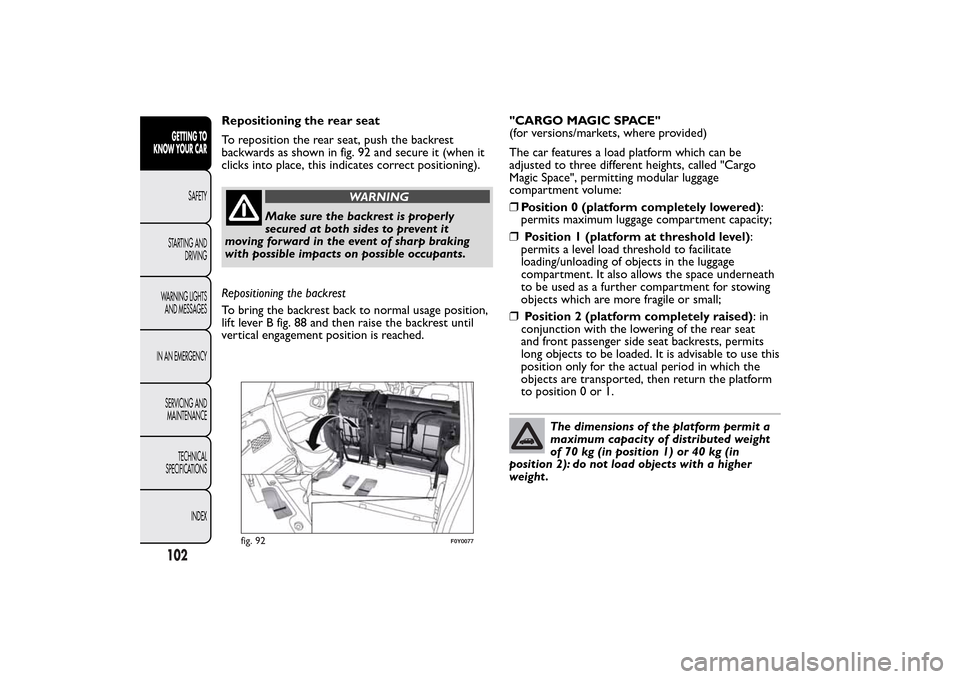
To reposition the rear seat, push the backrest
backwards as shown in fig. 92 and secure it (when it
clicks into place, this indicates correct positioning).
WARNING
Make sure the backrest is properly
secured at both sides to prevent it
moving forward in the event of sharp braking
with possible impacts on possible occupants.
Repositioning the backrest
To bring the backrest back to normal usage position,
lift lever B fig. 88 and then raise the backrest until
vertical engagement position is reached."CARGO MAGIC SPACE"
(for versions/markets, where provided)
The car features a load platform which can be
adjusted to three different heights, called "Cargo
Magic Space", permitting modular luggage
compartment volume:
❒Position 0 (platform completely lowered):
permits maximum luggage compartment capacity;
❒Position 1 (platform at threshold level):
permits a level load threshold to facilitate
loading/unloading of objects in the luggage
compartment. It also allows the space underneath
to be used as a further compartment for stowing
objects which are more fragile or small;
❒Position 2 (platform completely raised):in
conjunction with the lowering of the rear seat
and front passenger side seat backrests, permits
long objects to be loaded. It is advisable to use this
position only for the actual period in which the
objects are transported, then return the platform
to position 0 or 1.
The dimensions of the platform permit a
maximum capacity of distributed weight
of 70 kg (in position 1) or 40 kg (in
position 2): do not load objects with a higher
weight .
fig. 92
F0Y0077
102GETTING TO
KNOW YOUR CAR
SAFETY
STARTING AND
DRIVING
WARNING LIGHTS
AND MESSAGES
IN AN EMERGENCY
SERVICING AND
MAINTENANCE
TECHNICAL
SPECIFICATIONS
INDEX
Page 109 of 420
SECURING YOUR LOAD
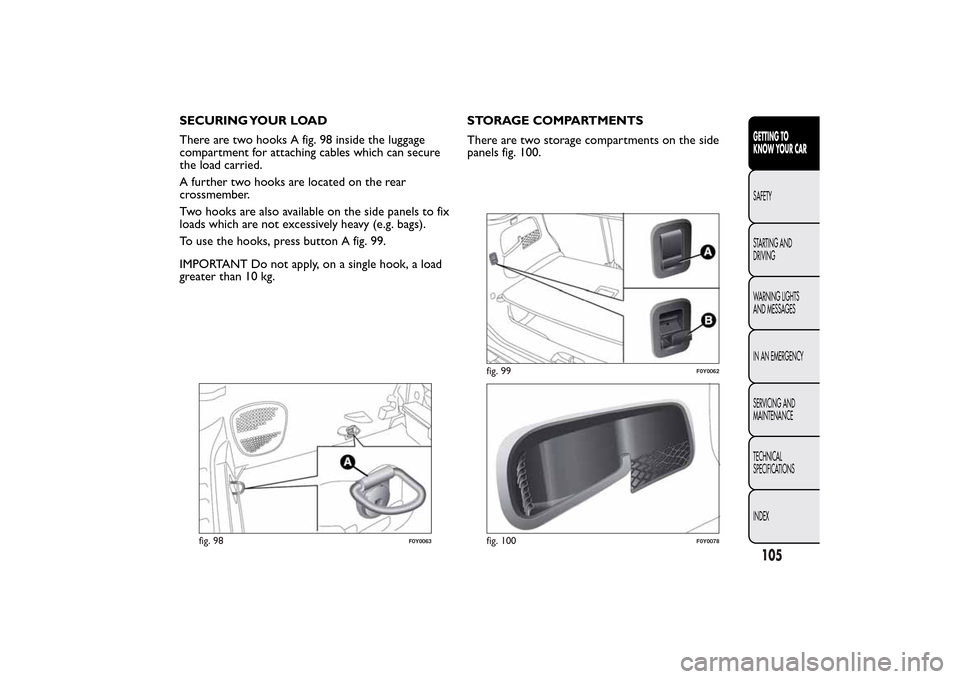
There are two hooks A fig. 98 inside the luggage
compartment for attaching cables which can secure
the load carried.
A further two hooks are located on the rear
crossmember.
Two hooks are also available on the side panels to fix
loads which are not excessively heavy (e.g. bags).
To use the hooks, press button A fig. 99.
IMPORTANT Do not apply, on a single hook, a load
greater than 10 kg.STORAGE COMPARTMENTS
There are two storage compartments on the side
panels fig. 100.
fig. 98
F0Y0063
fig. 99
F0Y0062
fig. 100
F0Y0078
105GETTING TO
KNOW YOUR CARSAFETY
STARTING AND
DRIVING
WARNING LIGHTS
AND MESSAGES
IN AN EMERGENCY
SERVICING AND
MAINTENANCE
TECHNICAL
SPECIFICATIONS
INDEX
Page 131 of 420
IMPORTANT
IMPORTANT In some circumstances, such as with
ice, snow or mud on the surface of the camera,
the camera sensitivity may be reduced.
IMPORTANT If the tailgate is to be re-painted
following to repairs, make sure the paint does not
get in contact with the camera.
IMPORTANT When parking, take the utmost care
over obstacles that may be above or under the
camera range.
WARNING
The responsibility for parking and other
manoeuvres is always and in any case
charged to the driver.While carr ying out these
manoeuvres, always make sure that no people
(especially children) or animals are in the area
concerned.The camera is an aid for the driver,
but the driver must never allow his/her
attention to lapse during potentially dangerous
manoeuvres, even those executed at low speeds.
Always keep a slow speed, so as to promptly
brake in case of obstacles.
It is vital, for correct operation, that the
camera is always kept clean and free from
any mud, dirt , snow or ice. Be careful not
to scratch or damage the camera while cleaning
it . Avoid using dry, rough or hard cloths.The
camera must be washed using clean water, with
the addition of car shampoo if necessary. In
washing stations which use steam or high-
pressure jets, clean the camera quickly, keeping
the nozzle more than 10 cm away from the
sensors. Also, do not apply stickers to the camera.
127GETTING TO
KNOW YOUR CARSAFETY
STARTING AND
DRIVING
WARNING LIGHTS
AND MESSAGES
IN AN EMERGENCY
SERVICING AND
MAINTENANCE
TECHNICAL
SPECIFICATIONS
INDEX
Page 139 of 420
GENERAL WARNINGS
When parking, take the utmost care over obstacles
that may be above or below the sensors.
Under certain circumstances, objects close to the
vehicle are not detected by the system and could
therefore cause damage to the car or be damaged
themselves.
Some conditions may influence the performance of
the parking sensors:
❒the presence of ice, snow, mud or think paint on
the sensor surface may cause reduced sensitivity
of the sensor itself and therefore reduce the
system performance.
❒mechanical interference (e.g. washing the car, rain,
strong wind, hail) may cause the sensor to detect a
non-existent obstacle ("echo interference");
❒the presence of ultrasonic systems (e.g. pneumatic
brake systems of trucks or pneumatic drills) near
the car could alter the signals sent by the sensor;
❒the variation in sensor position, caused by
variation in ride (due to suspension component
wear), changing tyres, overloaded car, or tuning
that lowers the car, for example, may affect
parking sensor system performance.
WARNING
The driver is always responsible for
parking manoeuvres however.When
making these manoeuvres, always make sure
that no people (especially children) or animals
are present in your manoeuvring area.The
parking sensors are an aid for the driver, but
must never allow their attention to lapse during
potentially dangerous manoeuvres, even those
executed at low speeds.
135GETTING TO
KNOW YOUR CARSAFETY
STARTING AND
DRIVING
WARNING LIGHTS
AND MESSAGES
IN AN EMERGENCY
SERVICING AND
MAINTENANCE
TECHNICAL
SPECIFICATIONS
INDEX
Page 151 of 420
CARRYING CHILDREN SAFELYFor optimal protection in the event of an impact, all
occupants must be seated and wearing adequate
restraint systems, including infants and other
children!
This prescription is compulsory in all EC countries
according to EC Directive 2003/20/EC.
Compared with an adult, a child's head is larger and
heavier in proportion to his/her body and the child's
muscular and bone structures are not fully
developed. Therefore, correct restraint systems
other than adult seat belts are necessary to reduce
as much as possible the risk of injuries in case of
accident, braking or sudden manoeuvre.
Children must be seated safely and comfortably. As
far as the characteristics of the child restraint
systems used, you are advised to keep children in
rearward facing restraint systems for as long as
possible (at least until 3–4 years old); this is the most
protected position in the event of an impact.
The choice of the most suitable child restraint device
depends on the weight of the child; there are
various types of child restraint systems and you are
advised always to choose the one that is most
suitable for the child.
When over 1.50 m in height, from the point of view
of restraint systems, children are considered as
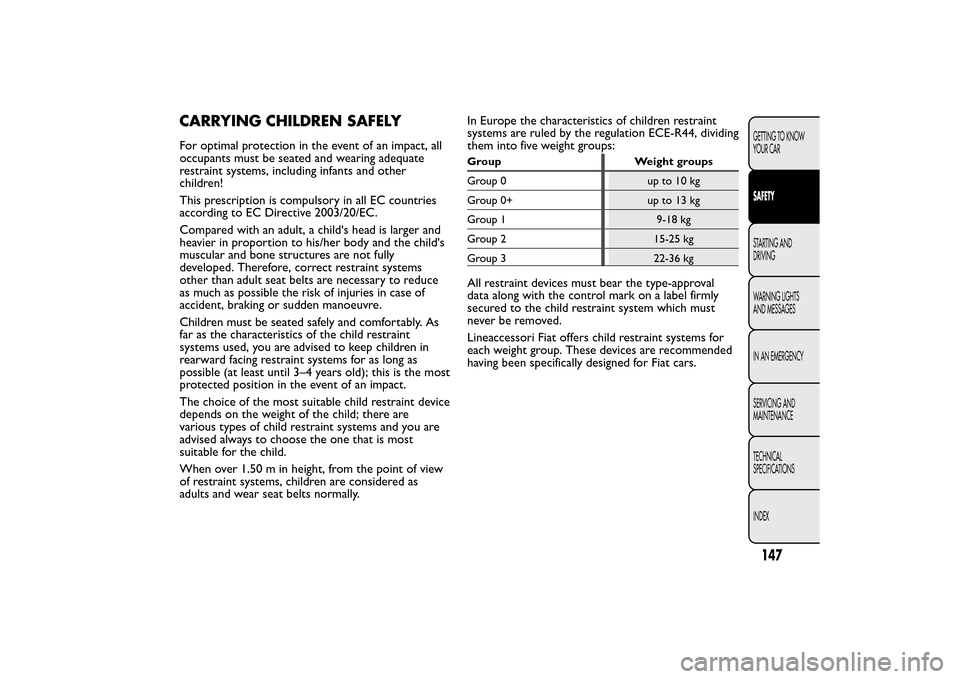
adults and wear seat belts normally.In Europe the characteristics of children restraint
systems are ruled by the regulation ECE-R44, dividing
them into five weight groups:
Group Weight groups
Group0 upto10kg
Group 0+ up to 13 kg
Group 1 9-18 kg
Group 2 15-25 kg
Group 3 22-36 kgAll restraint devices must bear the type-approval
data along with the control mark on a label firmly
secured to the child restraint system which must
never be removed.
Lineaccessori Fiat offers child restraint systems for
each weight group. These devices are recommended
having been specifically designed for Fiat cars.
147GETTING TO KNOW
YOUR CARSAFETYSTARTING AND
DRIVING
WARNING LIGHTS
AND MESSAGES
IN AN EMERGENCY
SERVICING AND
MAINTENANCE
TECHNICAL
SPECIFICATIONS
INDEX
Page 158 of 420
ISOFIX CHILD RESTRAINT SYSTEMThe car is equipped with ISOFIX anchorages, a new
standard which makes fitting a child restraint system
quick, simple and safe.
Isofix systems can be fitted alongside Universal child
restraint systems to different seats of the same
vehicle.
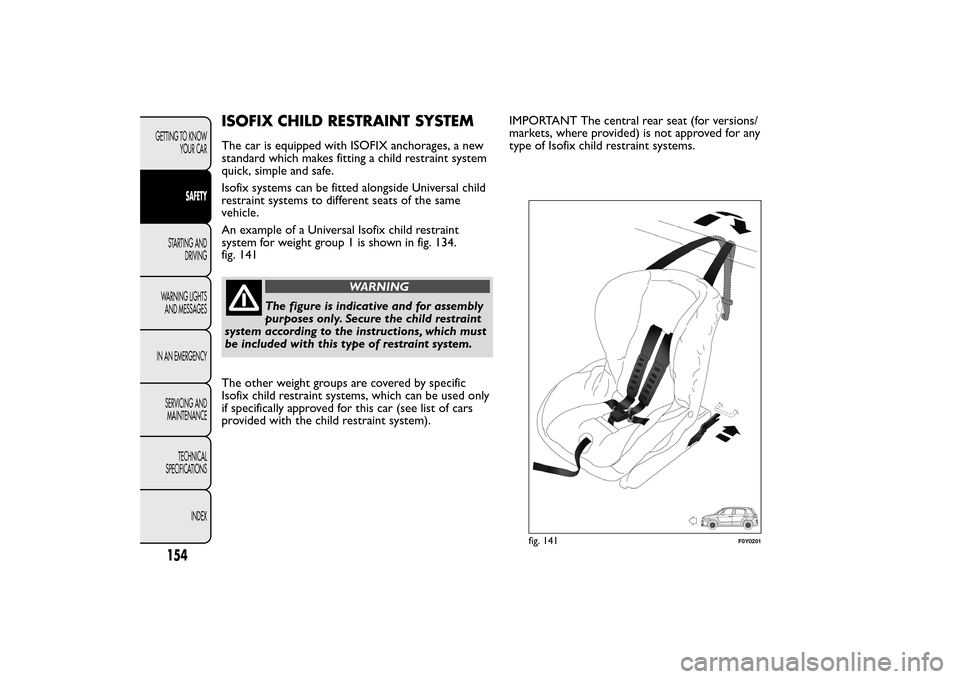
An example of a Universal Isofix child restraint
system for weight group 1 is shown in fig. 134.
fig. 141
WARNING
The figure is indicative and for assembly
purposes only. Secure the child restraint
system according to the instructions, which must
be included with this type of restraint system.
The other weight groups are covered by specific
Isofix child restraint systems, which can be used only
if specifically approved for this car (see list of cars
provided with the child restraint system).IMPORTANT The central rear seat (for versions/
markets, where provided) is not approved for any
type of Isofix child restraint systems.
fig. 141
F0Y0201
154GETTING TO KNOW
YOUR CAR
SAFETY
STARTING AND
DRIVING
WARNING LIGHTS
AND MESSAGES
IN AN EMERGENCY
SERVICING AND
MAINTENANCE
TECHNICAL
SPECIFICATIONS
INDEX