reset FIAT 500L LIVING 2015 2.G Owners Manual
[x] Cancel search | Manufacturer: FIAT, Model Year: 2015, Model line: 500L LIVING, Model: FIAT 500L LIVING 2015 2.GPages: 224, PDF Size: 5.92 MB
Page 45 of 224
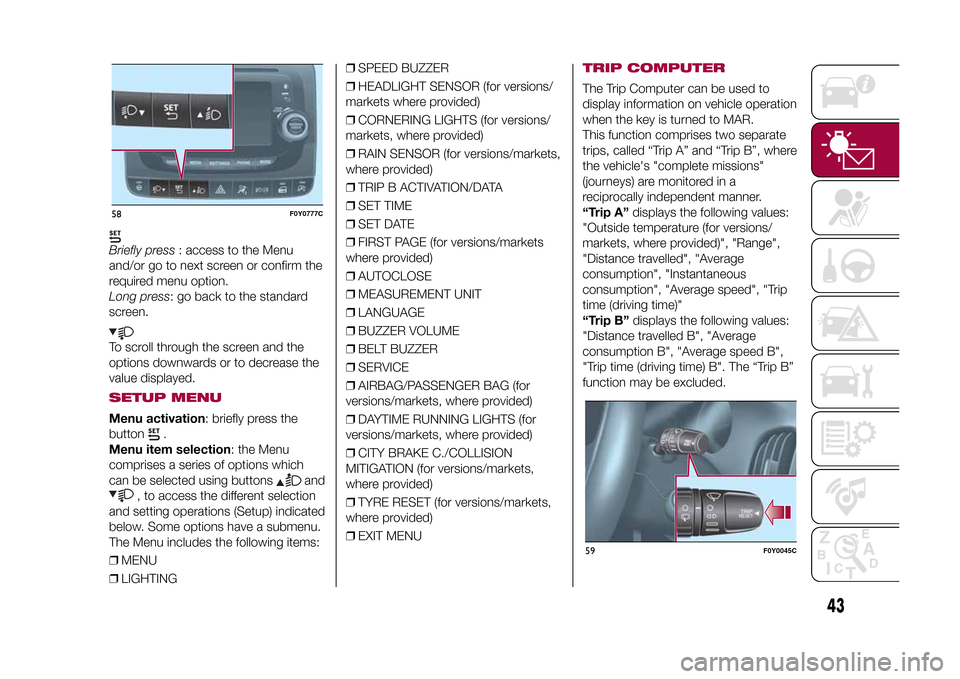
Briefly press: access to the Menu
and/or go to next screen or confirm the
required menu option.
Long press: go back to the standard
screen.To scroll through the screen and the
options downwards or to decrease the
value displayed.SETUP MENUMenu activation: briefly press the
button
.
Menu item selection: the Menu
comprises a series of options which
can be selected using buttons
and
, to access the different selection
and setting operations (Setup) indicated
below. Some options have a submenu.
The Menu includes the following items:
❒MENU
❒LIGHTING❒SPEED BUZZER
❒HEADLIGHT SENSOR (for versions/
markets where provided)
❒CORNERING LIGHTS (for versions/
markets, where provided)
❒RAIN SENSOR (for versions/markets,
where provided)
❒TRIP B ACTIVATION/DATA
❒SET TIME
❒SET DATE
❒FIRST PAGE (for versions/markets
where provided)
❒AUTOCLOSE
❒MEASUREMENT UNIT
❒LANGUAGE
❒BUZZER VOLUME
❒BELT BUZZER
❒SERVICE
❒AIRBAG/PASSENGER BAG (for
versions/markets, where provided)
❒DAYTIME RUNNING LIGHTS (for
versions/markets, where provided)
❒CITY BRAKE C./COLLISION
MITIGATION (for versions/markets,
where provided)
❒TYRE RESET (for versions/markets,
where provided)
❒EXIT MENU
TRIP COMPUTERThe Trip Computer can be used to
display information on vehicle operation
when the key is turned to MAR.
This function comprises two separate
trips, called “Trip A” and “Trip B”, where
the vehicle's "complete missions"
(journeys) are monitored in a
reciprocally independent manner.
“Trip A”displays the following values:
"Outside temperature (for versions/
markets, where provided)", "Range",
"Distance travelled", "Average
consumption", "Instantaneous
consumption", "Average speed", "Trip
time (driving time)"
“Trip B”displays the following values:
"Distance travelled B", "Average
consumption B", "Average speed B",
"Trip time (driving time) B". The “Trip B”
function may be excluded.
58
F0Y0777C
59
F0Y0045C
43
9-1-2015 12:9 Pagina 43
Page 46 of 224
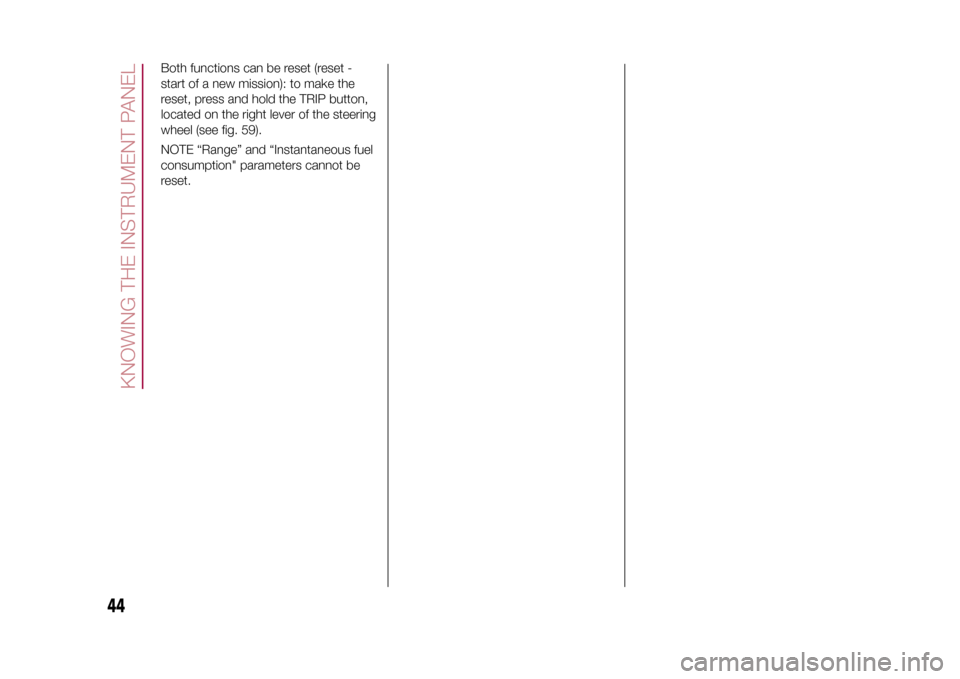
Both functions can be reset (reset -
start of a new mission): to make the
reset, press and hold the TRIP button,
located on the right lever of the steering
wheel (see fig. 59).
NOTE “Range” and “Instantaneous fuel
consumption" parameters cannot be
reset.
44
KNOWING THE INSTRUMENT PANEL
9-1-2015 12:9 Pagina 44
Page 53 of 224
Amber warning lights
Warning light What it means
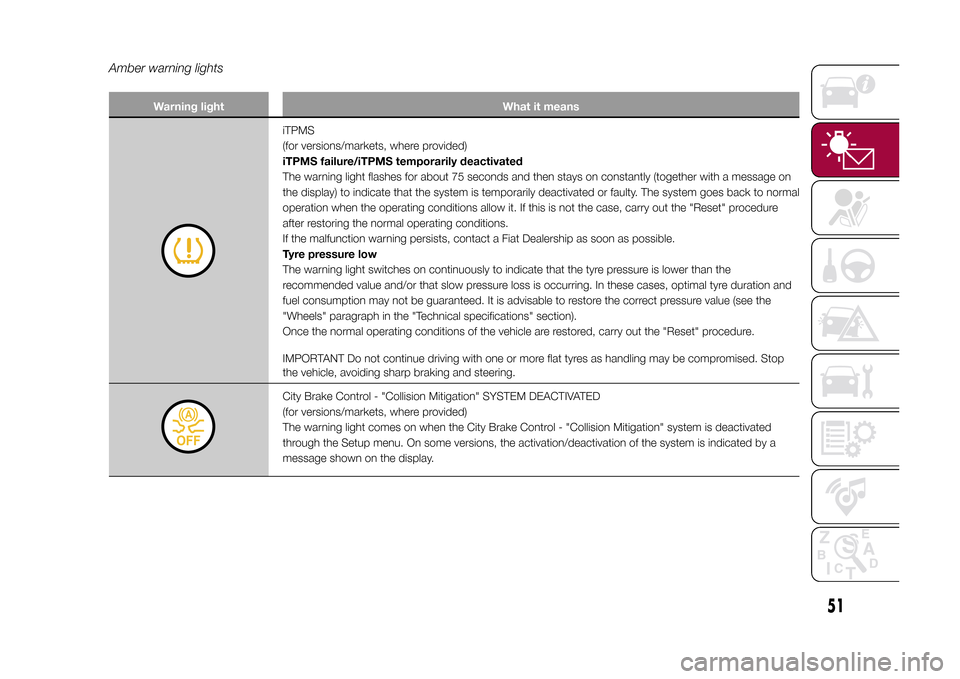
iTPMS
(for versions/markets, where provided)
iTPMS failure/iTPMS temporarily deactivated
The warning light flashes for about 75 seconds and then stays on constantly (together with a message on
the display) to indicate that the system is temporarily deactivated or faulty. The system goes back to normal
operation when the operating conditions allow it. If this is not the case, carry out the "Reset" procedure
after restoring the normal operating conditions.
If the malfunction warning persists, contact a Fiat Dealership as soon as possible.
Tyre pressure low
The warning light switches on continuously to indicate that the tyre pressure is lower than the
recommended value and/or that slow pressure loss is occurring. In these cases, optimal tyre duration and
fuel consumption may not be guaranteed. It is advisable to restore the correct pressure value (see the
"Wheels" paragraph in the "Technical specifications" section).
Once the normal operating conditions of the vehicle are restored, carry out the "Reset" procedure.
IMPORTANT Do not continue driving with one or more flat tyres as handling may be compromised. Stop
the vehicle, avoiding sharp braking and steering.City Brake Control - "Collision Mitigation" SYSTEM DEACTIVATED
(for versions/markets, where provided)
The warning light comes on when the City Brake Control - "Collision Mitigation" system is deactivated
through the Setup menu. On some versions, the activation/deactivation of the system is indicated by a
message shown on the display.
51
9-1-2015 12:9 Pagina 51
Page 64 of 224
Message on displaySTOP/START SYSTEMSystem activation: it is signalled by a message on the display.
System deactivation: it signalled by a message on the display. On some versions, the
symbol is displayed as well.
System failure
❒Versions with multifunction display: it is indicated by the switching on of the
warning light on the instrument panel and by the display of a dedicated message.
❒Versions with reconfigurable multifunction display:it is indicated by the displaying of thesymbol along with a dedicated message.
In the event of a Stop/Start system failure, contact a Fiat Dealership.
SERVICESCHEDULED SERVICING (SERVICE)
When the next scheduled service is approaching, the word “Service” appears on the
display, followed by the number of kilometres or miles left. This is displayed automatically,
with ignition key at MAR, 2000 km (or equivalent value in miles) before servicing or, where
provided, 30 days before servicing. It is also displayed each time the key is turned to MAR
or, for versions/markets, where provided, every 200 km (or equivalent value in miles).
Go to a Fiat Dealership, where the "Scheduled Servicing Plan" operations will be
performed and the message will be reset.
62
KNOWING THE INSTRUMENT PANEL
9-1-2015 12:9 Pagina 62
Page 71 of 224
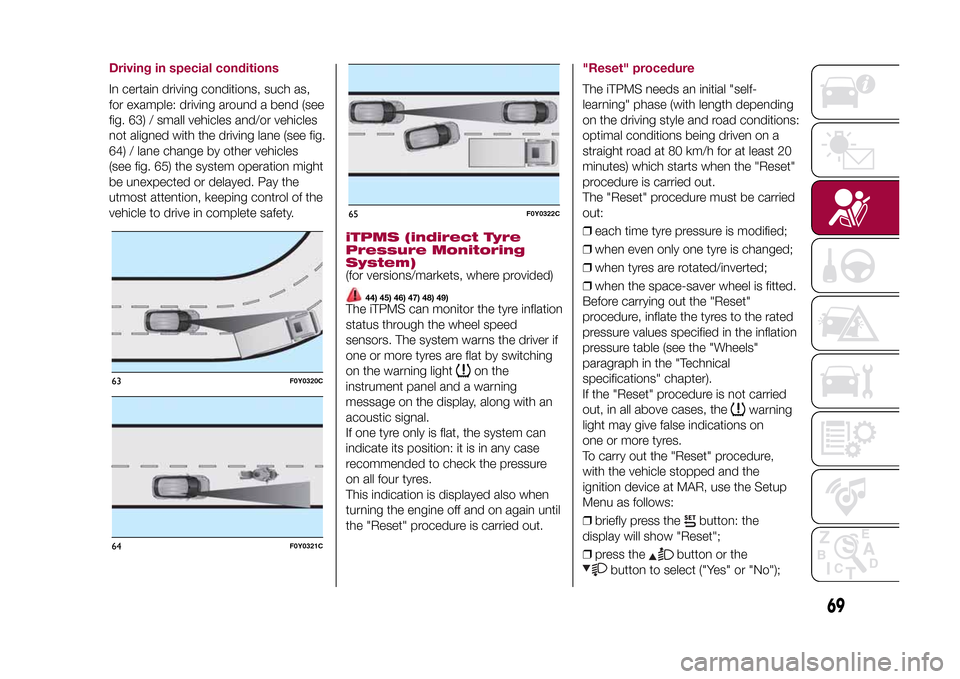
Driving in special conditionsIn certain driving conditions, such as,
for example: driving around a bend (see
fig. 63) / small vehicles and/or vehicles
not aligned with the driving lane (see fig.
64) / lane change by other vehicles
(see fig. 65) the system operation might
be unexpected or delayed. Pay the
utmost attention, keeping control of the
vehicle to drive in complete safety.
iTPMS (indirect Tyre
Pressure Monitoring
System)(for versions/markets, where provided)
44) 45) 46) 47) 48) 49)
The iTPMS can monitor the tyre inflation
status through the wheel speed
sensors. The system warns the driver if
one or more tyres are flat by switching
on the warning light
on the
instrument panel and a warning
message on the display, along with an
acoustic signal.
If one tyre only is flat, the system can
indicate its position: it is in any case
recommended to check the pressure
on all four tyres.
This indication is displayed also when
turning the engine off and on again until
the "Reset" procedure is carried out.
"Reset" procedureThe iTPMS needs an initial "self-
learning" phase (with length depending
on the driving style and road conditions:
optimal conditions being driven on a
straight road at 80 km/h for at least 20
minutes) which starts when the "Reset"
procedure is carried out.
The "Reset" procedure must be carried
out:
❒each time tyre pressure is modified;
❒when even only one tyre is changed;
❒when tyres are rotated/inverted;
❒when the space-saver wheel is fitted.
Before carrying out the "Reset"
procedure, inflate the tyres to the rated
pressure values specified in the inflation
pressure table (see the "Wheels"
paragraph in the "Technical
specifications" chapter).
If the "Reset" procedure is not carried
out, in all above cases, the
warning
light may give false indications on
one or more tyres.
To carry out the "Reset" procedure,
with the vehicle stopped and the
ignition device at MAR, use the Setup
Menu as follows:
❒briefly press the
button: the
display will show "Reset";
❒press the
button or the
button to select ("Yes" or "No");
63
F0Y0320C
64
F0Y0321C
65
F0Y0322C
69
9-1-2015 12:9 Pagina 69
Page 72 of 224
❒briefly press the
button: the
display will show "Confirm";
❒press the
button or the
button to select ("Yes" to "Reset"
or "No" to exit the screen);
❒hold the
button down again to go
back to the standard screen or to the
main menu according to where you are
in the menu.
Once the "Reset" procedure has been
performed, the display shows a
message indicating that the "self-
learning" procedure has started.
Working conditionsThe system is active for speeds above
15 km/h. In a few situations such as
sporty driving, particular conditions of
the road surface (e.g. icy, snowy,
unsurfaced roads) the signalling may be
delayed, or be partial in the detection
if more tyres are flat simultaneously.
Under special conditions (e.g. vehicle
loaded asymmetrically on one side,
towing a trailer, damaged or worn tyre,
fitting the space-saver wheel, use of the
"Fix&Go Automatic" kit, fitting snow
chains, fitting different tyres on the
axles) the system may give false
indications or be temporarily
deactivated.If the system is temporarily deactivated
the
warning light flashes for about
75 seconds and then is continuously
on; at the same time, the display shows
a dedicated message. This indication
is displayed also after the engine has
been switched off and then on again if
the correct operating conditions are not
restored.
WARNING
64)The system is an aid for the driver, who
must always pay full attention while
driving. The responsibility always rests with
the driver, who must take into account
the traffic conditions in order to drive
in complete safety. The driver must always
maintain a safe distance from the vehicle
in front.
65)If the driver depresses the brake pedal
fully or carries out a fast steering during
system operation, the automatic braking
function may stop (e.g. to allow a possible
manoeuvre to avoid the obstacle).
66)The laser beam is not visible at the
naked eye. Do not look directly, or with
optical instruments (e.g. lenses), at the
laser beam from a distance lower than 10
cm: this may cause damage to the sight.
The laser beam is also present when
the key is at MAR but its operation is off,
not available or manually deactivated
with the display Setup Menu.67)The system intervenes on vehicles
travelling in the same lane. Small sized
vehicles (e.g. bicycles or motorbikes)
or people, animals and things (e.g.
pushchairs) and more in general all those
obstacles with a low reflection of the light
emitted by the laser (e.g. vehicles soiled
with mud) are not taken into consideration.
68)If the car must be placed on a roller
bench (at a speed within 5 and 30 km/h)
for maintenance interventions or if it is
washed in an automatic roller washing
tunnel with an obstacle in the front part
(e.g. another car, a wall or another
obstacle), the system may detect its
presence and activate. In this case the
system must be deactivated through the
display Setup Menu.
WARNING
36)The laser sensor may have limited or
absent operation due to weather
conditions such as: heavy rain, hail, thick
fog, heavy snow, formation of ice layers on
the windscreen.
70
SAFETY
9-1-2015 12:9 Pagina 70
Page 107 of 224
In addition to the electrical branches,
the car's electrical system can be
connected only to the supply cable for
an electric brake and to the cable for an
internal trailer light, though not more
than 15 W. To connect, use the preset
control unit with a battery cable with
cross-section no less than 2.5 mm
2.
IMPORTANT The use of auxiliary loads
other than external lights (electric brake,
winch, etc.) must occur with engine
running.
IMPORTANT To install a tow hook
contact a Fiat Dealership.
WARNING
112)The ABS with which the vehicle is
equipped will not control the braking
system of the trailer. Take particular care
when travelling on slippery roads.
113)Never modify the braking system of
the vehicle to control the trailer brake. The
trailer braking system must be fully
independent of the vehicle’s hydraulic
system.
114)After fitting, fixing screw holes must
be sealed to prevent an exhaust gas inlet.
REFUELLING THE
VEHICLE
115) 116) 117)
61)
During refuelling, switch the engine off,
engage the handbrake, turn the ignition
key to STOP and do not smoke.PETROL ENGINESUse unleaded petrol only, with octane
number (RON) no lower than 95.DIESEL ENGINESOnly use Diesel for motor vehicles (EN
590 specification).
When using or parking the car for a
long time in the mountains or cold
areas, it is advisable to refuel using
locally available diesel. In this case, it is
also advisable to keep the tank over
50% full.REFUELLING
PROCEDURE
Diesel and petrol versionsProceed as follows:
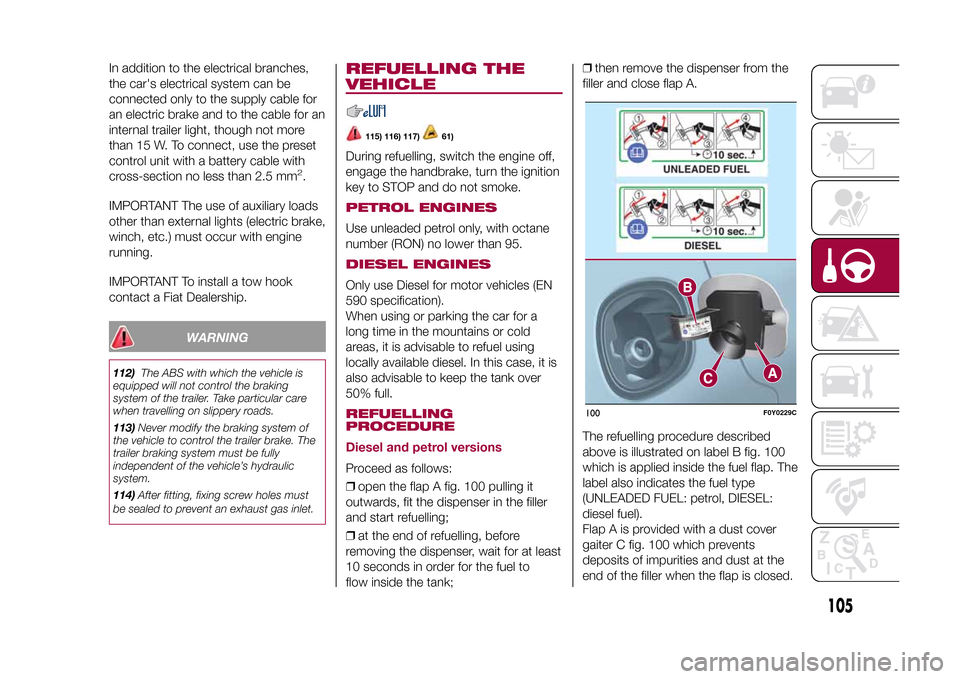
❒open the flap A fig. 100 pulling it
outwards, fit the dispenser in the filler
and start refuelling;
❒at the end of refuelling, before
removing the dispenser, wait for at least
10 seconds in order for the fuel to
flow inside the tank;❒then remove the dispenser from the
filler and close flap A.
The refuelling procedure described
above is illustrated on label B fig. 100
which is applied inside the fuel flap. The
label also indicates the fuel type
(UNLEADED FUEL: petrol, DIESEL:
diesel fuel).
Flap A is provided with a dust cover
gaiter C fig. 100 which prevents
deposits of impurities and dust at the
end of the filler when the flap is closed.
100
F0Y0229C
105
9-1-2015 12:9 Pagina 105
Page 201 of 224
Steering wheel control summary tableButton Interaction (pressure/rotation)
❒Acceptance of the second incoming call and putting the active call on hold
❒Activation of voice recognition for Phone function
❒Interruption of the voice message in order to give a new voice command
❒Interruption of voice recognition❒Reject incoming phone call/end phone call in progressPressing the centre of the left wheel:
❒deactivation/reactivation of the microphone during a phone conversation
❒activation/deactivation of the CD, USB/iPod,
Bluetooth
® sources Pause
❒activation/deactivation of radio Mute function
+/–❒Turning wheel upwards or downwards: adjust audio volume: hands-free, SMS message reader, voice announcements
and music sources.
❒Short press on the wheel: volume increase/decrease by small steps / Long press: volume continuous increase/decrease
until release
❒Scroll through stored radio stations (presets)❒Activation of voice recognition
❒Interruption of the voice message in order to give a new voice command
❒Interruption of voice recognitionTurning wheel upwards or downwards:
❒Short press (Radio mode): selection of next/previous station
❒Long press (Radio mode): scan higher/lower frequencies until released
❒Short press (CD, USB/iPod,
Bluetooth
® mode): selection of previous/next track
❒Long press (CD, USB/iPod,
Bluetooth
® mode): fast forward/rewind until released
SRC
Pressing the right wheel in the centre: selection of audio sources available: Radio, CD, USB/iPod, AUX and
Bluetooth
®
199
9-1-2015 12:9 Pagina 199
Page 202 of 224
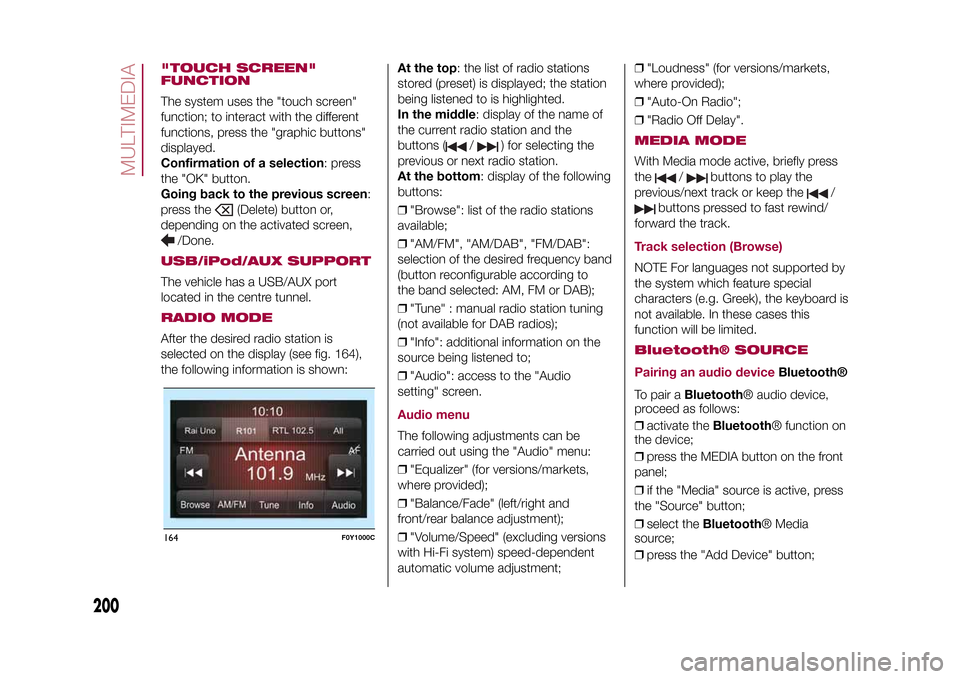
"TOUCH SCREEN"
FUNCTIONThe system uses the "touch screen"
function; to interact with the different
functions, press the "graphic buttons"
displayed.
Confirmation of a selection: press
the "OK" button.
Going back to the previous screen:
press the
(Delete) button or,
depending on the activated screen,
/Done.
USB/iPod/AUX SUPPORTThe vehicle has a USB/AUX port
located in the centre tunnel.RADIO MODEAfter the desired radio station is
selected on the display (see fig. 164),
the following information is shown:At the top: the list of radio stations
stored (preset) is displayed; the station
being listened to is highlighted.
In the middle: display of the name of
the current radio station and the
buttons (
/
) for selecting the
previous or next radio station.
At the bottom: display of the following
buttons:
❒"Browse": list of the radio stations
available;
❒"AM/FM", "AM/DAB", "FM/DAB":
selection of the desired frequency band
(button reconfigurable according to
the band selected: AM, FM or DAB);
❒"Tune" : manual radio station tuning
(not available for DAB radios);
❒"Info": additional information on the
source being listened to;
❒"Audio": access to the "Audio
setting" screen.
Audio menuThe following adjustments can be
carried out using the "Audio" menu:
❒"Equalizer" (for versions/markets,
where provided);
❒"Balance/Fade" (left/right and
front/rear balance adjustment);
❒"Volume/Speed" (excluding versions
with Hi-Fi system) speed-dependent
automatic volume adjustment;❒"Loudness" (for versions/markets,
where provided);
❒"Auto-On Radio";
❒"Radio Off Delay".
MEDIA MODEWith Media mode active, briefly press
the
/
buttons to play the
previous/next track or keep the
/
buttons pressed to fast rewind/
forward the track.
Track selection (Browse)NOTE For languages not supported by
the system which feature special
characters (e.g. Greek), the keyboard is
not available. In these cases this
function will be limited.Bluetooth® SOURCE
Pairing an audio device
Bluetooth®
To pair aBluetooth® audio device,
proceed as follows:
❒activate theBluetooth® function on
the device;
❒press the MEDIA button on the front
panel;
❒if the "Media" source is active, press
the "Source" button;
❒select theBluetooth® Media
source;
❒press the "Add Device" button;
164
F0Y1000C
200
MULTIMEDIA
9-1-2015 12:9 Pagina 200