gearbox FIAT 500L LIVING 2016 2.G User Guide
[x] Cancel search | Manufacturer: FIAT, Model Year: 2016, Model line: 500L LIVING, Model: FIAT 500L LIVING 2016 2.GPages: 240, PDF Size: 5.27 MB
Page 99 of 240
❒release the brake pedal and press
the accelerator pedal;
❒in driving conditions, push the gear
lever towards (+) to engage the next
gear up or towards (–) to engage the
next gear down.
AUTOMATIC LOGIC
(AUTO)
Proceed as follows:
❒press the brake pedal and start the
engine;
❒if AUTO is not displayed, move the
gear lever A fig. 91 to A/M to select
AUTOMATIC mode;
❒push the gear lever towards (+) to
engage first gear (if starting from N or
R, simply place the lever in the middle
position), or R to engage reverse;
❒release the brake pedal and press
the accelerator pedal: the gear most
suited to the vehicle speed will be
engaged.
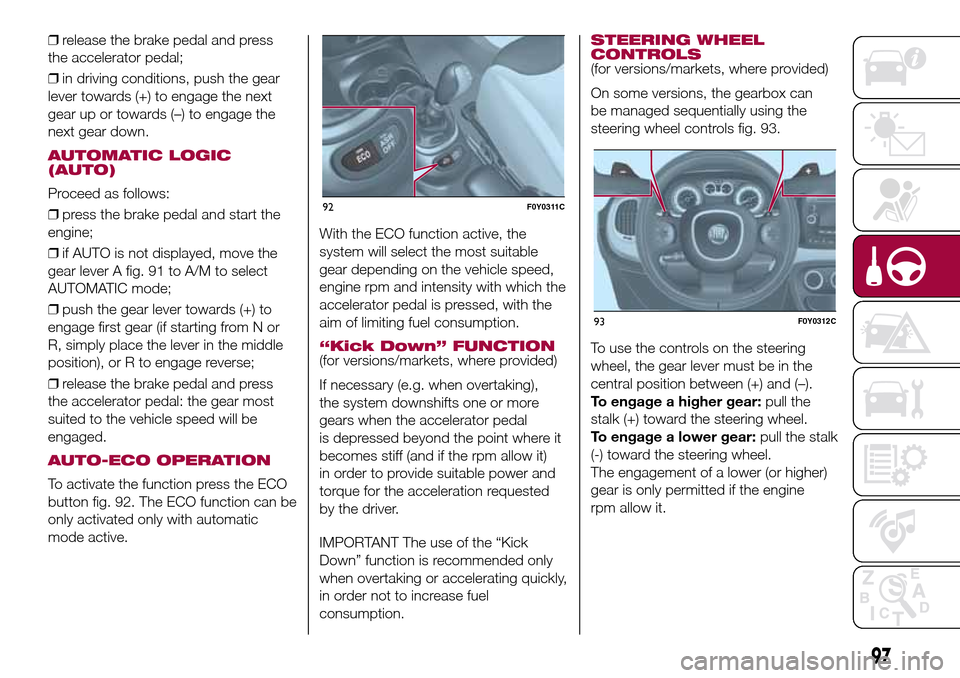
AUTO-ECO OPERATION
To activate the function press the ECO
button fig. 92. The ECO function can be
only activated only with automatic
mode active.With the ECO function active, the
system will select the most suitable
gear depending on the vehicle speed,
engine rpm and intensity with which the
accelerator pedal is pressed, with the
aim of limiting fuel consumption.
“Kick Down” FUNCTION(for versions/markets, where provided)
If necessary (e.g. when overtaking),
the system downshifts one or more
gears when the accelerator pedal
is depressed beyond the point where it
becomes stiff (and if the rpm allow it)
in order to provide suitable power and
torque for the acceleration requested
by the driver.
IMPORTANT The use of the “Kick
Down” function is recommended only
when overtaking or accelerating quickly,
in order not to increase fuel
consumption.
STEERING WHEEL
CONTROLS
(for versions/markets, where provided)
On some versions, the gearbox can
be managed sequentially using the
steering wheel controls fig. 93.
To use the controls on the steering
wheel, the gear lever must be in the
central position between (+) and (–).
To engage a higher gear:pull the
stalk (+) toward the steering wheel.
To engage a lower gear:pull the stalk
(-) toward the steering wheel.
The engagement of a lower (or higher)
gear is only permitted if the engine
rpm allow it.
92F0Y0311C
93F0Y0312C
97
Page 100 of 240
WARNING
105)If the engine fails to start with a gear
engaged, the potentially dangerous
situation due to the fact that the gearbox is
automatically placed in neutral will be
signalled by an acoustic signal.
WARNING
57)Avoid keeping your hand on this lever
between gear change or AUTO/MANUAL
mode requests.
STOP/START
SYSTEM
106) 107)58)
The Start&Stop system automatically
stops the engine each time the car
is stationary and starts it again when
the driver wants to move off.
In this way, the efficiency of the car is
increased, by reducing consumption,
emissions of harmful gases and noise
pollution.
OPERATING MODE
Engine stopping mode
With the car stopped, the engine stops
with gearbox in neutral and clutch
pedal released.
NoteThe engine can only be stopped
automatically after exceeding a speed
of about 10 km/h, to prevent the engine
from being repeatedly stopped when
driving at walking pace.
Restarting the engine
Press the clutch pedal to restart the
engine.
MANUAL SYSTEM
ACTIVATION/
DEACTIVATION
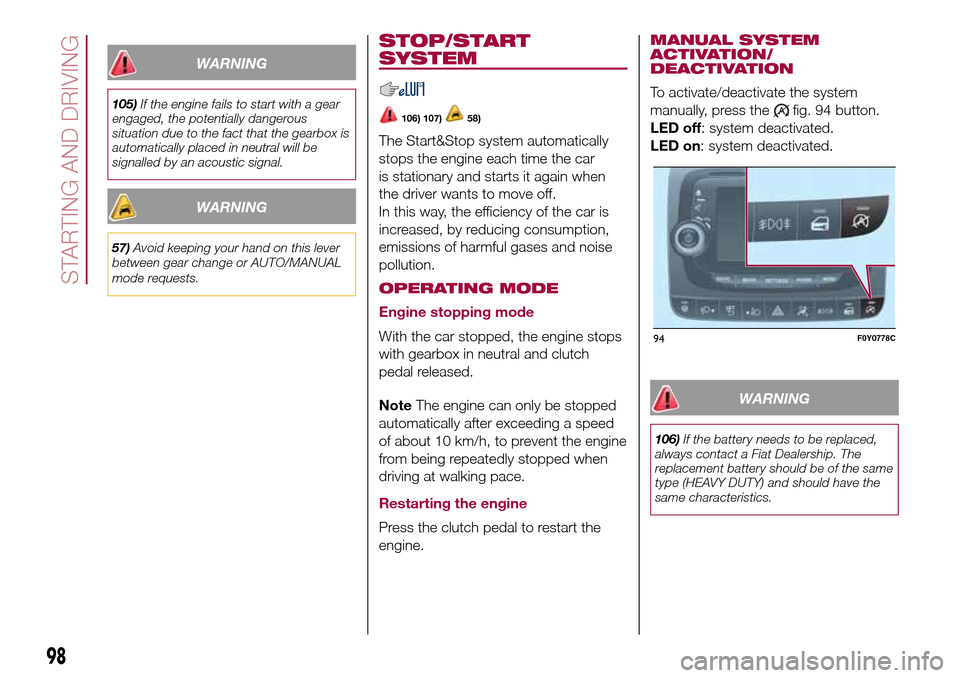
To activate/deactivate the system
manually, press the
fig. 94 button.
LED off: system deactivated.
LED on: system deactivated.
WARNING
106)If the battery needs to be replaced,
always contact a Fiat Dealership. The
replacement battery should be of the same
type (HEAVY DUTY) and should have the
same characteristics.
94F0Y0778C
98
STARTING AND DRIVING
Page 129 of 240
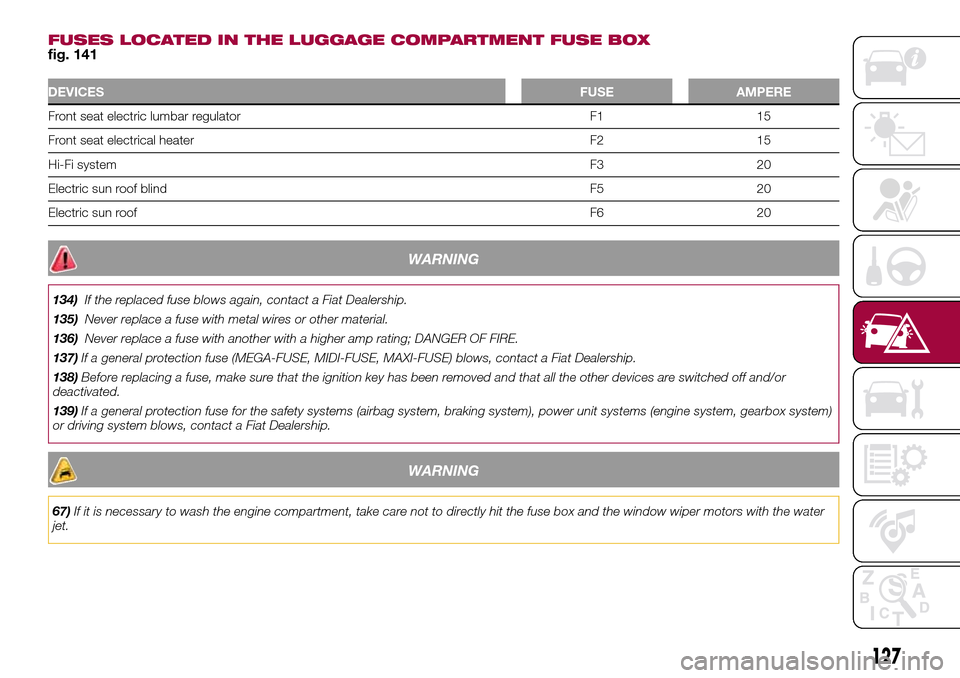
FUSES LOCATED IN THE LUGGAGE COMPARTMENT FUSE BOXfig. 141
DEVICESFUSE AMPERE
Front seat electric lumbar regulator F1 15
Front seat electrical heater F2 15
Hi-Fi systemF3 20
Electric sun roof blindF5 20
Electric sun roofF6 20
WARNING
134)If the replaced fuse blows again, contact a Fiat Dealership.
135)Never replace a fuse with metal wires or other material.
136)Never replace a fuse with another with a higher amp rating; DANGER OF FIRE.
137)If a general protection fuse (MEGA-FUSE, MIDI-FUSE, MAXI-FUSE) blows, contact a Fiat Dealership.
138)Before replacing a fuse, make sure that the ignition key has been removed and that all the other devices are switched off and/or
deactivated.
139)If a general protection fuse for the safety systems (airbag system, braking system), power unit systems (engine system, gearbox system)
or driving system blows, contact a Fiat Dealership.
WARNING
67)If it is necessary to wash the engine compartment, take care not to directly hit the fuse box and the window wiper motors with the water
jet.
127
Page 130 of 240
JUMP STARTING
If the battery is flat, a jump starting can
be performed using the battery and
the cables of another vehicle, or using a
booster battery.
IMPORTANT
When a booster battery is used, comply
with the utilisation and precaution
instructions specified by the producer.
Do not use the booster battery or
any other source of external supply with
a voltage above 12 V: the battery, the
starter, the alternator and the electrical
system of the vehicle could be
damaged.
Do not attempt jump starting if the
battery is frozen. The battery could
break and explode!
PREPARATION TO JUMP
STARTING
140) 141) 142)68)
IMPORTANT The positive terminal (+) of
the battery is shielded by a protective
cover. Lift the cover to access the
positive terminal.
Proceed as follows:
❒engage the handbrake, move the
Dualogic gear lever to P (Park) or,
for versions with manual gearbox, to
neutral and bring the ignition key to
STOP;❒switch off all the other electrical
devices in the vehicle;
❒if another vehicle is ready for jump
starting, park the vehicle within the
reach of the cables to be used for
starting, operate the handbrake and
make sure that the ignition is
deactivated.
IMPORTANT Avoid contact between
the two vehicles since this could cause
a connection to earth and may result
in serious injury to any people nearby.
PROCEDURE FOR JUMP
STARTING
IMPORTANT If the procedure below is
carried out incorrectly, it can cause
severe injury to people or damage the
recharging system of one or both
vehicles. Carefully follow the
instructions given below.
Cable connection
Proceed as follows to carry out a jump
starting:
❒connect one end of the cable used
for positive (+) to the positive terminal
(+) of the vehicle with flat battery;
❒connect the other end of the cable
used for positive (+) to the positive
terminal (+) of the auxiliary battery;❒connect one end of the cable used
for negative (–) to the negative terminal
(–) of the auxiliary battery;
❒connect the other end of the cable
used for negative (–) to an engine earth
(the visible metal part of the vehicle
engine with flat battery) away from the
battery and the fuel injection system;
❒start the vehicle engine with the
auxiliary battery, let it run for a
few minutes at idling. Start the engine
of the vehicle with flat battery.
Cable disconnection
Once the engine has been started,
remove the cables proceeding as
follows:
❒disconnect the end of the cable used
for negative (–) from the engine earth
of the vehicle with flat battery;
❒disconnect the other end of the cable
used for negative (–) from the negative
terminal (–) of the auxiliary battery;
❒disconnect the end of the cable used
for positive (+) from the positive terminal
(+) of the auxiliary battery;
❒disconnect one end of the cable
used for positive (+) from the positive
terminal (+) of the vehicle with flat
battery.
128
IN AN EMERGENCY
Page 132 of 240
❒activate the left direction indicator
and then stop it;
❒turn the ignition key to the STOP
position and then to MAR.
LPG versions: in the event of an
impact, petrol supply is immediately
cut-off, the LPG safety valves are
closed and the injection is interrupted,
switching off the engine.
Natural Power versions: in the event
of an impact, the power supply is
immediately cut off, causing engine
switching off.
WARNING
143)If, after an impact, you smell fuel or
notice leaks from the fuel system, do
not reactivate the system to avoid the risk
of fire.
TOWING THE
VEHICLE
ATTACHING THE TOW
RING
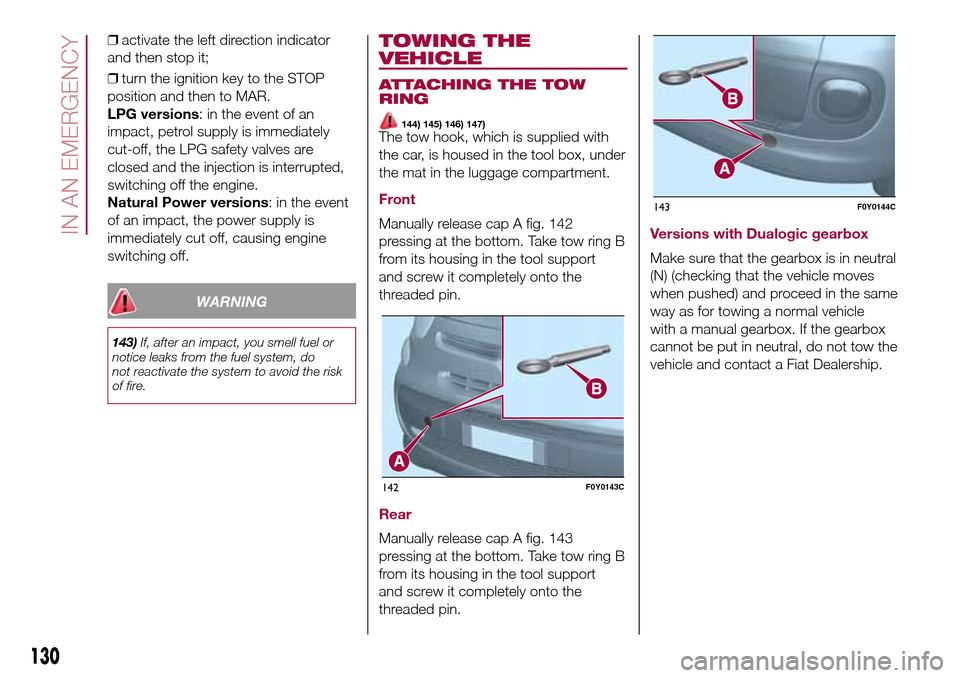
144) 145) 146) 147)The tow hook, which is supplied with
the car, is housed in the tool box, under
the mat in the luggage compartment.
Front
Manually release cap A fig. 142
pressing at the bottom. Take tow ring B
from its housing in the tool support
and screw it completely onto the
threaded pin.
Rear
Manually release cap A fig. 143
pressing at the bottom. Take tow ring B
from its housing in the tool support
and screw it completely onto the
threaded pin.
Versions with Dualogic gearbox
Make sure that the gearbox is in neutral
(N) (checking that the vehicle moves
when pushed) and proceed in the same
way as for towing a normal vehicle
with a manual gearbox. If the gearbox
cannot be put in neutral, do not tow the
vehicle and contact a Fiat Dealership.
142F0Y0143C
143F0Y0144C
130
IN AN EMERGENCY
Page 135 of 240
SCHEDULED
SERVICING
Correct servicing is crucial for
guaranteeing a long life for the vehicle
under the best conditions. For this
reason, Fiat has planned a series of
checks and services at fixed distance
intervals and, where provided, at fixed
time intervals, as described in the
Scheduled Servicing Plan.
Before each service, it is always
necessary to carefully follow the
instructions in the Scheduled Servicing
Plan (e.g. periodically check level of
fluids, tyre pressure, etc.).
Scheduled Servicing is offered by all
Fiat Dealerships according to a set time
schedule. If, during each operation, in
addition to the ones scheduled, the
need arises for further replacements or
repairs, these may be carried out with
the owner's explicit agreement only.
If your vehicle is used frequently for
towing, the interval between one
service operation and the next should
be reduced.IMPORTANT Scheduled Servicing
interventions are set out by the
Manufacturer. Failure to have them
carried out may invalidate the warranty.
It is advisable to inform a Fiat
Dealership of any small operating
irregularities without waiting for the next
service.
PERIODIC CHECKS
Every1,000km or before long
journeys, check and if necessary, top
up: engine coolant level; brake fluid
level; screen washer fluid level; tyre
inflation pressure and condition; lighting
system operation (headlights, direction
indicators, hazard warning lights, etc.);
screen washer/wiper system operation
and positioning/wear of windscreen/
rear window wiper blades.
Every3,000km, check and top up if
required: engine oil level.
HEAVY-DUTY USE OF THE
VEHICLE
If the vehicle is used under one of the
following conditions:
❒towing a trailer or caravan;
❒dusty roads;
❒short, repeated journeys (less than
7-8 km) at sub-zero outside
temperatures;❒engine often idling or driving long
distances at low speeds or long periods
of inactivity;
the following checks must be carried
out more often than indicated in the
Scheduled Servicing Plan:
❒check front disc brake pad condition
and wear;
❒check cleanliness of bonnet and
luggage compartment locks,
cleanliness and lubrication of linkage;
❒visually inspect conditions of: engine,
gearbox, transmission, pipes and
hoses (exhaust/fuel system/brakes) and
rubber elements (gaiters/sleeves/
bushes, etc.);
❒check battery charge and battery
fluid level (electrolyte);
❒visually inspect conditions of the
accessory drive belts;
❒check and, if necessary, change
engine oil and replace oil filter;
❒check and, if necessary, replace
pollen filter;
❒check and, if necessary, replace air
cleaner.
133
Page 138 of 240
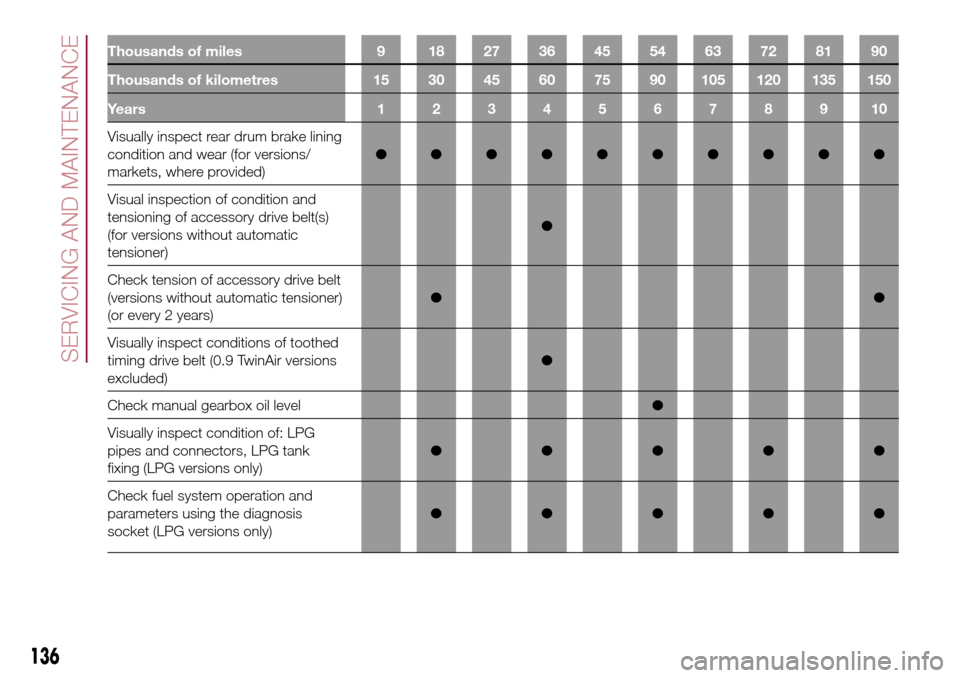
Thousands of miles 9 18 27 36 45 54 63 72 81 90
Thousands of kilometres 15 30 45 60 75 90 105 120 135 150
Years12345678910
Visually inspect rear drum brake lining
condition and wear (for versions/
markets, where provided)●●●●●●●●●●
Visual inspection of condition and
tensioning of accessory drive belt(s)
(for versions without automatic
tensioner)●
Check tension of accessory drive belt
(versions without automatic tensioner)
(or every 2 years)●●
Visually inspect conditions of toothed
timing drive belt (0.9 TwinAir versions
excluded)●
Check manual gearbox oil level●
Visually inspect condition of: LPG
pipes and connectors, LPG tank
fixing (LPG versions only)●●●●●
Check fuel system operation and
parameters using the diagnosis
socket (LPG versions only)●●●●●
136
SERVICING AND MAINTENANCE
Page 144 of 240
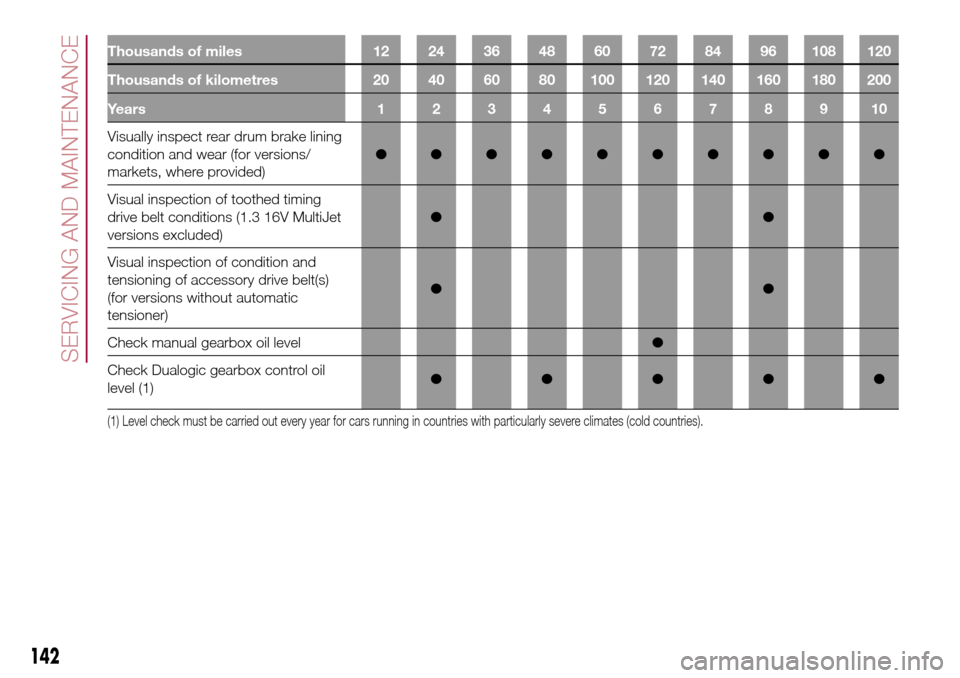
Thousands of miles 12 24 36 48 60 72 84 96 108 120
Thousands of kilometres 20 40 60 80 100 120 140 160 180 200
Years12345678910
Visually inspect rear drum brake lining
condition and wear (for versions/
markets, where provided)●●●●●●●●●●
Visual inspection of toothed timing
drive belt conditions (1.3 16V MultiJet
versions excluded)●●
Visual inspection of condition and
tensioning of accessory drive belt(s)
(for versions without automatic
tensioner)●●
Check manual gearbox oil level●
Check Dualogic gearbox control oil
level (1)●●●●●
(1) Level check must be carried out every year for cars running in countries with particularly severe climates (cold countries).
142
SERVICING AND MAINTENANCE
Page 153 of 240
ENGINE OIL
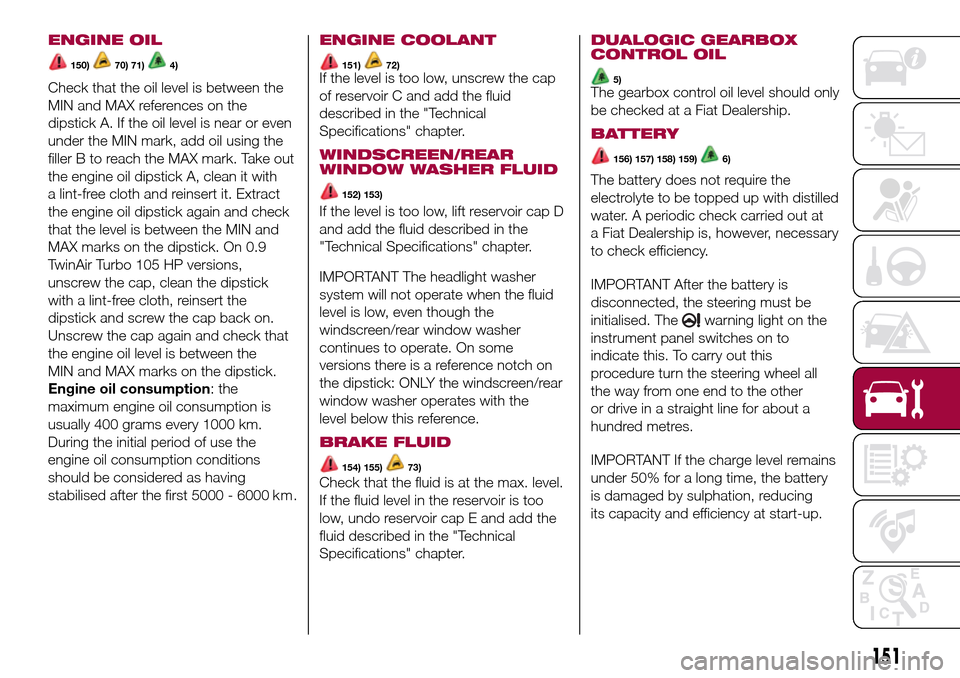
150)70) 71)4)
Check that the oil level is between the
MIN and MAX references on the
dipstick A. If the oil level is near or even
under the MIN mark, add oil using the
filler B to reach the MAX mark. Take out
the engine oil dipstick A, clean it with
a lint-free cloth and reinsert it. Extract
the engine oil dipstick again and check
that the level is between the MIN and
MAX marks on the dipstick. On 0.9
TwinAir Turbo 105 HP versions,
unscrew the cap, clean the dipstick
with a lint-free cloth, reinsert the
dipstick and screw the cap back on.
Unscrew the cap again and check that
the engine oil level is between the
MIN and MAX marks on the dipstick.
Engine oil consumption: the
maximum engine oil consumption is
usually 400 grams every 1000 km.
During the initial period of use the
engine oil consumption conditions
should be considered as having
stabilised after the first 5000 - 6000 k m .
ENGINE COOLANT
151)72)If the level is too low, unscrew the cap
of reservoir C and add the fluid
described in the "Technical
Specifications" chapter.
WINDSCREEN/REAR
WINDOW WASHER FLUID
152) 153)
If the level is too low, lift reservoir cap D
and add the fluid described in the
"Technical Specifications" chapter.
IMPORTANT The headlight washer
system will not operate when the fluid
level is low, even though the
windscreen/rear window washer
continues to operate. On some
versions there is a reference notch on
the dipstick: ONLY the windscreen/rear
window washer operates with the
level below this reference.
BRAKE FLUID
154) 155)73)
Check that the fluid is at the max. level.
If the fluid level in the reservoir is too
low, undo reservoir cap E and add the
fluid described in the "Technical
Specifications" chapter.
DUALOGIC GEARBOX
CONTROL OIL
5)The gearbox control oil level should only
be checked at a Fiat Dealership.
BATTERY
156) 157) 158) 159)6)
The battery does not require the
electrolyte to be topped up with distilled
water. A periodic check carried out at
a Fiat Dealership is, however, necessary
to check efficiency.
IMPORTANT After the battery is
disconnected, the steering must be
initialised. The
warning light on the
instrument panel switches on to
indicate this. To carry out this
procedure turn the steering wheel all
the way from one end to the other
or drive in a straight line for about a
hundred metres.
IMPORTANT If the charge level remains
under 50% for a long time, the battery
is damaged by sulphation, reducing
its capacity and efficiency at start-up.
151
Page 193 of 240
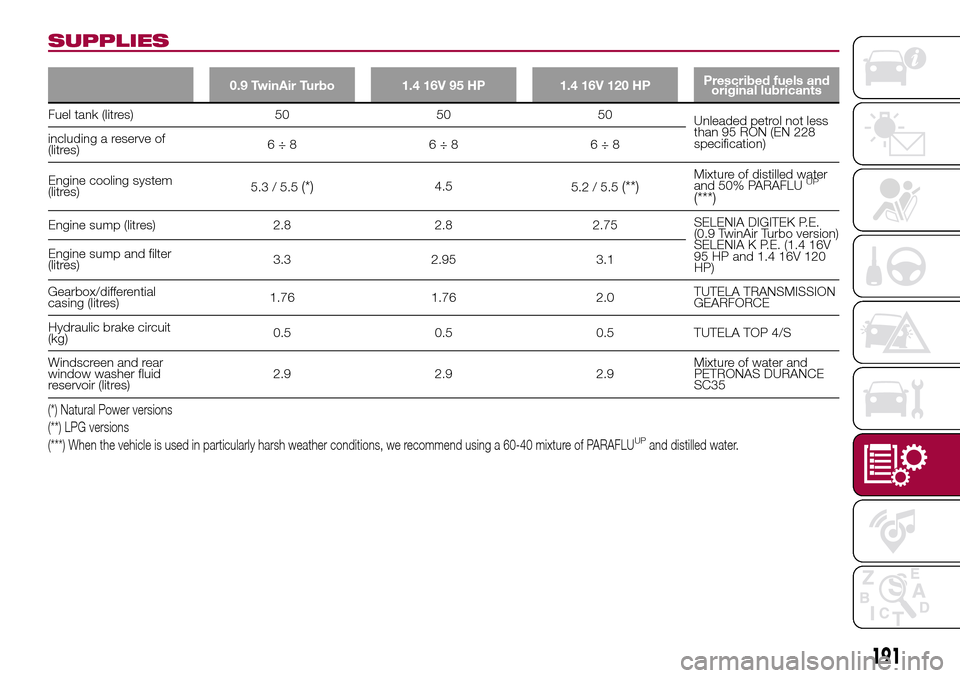
SUPPLIES
0.9 TwinAir Turbo 1.4 16V 95 HP 1.4 16V 120 HPPrescribed fuels and
original lubricants
Fuel tank (litres) 50 50 50
Unleaded petrol not less
than 95 RON (EN 228
specification) including a reserve of
(litres)6÷8 6÷8 6÷8
Engine cooling system
(litres)5.3 / 5.5
(*)4.5
5.2 / 5.5(**)Mixture of distilled water
and 50% PARAFLUUP
(***)
Engine sump (litres) 2.8 2.8 2.75SELENIA DIGITEK P.E.
(0.9 TwinAir Turbo version)
SELENIA K P.E. (1.4 16V
95 HP and 1.4 16V 120
HP) Engine sump and filter
(litres)3.3 2.95 3.1
Gearbox/differential
casing (litres)1.76 1.76 2.0TUTELA TRANSMISSION
GEARFORCE
Hydraulic brake circuit
(kg)0.5 0.5 0.5 TUTELA TOP 4/S
Windscreen and rear
window washer fluid
reservoir (litres)2.9 2.9 2.9Mixture of water and
PETRONAS DURANCE
SC35
(*) Natural Power versions
(**) LPG versions
(***) When the vehicle is used in particularly harsh weather conditions, we recommend using a 60-40 mixture of PARAFLU
UPand distilled water.
191