warning lights FIAT 500L LIVING 2017 2.G User Guide
[x] Cancel search | Manufacturer: FIAT, Model Year: 2017, Model line: 500L LIVING, Model: FIAT 500L LIVING 2017 2.GPages: 240, PDF Size: 5.26 MB
Page 59 of 240
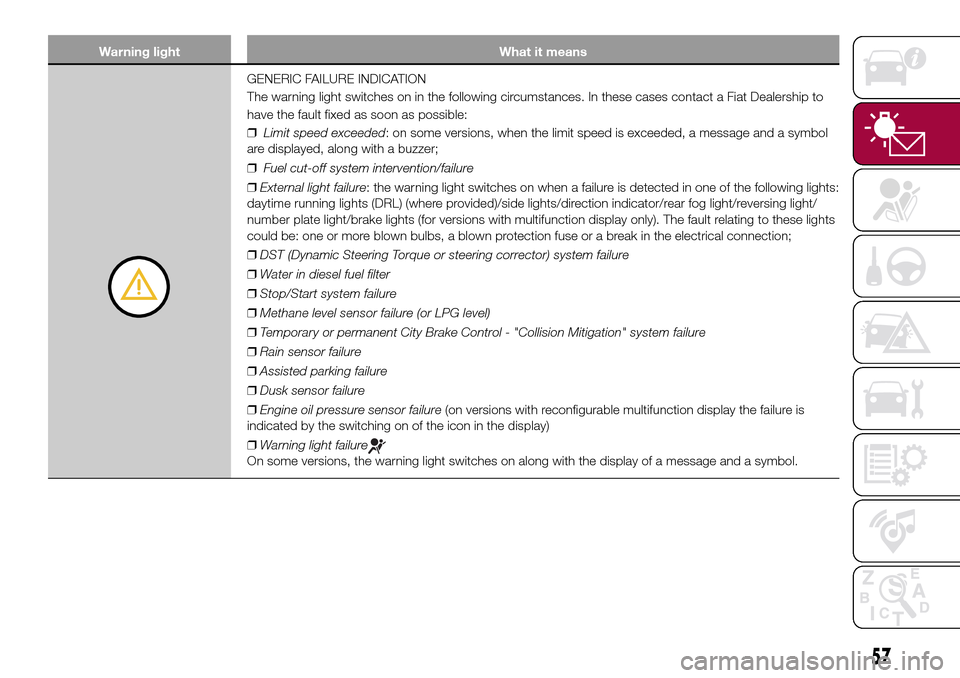
Warning light What it means
GENERIC FAILURE INDICATION
The warning light switches on in the following circumstances. In these cases contact a Fiat Dealership to
have the fault fixed as soon as possible:
❒Limit speed exceeded: on some versions, when the limit speed is exceeded, a message and a symbol
are displayed, along with a buzzer;
❒Fuel cut-off system intervention/failure
❒External light failure: the warning light switches on when a failure is detected in one of the following lights:
daytime running lights (DRL) (where provided)/side lights/direction indicator/rear fog light/reversing light/
number plate light/brake lights (for versions with multifunction display only). The fault relating to these lights
could be: one or more blown bulbs, a blown protection fuse or a break in the electrical connection;
❒DST (Dynamic Steering Torque or steering corrector) system failure
❒Water in diesel fuel filter
❒Stop/Start system failure
❒Methane level sensor failure (or LPG level)
❒Temporary or permanent City Brake Control - "Collision Mitigation" system failure
❒Rain sensor failure
❒Assisted parking failure
❒Dusk sensor failure
❒Engine oil pressure sensor failure(on versions with reconfigurable multifunction display the failure is
indicated by the switching on of the icon in the display)
❒Warning light failure
On some versions, the warning light switches on along with the display of a message and a symbol.
57
Page 60 of 240
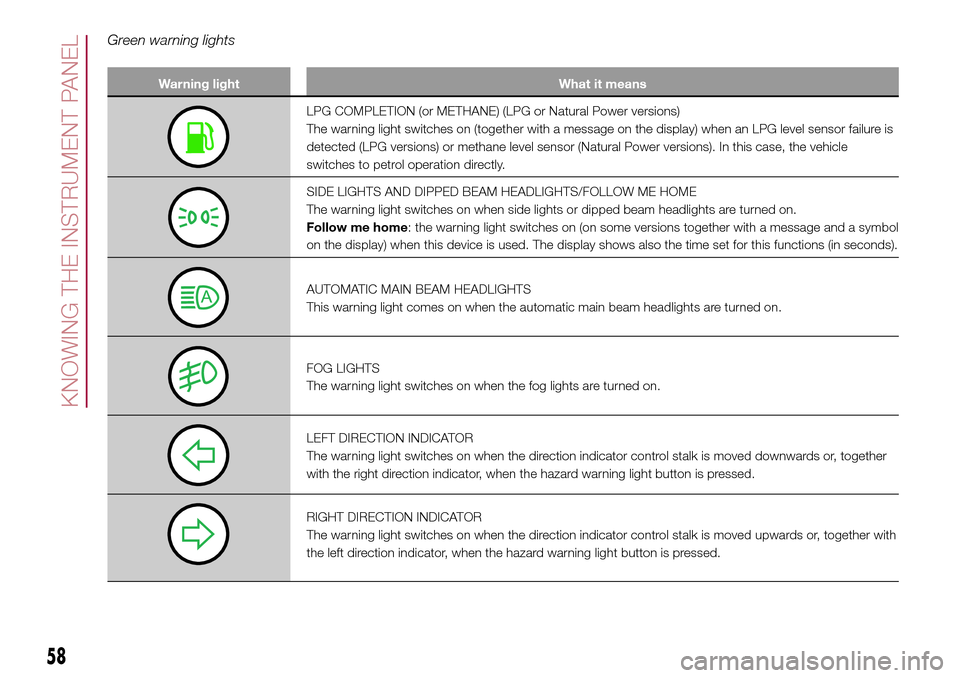
Green warning lights
Warning light What it means
LPG COMPLETION (or METHANE) (LPG or Natural Power versions)
The warning light switches on (together with a message on the display) when an LPG level sensor failure is
detected (LPG versions) or methane level sensor (Natural Power versions). In this case, the vehicle
switches to petrol operation directly.
SIDE LIGHTS AND DIPPED BEAM HEADLIGHTS/FOLLOW ME HOME
The warning light switches on when side lights or dipped beam headlights are turned on.
Follow me home: the warning light switches on (on some versions together with a message and a symbol
on the display) when this device is used. The display shows also the time set for this functions (in seconds).
AUTOMATIC MAIN BEAM HEADLIGHTS
This warning light comes on when the automatic main beam headlights are turned on.
FOG LIGHTS
The warning light switches on when the fog lights are turned on.
LEFT DIRECTION INDICATOR
The warning light switches on when the direction indicator control stalk is moved downwards or, together
with the right direction indicator, when the hazard warning light button is pressed.
RIGHT DIRECTION INDICATOR
The warning light switches on when the direction indicator control stalk is moved upwards or, together with
the left direction indicator, when the hazard warning light button is pressed.
58
KNOWING THE INSTRUMENT PANEL
Page 61 of 240
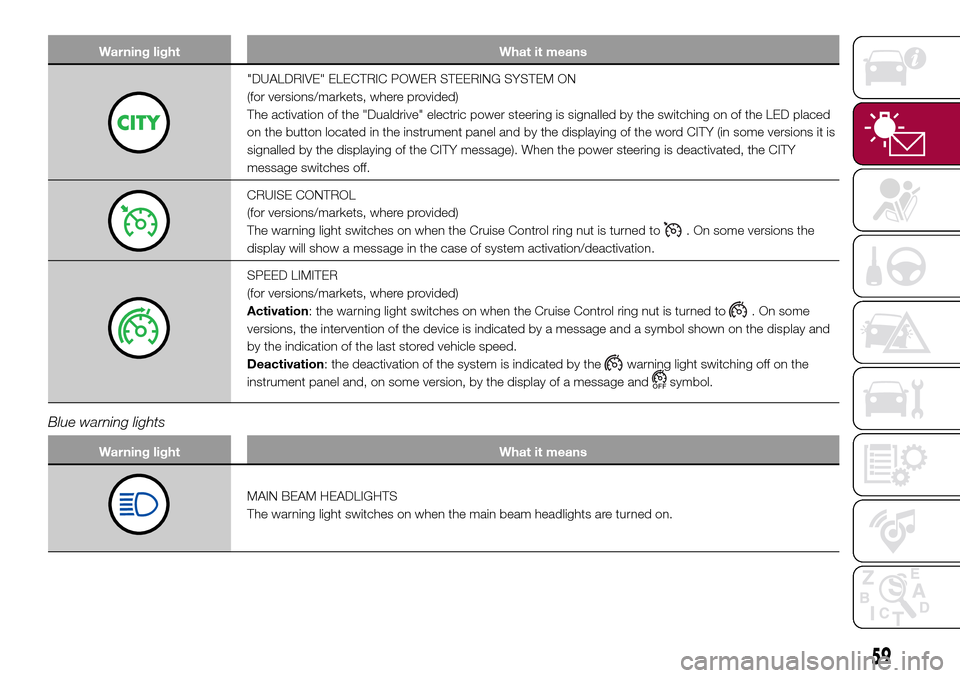
Warning light What it means
"DUALDRIVE" ELECTRIC POWER STEERING SYSTEM ON
(for versions/markets, where provided)
The activation of the "Dualdrive" electric power steering is signalled by the switching on of the LED placed
on the button located in the instrument panel and by the displaying of the word CITY (in some versions it is
signalled by the displaying of the CITY message). When the power steering is deactivated, the CITY
message switches off.
CRUISE CONTROL
(for versions/markets, where provided)
The warning light switches on when the Cruise Control ring nut is turned to
. On some versions the
display will show a message in the case of system activation/deactivation.
SPEED LIMITER
(for versions/markets, where provided)
Activation: the warning light switches on when the Cruise Control ring nut is turned to
. On some
versions, the intervention of the device is indicated by a message and a symbol shown on the display and
by the indication of the last stored vehicle speed.
Deactivation: the deactivation of the system is indicated by the
warning light switching off on the
instrument panel and, on some version, by the display of a message and
symbol.
Blue warning lights
Warning light What it means
MAIN BEAM HEADLIGHTS
The warning light switches on when the main beam headlights are turned on.
59
Page 93 of 240
88)SEVERE DANGER: when an active
passenger airbag is fitted, DO NOT install
rearward facing child restraint systems
on the front passenger seat. Deployment of
the airbag in an accident could cause fatal
injuries to the child regardless of the
severity of the impact. Therefore, always
deactivate the passenger side airbag when
a rearward facing child restraint system is
installed on the front passenger seat.
The front passenger seat must also be
positioned back as far as possible in order
to prevent the child restraint system from
coming into contact with the dashboard.
Immediately reactivate the passenger
airbag as soon as the child restraint system
has been removed.
89)When an active passenger airbag is
fitted, DO NOT install rear facing child
restraint systems on the front seat.
Deployment of the airbag in an accident
could cause fatal injuries to the child
regardless of the severity of the impact.
90)If the
warning light does not switch
on when the key is turned to MAR, or
stays on whilst driving, a fault may have
occurred in the restraint systems. In this
case the airbags or pretensioners may not
deploy in an impact or, in a lower number
of cases, they may be deployed
accidentally. Before proceeding, contact a
Fiat Dealership immediately to have the
system checked.
91)On some versions if the
warning
light does not switch on, thewarning
light switches on instead, deactivating
the explosive charges of the passenger
airbag.
92)If a side bag is present, do not cover
the front seat backrests with extra covers.93)Do not travel carrying objects in your
lap, in front of your chest or between your
lips (pipe, pencils, etc.). They could cause
severe injury if the airbag is deployed.
94)If the vehicle has been subject to theft,
attempted theft, vandalism, or flooding,
have the airbag system inspected at a Fiat
Dealership.
95)When the ignition key is inserted and
turned to MAR, airbags may be deployed if
another vehicle crashes into yours, even if
the engine is not running and the vehicle
is stationary. Therefore, even if the vehicle
is stationary, when an active front
passenger airbag is fitted, DO NOT install
rearward facing child restraint systems
on the front passenger seat. Deployment of
the airbag following an impact could cause
fatal injuries to the child. Therefore, always
deactivate the passenger side airbag
when a rearward facing child restraint
system is installed on the front passenger
seat. The front passenger seat must also
be positioned back as far as possible in
order to prevent the child restraint system
from coming into contact with the
dashboard. Immediately reactivate the
passenger airbag as soon as the child
restraint system has been removed. Also
remember that, if the key is turned to
STOP, none of the safety devices (airbags
or pretensioners) will be deployed in the
event of collision. Non-deployment in such
cases does not indicate a system
malfunction.96)The
LED indicates the passenger
side airbag protection status. If the LED is
off, passenger side protection is active:
to deactivate it, use the Setup Menu (in this
case the LED lights up). When the engine
is started (ignition key turned to MAR
position), the LED turns on for about 8
seconds, provided that at least 5 seconds
have elapsed from when it was switched
off. If not, contact a Fiat Dealership. If
the engine is switched off/on again in less
than 5 seconds the LED may remain off.
In this case, to check correct LED
operation, switch the engine off, wait for at
least 5 seconds and switch the engine
on again. The LED may light up with
various intensity levels depending on the
vehicle conditions. The intensity may also
vary during the same key cycle.
97)The airbag deployment threshold is
higher than that of the pretensioners. When
the impact is between the two deployment
thresholds, it is normal that pretensioners
only are engaged.
98)The airbag does not replace seat belts,
but increases their efficiency. Because
front airbags are not deployed for
low-speed crashes, side collisions,
rear-end shunts or rollovers, occupants are
protected, in addition to any side bags,
only by their seat belts, which must
therefore always be fastened.
91
Page 95 of 240

STARTING THE
ENGINE
99) 100)51) 52) 53) 54) 55)
Before starting the engine, adjust the
seat, the interior rear view mirrors,
the door mirrors and fasten the seat
belt correctly.
Never press the accelerator pedal for
starting the engine.
VERSIONS WITH MANUAL
GEARBOX
Petrol versions
Proceed as follows:
❒engage the handbrake and place the
gear lever in neutral.For 0.9 TwinAir
Turbo 105 HP versionsengage the
handbrake and place the gear lever
in neutral or fully press the clutch pedal
if a gear other than neutral is engaged;
❒for all versions (except 0.9
TwinAir Turbo 105 HP)fully depress
the clutch pedal, without pressing
the accelerator;
❒turn the ignition key to AVV and
release it as soon as the engine starts.
Diesel versions
Proceed as follows:
❒engage the handbrake, put the gear
lever into neutral and turn the ignition
key to MAR: the warning lights
andon the instrument panel
will turn on;
❒wait for the warning lights
and
to turn off and then fully depress
the clutch pedal without pressing the
accelerator;
❒turn the ignition key to AVV as soon
as warning light
switches off.
Release the ignition key as soon as the
engine starts.
IMPORTANT If the engine does not
start at the first attempt, return the
ignition key to STOP before repeating
the procedure. If, with the ignition
key at MAR, the warning lights
and
(only for petrol versions) stay on
in the instrument panel, the ignition key
must be brought back to STOP and
then to MAR again. If the
warning
light stays on, retry with the other
keys provided. Contact a Fiat
Dealership if you still cannot start the
engine.
VERSIONS WITH
DUALOGIC GEARBOX
101)Engine starting is allowed both with a
gear engaged and with the gearbox
in neutral (N).
However, the brake pedal must always
be pressed first if neutral is not
engaged. It is therefore advisable to
place the gear lever in neutral (N) before
starting the engine.
LPG AND NATURAL
POWER VERSIONS
The engine always starts up on petrol
independently of the mode previously
selected.
There must therefore always be an
adequate reserve of petrol in the tank to
protect the petrol pump and to
guarantee temporary switching from
methane or LPG to petrol operation, if
high performance is required.
STOPPING THE ENGINE
Turn the ignition key to STOP while the
engine is idling.
IMPORTANT After a demanding drive,
before turning the engine off you should
allow it to idle to allow the temperature
in the engine compartment to
decrease.
93
Page 107 of 240

In addition to the electrical branches,
the car's electrical system can be
connected only to the supply cable for
an electric brake and to the cable for an
internal trailer light, though not more
than 15 W. To connect, use the preset
control unit with a battery cable with
cross-section no less than 2.5 mm
2.
IMPORTANT The use of auxiliary loads
other than external lights (electric brake,
winch, etc.) must occur with engine
running.
IMPORTANT To install a tow hook
contact a Fiat Dealership.
WARNING
112)The ABS with which the vehicle is
equipped will not control the braking
system of the trailer. Take particular care
when travelling on slippery roads.
113)Never modify the braking system of
the vehicle to control the trailer brake. The
trailer braking system must be fully
independent of the vehicle’s hydraulic
system.
114)After fitting, fixing screw holes must
be sealed to prevent an exhaust gas inlet.
REFUELLING THE
VEHICLE
115) 116) 117)61)
During refuelling, switch the engine off,
engage the handbrake, turn the ignition
key to STOP and do not smoke.
PETROL ENGINES
Use unleaded petrol only, with octane
number (RON) no lower than 95.
DIESEL ENGINES
Only use Diesel for motor vehicles (EN
590 specification).
When using or parking the car for a
long time in the mountains or cold
areas, it is advisable to refuel using
locally available diesel. In this case, it is
also advisable to keep the tank over
50% full.
REFUELLING
PROCEDURE
Diesel and petrol versions
Proceed as follows:
❒open the flap A fig. 100 pulling it
outwards, fit the dispenser in the filler
and start refuelling;
❒at the end of refuelling, before
removing the dispenser, wait for at least
10 seconds in order for the fuel to
flow inside the tank;❒then remove the dispenser from the
filler and close flap A.
The refuelling procedure described
above is illustrated on label B fig. 100
which is applied inside the fuel flap. The
label also indicates the fuel type
(UNLEADED FUEL: petrol, DIESEL:
diesel fuel).
Flap A is provided with a dust cover
gaiter C fig. 100 which prevents
deposits of impurities and dust at the
end of the filler when the flap is closed.
100F0Y0229C
105
Page 110 of 240

IN AN EMERGENCY
A punctured tyre or a burnt-out bulb?
At times, a problem may interfere
with our journey.
The pages on emergencies can help
you to deal with critical situations
independently and with calm.
In an emergency we recommend that
you call the freephone number found in
the Warranty Booklet.
It is also possible to call the national or
international universal freephone
number to search for the nearest
Dealership.HAZARD WARNING LIGHTS...........109
CHANGING A WHEEL ....................109
"FIX&GO AUTOMATIC" KIT .............113
REPLACING A BULB ......................115
REPLACING FUSES........................122
JUMP STARTING ............................128
FUEL CUT-OFF SYSTEM ................129
TOWING THE VEHICLE ..................130
108
IN AN EMERGENCY
Page 111 of 240
HAZARD WARNING
LIGHTS
CONTROL
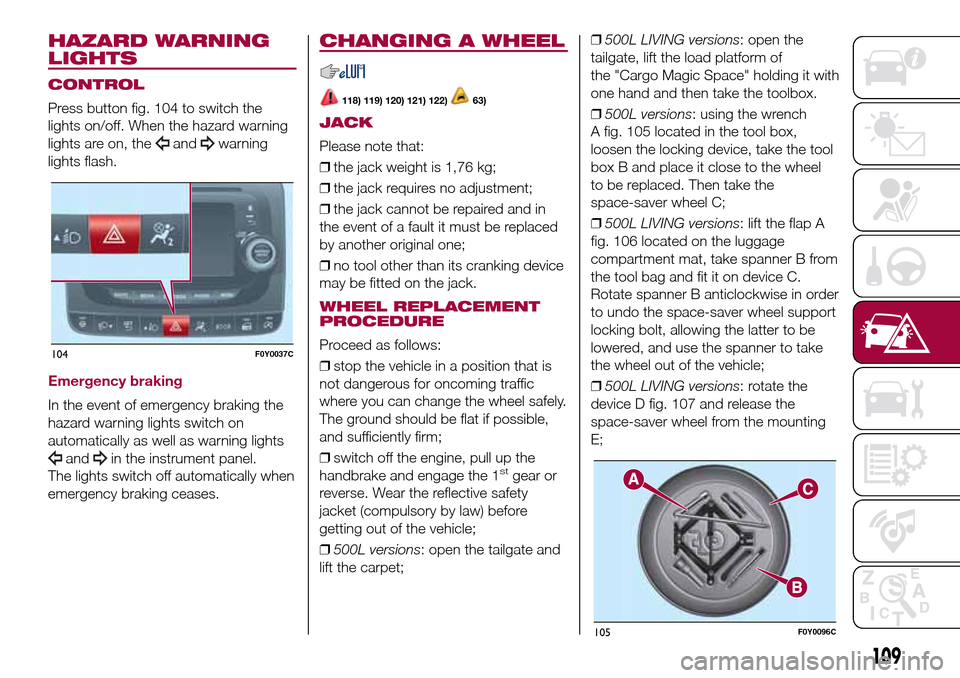
Press button fig. 104 to switch the
lights on/off. When the hazard warning
lights are on, the
andwarning
lights flash.
Emergency braking
In the event of emergency braking the
hazard warning lights switch on
automatically as well as warning lights
andin the instrument panel.
The lights switch off automatically when
emergency braking ceases.
CHANGING A WHEEL
118) 119) 120) 121) 122)63)
JACK
Please note that:
❒the jack weight is 1,76 kg;
❒the jack requires no adjustment;
❒the jack cannot be repaired and in
the event of a fault it must be replaced
by another original one;
❒no tool other than its cranking device
may be fitted on the jack.
WHEEL REPLACEMENT
PROCEDURE
Proceed as follows:
❒stop the vehicle in a position that is
not dangerous for oncoming traffic
where you can change the wheel safely.
The ground should be flat if possible,
and sufficiently firm;
❒switch off the engine, pull up the
handbrake and engage the 1
stgear or
reverse. Wear the reflective safety
jacket (compulsory by law) before
getting out of the vehicle;
❒500L versions: open the tailgate and
lift the carpet;❒500L LIVING versions: open the
tailgate, lift the load platform of
the "Cargo Magic Space" holding it with
one hand and then take the toolbox.
❒500L versions: using the wrench
A fig. 105 located in the tool box,
loosen the locking device, take the tool
box B and place it close to the wheel
to be replaced. Then take the
space-saver wheel C;
❒500L LIVING versions: lift the flap A
fig. 106 located on the luggage
compartment mat, take spanner B from
the tool bag and fit it on device C.
Rotate spanner B anticlockwise in order
to undo the space-saver wheel support
locking bolt, allowing the latter to be
lowered, and use the spanner to take
the wheel out of the vehicle;
❒500L LIVING versions: rotate the
device D fig. 107 and release the
space-saver wheel from the mounting
E;
104F0Y0037C
105F0Y0096C
109
Page 114 of 240
❒fit the standard wheel inserting the 5
stud bolts into the holes;
❒press-fit the wheel cap, aligning the
special splining (on the cap) with the
inflation valve;
❒using the spanner provided, tighten
the fixing stud bolts;
❒lower the vehicle and remove the
jack;
❒using the spanner provided, fully
tighten the stud bolts in the sequence
shown previously.
Versions with alloy wheels
❒insert the wheel on the hub and using
the spanner provided tighten the stud
bolts;
❒lower the vehicle and remove the
jack;
❒using the spanner provided, fully
tighten the 5 stud bolts in the sequence
shown;❒reinstall the hub cap, taking care to
position the three plastic pins in the
dedicated seats on the wheel. Slightly
press the cap to prevent any damage
to the plastic pins.
IMPORTANT If it is not fitted properly,
the hub cap may detach itself when the
car is running.
After tyre replacement
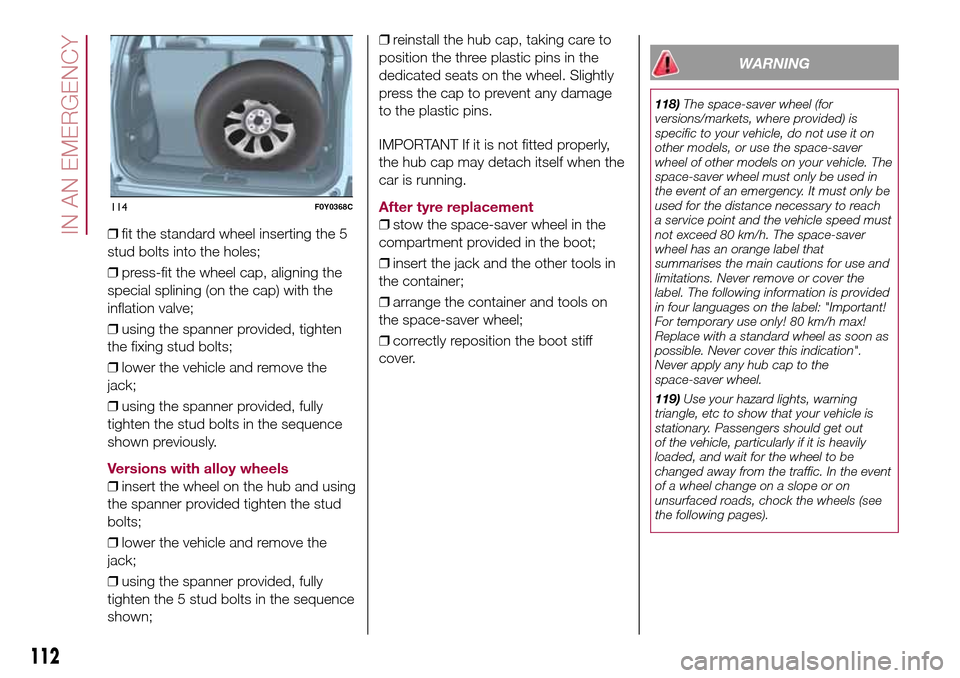
❒stow the space-saver wheel in the
compartment provided in the boot;
❒insert the jack and the other tools in
the container;
❒arrange the container and tools on
the space-saver wheel;
❒correctly reposition the boot stiff
cover.
WARNING
118)The space-saver wheel (for
versions/markets, where provided) is
specific to your vehicle, do not use it on
other models, or use the space-saver
wheel of other models on your vehicle. The
space-saver wheel must only be used in
the event of an emergency. It must only be
used for the distance necessary to reach
a service point and the vehicle speed must
not exceed 80 km/h. The space-saver
wheel has an orange label that
summarises the main cautions for use and
limitations. Never remove or cover the
label. The following information is provided
in four languages on the label: "Important!
For temporary use only! 80 km/h max!
Replace with a standard wheel as soon as
possible. Never cover this indication".
Never apply any hub cap to the
space-saver wheel.
119)Use your hazard lights, warning
triangle, etc to show that your vehicle is
stationary. Passengers should get out
of the vehicle, particularly if it is heavily
loaded, and wait for the wheel to be
changed away from the traffic. In the event
of a wheel change on a slope or on
unsurfaced roads, chock the wheels (see
the following pages).
114F0Y0368C
112
IN AN EMERGENCY
Page 124 of 240
WARNING
132)Changes or repairs to the electrical
system carried out incorrectly and without
due consideration for the technical
specifications of the system may lead to
malfunctioning and generate a fire hazard.
133)Halogen bulbs contain pressurised
gas. If they break, glass fragments could fly
everywhere.
WARNING
65)Halogen bulbs must be handled by
holding the metallic part only. Touching the
transparent part of the bulb with your
fingers may reduce the intensity of the
emitted light and even reduce the lifespan
of the bulb. In the event of accidental
contact, wipe the bulb with a cloth
moistened with alcohol and leave it to dry.
66)Where possible, it is advisable to
have bulbs changed at a Fiat Dealership.
Proper operation and direction of the
external lights are essential for driving in
safety and comply with law.
REPLACING FUSES
134) 135) 136) 137) 138) 139)67)
FUSE LOCATION
Fuses are grouped together in three
fuse boxes located in the engine
compartment, under the dashboard
and inside the luggage compartment.
ENGINE COMPARTMENT
FUSE BOX
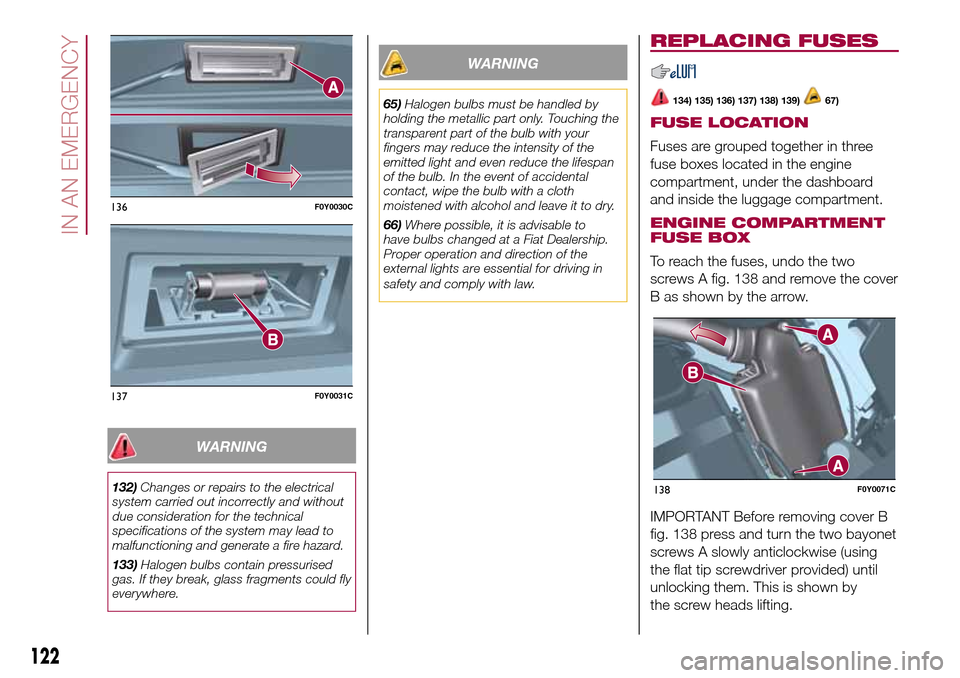
To reach the fuses, undo the two
screws A fig. 138 and remove the cover
B as shown by the arrow.
IMPORTANT Before removing cover B
fig. 138 press and turn the two bayonet
screws A slowly anticlockwise (using
the flat tip screwdriver provided) until
unlocking them. This is shown by
the screw heads lifting.
136F0Y0030C
137F0Y0031C
138F0Y0071C
122
IN AN EMERGENCY