audio FIAT 500X 2017 Owner handbook (in English)
[x] Cancel search | Manufacturer: FIAT, Model Year: 2017, Model line: 500X, Model: FIAT 500X 2017Pages: 284, PDF Size: 11.14 MB
Page 49 of 284
 MAIN MENU
The Menu includes the following items:
TRIP
MOOD SELECTOR (or DRIVE MODE
VEHICLE INFO
DRIVER ASSIST
AUDIO
PHONE
NAVIGATION
WARNINGS
VEHICLE SETTINGS
Vehicle setup (Change car settings)
This")
MAIN MENU
The Menu includes the following items:
TRIP
MOOD SELECTOR (or DRIVE MODE
VEHICLE INFO
DRIVER ASSIST
AUDIO
PHONE
NAVIGATION
WARNINGS
VEHICLE SETTINGS
Vehicle setup (Change car settings)
This menu item allows you to change
the settings for:
"Display";
"Units";
"Clock & Date";
"Security"
"Security & Assistance";
"Lights";
"Doors & Locks".
Display
By selecting item "Display" you can
access the settings/information
regarding: "Language", "See phone",
"See navigation", "Automatic Trip B
reset", “Repeat Drive Mode” or
(where provided)."Units"
Select item "Units" to choose the unit of
measurement between: "Imperial",
"Metric", "Customised".
"Clock & Date"
Select item "Clock & Date" to make the
following adjustments: "Set time", "Time
format", "Set date".
"Security"
Select item "Security" to make the
following adjustments: "Passenger
AIRBAG", "Speed beep", "Seat belt
buzzer", "Hill Hold Control".
"Passenger AIRBAG" adjustment allows
you to activate/deactivate the
passenger airbag:
Passenger's protection active:
the
ONLED comes on constantly in
the instrument panel dashboard.
Passenger's protection not
active: the
OFFLED comes on
constantly in the instrument panel
dashboard.
"Security & Assistance"
For possible adjustments see
paragraphUconnect™in the
dedicated chapter."Lights"
Select item "Lights" to make the
following adjustments: "Interior Ambient
lighting", "Headlight sensor", "Follow
me", "Headlights while opening", "Auto
high beams", "Daytime Lights",
"Cornering lights".
"Doors & Locks"
Select item "Doors & Locks" to make
the following adjustments: "Autoclose",
"Aut. unl. on exit", "Flsh.Light w/Lock",
"Horn with Lock", "Horn with remote
start", "Remote unlock", "Door Unlock"
(versions with Keyless Entry), "Keyless
Entry".
NOTE With theUconnect™system,
some Menu items are shown and
managed on the display of the latter
and not on the instrument panel display
(refer to the Multimedia chapter or to
the supplement available online).
47
GSIfor some markets) (where provided) /
“Repeat Mood Selector” (for
some markets)
Page 62 of 284
 Symbol What it means
FIAT CODE SYSTEM FAILURE/BREAK-IN ATTEMPT
Fiat CODE system failure
The symbol switches on to indicate a failure of the Fiat CODE system. Contact a Fiat Dealership as soon as
possi")
Symbol What it means
FIAT CODE SYSTEM FAILURE/BREAK-IN ATTEMPT
Fiat CODE system failure
The symbol switches on to indicate a failure of the Fiat CODE system. Contact a Fiat Dealership as soon as
possible.
Break-in attempt
The symbol switches on when the ignition device is moved to MAR position, to indicate a possible break-in
attempt detected by the alarm system.
FUEL CUT-OFF SYSTEM OPERATION
The symbol switches on in the event of fuel cut-off system intervention.
For reactivating the fuel cut-off system, refer to the description in the "Fuel cut-off system" section in the "In
an emergency" chapter. If it is still not possible to restore the fuel supply, contact a Fiat Dealership.
FUEL CUT-OFF SYSTEM FAILURE
The symbol switches on in the event of fuel cut-off system failure. Contact a Fiat Dealership as soon as
possible.
EXCESSIVE AT9 AUTOMATIC TRANSMISSION OIL TEMPERATURE / EXCESSIVE TWIN CLUTCH
AUTOMATIC TRANSMISSION OIL TEMPERATURE
The symbol switches on in the case of transmission overheating, after a particularly demanding use. In this
case an engine performance limitation is carried out. With engine off or at idle speed, wait until the symbol
switches off.
AUDIO SYSTEM FAILURE
The symbol switches on to report a failure of the audio system. Contact a Fiat Dealership as soon as
possible.
60
KNOWING THE INSTRUMENT PANEL
Page 233 of 284
 Button Functions Mode
Switching on/off
Brief button press
Volume adjustment
Knob clockwise/anticlockwise turning
Volume activation/deactivation (Mute/Pause) Brief button press
Exit the selection/retur")
Button Functions Mode
Switching on/off
Brief button press
Volume adjustment
Knob clockwise/anticlockwise turning
Volume activation/deactivation (Mute/Pause) Brief button press
Exit the selection/return to previous screen Brief button press
BROWSE ENTERScrolling the list or tuning to a radio station or select
previous/next trackKnob clockwise/anticlockwise turning
Confirmation of the option displayed Brief button press
INFODisplay mode selection (Radio, Media Player) Brief button press
AUDIOAccess to the sound setting and adjustment functions Brief button press
MENUAccess to the Settings menu Brief button press
MEDIASource selection: USB/iPod or AUX Brief button press
RADIOAccess to the Radio mode Brief button press
1-2-3-4-5-6Store current radio station Long button press
Stored radio station recall Brief button press
A-B-CSelection of the group of radio presets or selection of
the desired letter in each listBrief button press
Search for previous radio station or selection of
USB/iPod previous trackBrief button press
Scan of lower frequencies until released/Fast rewind of
USB/iPod trackLong button press
Search for next radio station or selection of USB/iPod
next trackBrief button press
Scan of higher frequencies until released/Fast forward
of USB/iPod trackLong button press
231
Page 238 of 284
 TRACK SELECTION
(Browse)
Use this function to scroll through and
select the tracks on the active device.
The choices available depend on the
device connected.
For example, on an USB/iPod device
you ca")
TRACK SELECTION
(Browse)
Use this function to scroll through and
select the tracks on the active device.
The choices available depend on the
device connected.
For example, on an USB/iPod device
you can also scroll through the list of
artists, genres and albums available
depending on the information present
on the tracks using the BROWSE
ENTER button/knob.
Within each alphabetical list, theA-B-C
button on the front panel allows the
user to skip to the desired letter in the
list.
NOTE This button might be disabled for
some
Apple®devices.
NOTE The BROWSE ENTER button
does not allow any operation on an
AUX device.
Press the BROWSE ENTER button to
activate this function on the source
being played.
Turn the BROWSE ENTER button/knob
to select the desired category and then
press the button/knob to confirm the
selection.
Press the
button to cancel the
function.
AUDIO SOURCE
SELECTION
To select the desired audio source
among those available: AUX o
USB/iPod, press theMEDIAbutton.
To select and playback music tracks on
the mobile phone CD card (where the
phone allows) press the BROWSE
ENTER button/knob, select Folders
then Card.
IMPORTANT Some multimedia player
devices may not be compatible with the
Uconnect™system.
TRACK INFORMATION
DISPLAY
Press theINFObutton to select the
information displayed while playing
(Artist, Album, Genre, Name, Folder, File
name).
Press the
button to exit the
screen.
TRACK SHUFFLE
Press thebutton to play the tracks
on USB/iPod in a random order.
Press again to deactivate the function.
TRACK REPETITION
To listen to the track again, press the
button.
Press again to deactivate the function.
AUX SUPPORT
To activate AUX mode, insert an
appropriate device in the AUX socket
on the vehicle.
Adjust the volume using the
button/knob on the front panel or
using the volume adjustment control on
the connected device.
For the "Audio source selection"
function, see the "Media mode"
chapter.
IMPORTANT
The functions of the device connected
with the AUX socket are directly
managed by the device itself: it is not
possible to change track/folder/playlist
or control playing start/end/pause with
the controls on the front panel or on the
steering wheel.
Do not leave the cable of your portable
player connected to the AUX socket
after disconnection, to avoid possible
hiss from the speakers.
236
MULTIMEDIA
Page 239 of 284
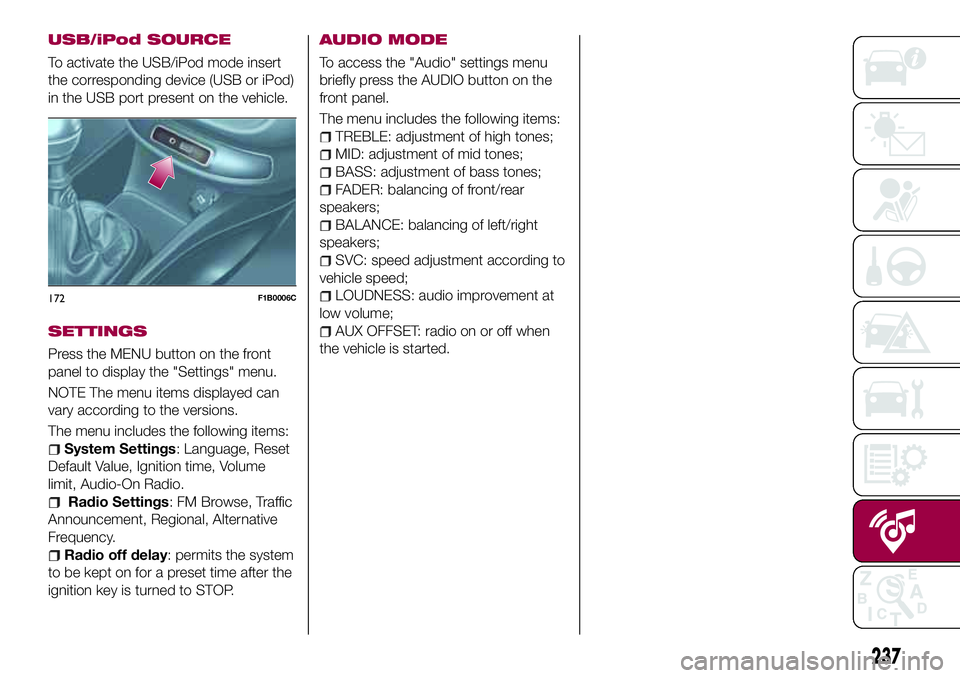
USB/iPod SOURCE
To activate the USB/iPod mode insert
the corresponding device (USB or iPod)
in the USB port present on the vehicle.
SETTINGS
Press the MENU button on the front
panel to display the "Settings" menu.
NOTE The menu items displayed can
vary according to the versions.
The menu includes the following items:
System Settings: Language, Reset
Default Value, Ignition time, Volume
limit, Audio-On Radio.
Radio Settings: FM Browse, Traffic
Announcement, Regional, Alternative
Frequency.
Radio off delay: permits the system
to be kept on for a preset time after the
ignition key is turned to STOP.
AUDIO MODE
To access the "Audio" settings menu
briefly press the AUDIO button on the
front panel.
The menu includes the following items:
TREBLE: adjustment of high tones;
MID: adjustment of mid tones;
BASS: adjustment of bass tones;
FADER: balancing of front/rear
speakers;
BALANCE: balancing of left/right
speakers;
SVC: speed adjustment according to
vehicle speed;
LOUDNESS: audio improvement at
low volume;
AUX OFFSET: radio on or off when
the vehicle is started.
172F1B0006C
237
Page 244 of 284
 SWITCHING THE SYSTEM
ON/OFF
The system is switched on/off by
pressing the
(ON/OFF) button/knob.
Turn the button/knob clockwise to
increase the radio volume or
anticlockwise to decrease it.
USB/iPod SO")
SWITCHING THE SYSTEM
ON/OFF
The system is switched on/off by
pressing the
(ON/OFF) button/knob.
Turn the button/knob clockwise to
increase the radio volume or
anticlockwise to decrease it.
USB/iPod SOURCE
The vehicle is equipped with USB port
and AUX socket. Some versions are
equipped with an SD-SDHC reader
able to read/manage cards with SPI
technology.
Some versions are also equipped with
another USB port, located in the front
armrest compartment.
RADIO (TUNER) MODE
After the desired radio station is
selected, the following information is
shown on the display:
At the top: the list of radio stations
stored (preset) is displayed; the station
being listened to is highlighted.
In the middle: the name of the radio
station being listened to and the
buttons to select the previous or the
next radio station are displayed.
At the bottom: display of the following
buttons:
"Browse": list of the radio stations
available;
"AM/FM", "AM/DAB", "FM/DAB":
selection of the desired frequency band
(button reconfigurable according to the
band selected: AM, FM or DAB);
"Tune" : manual radio station tuning
(not available for DAB radios);
"Info": additional information on the
source being listened to;
"Audio": access to the "Audio
settings" screen.
Audio menu
The following adjustments can be
carried out using the "Audio" menu:
"Equaliser" (where provided);
"Balance/Fader" (left/right and
front/rear sound balance adjustment);
"Speed/Volume" (speed-dependent
automatic volume control);
"Loudness" (where provided);
"Radio Auto-On";
"Radio Off Delay".
To exit the "Audio" menu, press the
/Done button.
MEDIA MODE
Audio source selection
Press the "choose source" button to
select the desired audio source among
those available: AUX, USB / iPod, SD
(where provided) or
Bluetooth®.
NoteApplications used on portable
devices may be not compatible with the
Uconnect™system.Track selection (Browse)
With Media mode active, briefly press
the
/buttons to play the
previous/next track or keep the
/
buttons pressed to fast
rewind/forward the track.
NoteFor languages not supported by
the system which feature special
characters (e.g. Greek), the keyboard is
not available. In these cases this
function will be limited.
Bluetooth SOURCE
Pairing aBluetooth® audio device
To pair a
Bluetooth®audio device,
proceed as follows:
activate theBluetooth®function on
the device;
Press the MEDIA button on the front
panel;
if the "Media" source is active, press
the "Source" button;
select theBluetooth®Media
source;
press the "Add Device" button;
search forUconnect™on the
Bluetooth®audio device (during the
pairing stage a screen is displayed
showing the progress of the operation);
when requested by the audio device,
enter the PIN code shown on the
system display or confirm on the device
the PIN displayed;
if the pairing procedure is completed
successfully, a screen is displayed.
242
MULTIMEDIA
Page 245 of 284
 Answer \"Yes\" to the question to pair the
Bluetooth®audio device as favourite
(the device will have priority over all
other devices to be paired
subsequently). If \"No\" is selected, the")
Answer "Yes" to the question to pair the
Bluetooth®audio device as favourite
(the device will have priority over all
other devices to be paired
subsequently). If "No" is selected, the
priority is determined according to the
order of connection. The last device
connected will have the highest priority;
an audio device can also be paired
by pressing the
PHONE button on
the front panel and by selecting
"Settings" or, from the "Settings" menu,
selecting "Phone/Bluetooth".
IMPORTANT If theBluetooth®
connection between mobile phone and
system is lost, consult the mobile
phone Owner's handbook.
PHONE MODE
Activate phone mode
Press the PHONE button on the front
panel to activate the Phone mode.
Use the buttons on the display to:
dial the phone number (using the
graphic keypad on the display);
display and call the contacts in the
mobile phone phonebook;
display and call contacts from the
registers of previous calls;
pair up to 10 phones/audio devices
to make access and connection easier
and quicker;
transfer calls from the system to the
mobile phone and vice versa anddeactivate the microphone audio for
private conversations.
The mobile phone audio is transmitted
through the car’s audio system; the
system automatically mutes the radio
when the Phone function is used.
NOTE To consult the list of mobile
phones and supported functions, visit
the www.driveuconnect.eu website
Pairing a mobile phone
Proceed as follows:
activate theBluetooth®function on
the mobile phone;
press the PHONE button on the front
panel;
if no phone is paired with the system
yet, the display shows a dedicated
screen;
select "Yes" to start the pairing
procedure, then search for the
Uconnect™device on the mobile
phone (if "No" is selected, the Phone
main screen is displayed);
when prompted by the mobile
phone, use its keypad to enter the PIN
code shown on the system display or
confirm on the mobile phone the PIN
displayed;
from the "Phone" screen you can
always pair a mobile phone by pressing
the "Settings" button: press the "Add
Device" button and proceed as
described above;
during the pairing stage a screen is
displayed showing the progress of the
operation;
when the pairing procedure is
completed successfully, a screen is
displayed: answer "Yes" to the question
to pair the mobile phone as favourite
(the mobile phone will have priority over
all other mobile phones to be paired
subsequently). If no other devices are
paired, the system will consider the first
associated device as favourite.
NOTE After updating the telephone
software, for correct operation it is
advisable to remove the telephone from
the list of devices paired to the radio,
also delete the previous system pairing
from the telephone's available
Bluetooth®device list and pair it
again.
Making a phone call
The operations described below can
only be accessed if supported by the
mobile phone in use.
Proceed as follows:
selecting theicon (mobile phone
phonebook);
selecting "Recent Calls";
selecting theicon;
pressing the "Redial" button.
Text message reader
The system can read the messages
received by the mobile phone. To use
243
Page 249 of 284
 When the USB memory stick is full, the
dedicated messages are shown on the
radio display.
When theeco:Drive™data are not
transferred to the USB memory stick for
a long time, the internal memory of t")
When the USB memory stick is full, the
dedicated messages are shown on the
radio display.
When theeco:Drive™data are not
transferred to the USB memory stick for
a long time, the internal memory of the
Uconnect™LIVEsystem may be full:
in this case, follow the
recommendations provided in the
messages on theUconnect™display.
my:Car
my:Car allows you to keep the
condition of your vehicle always under
control.
my:Car can detect malfunction in real
time and inform the user about the
expiry of the servicing interval. Press the
"my:Car" button to interact with the
application.
The display will show a screen with the
"care:Index" section, which provides all
the detailed information about the
status of the vehicle. Press the "Active
warnings" button to show (if present)
the details of the vehicle's faults which
caused a warning light to switch on.
The vehicle status can be seen both on
www.DriveUconnect.eu or through the
App Uconnect™LIVE.
SETTINGS
Press thebutton on the front panel
to display the main "Settings" menu.
NOTE The menu items displayed vary
according to the versions.
The menu includes the following items:
Display;
Units;
Voice commands;
Clock & Date;
Safety/Assistance (where provided);
Lights (where provided);
Doors & Locks;
Vehicle Off Options;
Audio;
Phone/Bluetooth;
SiriusXM Setup (where provided);
Radio Setup;
Restore Settings
Safety/Assistance(where provided)
This function can be used to carry out
the following adjustments:
"Rear View camera"(where
provided): this function can be used to
carry out the following adjustments:
- "Active Guidelines" (where provided):
permits the activation of dynamic grids
that indicate the route of the vehicle on
the display.
- "Rear View cam.delay" (where
provided): permits a delay in thedisappearance of images from the
camera when reverse is disengaged.
"Frnt Coll. Warning"(where
provided): this function can be used to
select the Full Brake Control system
intervention mode.
The options available are:
- "Off": the system is deactivated;
- "Only warning": the system intervenes
only by providing the driver with an
acoustic warning (where provided);
- "Only active braking": the system
intervenes by activating automatic
braking (where provided);
- "Warning + active braking": the
system intervenes by providing the
driver with an acoustic warning and
activating automatic braking.
"Fwd Coll. Sensitivity"(where
provided): this function can be used to
select the "readiness" of the system to
intervene, on the basis of distance from
the obstacle.
The options available are "Near",
"Med", "Far".
"Park Assist"(where provided): this
function can be used to select the type
of warning provided by the Park Assist
system.
The options available are:
- "Sound Only": the system warns the
driver that an obstacle is present
247
Page 253 of 284
 VOICE COMMANDS
NoteFor languages not supported by
the system, voice commands are not
available.
To use the voice commands, press the
button (\"Voice\" button) on the
steering wheel and give the")
VOICE COMMANDS
NoteFor languages not supported by
the system, voice commands are not
available.
To use the voice commands, press the
button ("Voice" button) on the
steering wheel and give the command
you want to activate, out loud.
Global
The following voice commands can be
given after pressing the
button on
the steering wheel:
Help
Cancel
Repeat
Voice Prompts
Navigation
Phone
The following voice commands can be
given after pressing the
button on
the steering wheel and saying "Go to
telephone":
Call
Dial
Redial
Call back
Last calls
Outgoing calls
Missed calls
Incoming calls
Phonebook
Search
Show SMS
SMS voice commands
The following voice commands can be
given after pressing the
button on
the steering wheel:
Send an SMS to "0123456"
Send an SMS to "Mario Rossi"
"mobile"
Show messages
Radio
The following voice commands can be
given after pressing the
button on
the steering wheel:
Tune to FM "frequency"
Tune to AM "frequency"
Tune to "radio station name" FM
Tune to "radio station name" DAB
channel
Media
The following voice commands can be
given after pressing the
button on
the steering wheel:
Play song...
Play album…
Play artist…
Play genre…
Play playlist…
Play podcast…
Play audiobook…
Play track number…
Select the source...
Display...Navigation
(Uconnect 5" Radio Nav LIVE only)
The following voice commands can be
given after pressing the
button on
the steering wheel:
Drive Home
2D view
3D view
Clear route
Add Favourite
Repeat instruction
251
Page 258 of 284
 SWITCHING THE SYSTEM
ON/OFF
The system is switched on/off by
pressing the
(ON/OFF) button/knob.
Turn the button/knob clockwise to
increase the radio volume or
anticlockwise to decrease it.
RADIO (TUNE")
SWITCHING THE SYSTEM
ON/OFF
The system is switched on/off by
pressing the
(ON/OFF) button/knob.
Turn the button/knob clockwise to
increase the radio volume or
anticlockwise to decrease it.
RADIO (TUNER) MODE
The system has the following tuners:
AM, FM and DAB (where provided).
RADIO MODE SELECTION
Press the RADIO button on the front
panel to activate radio mode.
The different tuning modes can be
selected with the corresponding button
on the display.
Up to 12 favourite radio stations can be
stored in each mode.
FREQUENCY BAND
SELECTION
Press one of the buttons at the left of
the display to select the frequency
band: AM, FM and DAB (where
provided).
DISPLAYED
INFORMATION
After the desired radio station is
selected, the following information is
shown on the display:
At the top: display of the stored radiostation (preset) list. If the current station
is in the list of presets, it will be
highlighted on the display.
In the middle: the name of the radio
station being listened to and the
buttons to select the previous or the
next radio station are displayed.
At the bottom: display of the following
buttons:
"browse": search available radio
stations
"tune" : manual radio station tuning
(not available for DAB radios);
"audio": access to the "Audio
settings" screen
and: permit searching
for the desired radio station.
Select previous/next
radio station
The previous/next radio station can be
selected using the following methods:
turning the BROWSE ENTER
button/knob, briefly pressing the
orbutton on the display,
pressing of the buttons behind the
steering wheel.
Holding down the
or
buttons on the display activates
rapid scrolling through the active
frequency band.
PREVIOUS/NEXT RADIO
STATION FAST SEARCH
To start the fast search press the
orbutton on the display, or
use the corresponding steering wheel
controls.
AM/FM RADIO STATION
TUNING
Press the "tune" button, then select the
first digit of the desired radio station.
Press the
button to delete a wrong
number (and enter the correct station
number).
After entering the last digit of the station
the system will tune to the selected
one.
The screen disappears automatically
after 5 seconds or manually by pressing
the OK button.
DAB RADIO
Once DAB radio mode is selected, the
information on the current station is
displayed and the following functions.
The "browse" button is used to display:
the list of all DAB stations;
the list of all the favourites;
the list of stations filtered by
"Ensembles" (broadcast group).
Within each list, the "ABC" button
allows the user to skip to the desired
letter in the list.
256
MULTIMEDIA