ESP FIAT 500X 2018 Owner handbook (in English)
[x] Cancel search | Manufacturer: FIAT, Model Year: 2018, Model line: 500X, Model: FIAT 500X 2018Pages: 276, PDF Size: 7.08 MB
Page 219 of 276
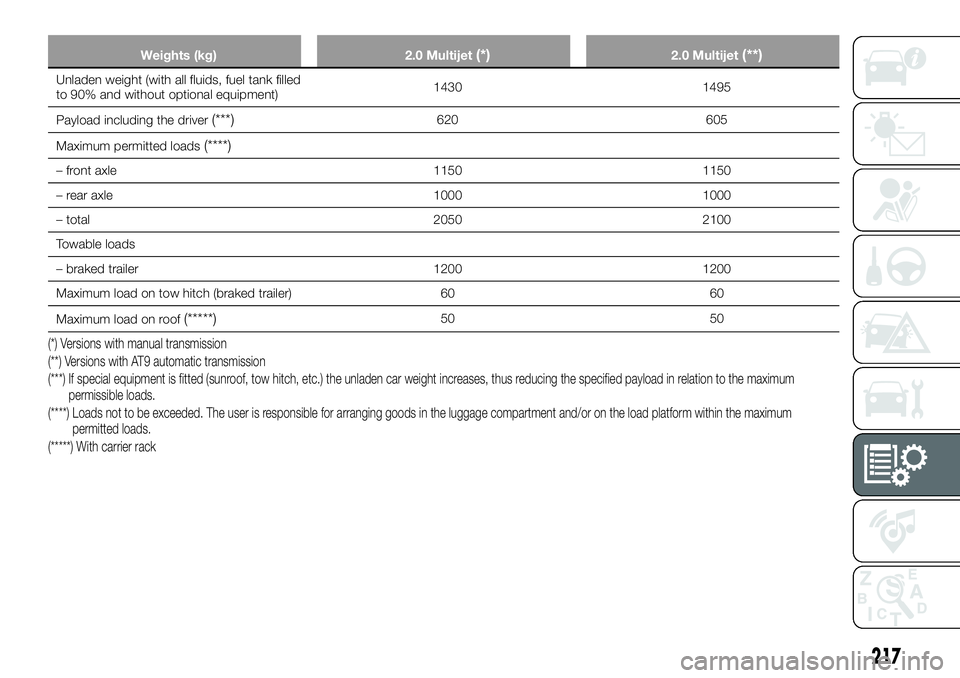
Weights (kg)2.0 Multijet(*)2.0 Multijet(**)
Unladen weight (with all fluids, fuel tank filled
to 90% and without optional equipment) 1430 1495
Payload including the driver
(***)620 605
Maximum permitted loads
(****)
– front axle 11501150
– rear axle 10001000
– total 20502100
Towable loads
– braked trailer 12001200
Maximum load on tow hitch (braked trailer) 6060
Maximum load on roof
(*****)50 50
(*) Versions with manual transmission
(**) Versions with AT9 automatic transmission
(***) If special equipment is fitted (sunroof, tow hitch, etc.) the unladen car weight increases, thus reducing the specified payload in relation to the maximum
permissible loads.
(****) Loads not to be exceeded. The user is responsible for arranging goods in the luggage compartment and/or on the load platform within the maximum permitted loads.
(*****) With carrier rack
217
Page 233 of 276
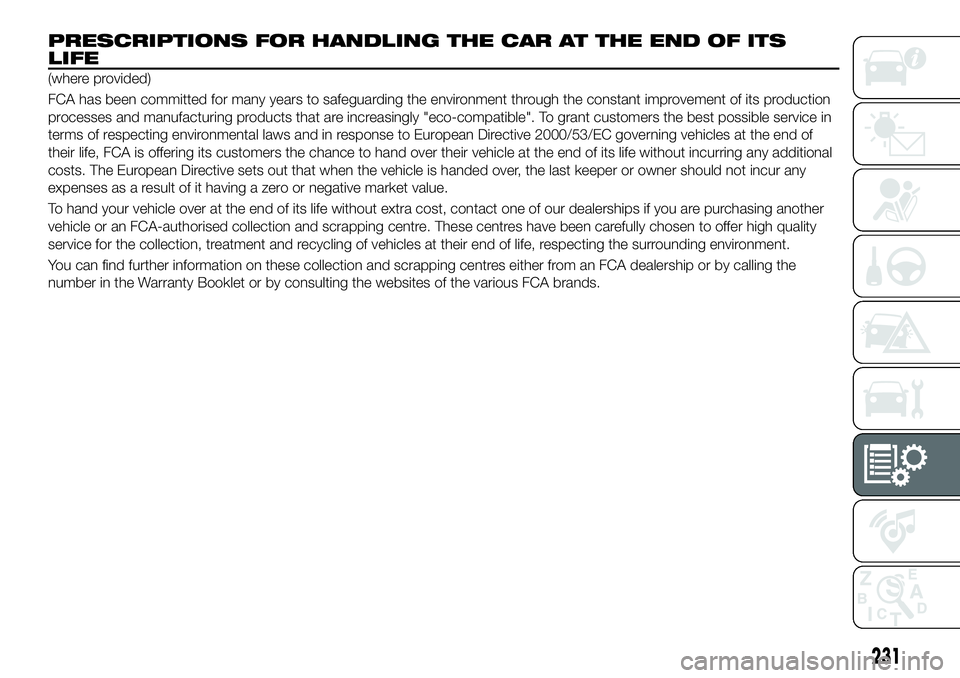
PRESCRIPTIONS FOR HANDLING THE CAR AT THE END OF ITS
LIFE
(where provided)
FCA has been committed for many years to safeguarding the environment through the constant improvement of its production
processes and manufacturing products that are increasingly "eco-compatible". To grant customers the best possible service in
terms of respecting environmental laws and in response to European Directive 2000/53/EC governing vehicles at the end of
their life, FCA is offering its customers the chance to hand over their vehicle at the end of its life without incurring any additional
costs. The European Directive sets out that when the vehicle is handed over, the last keeper or owner should not incur any
expenses as a result of it having a zero or negative market value.
To hand your vehicle over at the end of its life without extra cost, contact one of our dealerships if you are purchasing another
vehicle or an FCA-authorised collection and scrapping centre. These centres have been carefully chosen to offer high quality
service for the collection, treatment and recycling of vehicles at their end of life, respecting the surrounding environment.
You can find further information on these collection and scrapping centres either from an FCA dealership or by calling the
number in the Warranty Booklet or by consulting the websites of the various FCA brands.
231
Page 235 of 276
TIPS, CONTROLS
AND GENERAL
INFORMATION
ROAD SAFETY
Learn how to use the various system
functions before setting off.
Read the instructions for the system
carefully before setting off.
192) 193)
RECEPTION CONDITIONS
Reception conditions change
constantly while driving. Reception may
be interfered with by the presence of
mountains, buildings or bridges,
especially when you are far away from
the broadcaster.
IMPORTANT The volume may be
increased when receiving traffic alerts
and news.CARE AND
MAINTENANCE
Observe the following precautions to
ensure the system is fully operational:
the display lens should not come into
contact with pointed or rigid objects
which could damage its surface; use a
soft, dry anti-static cloth to clean and
do not press.
never use alcohol, petrols and
derivatives to clean the display lens.
prevent any liquid from entering the
system: this could damage it beyond
repair.
105) 106)
MULTIMEDIA DEVICES
IMPORTANT Some multimedia players
may not be compatible with the
Uconnect™.
Only use devices (e.g. USB flash drives)
from safe sources on the car. Devices
from unknown sources could contain
software infected by viruses which, if
installed on the car, could increase the
vulnerability of the car's electric/
electronic systems to hacking.
ANTITHEFT PROTECTION
The system is equipped with an
anti-theft protection system based on
the exchange of information with the
electronic control unit (Body Computer)
on the vehicle.
This guarantees maximum safety and
prevents the secret code from being
entered after the power supply has
been disconnected.
If the check has a positive outcome, the
system will start to operate, whereas if
the comparison codes are not the same
or if the electronic control unit (Body
Computer) is replaced, the system will
ask the user to enter the secret code
according to the procedure described
in the paragraph below.
Entering the secret code
When the system is switched on, if the
code is requested, the display will show
"Please enter Anti-Theft Code" followed
by the screen showing a keypad to
enter the secret code.
The secret code is made up of four
digits, from 0 to 9: to insert the code,
turn the "BROWSE ENTER" right knob
and press to confirm.
After inserting the fourth digit, move the
cursor to "OK" and press the
"BROWSE ENTER" right knob: the
system will start to operate.
233
Page 243 of 276
SWITCHING THE SYSTEM
ON/OFF
The system is switched on/off by
pressing the
button/knob.
Turn the button/knob clockwise to
increase the radio volume or
anticlockwise to decrease it.
RADIO (TUNER) MODE
The system features the following
tuners: AM, FM.
RADIO MODE SELECTION
Press the RADIO button on the front
panel to activate radio mode.
FREQUENCY BAND
SELECTION
The different tuning modes can be
selected by pressing the RADIO button
on the front panel.
DISPLAYED
INFORMATION
After the desired radio station is
selected on the display, the following
information is shown (INFO mode
activated):
In the upper part: the preset station, the
time and the other active radio settings
are highlighted.
In the central part: the name of the
current station, the frequency and the
radio text information (if any) are
highlighted.
FM station list
Press the BROWSE ENTER
button/knob to display the complete list
of the FM stations that can be received.
SETTING THE PRESETS
The preset stations are available in all
system modes and are selected by
touching one of the presetting buttons
1-2-3-4-5-6 on the front panel.
If you are tuned to a radio station that
you wish to store, hold down the button
on the display which corresponds to
the desired preset until an acoustic
confirmation signal is emitted.
RADIO STATION
SELECTION
To search for the desired radio station
press the
orbutton or use
the wheel of the steering wheel controls
, or turn the "BROWSE ENTER"
knob.
PREVIOUS/NEXT RADIO
STATION SEARCH
Press briefly theorbutton
or use the wheel of the steering wheel
controls
: when the button is
released the previous or next radio
station is displayed.
PREVIOUS/NEXT RADIO
STATION FAST SEARCH
Hold down theorbutton to
start the fast search: when the button is
released, the first tunable radio is
played.
MEDIA MODE
Press the MEDIAbutton to select the
desired audio source among those
available: AUX or USB.
To select and playback music tracks on
the mobile phone CD card (where the
phone allows) press the BROWSE
ENTER button/knob, select Folders
then Card.
IMPORTANT Some multimedia player
devices may not be compatible with the
Uconnect™ system.
TRACK CHANGE
(previous/next)
Briefly press thebutton or turn
the BROWSE ENTER button/knob
clockwise to play the next track.
Briefly press the
button or turn
the BROWSE ENTER button/knob
anticlockwise to return to the beginning
of the selected track or to the beginning
of the previous track (if this has been
played for less than 3 seconds).
241
Page 245 of 276
USB SOURCE
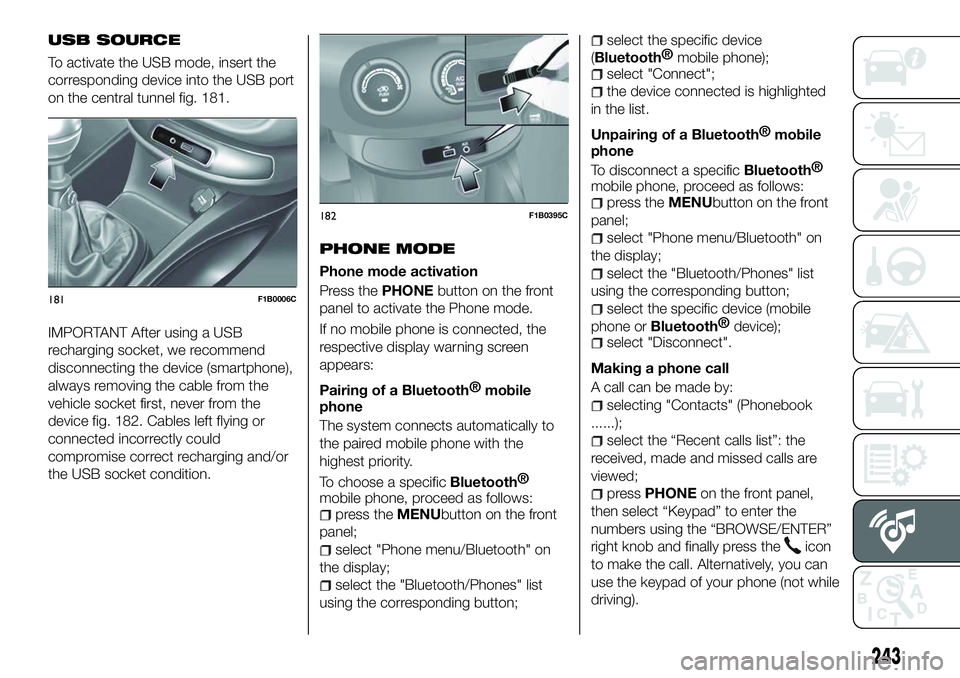
To activate the USB mode, insert the
corresponding device into the USB port
on the central tunnel fig. 181.
IMPORTANT After using a USB
recharging socket, we recommend
disconnecting the device (smartphone),
always removing the cable from the
vehicle socket first, never from the
device fig. 182. Cables left flying or
connected incorrectly could
compromise correct recharging and/or
the USB socket condition.PHONE MODE
Phone mode activation
Press the
PHONEbutton on the front
panel to activate the Phone mode.
If no mobile phone is connected, the
respective display warning screen
appears:
Pairing of a
Bluetooth® mobile
phone
The system connects automatically to
the paired mobile phone with the
highest priority.
To choose a specific
Bluetooth®
mobile phone, proceed as follows:
press the MENUbutton on the front
panel;
select "Phone menu/Bluetooth" on
the display;
select the "Bluetooth/Phones" list
using the corresponding button;
select the specific device
(
Bluetooth® mobile phone);
select "Connect";
the device connected is highlighted
in the list.
Unpairing of a
Bluetooth® mobile
phone
To disconnect a specific
Bluetooth®
mobile phone, proceed as follows:
press the MENUbutton on the front
panel;
select "Phone menu/Bluetooth" on
the display;
select the "Bluetooth/Phones" list
using the corresponding button;
select the specific device (mobile
phone or
Bluetooth® device);
select "Disconnect".
Making a phone call
A call can be made by:
selecting "Contacts" (Phonebook
......);
select the “Recent calls list”: the
received, made and missed calls are
viewed;
press PHONE on the front panel,
then select “Keypad” to enter the
numbers using the “BROWSE/ENTER”
right knob and finally press the
icon
to make the call. Alternatively, you can
use the keypad of your phone (not while
driving).
181F1B0006C
182F1B0395C
243
Page 253 of 276
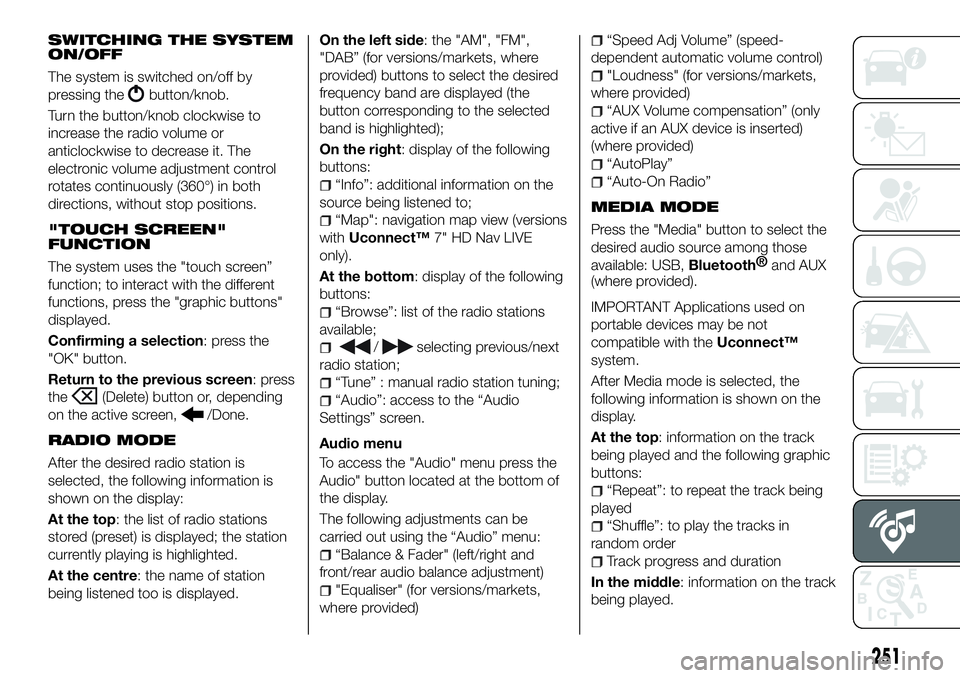
SWITCHING THE SYSTEM
ON/OFF
The system is switched on/off by
pressing the
button/knob.
Turn the button/knob clockwise to
increase the radio volume or
anticlockwise to decrease it. The
electronic volume adjustment control
rotates continuously (360°) in both
directions, without stop positions.
"TOUCH SCREEN"
FUNCTION
The system uses the "touch screen”
function; to interact with the different
functions, press the "graphic buttons"
displayed.
Confirming a selection: press the
"OK" button.
Return to the previous screen: press
the
(Delete) button or, depending
on the active screen,
/Done.
RADIO MODE
After the desired radio station is
selected, the following information is
shown on the display:
At the top: the list of radio stations
stored (preset) is displayed; the station
currently playing is highlighted.
At the centre: the name of station
being listened too is displayed. On the left side: the "AM", "FM",
"DAB” (for versions/markets, where
provided) buttons to select the desired
frequency band are displayed (the
button corresponding to the selected
band is highlighted);
On the right: display of the following
buttons:
“Info”: additional information on the
source being listened to;
“Map": navigation map view (versions
with Uconnect™ 7" HD Nav LIVE
only).
At the bottom: display of the following
buttons:
“Browse”: list of the radio stations
available;
/selecting previous/next
radio station;
“Tune” : manual radio station tuning;
“Audio”: access to the “Audio
Settings” screen.
Audio menu
To access the "Audio" menu press the
Audio" button located at the bottom of
the display.
The following adjustments can be
carried out using the “Audio” menu:
“Balance & Fader" (left/right and
front/rear audio balance adjustment)
"Equaliser" (for versions/markets,
where provided)
“Speed Adj Volume” (speed-
dependent automatic volume control)
"Loudness" (for versions/markets,
where provided)
“AUX Volume compensation” (only
active if an AUX device is inserted)
(where provided)
“AutoPlay”
“Auto-On Radio”
MEDIA MODE
Press the "Media" button to select the
desired audio source among those
available: USB,
Bluetooth® and AUX
(where provided).
IMPORTANT Applications used on
portable devices may be not
compatible with the Uconnect™
system.
After Media mode is selected, the
following information is shown on the
display.
At the top: information on the track
being played and the following graphic
buttons:
“Repeat”: to repeat the track being
played
“Shuffle”: to play the tracks in
random order
Track progress and duration
In the middle: information on the track
being played.
251
Page 255 of 276
NOTE When modifying the
name-device in the
Bluetooth®
settings of the phone (where provided),
the Radio may change the track being
played if the device is connected via
USB after the
Bluetooth® connection.
After updating the phone software, for
proper operation, it is recommended to
remove the phone from the list of
devices linked to the radio, delete the
previous system pairing also from the
list of
Bluetooth® devices on the
phone and make a new pairing.
IMPORTANT If the Bluetooth®
connection between mobile phone and
system is lost, consult the mobile
phone handbook.
USB SOURCE
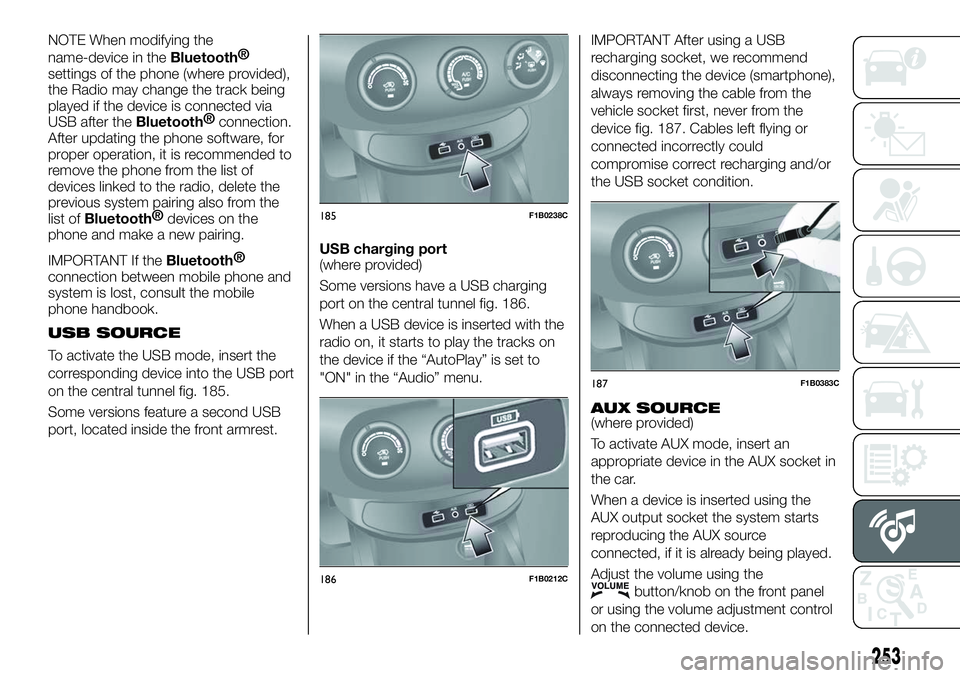
To activate the USB mode, insert the
corresponding device into the USB port
on the central tunnel fig. 185.
Some versions feature a second USB
port, located inside the front armrest. USB charging port
(where provided)
Some versions have a USB charging
port on the central tunnel fig. 186.
When a USB device is inserted with the
radio on, it starts to play the tracks on
the device if the “AutoPlay” is set to
"ON" in the “Audio” menu.
IMPORTANT After using a USB
recharging socket, we recommend
disconnecting the device (smartphone),
always removing the cable from the
vehicle socket first, never from the
device fig. 187. Cables left flying or
connected incorrectly could
compromise correct recharging and/or
the USB socket condition.
AUX SOURCE
(where provided)
To activate AUX mode, insert an
appropriate device in the AUX socket in
the car.
When a device is inserted using the
AUX output socket the system starts
reproducing the AUX source
connected, if it is already being played.
Adjust the volume using the
button/knob on the front panel
or using the volume adjustment control
on the connected device.
185F1B0238C
186F1B0212C
187F1B0383C
253
Page 257 of 276
A call can be made by:
selecting "Phonebook";
selecting "Recent";
selecting "Dial";
selecting "Redial".
Favourites
You can add a number or a contact (if
already in Contacts) to the favourite list
during a call by pressing one of the 5
"Empty" graphic buttons on the upper
part of the display. The favourites can
also be managed by using the
Phonebook options
Text message reader
The system can read the messages
received by the mobile phone. To use
this function the mobile phone must
support the SMS exchange function
through
Bluetooth® .
If this function is not supported by the
phone, the corresponding "Text" button
is deactivated (greyed out).
When a text message is received, the
display will show a screen where the
options "Read", "Show", "Call" or
"Ignore" can be selected.
Press the "Text Message" graphic
button to access the list of text
messages received by the mobile
phone (the list displays a maximum of
60 messages received). NOTE On some mobile phones, to
make the SMS voice reading function
available, the SMS notification option
on the phone must be enabled; this
option is usually available on the phone,
in the
Bluetooth®
connections menu
for a device registered as Uconnect™.
After enabling this function on the
mobile phone, it must be disconnected
and reconnected with the Uconnect™
system in order to make it effective.
IMPORTANT Some mobile phones may
not take the SMS delivery confirmation
settings into account when interfacing
with Uconnect™. If a text message is
sent via the Uconnect™ system, the
driver could face an additional cost,
without any warning, due to the text
message delivery confirmation request
sent by the phone. For any problems
related to the above, contact your
telephone service provider.
"Do not disturb" function
If supported by the connected phone,
by pressing the "Do not disturb"
graphic button the user will not receive
notifications of incoming calls or text
messages. The user can reply with a
default or customised message by
means of the settings. SMS message options
Default SMS messages are stored in
the system memory and can be sent to
answer a received message or as a
new message.
Ye s
No
Okay
I can't talk right now
Call me
I'll call you later
I'm on my way
Thanks
I'll be late
Stuck in traffic
Start without me
Where are you?
Are you there yet?
I need directions
I'm lost
See you later
I will be 5 (or 10, 15, 20, 25, 30, 45,
60) (*) minutes late
See you in 5 (or 10, 15, 20, 25, 30,
45, 60) (*) minutes
(*) Only use the numbers listed,
otherwise the system will not take the
message. When receiving an SMS, the
systems also allows the same message
to be forwarded.
NOTE For details on how to send an
SMS using the voice commands, refer
to the dedicated paragraph.
255
Page 275 of 276
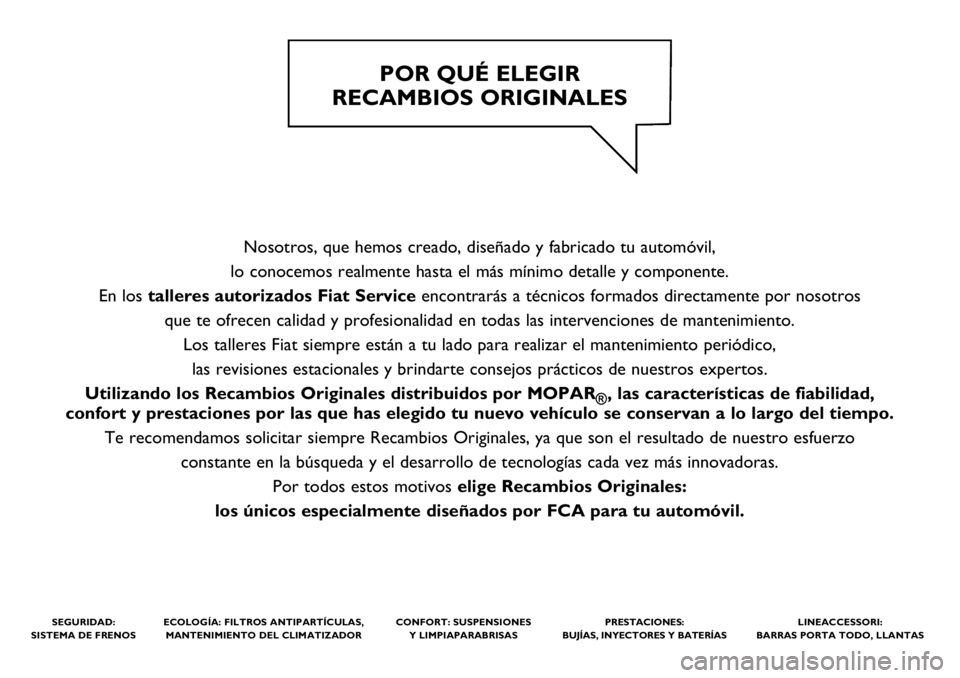
Nosotros, que hemos creado, diseñado y fabricado tu automóvil,
lo conocemos realmente hasta el más mínimo detalle y componente.
En los talleres autorizados Fiat Serviceencontrarás a técnicos formados directamente por nosotros
que te ofrecen calidad y profesionalidad en todas las intervenciones de mantenimiento.
Los talleres Fiat siempre están a tu lado para realizar el mantenimiento periódico,
las revisiones estacionales y brindarte consejos prácticos de nuestros expertos.
Utilizando los Recambios Originales distribuidos por MOPAR
®, las características de fiabilidad,
confort y prestaciones por las que has elegido tu nuevo vehículo se conservan a lo largo del tiempo.
Te recomendamos solicitar siempre Recambios Originales, ya que son el resultado de nuestro esfuerzo
constante en la búsqueda y el desarrollo de tecnologías cada vez más innovadoras.
Por todos estos motivos elige Recambios Originales:
los únicos especialmente diseñados por FCA para tu automóvil.
SEGURIDAD:
SISTEMA DE FRENOSECOLOGÍA: FILTROS ANTIPARTÍCULAS,
MANTENIMIENTO DEL CLIMATIZADORCONFORT: SUSPENSIONES
Y LIMPIAPARABRISAS PRESTACIONES:
BUJÍAS, INYECTORES Y BATERÍASLINEACCESSORI:
BARRAS PORTA TODO, LLANTAS
POR QUÉ ELEGIR
RECAMBIOS ORIGINALES
Page 276 of 276
Los datos contenidos en esta publicación son a título indicativo.
FCA Italy S.p.A. podrá modificar en cualquier momento los modelos descritos en esta publicación por razones técnicas o comerciales.
El Cliente puede solicitar más información en los concesionarios de la Red de Asistencia Fiat.
Impreso en papel ecológico sin cloro.
ESPAÑOL