mirror FIAT 500X 2019 Owner handbook (in English)
[x] Cancel search | Manufacturer: FIAT, Model Year: 2019, Model line: 500X, Model: FIAT 500X 2019Pages: 284, PDF Size: 8.33 MB
Page 8 of 284
USE OF THE OWNER HANDBOOK
OPERATING INSTRUCTIONS
Each time direction instructions (left/right or forwards/backwards) about the vehicle are given, these must be understood as
regarding an occupant in the driver's seat.
Special cases not complying with this rule will be specified as appropriate in the text.
The figures in the Owner Handbook are provided by way of example only: this might imply that some details of the image do
not correspond to the actual arrangement of your vehicle.
In addition, the Handbook has been conceived considering vehicles with steering wheel on the left side; it is therefore possible
that on vehicles with steering wheel on the right side, the position or construction of some controls is not exactly mirror-like with
respect to the figure.
To identify the chapter with the information needed you can consult the index at the end of this Owner Handbook.
Chapters can be rapidly identified with dedicated graphic tabs, at the side of each odd page. A few pages further there is a key
for getting to know the chapter order and the relevant symbols in the tabs. There is in any case a textual indication of the
current chapter at the side of each even page.
WARNINGS AND PRECAUTIONS
While reading this Owner Handbook you will find a series ofWARNINGSto prevent procedures that could damage your
vehicle.
There are alsoPRECAUTIONSthat must be carefully followed to prevent incorrect use of the components of the vehicle,
which could cause accidents or injuries.
Therefore allWARNINGSandPRECAUTIONSmust always be carefully followed.
WARNINGSandPRECAUTIONSare recalled in the text with the following symbols:
personal safety;
vehicle safety;
environmental protection.
NOTE These symbols, when necessary, are indicated besides the title or at the end of the line and are followed by a number.
That number recalls the corresponding warning at the end of the relevant section.
Page 11 of 284
GETTING TO KNOW YOUR CAR
In-depth knowledge of your new vehicle
starts here.
The booklet that you are reading simply
and directly explains how it is made and
how it works.
That’s why we advise you to read it
seated comfortably on board, so that
you can see immediately what is
described here for yourself.DASHBOARD...............10
THE KEYS.................11
IGNITION DEVICE............12
FIAT CODE.................14
ALARM...................14
DOORS...................15
SEATS....................19
HEAD RESTRAINTS...........21
STEERING WHEEL............23
REAR VIEW MIRRORS.........23
EXTERIOR LIGHTS............25
INTERIOR LIGHTS............29
WINDSCREEN/REAR WINDOW
WIPER...................30
CLIMATE CONTROL SYSTEM.....34
ELECTRIC WINDOWS..........39
ELECTRIC SUNROOF..........40
BONNET..................42
BOOT....................43
9
Page 18 of 284
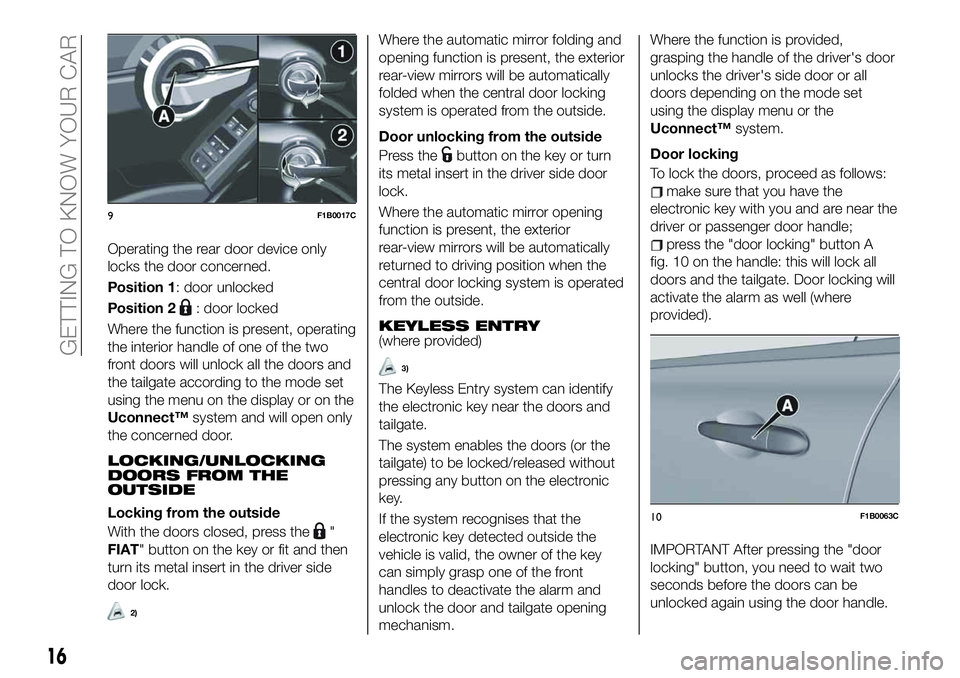
Operating the rear door device only
locks the door concerned.
Position 1: door unlocked
Position 2
: door locked
Where the function is present, operating
the interior handle of one of the two
front doors will unlock all the doors and
the tailgate according to the mode set
using the menu on the display or on the
Uconnect™system and will open only
the concerned door.
LOCKING/UNLOCKING
DOORS FROM THE
OUTSIDE
Locking from the outside
With the doors closed, press the
"
FIAT" button on the key or fit and then
turn its metal insert in the driver side
door lock.
2)
Where the automatic mirror folding and
opening function is present, the exterior
rear-view mirrors will be automatically
folded when the central door locking
system is operated from the outside.
Door unlocking from the outside
Press the
button on the key or turn
its metal insert in the driver side door
lock.
Where the automatic mirror opening
function is present, the exterior
rear-view mirrors will be automatically
returned to driving position when the
central door locking system is operated
from the outside.
KEYLESS ENTRY(where provided)
3)
The Keyless Entry system can identify
the electronic key near the doors and
tailgate.
The system enables the doors (or the
tailgate) to be locked/released without
pressing any button on the electronic
key.
If the system recognises that the
electronic key detected outside the
vehicle is valid, the owner of the key
can simply grasp one of the front
handles to deactivate the alarm and
unlock the door and tailgate opening
mechanism.Where the function is provided,
grasping the handle of the driver's door
unlocks the driver's side door or all
doors depending on the mode set
using the display menu or the
Uconnect™system.
Door locking
To lock the doors, proceed as follows:
make sure that you have the
electronic key with you and are near the
driver or passenger door handle;
press the "door locking" button A
fig. 10 on the handle: this will lock all
doors and the tailgate. Door locking will
activate the alarm as well (where
provided).
IMPORTANT After pressing the "door
locking" button, you need to wait two
seconds before the doors can be
unlocked again using the door handle.
9F1B0017C
10F1B0063C
16
GETTING TO KNOW YOUR CAR
Page 25 of 284
STEERING WHEEL
15) 16)
ADJUSTMENTS
The steering wheel can be adjusted
both in height and axially.
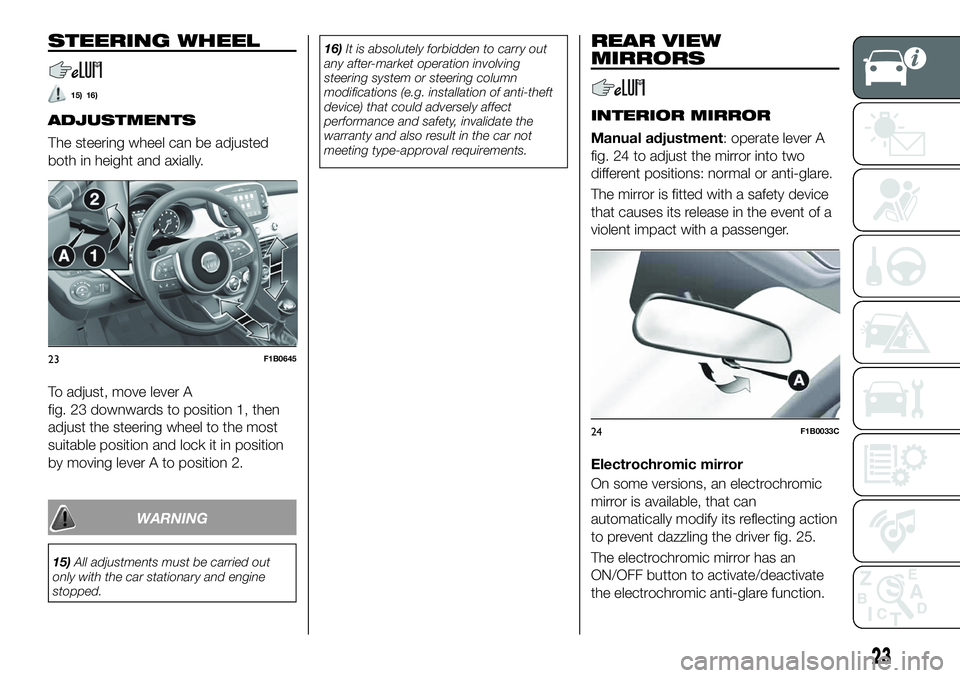
To adjust, move lever A
fig. 23 downwards to position 1, then
adjust the steering wheel to the most
suitable position and lock it in position
by moving lever A to position 2.
WARNING
15)All adjustments must be carried out
only with the car stationary and engine
stopped.16)It is absolutely forbidden to carry out
any after-market operation involving
steering system or steering column
modifications (e.g. installation of anti-theft
device) that could adversely affect
performance and safety, invalidate the
warranty and also result in the car not
meeting type-approval requirements.
REAR VIEW
MIRRORS
INTERIOR MIRROR
Manual adjustment: operate lever A
fig. 24 to adjust the mirror into two
different positions: normal or anti-glare.
The mirror is fitted with a safety device
that causes its release in the event of a
violent impact with a passenger.
Electrochromic mirror
On some versions, an electrochromic
mirror is available, that can
automatically modify its reflecting action
to prevent dazzling the driver fig. 25.
The electrochromic mirror has an
ON/OFF button to activate/deactivate
the electrochromic anti-glare function.
23F1B0645
24F1B0033C
23
Page 26 of 284
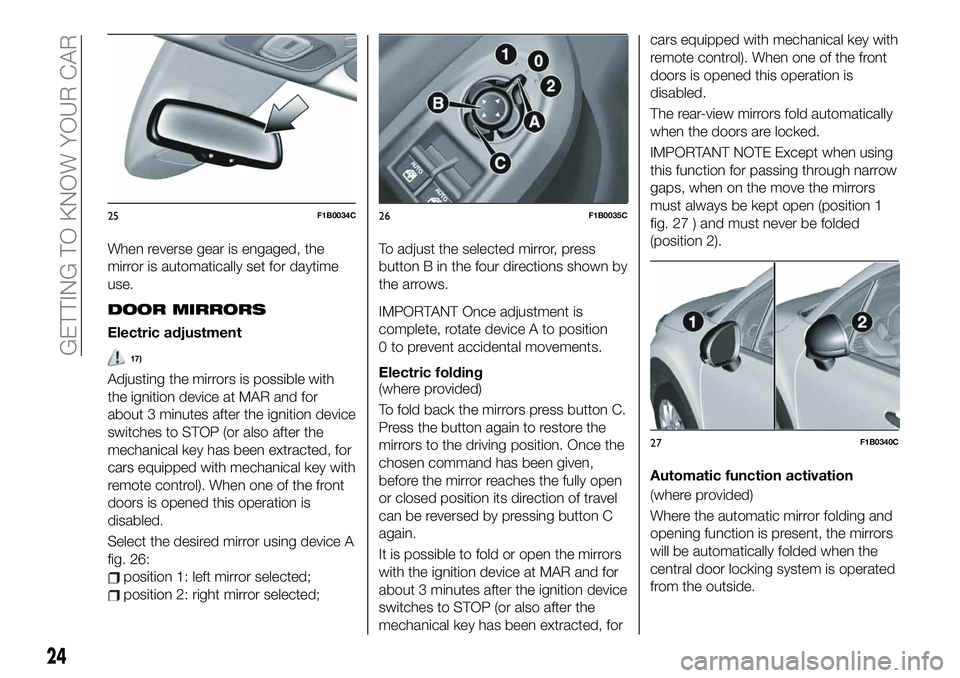
When reverse gear is engaged, the
mirror is automatically set for daytime
use.
DOOR MIRRORS
Electric adjustment
17)
Adjusting the mirrors is possible with
the ignition device at MAR and for
about 3 minutes after the ignition device
switches to STOP (or also after the
mechanical key has been extracted, for
cars equipped with mechanical key with
remote control). When one of the front
doors is opened this operation is
disabled.
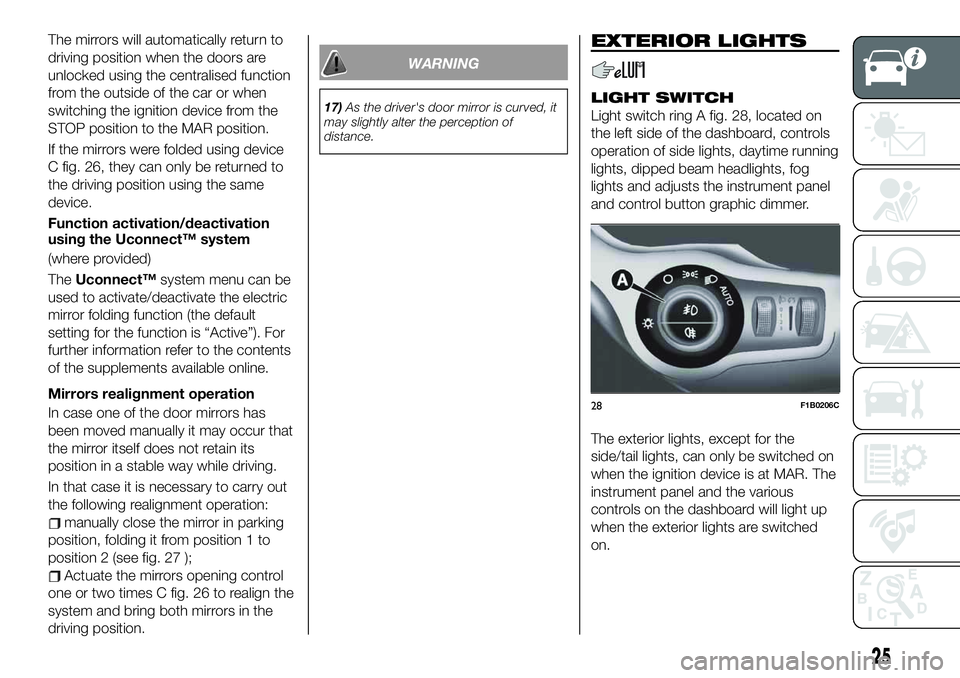
Select the desired mirror using device A
fig. 26:
position 1: left mirror selected;
position 2: right mirror selected;To adjust the selected mirror, press
button B in the four directions shown by
the arrows.
IMPORTANT Once adjustment is
complete, rotate device A to position
0 to prevent accidental movements.
Electric folding
(where provided)
To fold back the mirrors press button C.
Press the button again to restore the
mirrors to the driving position. Once the
chosen command has been given,
before the mirror reaches the fully open
or closed position its direction of travel
can be reversed by pressing button C
again.
It is possible to fold or open the mirrors
with the ignition device at MAR and for
about 3 minutes after the ignition device
switches to STOP (or also after the
mechanical key has been extracted, forcars equipped with mechanical key with
remote control). When one of the front
doors is opened this operation is
disabled.
The rear-view mirrors fold automatically
when the doors are locked.
IMPORTANT NOTE Except when using
this function for passing through narrow
gaps, when on the move the mirrors
must always be kept open (position 1
fig. 27 ) and must never be folded
(position 2).
Automatic function activation
(where provided)
Where the automatic mirror folding and
opening function is present, the mirrors
will be automatically folded when the
central door locking system is operated
from the outside.
25F1B0034C26F1B0035C
27F1B0340C
24
GETTING TO KNOW YOUR CAR
Page 27 of 284
The mirrors will automatically return to
driving position when the doors are
unlocked using the centralised function
from the outside of the car or when
switching the ignition device from the
STOP position to the MAR position.
If the mirrors were folded using device
C fig. 26, they can only be returned to
the driving position using the same
device.
Function activation/deactivation
using the Uconnect™ system
(where provided)
TheUconnect™system menu can be
used to activate/deactivate the electric
mirror folding function (the default
setting for the function is “Active”). For
further information refer to the contents
of the supplements available online.
Mirrors realignment operation
In case one of the door mirrors has
been moved manually it may occur that
the mirror itself does not retain its
position in a stable way while driving.
In that case it is necessary to carry out
the following realignment operation:
manually close the mirror in parking
position, folding it from position 1 to
position 2 (see fig. 27 );
Actuate the mirrors opening control
one or two times C fig. 26 to realign the
system and bring both mirrors in the
driving position.
WARNING
17)As the driver's door mirror is curved, it
may slightly alter the perception of
distance.
EXTERIOR LIGHTS
LIGHT SWITCH
Light switch ring A fig. 28, located on
the left side of the dashboard, controls
operation of side lights, daytime running
lights, dipped beam headlights, fog
lights and adjusts the instrument panel
and control button graphic dimmer.
The exterior lights, except for the
side/tail lights, can only be switched on
when the ignition device is at MAR. The
instrument panel and the various
controls on the dashboard will light up
when the exterior lights are switched
on.
28F1B0206C
25
Page 33 of 284
wiper moves with active control.
Releasing the stalk will activate three
strokes.
With the ring nut A fig. 32 turned to
positionLOorHI, the smart washing
function is not carried out.
IMPORTANT If the stalk is activated for
less than half a second, only the
windscreen washer jet is activated. Do
not prolong the activation of the "Smart
Washing" function for more than
30 seconds. Do not activate the
windscreen washer control when the
reservoir is empty.
RAIN SENSOR
(where provided)
9) 10)
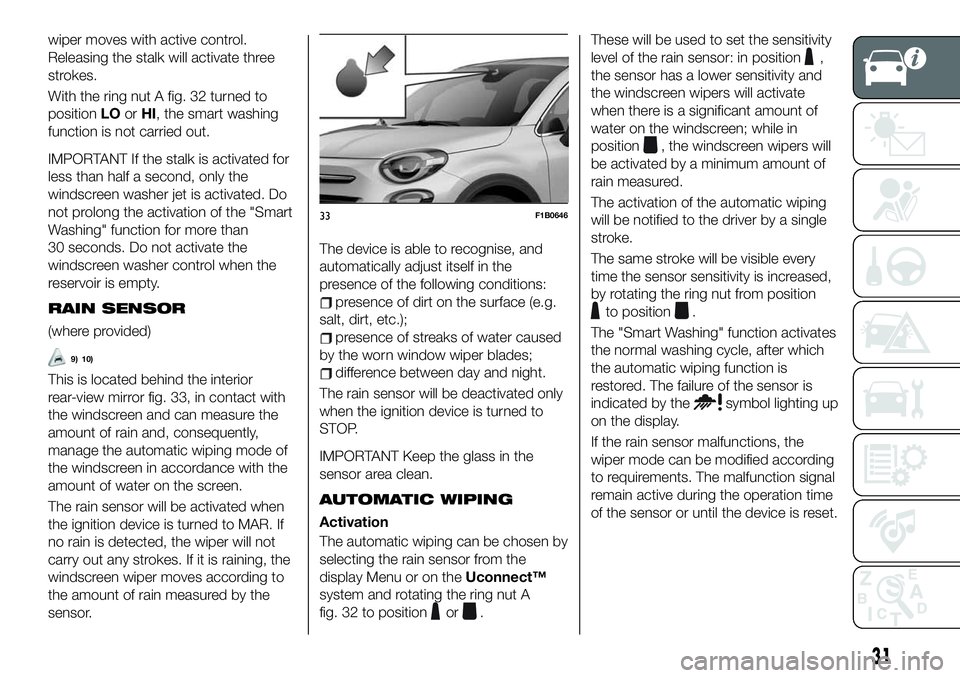
This is located behind the interior
rear-view mirror fig. 33, in contact with
the windscreen and can measure the
amount of rain and, consequently,
manage the automatic wiping mode of
the windscreen in accordance with the
amount of water on the screen.
The rain sensor will be activated when
the ignition device is turned to MAR. If
no rain is detected, the wiper will not
carry out any strokes. If it is raining, the
windscreen wiper moves according to
the amount of rain measured by the
sensor.The device is able to recognise, and
automatically adjust itself in the
presence of the following conditions:
presence of dirt on the surface (e.g.
salt, dirt, etc.);
presence of streaks of water caused
by the worn window wiper blades;
difference between day and night.
The rain sensor will be deactivated only
when the ignition device is turned to
STOP.
IMPORTANT Keep the glass in the
sensor area clean.
AUTOMATIC WIPING
Activation
The automatic wiping can be chosen by
selecting the rain sensor from the
display Menu or on theUconnect™
system and rotating the ring nut A
fig. 32 to position
or.These will be used to set the sensitivity
level of the rain sensor: in position
,
the sensor has a lower sensitivity and
the windscreen wipers will activate
when there is a significant amount of
water on the windscreen; while in
position
, the windscreen wipers will
be activated by a minimum amount of
rain measured.
The activation of the automatic wiping
will be notified to the driver by a single
stroke.
The same stroke will be visible every
time the sensor sensitivity is increased,
by rotating the ring nut from position
to position.
The "Smart Washing" function activates
the normal washing cycle, after which
the automatic wiping function is
restored. The failure of the sensor is
indicated by the
symbol lighting up
on the display.
If the rain sensor malfunctions, the
wiper mode can be modified according
to requirements. The malfunction signal
remain active during the operation time
of the sensor or until the device is reset.
33F1B0646
31
Page 72 of 284
Messages on the display
Message on display
BLIND SPOT ASSISTBLIND SPOT ASSIST SYSTEM
Sensor locking: in case of failure of the Blind Spot Assist system sensor, a
message will appear on the display. In this case, the LEDs on the door mirrors are
switched on continuously. Free the bumper of any obstacles or clean it.
System not available: in case the Blind Spot Assist system is not available, a
message will appear on the display. In this case, the LEDs on the door mirrors are
switched on continuously. The failed operation of the system might be due to the
insufficient voltage from the battery or other failures on the electrical system.
Contact a Fiat Dealership as soon as possible to have the electrical system
checked.
Blind Spot Assist system failure: in case of a failure of the Blind Spot Assist
system, a message will appear on the display. In this case, the LEDs on the door
mirrors are switched off. An acoustic signal is also emitted. Contact a Fiat
Dealership as soon as possible.
DYNAMIC STEERING TORQUEDST SYSTEM (Dynamic Steering Torque)
A dedicated message is displayed in the case of a DST system failure. Contact a
Fiat Dealership as soon as possible.
PARK ASSISTACTIVE PARK ASSIST (where provided)
Temporary parking sensors failure: a dedicated message is displayed in case
of a temporary failure of the parking sensors. If the problem is still present after
cleaning the parking sensor area, contact a Fiat Dealership.
Permanent parking sensors failure: a dedicated message is displayed in case
of a permanent failure of the parking sensors. The failed operation of the system
might be due to the insufficient voltage from the battery or other failures of the
electrical system. Contact a Fiat Dealership as soon as possible.
LANE ASSISTLANE ASSIST SYSTEM
Camera obstructed: a dedicated message is shown on the display in the case
of dirt on the windscreen, which may adversely affect correct operation of the
camera. Clean the windscreen using a soft clean cloth, taking care not to scratch
it. Should the failure persist, contact a Fiat Dealership as soon as possible.
70
KNOWING THE INSTRUMENT PANEL
Page 81 of 284
DRIVING
ASSISTANCE
SYSTEMS
The vehicle can feature the following
driving assistance systems:
BSA (Blind Spot Assist);
FBC (Full Brake Control);
iTPMS (indirect Tyre Pressure
Monitoring System).
For the operation of the systems, see
the following pages.
BSA (Blind-Spot Assist)
SYSTEM
The car can be equipped with the BSA
(Blind Spot Assist) system for blind spot
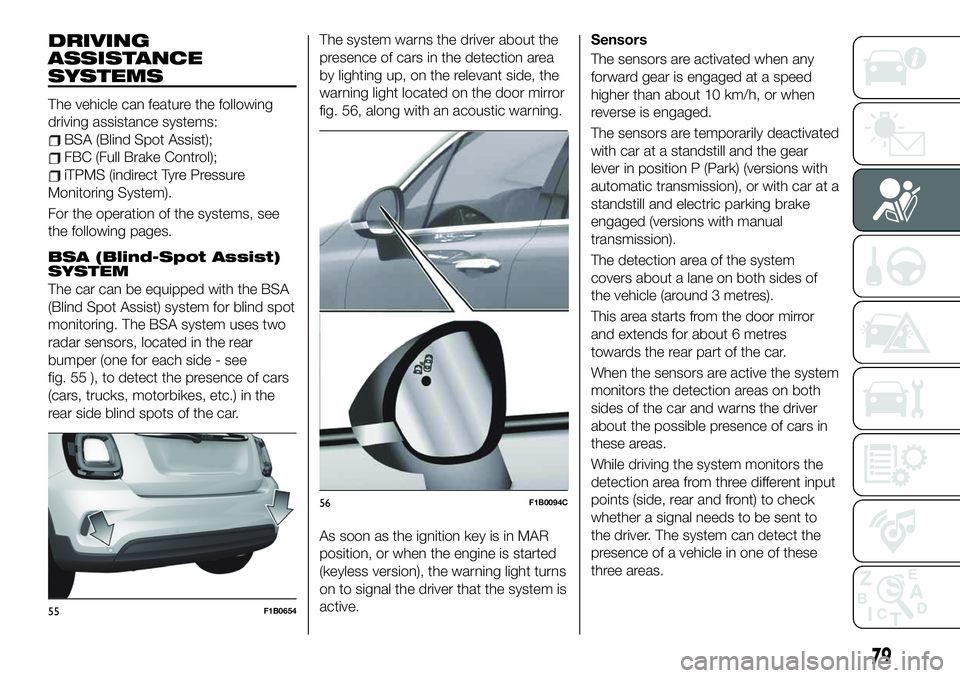
monitoring. The BSA system uses two
radar sensors, located in the rear
bumper (one for each side - see
fig. 55 ), to detect the presence of cars
(cars, trucks, motorbikes, etc.) in the
rear side blind spots of the car.The system warns the driver about the
presence of cars in the detection area
by lighting up, on the relevant side, the
warning light located on the door mirror
fig. 56, along with an acoustic warning.
As soon as the ignition key is in MAR
position, or when the engine is started
(keyless version), the warning light turns
on to signal the driver that the system is
active.Sensors
The sensors are activated when any
forward gear is engaged at a speed
higher than about 10 km/h, or when
reverse is engaged.
The sensors are temporarily deactivated
with car at a standstill and the gear
lever in position P (Park) (versions with
automatic transmission), or with car at a
standstill and electric parking brake
engaged (versions with manual
transmission).
The detection area of the system
covers about a lane on both sides of
the vehicle (around 3 metres).
This area starts from the door mirror
and extends for about 6 metres
towards the rear part of the car.
When the sensors are active the system
monitors the detection areas on both
sides of the car and warns the driver
about the possible presence of cars in
these areas.
While driving the system monitors the
detection area from three different input
points (side, rear and front) to check
whether a signal needs to be sent to
the driver. The system can detect the
presence of a vehicle in one of these
three areas.
55F1B0654
56F1B0094C
79
Page 82 of 284
IMPORTANT The system does not
signal the presence of fixed object (e.g.
safety barriers, poles, walls, etc.).
However, in some circumstances, the
system may activate in the presence of
these objects. This is normal and does
not indicate a system malfunction.
IMPORTANT The system does not
warn the driver about the presence of
vehicles coming from the opposite
direction, in the adjacent lanes.
57)
Important notes
If a trailer is connected to the car, to
avoid false indications this system must
be manually deactivated using the
relative menu.
For the system to operate correctly, the
rear bumper area where the radar
sensors are located must stay free from
snow, ice and dirt gathered from the
road surface.
Do not cover the rear bumper area
where the radar sensors are located
with any object (e.g. adhesives, bike
rack, etc.).
Rear-view
The system detects vehicles coming
from the rear part of your vehicle on
both sides and entering the rear
detection area with a difference inspeed of less than 50 km/h with
respect to your vehicle.
Overtaking vehicles
If another vehicle is overtaken slowly
(with a difference in speed of less than
about 25 km/h) and this stays in the
blind spot for about 1.5 seconds, the
warning light on the door mirror of the
corresponding side lights up.
If the speed delta between the two
vehicles is higher than about 25 km/h,
the warning light does not light up.
RCP (Rear Cross Path detection)
system
This system helps the driver during
reverse manoeuvres in the case of
reduced visibility.
The RCP system monitors the rear
detection areas on both sides of the
vehicle, to detect objects moving
towards the sides of the vehicle at a
minimum speed between about 1 km/h
and 3 km/h and objects moving at a
maximum speed of 35 km/h, as
generally happens in parking areas.
The system activation is signalled to the
driver by means of a visual and acoustic
warning.
IMPORTANT If the sensors are covered
by objects or vehicles, the system will
not warn the driver.
Operating mode
The system can be activated/
deactivated by operating on the display
Menu, or via theUconnect™system
(for further information see the
dedicated Supplement).
Blind Spot Assist "Visual" mode
When this mode is active, the BSA
system sends a visual warning to the
door mirror relating to the object
detected.
However, when operating in "RCP"
mode, the system produces acoustic
and visual warnings when if the
presence of an object is detected.
When an acoustic warning is sent,
theUconnect™volume is lowered.
Blind Spot Assist "Visual &
acoustic" mode
When this mode has been activated,
the BSA system sends a visual warning
to the door mirror relating to the object
detected.
If the direction indicator on the side
where an obstacle has been detected is
activated, an acoustic warning is
emitted as well.
If a direction indicator is in operation
and an object is simultaneously
detected on the same side, both an
acoustic and a visual warning are
emitted. TheUconnect™volume is
also lowered.
80
SAFETY