turn signal FIAT 500X 2019 Owner handbook (in English)
[x] Cancel search | Manufacturer: FIAT, Model Year: 2019, Model line: 500X, Model: FIAT 500X 2019Pages: 284, PDF Size: 8.33 MB
Page 33 of 284
wiper moves with active control.
Releasing the stalk will activate three
strokes.
With the ring nut A fig. 32 turned to
positionLOorHI, the smart washing
function is not carried out.
IMPORTANT If the stalk is activated for
less than half a second, only the
windscreen washer jet is activated. Do
not prolong the activation of the "Smart
Washing" function for more than
30 seconds. Do not activate the
windscreen washer control when the
reservoir is empty.
RAIN SENSOR
(where provided)
9) 10)
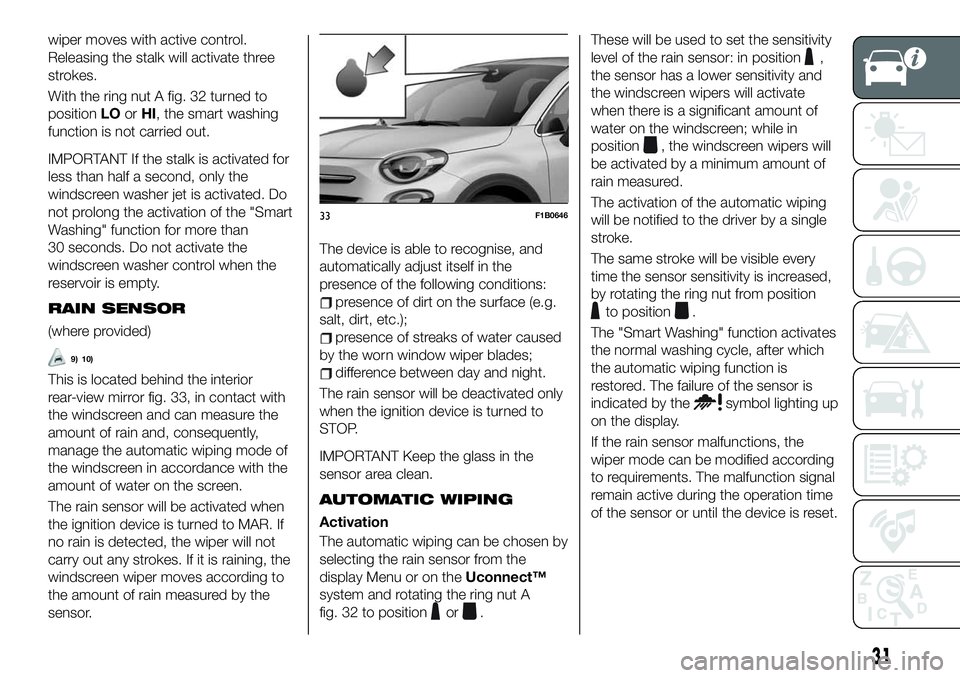
This is located behind the interior
rear-view mirror fig. 33, in contact with
the windscreen and can measure the
amount of rain and, consequently,
manage the automatic wiping mode of
the windscreen in accordance with the
amount of water on the screen.
The rain sensor will be activated when
the ignition device is turned to MAR. If
no rain is detected, the wiper will not
carry out any strokes. If it is raining, the
windscreen wiper moves according to
the amount of rain measured by the
sensor.The device is able to recognise, and
automatically adjust itself in the
presence of the following conditions:
presence of dirt on the surface (e.g.
salt, dirt, etc.);
presence of streaks of water caused
by the worn window wiper blades;
difference between day and night.
The rain sensor will be deactivated only
when the ignition device is turned to
STOP.
IMPORTANT Keep the glass in the
sensor area clean.
AUTOMATIC WIPING
Activation
The automatic wiping can be chosen by
selecting the rain sensor from the
display Menu or on theUconnect™
system and rotating the ring nut A
fig. 32 to position
or.These will be used to set the sensitivity
level of the rain sensor: in position
,
the sensor has a lower sensitivity and
the windscreen wipers will activate
when there is a significant amount of
water on the windscreen; while in
position
, the windscreen wipers will
be activated by a minimum amount of
rain measured.
The activation of the automatic wiping
will be notified to the driver by a single
stroke.
The same stroke will be visible every
time the sensor sensitivity is increased,
by rotating the ring nut from position
to position.
The "Smart Washing" function activates
the normal washing cycle, after which
the automatic wiping function is
restored. The failure of the sensor is
indicated by the
symbol lighting up
on the display.
If the rain sensor malfunctions, the
wiper mode can be modified according
to requirements. The malfunction signal
remain active during the operation time
of the sensor or until the device is reset.
33F1B0646
31
Page 34 of 284
Inhibition
If the ignition device is turned to STOP,
leaving the ring nut A in position
or
, when the engine is next started
(ignition device at MAR), no wiping
cycle occurs for system protection
reasons.
This temporary inhibition prevents
unwanted activation of the wipers when
the car is started (i.e. when the
windscreen is being washed by hand or
the wipers are stuck to the windscreen
by ice).
It is possible to reactivate the automatic
wiping mode in three ways:
by rotating the ring nut to positionO
and then again to position
or
by moving the stalk upwards to
position MIST
upon exceeding the 5 km/h speed
with the rain sensor
When the windscreen wiper is
reactivated using any of the
manoeuvres described above,
reactivation is indicated by a single
stroke of the windscreen wipers,
regardless of the condition of the
windscreen.
IMPORTANT For automatic
transmission vehicles with rain sensor,
engaging the gear N (Neutral) inhibits
the automatic wiping mode.
Deactivation
It is possible to deselect the automatic
wiping through the display Menu or the
Uconnect™system, or by rotating ring
nut A to any non-intermittent position (
or).
Service Position
The function allows the driver to replace
the windscreen wiper blades more
easily, protecting them also from ice
and/or snow.
Activation
To activate this function deactivate the
windscreen wiper (ring nut A fig. 32 in
position
) before setting the ignition
device to STOP. This function can only
be activated within 2 minutes of setting
the ignition device to STOP.
To activate this function, move the lever
upwards (unstable position) for at least
half a second.
Each time the function is activated
correctly, the wiper blades move to
signal the correct reception of the
command. The command can be
repeated up to a maximum of the three
times. The fourth repetition of the
command deactivates the function.
If, after using the function, the ignition
device is set back to MAR with the
blades in a position other than rest
position (at the base of the windscreen),they will only return to rest position
following a command given using the
stalk (stalk upwards, into unstable
position) or when a speed of 5 km/h is
exceeded.
IMPORTANT Before activating the
function, make sure that when the
engine is turned on the windscreen
wiper is free of snow or ice
Deactivation
The function is deactivated if:
2 minutes have passed since the
ignition device was set to STOP;
the ignition device is set to MAR and
the blades are in rest position;
the ignition device is set to MAR and
a wiping command is carried out.
REAR WINDOW WIPER/
WASHER
Turn the ring B fig. 32 to set the
rearscreen wiper to operate in the
following modes:
continuous: when ring is in the
position;
intermittent: when ring is in the
position and the windscreen wiper is
stationary;
synchronous: when the rearscreen
wiper ring is in the
position and the
windscreen wiper is moving or set to
AUTO. In this mode, the rear window
wiper makes one stroke for each two
strokes of the windscreen wiper;
32
GETTING TO KNOW YOUR CAR
Page 53 of 284
WARNING LIGHTS AND MESSAGES
IMPORTANT The warning light switches on in the instrument panel together with a dedicated message and/or acoustic signal
when applicable. These indications are indicative and precautionary and as such must not be considered as exhaustive and/or
alternative to the information contained in the Owner Handbook, which you are advised to read carefully in all cases. Always
refer to the information in this chapter in the event of a failure indication.
IMPORTANT Failure indications displayed are divided into two categories: serious and less serious failures. Serious failures are
indicated by a repeated and prolonged warning "cycle". Less serious failures are indicated by a warning "cycle" with a shorter
duration. The display cycle of both categories can be interrupted. The instrument panel warning light will stay on until the cause
of the failure is eliminated.
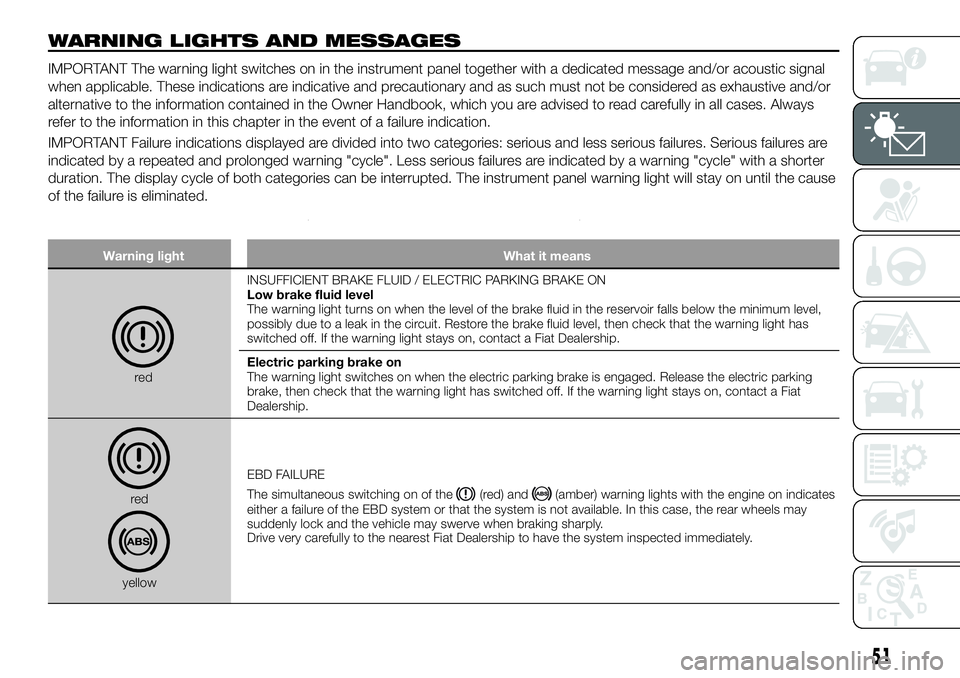
Warning light What it means
redINSUFFICIENT BRAKE FLUID / ELECTRIC PARKING BRAKE ON
Low brake fluid level
The warning light turns on when the level of the brake fluid in the reservoir falls below the minimum level,
possibly due to a leak in the circuit. Restore the brake fluid level, then check that the warning light has
switched off. If the warning light stays on, contact a Fiat Dealership.
Electric parking brake on
The warning light switches on when the electric parking brake is engaged. Release the electric parking
brake, then check that the warning light has switched off. If the warning light stays on, contact a Fiat
Dealership.
red
yellowEBD FAILURE
The simultaneous switching on of the
(red) and(amber) warning lights with the engine on indicates
either a failure of the EBD system or that the system is not available. In this case, the rear wheels may
suddenly lock and the vehicle may swerve when braking sharply.
Drive very carefully to the nearest Fiat Dealership to have the system inspected immediately.
51
Page 73 of 284
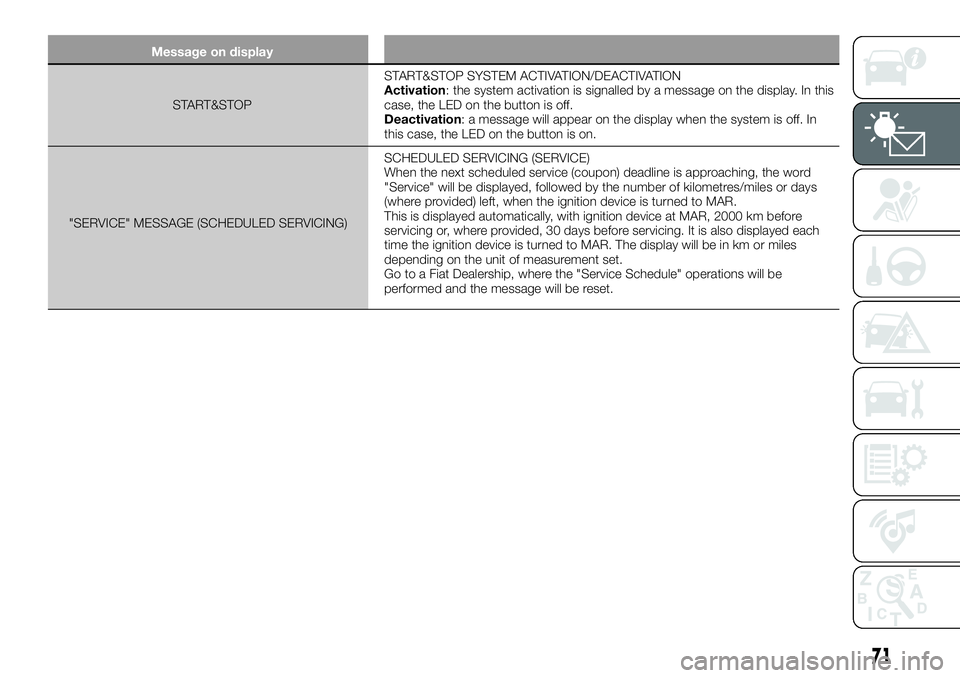
Message on display
START&STOPSTART&STOP SYSTEM ACTIVATION/DEACTIVATION
Activation: the system activation is signalled by a message on the display. In this
case, the LED on the button is off.
Deactivation: a message will appear on the display when the system is off. In
this case, the LED on the button is on.
"SERVICE" MESSAGE (SCHEDULED SERVICING)SCHEDULED SERVICING (SERVICE)
When the next scheduled service (coupon) deadline is approaching, the word
"Service" will be displayed, followed by the number of kilometres/miles or days
(where provided) left, when the ignition device is turned to MAR.
This is displayed automatically, with ignition device at MAR, 2000 km before
servicing or, where provided, 30 days before servicing. It is also displayed each
time the ignition device is turned to MAR. The display will be in km or miles
depending on the unit of measurement set.
Go to a Fiat Dealership, where the "Service Schedule" operations will be
performed and the message will be reset.
71
Page 75 of 284
WARNING
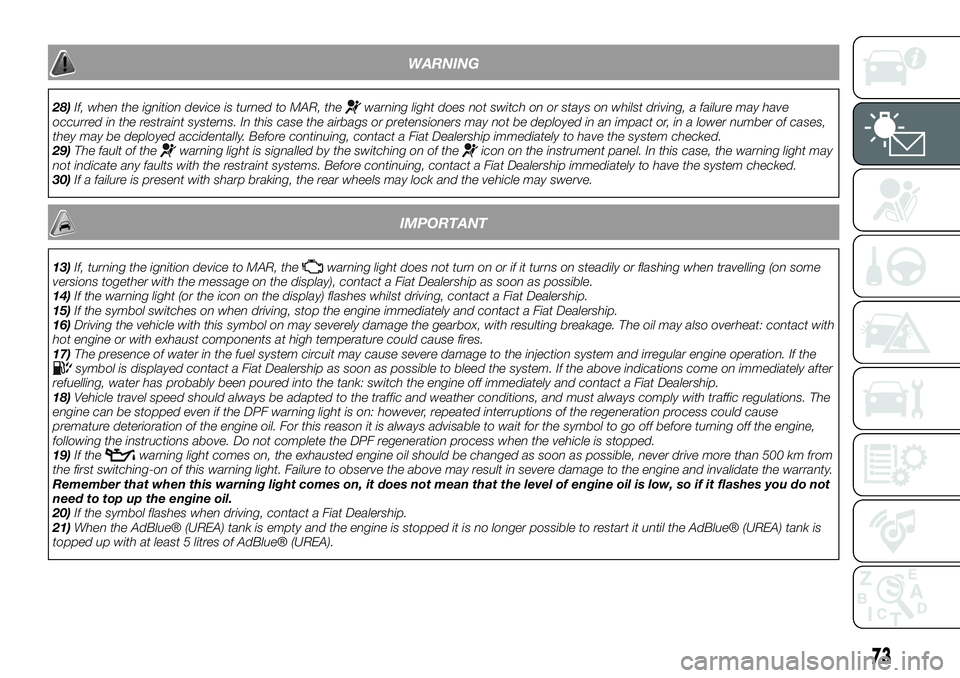
28)If, when the ignition device is turned to MAR, thewarning light does not switch on or stays on whilst driving, a failure may have
occurred in the restraint systems. In this case the airbags or pretensioners may not be deployed in an impact or, in a lower number of cases,
they may be deployed accidentally. Before continuing, contact a Fiat Dealership immediately to have the system checked.
29)The fault of the
warning light is signalled by the switching on of theicon on the instrument panel. In this case, the warning light may
not indicate any faults with the restraint systems. Before continuing, contact a Fiat Dealership immediately to have the system checked.
30)If a failure is present with sharp braking, the rear wheels may lock and the vehicle may swerve.
IMPORTANT
13)If, turning the ignition device to MAR, thewarning light does not turn on or if it turns on steadily or flashing when travelling (on some
versions together with the message on the display), contact a Fiat Dealership as soon as possible.
14)If the warning light (or the icon on the display) flashes whilst driving, contact a Fiat Dealership.
15)If the symbol switches on when driving, stop the engine immediately and contact a Fiat Dealership.
16)Driving the vehicle with this symbol on may severely damage the gearbox, with resulting breakage. The oil may also overheat: contact with
hot engine or with exhaust components at high temperature could cause fires.
17)The presence of water in the fuel system circuit may cause severe damage to the injection system and irregular engine operation. If the
symbol is displayed contact a Fiat Dealership as soon as possible to bleed the system. If the above indications come on immediately after
refuelling, water has probably been poured into the tank: switch the engine off immediately and contact a Fiat Dealership.
18)Vehicle travel speed should always be adapted to the traffic and weather conditions, and must always comply with traffic regulations. The
engine can be stopped even if the DPF warning light is on: however, repeated interruptions of the regeneration process could cause
premature deterioration of the engine oil. For this reason it is always advisable to wait for the symbol to go off before turning off the engine,
following the instructions above. Do not complete the DPF regeneration process when the vehicle is stopped.
19)If the
warning light comes on, the exhausted engine oil should be changed as soon as possible, never drive more than 500 km from
the first switching-on of this warning light. Failure to observe the above may result in severe damage to the engine and invalidate the warranty.
Remember that when this warning light comes on, it does not mean that the level of engine oil is low, so if it flashes you do not
need to top up the engine oil.
20)If the symbol flashes when driving, contact a Fiat Dealership.
21)When the AdBlue® (UREA) tank is empty and the engine is stopped it is no longer possible to restart it until the AdBlue® (UREA) tank is
topped up with at least 5 litres of AdBlue® (UREA).
73
Page 81 of 284
DRIVING
ASSISTANCE
SYSTEMS
The vehicle can feature the following
driving assistance systems:
BSA (Blind Spot Assist);
FBC (Full Brake Control);
iTPMS (indirect Tyre Pressure
Monitoring System).
For the operation of the systems, see
the following pages.
BSA (Blind-Spot Assist)
SYSTEM
The car can be equipped with the BSA
(Blind Spot Assist) system for blind spot
monitoring. The BSA system uses two
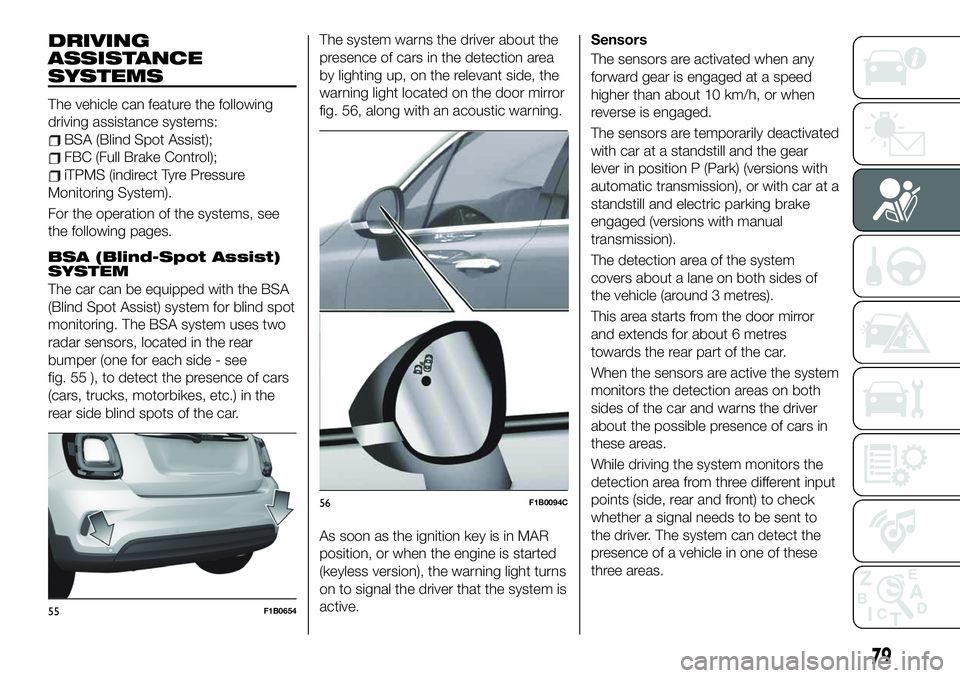
radar sensors, located in the rear
bumper (one for each side - see
fig. 55 ), to detect the presence of cars
(cars, trucks, motorbikes, etc.) in the
rear side blind spots of the car.The system warns the driver about the
presence of cars in the detection area
by lighting up, on the relevant side, the
warning light located on the door mirror
fig. 56, along with an acoustic warning.
As soon as the ignition key is in MAR
position, or when the engine is started
(keyless version), the warning light turns
on to signal the driver that the system is
active.Sensors
The sensors are activated when any
forward gear is engaged at a speed
higher than about 10 km/h, or when
reverse is engaged.
The sensors are temporarily deactivated
with car at a standstill and the gear
lever in position P (Park) (versions with
automatic transmission), or with car at a
standstill and electric parking brake
engaged (versions with manual
transmission).
The detection area of the system
covers about a lane on both sides of
the vehicle (around 3 metres).
This area starts from the door mirror
and extends for about 6 metres
towards the rear part of the car.
When the sensors are active the system
monitors the detection areas on both
sides of the car and warns the driver
about the possible presence of cars in
these areas.
While driving the system monitors the
detection area from three different input
points (side, rear and front) to check
whether a signal needs to be sent to
the driver. The system can detect the
presence of a vehicle in one of these
three areas.
55F1B0654
56F1B0094C
79
Page 87 of 284
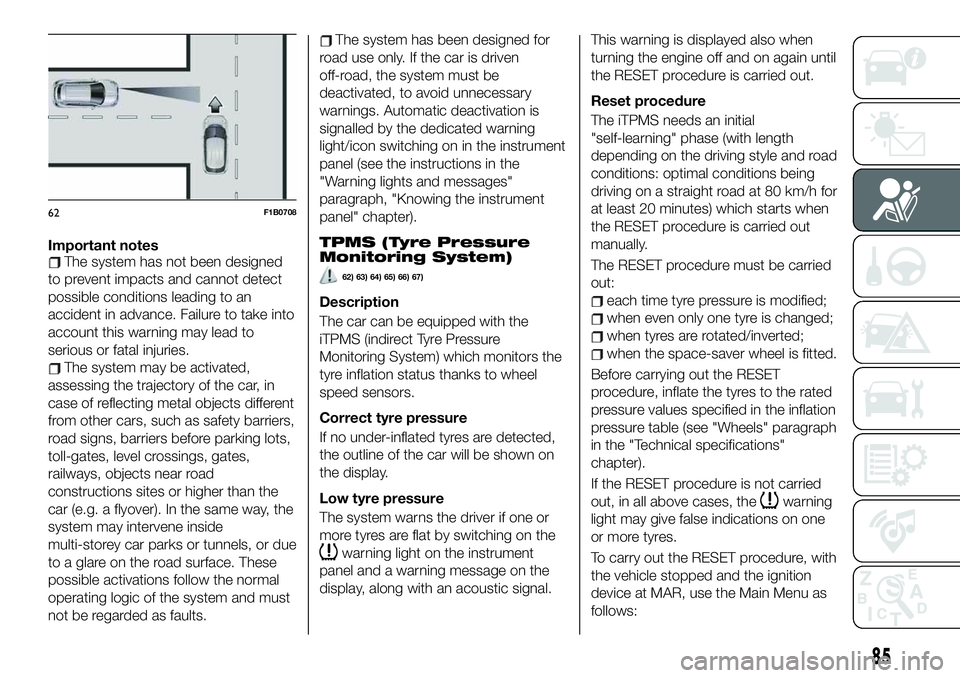
Important notesThe system has not been designed
to prevent impacts and cannot detect
possible conditions leading to an
accident in advance. Failure to take into
account this warning may lead to
serious or fatal injuries.
The system may be activated,
assessing the trajectory of the car, in
case of reflecting metal objects different
from other cars, such as safety barriers,
road signs, barriers before parking lots,
toll-gates, level crossings, gates,
railways, objects near road
constructions sites or higher than the
car (e.g. a flyover). In the same way, the
system may intervene inside
multi-storey car parks or tunnels, or due
to a glare on the road surface. These
possible activations follow the normal
operating logic of the system and must
not be regarded as faults.
The system has been designed for
road use only. If the car is driven
off-road, the system must be
deactivated, to avoid unnecessary
warnings. Automatic deactivation is
signalled by the dedicated warning
light/icon switching on in the instrument
panel (see the instructions in the
"Warning lights and messages"
paragraph, "Knowing the instrument
panel" chapter).
TPMS (Tyre Pressure
Monitoring System)
62) 63) 64) 65) 66) 67)
Description
The car can be equipped with the
iTPMS (indirect Tyre Pressure
Monitoring System) which monitors the
tyre inflation status thanks to wheel
speed sensors.
Correct tyre pressure
If no under-inflated tyres are detected,
the outline of the car will be shown on
the display.
Low tyre pressure
The system warns the driver if one or
more tyres are flat by switching on the
warning light on the instrument
panel and a warning message on the
display, along with an acoustic signal.This warning is displayed also when
turning the engine off and on again until
the RESET procedure is carried out.
Reset procedure
The iTPMS needs an initial
"self-learning" phase (with length
depending on the driving style and road
conditions: optimal conditions being
driving on a straight road at 80 km/h for
at least 20 minutes) which starts when
the RESET procedure is carried out
manually.
The RESET procedure must be carried
out:
each time tyre pressure is modified;
when even only one tyre is changed;
when tyres are rotated/inverted;
when the space-saver wheel is fitted.
Before carrying out the RESET
procedure, inflate the tyres to the rated
pressure values specified in the inflation
pressure table (see "Wheels" paragraph
in the "Technical specifications"
chapter).
If the RESET procedure is not carried
out, in all above cases, the
warning
light may give false indications on one
or more tyres.
To carry out the RESET procedure, with
the vehicle stopped and the ignition
device at MAR, use the Main Menu as
follows:
62F1B0708
85
Page 91 of 284
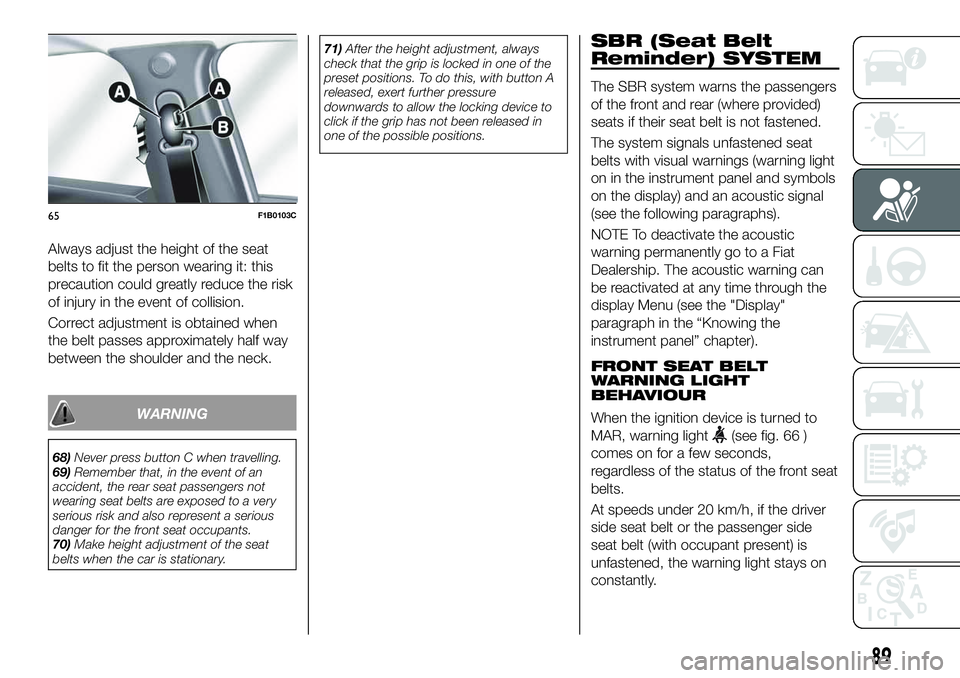
Always adjust the height of the seat
belts to fit the person wearing it: this
precaution could greatly reduce the risk
of injury in the event of collision.
Correct adjustment is obtained when
the belt passes approximately half way
between the shoulder and the neck.
WARNING
68)Never press button C when travelling.
69)Remember that, in the event of an
accident, the rear seat passengers not
wearing seat belts are exposed to a very
serious risk and also represent a serious
danger for the front seat occupants.
70)Make height adjustment of the seat
belts when the car is stationary.71)After the height adjustment, always
check that the grip is locked in one of the
preset positions. To do this, with button A
released, exert further pressure
downwards to allow the locking device to
click if the grip has not been released in
one of the possible positions.
SBR (Seat Belt
Reminder) SYSTEM
The SBR system warns the passengers
of the front and rear (where provided)
seats if their seat belt is not fastened.
The system signals unfastened seat
belts with visual warnings (warning light
on in the instrument panel and symbols
on the display) and an acoustic signal
(see the following paragraphs).
NOTE To deactivate the acoustic
warning permanently go to a Fiat
Dealership. The acoustic warning can
be reactivated at any time through the
display Menu (see the "Display"
paragraph in the “Knowing the
instrument panel” chapter).
FRONT SEAT BELT
WARNING LIGHT
BEHAVIOUR
When the ignition device is turned to
MAR, warning light
(see fig. 66 )
comes on for a few seconds,
regardless of the status of the front seat
belts.
At speeds under 20 km/h, if the driver
side seat belt or the passenger side
seat belt (with occupant present) is
unfastened, the warning light stays on
constantly.
65F1B0103C
89
Page 136 of 284
The acceptance by the system of the
requested driving mode is signalled by
the LED, located besides the symbol,
coming on, and by the corresponding
symbol appearing on the instrument
panel display.
When the engine is started, the system
usually maintains the driving mode that
was active before the engine was
stopped. For versions/markets where
provided, on start-up, the system is set
to the "Auto" mode.
"Auto" MODE
Recommended mode for normal
driving, aimed at comfort and safety in
normal grip and driving conditions. This
mode also reduces fuel consumption,
since it automatically disconnects the
transmission from the rear wheels if the
road and driving conditions allow it, in
addition to changing drive torque
distribution between the front and rear
axles.
Activation
Starting with the "All Weather" mode
active, turn the ring-nut anticlockwise
and hold it in this position for at least
half a second, until the relative LED
illuminates and the selected mode
appears on the display. The LED of the
mode selected previously will go out atthe same time. Once released, the
ring-nut returns to the central position.
Starting with the "Sport" mode active,
turn the ring-nut clockwise and hold it
in this position for at least half a
second, until the relative LED
illuminates and the selected mode
appears on the display. The LED of the
mode selected previously will go out at
the same time. Once released, the
ring-nut returns to the central position.
“All Weather” MODE
This driving mode is intended for safety
in poor vehicle grip conditions
(wet/slippery road surface, rain, snow).
It is also recommended for driving on
unpaved roads or off-road.
Activation
Starting with the "Auto" mode active,
turn the ring-nut clockwise and hold it
in this position for at least half a
second, until the relative LED
illuminates and the selected mode
appears on the display. The LED of the
mode selected previously will go out at
the same time. Once released, the
ring-nut returns to the central position.
Starting from the active "Sport" mode,
turn the ring nut anticlockwise, keeping
it in this position for at least half a
second, and in any case until the
relevant LED turns on, and the selectedmode is shown on the display. The LED
of the mode selected previously will go
out at the same time. Once released,
the ring-nut returns to the central
position.
"Sport" MODE
This mode gives the most enjoyable
sporty driving experience, however, it
increases fuel consumption. Traction is
optimised to improve the car's
road-holding, also when cornering.
Activation
Starting with the "Auto" mode active,
turn the ring-nut anticlockwise and hold
it in this position for at least half a
second, until the relative LED
illuminates and the selected mode
appears on the display. The LED of the
mode selected previously will go out at
the same time. Once released, the
ring-nut returns to the central position.
Starting with the "All Weather" mode
active, turn the ring nut clockwise,
keeping it in this position for at least half
a second, and in any case until the
relevant LED turns on, and the selected
mode is shown on the display. The LED
of the mode selected previously will go
out at the same time. Once released,
the ring-nut returns to the central
position.
134
STARTING AND DRIVING
Page 248 of 284
SWITCHING THE SYSTEM
ON/OFF
The system is switched on/off by
pressing the
button/knob.
Turn the button/knob clockwise to
increase the radio volume or
anticlockwise to decrease it.
RADIO (TUNER) MODE
The system features the following
tuners: AM, FM.
RADIO MODE SELECTION
Press the RADIO button on the front
panel to activate radio mode.
FREQUENCY BAND
SELECTION
The different tuning modes can be
selected by pressing the RADIO button
on the front panel.
DISPLAYED
INFORMATION
After the desired radio station is
selected on the display, the following
information is shown (INFO mode
activated):
In the upper part: the preset station, the
time and the other active radio settings
are highlighted.
In the central part: the name of the
current station, the frequency and the
radio text information (if any) are
highlighted.
FM station list
Press the BROWSE ENTER
button/knob to display the complete list
of the FM stations that can be received.
SETTING THE PRESETS
The preset stations are available in all
system modes and are selected by
touching one of the presetting buttons
1-2-3-4-5-6on the front panel.
If you are tuned to a radio station that
you wish to store, hold down the button
on the display which corresponds to
the desired preset until an acoustic
confirmation signal is emitted.
RADIO STATION
SELECTION
To search for the desired radio station
press the
orbutton or use
the wheel of the steering wheel controls
, or turn the "BROWSE ENTER"
knob.
PREVIOUS/NEXT RADIO
STATION SEARCH
Press briefly theorbutton
or use the wheel of the steering wheel
controls
: when the button is
released the previous or next radio
station is displayed.
PREVIOUS/NEXT RADIO
STATION FAST SEARCH
Hold down theorbutton to
start the fast search: when the button is
released, the first tunable radio is
played.
MEDIA MODE
To select the USB source, press the
MEDIAbutton.
To select and playback music tracks on
the mobile phone CD card (where the
phone allows) press the BROWSE
ENTER button/knob, select Folders
then Card.
IMPORTANT Some multimedia player
devices may not be compatible with the
Uconnect™system.
TRACK CHANGE
(previous/next)
Briefly press thebutton or turn
the BROWSE ENTER button/knob
clockwise to play the next track.
Briefly press the
button or turn
the BROWSE ENTER button/knob
anticlockwise to return to the beginning
of the selected track or to the beginning
of the previous track (if this has been
played for less than 3 seconds).
246
MULTIMEDIA