seats FIAT 500X 2022 Owner's Manual
[x] Cancel search | Manufacturer: FIAT, Model Year: 2022, Model line: 500X, Model: FIAT 500X 2022Pages: 312, PDF Size: 13.26 MB
Page 210 of 312
208SAFETY
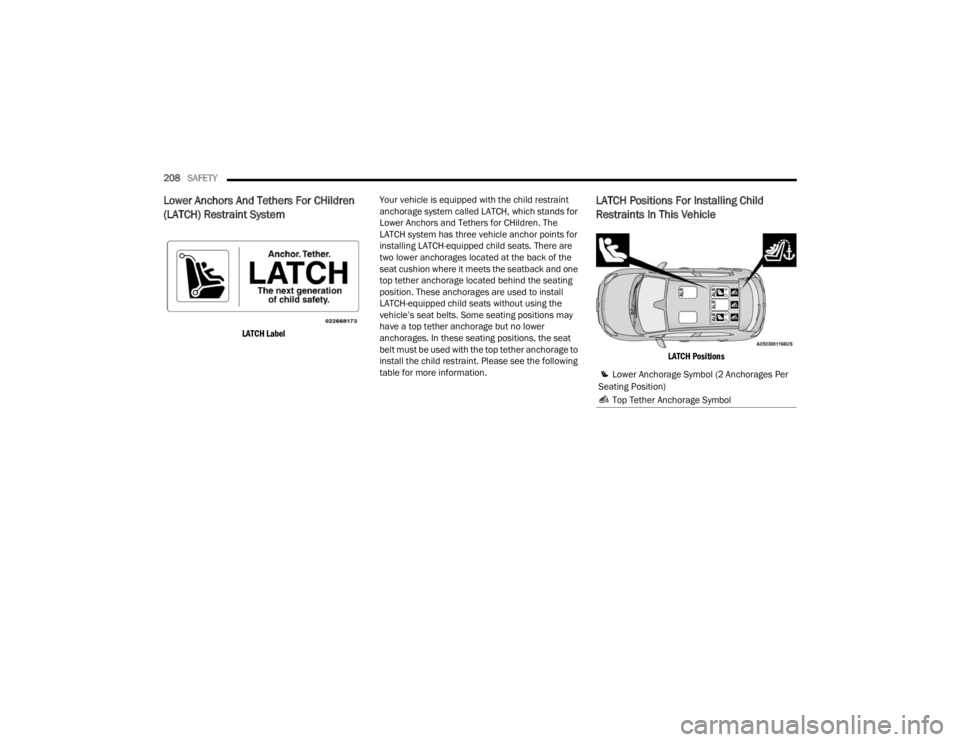
Lower Anchors And Tethers For CHildren
(LATCH) Restraint System
LATCH Label
Your vehicle is equipped with the child restraint
anchorage system called LATCH, which stands for
Lower Anchors and Tethers for CHildren. The
LATCH system has three vehicle anchor points for
installing LATCH-equipped child seats. There are
two lower anchorages located at the back of the
seat cushion where it meets the seatback and one
top tether anchorage located behind the seating
position. These anchorages are used to install
LATCH-equipped child seats without using the
vehicle’s seat belts. Some seating positions may
have a top tether anchorage but no lower
anchorages. In these seating positions, the seat
belt must be used with the top tether anchorage to
install the child restraint. Please see the following
table for more information.
LATCH Positions For Installing Child
Restraints In This Vehicle
LATCH Positions
Lower Anchorage Symbol (2 Anchorages Per
Seating Position)
Top Tether Anchorage Symbol
22_FD_OM_EN_USC_t.book Page 208
Page 211 of 312
SAFETY209
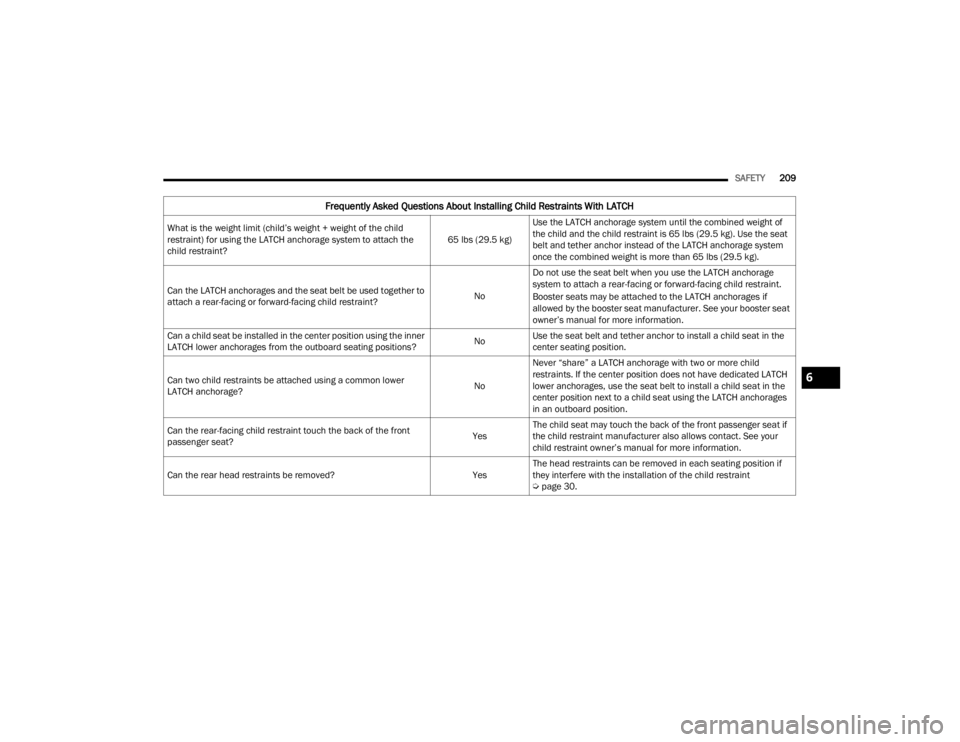
Frequently Asked Questions About Installing Child Restraints With LATCH
What is the weight limit (child’s weight + weight of the child
restraint) for using the LATCH anchorage system to attach the
child restraint? 65 lbs (29.5 kg)Use the LATCH anchorage system until the combined weight of
the child and the child restraint is 65 lbs (29.5 kg). Use the seat
belt and tether anchor instead of the LATCH anchorage system
once the combined weight is more than 65 lbs (29.5 kg).
Can the LATCH anchorages and the seat belt be used together to
attach a rear-facing or forward-facing child restraint? NoDo not use the seat belt when you use the LATCH anchorage
system to attach a rear-facing or forward-facing child restraint.
Booster seats may be attached to the LATCH anchorages if
allowed by the booster seat manufacturer. See your booster seat
owner’s manual for more information.
Can a child seat be installed in the center position using the inner
LATCH lower anchorages from the outboard seating positions? NoUse the seat belt and tether anchor to install a child seat in the
center seating position.
Can two child restraints be attached using a common lower
LATCH anchorage? NoNever “share” a LATCH anchorage with two or more child
restraints. If the center position does not have dedicated LATCH
lower anchorages, use the seat belt to install a child seat in the
center position next to a child seat using the LATCH anchorages
in an outboard position.
Can the rear-facing child restraint touch the back of the front
passenger seat? YesThe child seat may touch the back of the front passenger seat if
the child restraint manufacturer also allows contact. See your
child restraint owner’s manual for more information.
Can the rear head restraints be removed? YesThe head restraints can be removed in each seating position if
they interfere with the installation of the child restraint
Ú
page 30.
6
22_FD_OM_EN_USC_t.book Page 209
Page 212 of 312
210SAFETY
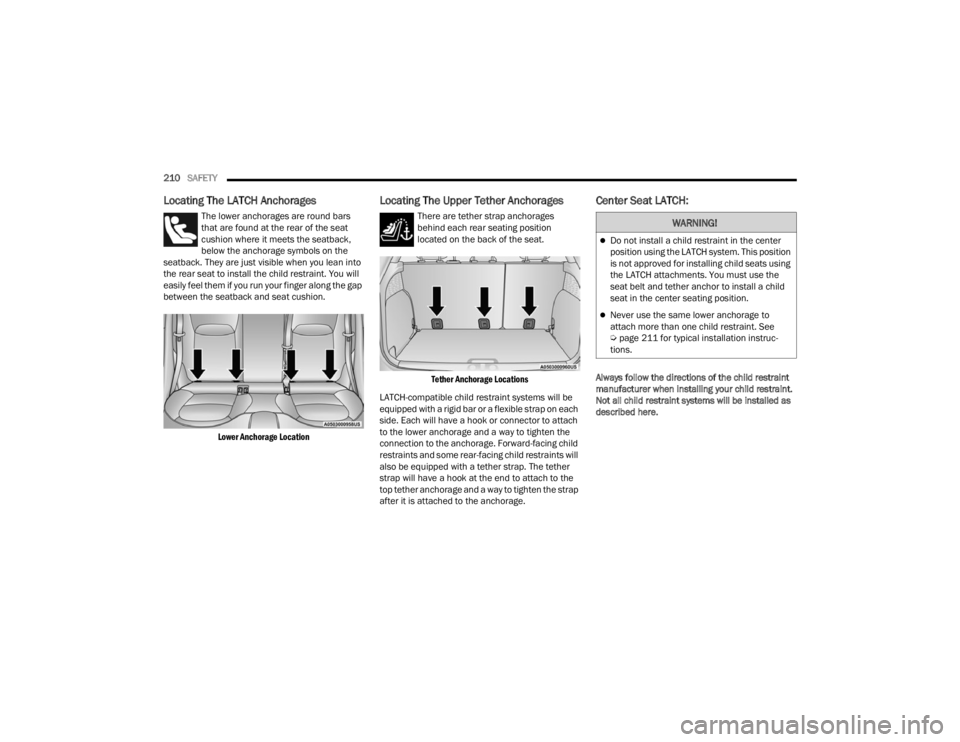
Locating The LATCH Anchorages
The lower anchorages are round bars
that are found at the rear of the seat
cushion where it meets the seatback,
below the anchorage symbols on the
seatback. They are just visible when you lean into
the rear seat to install the child restraint. You will
easily feel them if you run your finger along the gap
between the seatback and seat cushion.
Lower Anchorage Location
Locating The Upper Tether Anchorages
There are tether strap anchorages
behind each rear seating position
located on the back of the seat.
Tether Anchorage Locations
LATCH-compatible child restraint systems will be
equipped with a rigid bar or a flexible strap on each
side. Each will have a hook or connector to attach
to the lower anchorage and a way to tighten the
connection to the anchorage. Forward-facing child
restraints and some rear-facing child restraints will
also be equipped with a tether strap. The tether
strap will have a hook at the end to attach to the
top tether anchorage and a way to tighten the strap
after it is attached to the anchorage.
Center Seat LATCH:
Always follow the directions of the child restraint
manufacturer when installing your child restraint.
Not all child restraint systems will be installed as
described here.
WARNING!
Do not install a child restraint in the center
position using the LATCH system. This position
is not approved for installing child seats using
the LATCH attachments. You must use the
seat belt and tether anchor to install a child
seat in the center seating position.
Never use the same lower anchorage to
attach more than one child restraint. See
Ú page 211 for typical installation instruc -
tions.
22_FD_OM_EN_USC_t.book Page 210
Page 213 of 312
SAFETY211
(Continued)
To Install A LATCH-Compatible Child
Restraint
If the selected seating position has a Switchable
Automatic Locking Retractor (ALR) seat belt, stow
the seat belt, following the instructions below. See
Ú page 211 to check what type of seat belt each
seating position has.
1. Loosen the adjusters on the lower straps and on the tether strap of the child seat so that
you can more easily attach the hooks or
connectors to the vehicle anchorages.
2. Place the child seat between the lower anchorages for that seating position. If the
second row seat can be reclined, you may
recline the seat and/or raise the head restraint
(if adjustable) to get a better fit. If the rear seat
can be moved forward and rearward in the
vehicle, you may wish to move it to its
rear-most position to make room for the child
seat. You may also move the front seat forward
to allow more room for the child seat.
3. Attach the lower hooks or connectors of the child restraint to the lower anchorages in the
selected seating position.
4. If the child restraint has a tether strap, connect it to the top tether anchorage. See
Úpage 213 for directions to attach a tether
anchor. 5. Tighten all of the straps as you push the child
restraint rearward and downward into the
seat. Remove slack in the straps according to
the child restraint manufacturer’s instructions.
6. Test that the child restraint is installed tightly by pulling back and forth on the child seat at
the belt path. It should not move more than
1 inch (25.4 mm) in any direction.
How To Stow An Unused Switchable-ALR
(ALR) Seat Belt:
When using the LATCH attaching system to install
a child restraint, stow all ALR seat belts that are not
being used by other occupants or being used to
secure child restraints. An unused belt could injure
a child if they play with it and accidentally lock the
seat belt retractor. Before installing a child
restraint using the LATCH system, buckle the seat
belt behind the child restraint and out of the child’s
reach. If the buckled seat belt interferes with the
child restraint installation, instead of buckling it
behind the child restraint, route the seat belt
through the child restraint belt path and then
buckle it. Do not lock the seat belt. Remind all
children in the vehicle that the seat belts are not
toys and that they should not play with them.
Installing Child Restraints Using The
Vehicle Seat Belt
Child restraint systems are designed to be secured
in vehicle seats by lap belts or the lap belt portion
of a lap/shoulder belt.
WARNING!
Improper installation of a child restraint to the
LATCH anchorages can lead to failure of the
restraint. The child could be badly injured or
killed. Follow the child restraint manufac -
turer’s directions exactly when installing an
infant or child restraint.
Child restraint anchorages are designed to
withstand only those loads imposed by
correctly-fitted child restraints. Under no
circumstances are they to be used for adult
seat belts, harnesses, or for attaching other
items or equipment to the vehicle.
WARNING!
Improper installation or failure to properly
secure a child restraint can lead to failure of
the restraint. The child could be badly injured
or killed.
6
22_FD_OM_EN_USC_t.book Page 211
Page 215 of 312
SAFETY213
Installing A Child Restraint With A
Switchable Automatic Locking Retractor
(ALR):
Child restraint systems are designed to be secured
in vehicle seats by lap belts or the lap belt portion
of a lap/shoulder belt.
1. Place the child seat in the center of the
seating position. If the second row seat can
be reclined, you may recline the seat and/or
raise the head restraint (if adjustable) to get a
better fit. If the rear seat can be moved
forward and rearward in the vehicle, you may
wish to move it to its rear-most position to
make room for the child seat. You may also
move the front seat forward to allow more
room for the child seat.
2. Pull enough of the seat belt webbing from the retractor to pass it through the belt path of the child restraint. Do not twist the belt webbing in
the belt path.
3. Slide the latch plate into the buckle until you hear a “click.”
4. Pull on the webbing to make the lap portion tight against the child seat.
5. To lock the seat belt, pull down on the shoulder part of the belt until you have pulled all the
seat belt webbing out of the retractor. Then,
allow the webbing to retract back into the
retractor. As the webbing retracts, you will hear
a clicking sound. This means the seat belt is
now in the Automatic Locking mode.
6. Try to pull the webbing out of the retractor. If it is locked, you should not be able to pull out any
webbing. If the retractor is not
locked, repeat
step 5.
7. Finally, pull up on any excess webbing to tighten the lap portion around the child
restraint while you push the child restraint
rearward and downward into the vehicle seat.
8. If the child restraint has a top tether strap and the seating position has a top tether
anchorage, connect the tether strap to the
anchorage and tighten the tether strap. See
Úpage 213 for directions to attach a tether
anchor.
9. Test that the child restraint is installed tightly by pulling back and forth on the child seat at the belt path. It should not move more than
1 inch (25.4 mm) in any direction.
Any seat belt system will loosen with time, so check
the belt occasionally, and pull it tight if necessary.
Installing Child Restraints Using The Top
Tether Anchorage:
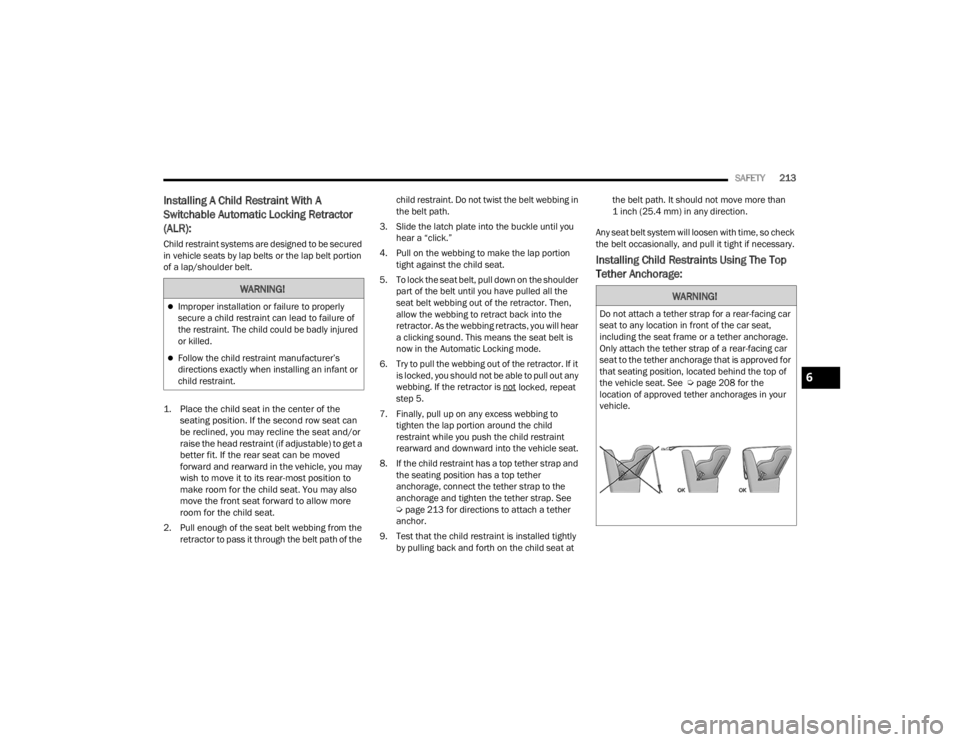
WARNING!
Improper installation or failure to properly
secure a child restraint can lead to failure of
the restraint. The child could be badly injured
or killed.
Follow the child restraint manufacturer’s
directions exactly when installing an infant or
child restraint.
WARNING!
Do not attach a tether strap for a rear-facing car
seat to any location in front of the car seat,
including the seat frame or a tether anchorage.
Only attach the tether strap of a rear-facing car
seat to the tether anchorage that is approved for
that seating position, located behind the top of
the vehicle seat. See Ú page 208 for the
location of approved tether anchorages in your
vehicle.
6
22_FD_OM_EN_USC_t.book Page 213
Page 216 of 312
214SAFETY
1. Look behind the seating position where you plan to install the child restraint to find the
tether anchorage. If the seat can be moved,
you may need to move the seat forward to
provide better access to the tether
anchorage. If there is no top tether anchorage
for that seating position, move the child
restraint to another position in the vehicle if
one is available.
2. Route the tether strap to provide the most direct path for the strap between the anchor
and the child seat. If your vehicle is equipped
with adjustable rear head restraints, raise the
head restraint, and where possible, route the
tether strap under the head restraint and
between the two posts. If not possible, lower
the head restraint and pass the tether strap
around the outboard side of the head restraint.
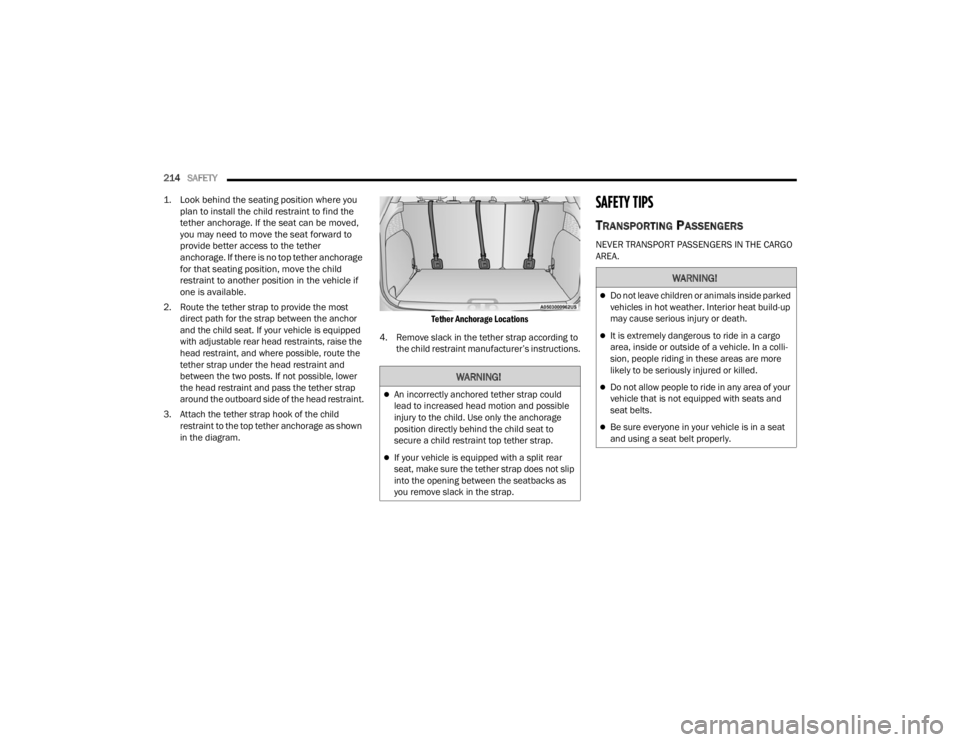
3. Attach the tether strap hook of the child restraint to the top tether anchorage as shown
in the diagram.
Tether Anchorage Locations
4. Remove slack in the tether strap according to the child restraint manufacturer’s instructions.
SAFETY TIPS
TRANSPORTING PASSENGERS
NEVER TRANSPORT PASSENGERS IN THE CARGO
AREA.
WARNING!
An incorrectly anchored tether strap could
lead to increased head motion and possible
injury to the child. Use only the anchorage
position directly behind the child seat to
secure a child restraint top tether strap.
If your vehicle is equipped with a split rear
seat, make sure the tether strap does not slip
into the opening between the seatbacks as
you remove slack in the strap.
WARNING!
Do not leave children or animals inside parked
vehicles in hot weather. Interior heat build-up
may cause serious injury or death.
It is extremely dangerous to ride in a cargo
area, inside or outside of a vehicle. In a colli -
sion, people riding in these areas are more
likely to be seriously injured or killed.
Do not allow people to ride in any area of your
vehicle that is not equipped with seats and
seat belts.
Be sure everyone in your vehicle is in a seat
and using a seat belt properly.
22_FD_OM_EN_USC_t.book Page 214
Page 260 of 312
258SERVICING AND MAINTENANCE
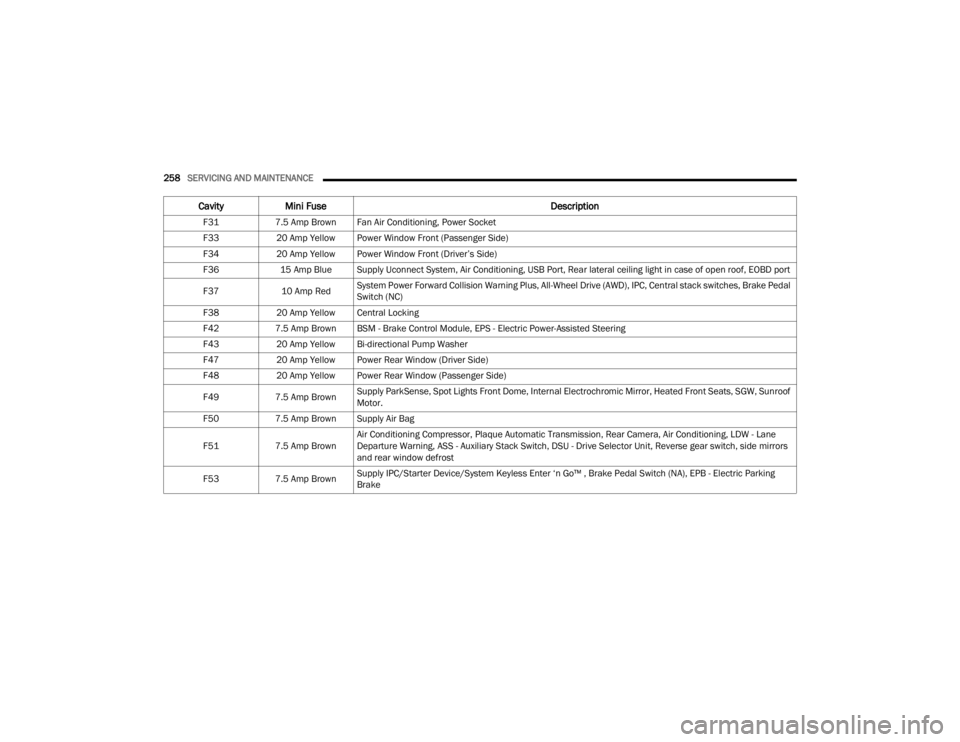
CavityMini Fuse Description
F317.5 Amp Brown Fan Air Conditioning, Power Socket
F33 20 Amp Yellow Power Window Front (Passenger Side)
F34 20 Amp Yellow Power Window Front (Driver’s Side)
F36 15 Amp Blue Supply Uconnect System, Air Conditioning, USB Port, Rear lateral ceiling light in case of open roof, EOBD port
F37 10 Amp RedSystem Power Forward Collision Warning Plus, All-Wheel Drive (AWD), IPC, Central stack switches, Brake Pedal
Switch (NC)
F38 20 Amp Yellow Central Locking
F42 7.5 Amp Brown BSM - Brake Control Module, EPS - Electric Power-Assisted Steering
F43 20 Amp Yellow Bi-directional Pump Washer
F47 20 Amp Yellow Power Rear Window (Driver Side)
F48 20 Amp Yellow Power Rear Window (Passenger Side)
F49 7.5 Amp Brown Supply ParkSense, Spot Lights Front Dome, Internal Electrochromic Mirror, Heated Front Seats, SGW, Sunroof
Motor.
F50 7.5 Amp Brown Supply Air Bag
F51 7.5 Amp Brown Air Conditioning Compressor, Plaque Automatic Transmission, Rear Camera, Air Conditioning, LDW - Lane
Departure Warning, ASS - Auxiliary Stack Switch, DSU - Drive Selector Unit, Reverse gear switch, side mirrors
and rear window defrost
F53 7.5 Amp Brown Supply IPC/Starter Device/System Keyless Enter ‘n Go™ , Brake Pedal Switch (NA), EPB - Electric Parking
Brake
22_FD_OM_EN_USC_t.book Page 258
Page 261 of 312
SERVICING AND MAINTENANCE259
Rear Cargo Fuse/Relay Distribution Unit
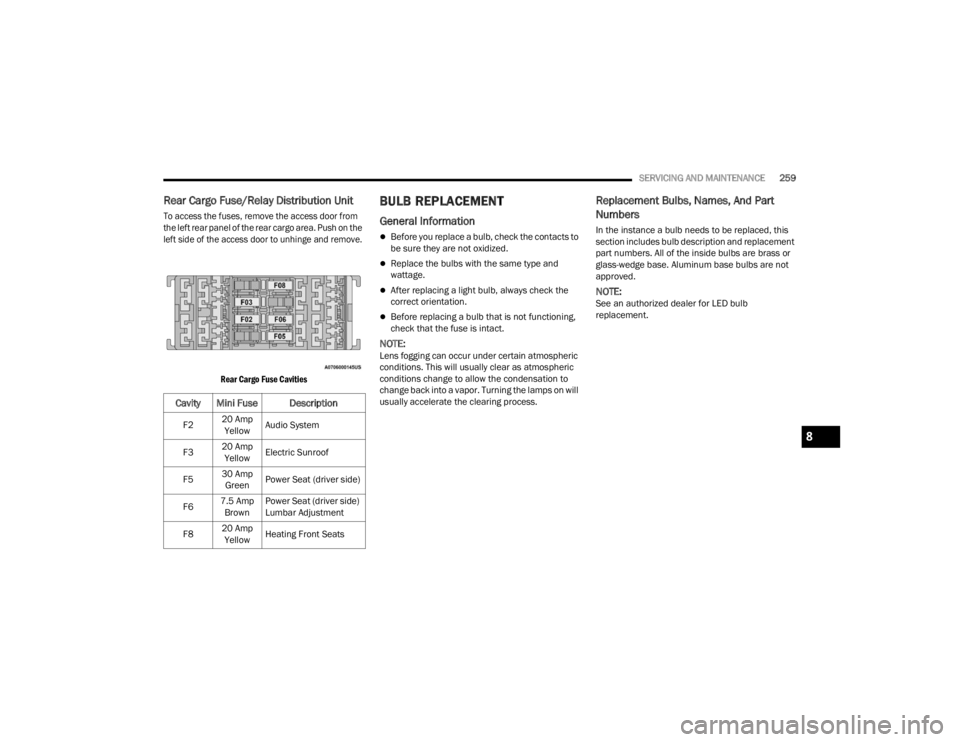
To access the fuses, remove the access door from
the left rear panel of the rear cargo area. Push on the
left side of the access door to unhinge and remove.
Rear Cargo Fuse Cavities
BU LB REPLACEMENT
General Information
Before you replace a bulb, check the contacts to
be sure they are not oxidized.
Replace the bulbs with the same type and
wattage.
After replacing a light bulb, always check the
correct orientation.
Before replacing a bulb that is not functioning,
check that the fuse is intact.
NOTE:Lens fogging can occur under certain atmospheric
conditions. This will usually clear as atmospheric
conditions change to allow the condensation to
change back into a vapor. Turning the lamps on will
usually accelerate the clearing process.
Replacement Bulbs, Names, And Part
Numbers
In the instance a bulb needs to be replaced, this
section includes bulb description and replacement
part numbers. All of the inside bulbs are brass or
glass-wedge base. Aluminum base bulbs are not
approved.
NOTE:See an authorized dealer for LED bulb
replacement.
Cavity Mini Fuse Description
F220 Amp
Yellow Audio System
F3 20 Amp
Yellow Electric Sunroof
F5 30 Amp
Green Power Seat (driver side)
F6 7.5 Amp
Brown Power Seat (driver side)
Lumbar Adjustment
F8 20 Amp
Yellow Heating Front Seats
8
22_FD_OM_EN_USC_t.book Page 259
Page 289 of 312
SERVICING AND MAINTENANCE287
Special Care
If you drive on salted or dusty roads or if you
drive near the ocean, hose off the undercarriage
at least once a month.
It is important that the drain holes in the lower
edges of the doors, rocker panels, and trunk be
kept clear and open.
If you detect any stone chips or scratches in the
paint, touch them up immediately.
If your vehicle is damaged due to a collision or
similar cause that destroys the paint and protec -
tive coating, have your vehicle repaired as soon
as possible.
If you carry special cargo such as chemicals,
fertilizers, de-icer salt, etc., be sure that such
materials are well packaged and sealed.
If a lot of driving is done on gravel roads,
consider mud or stone shields behind each
wheel.
Use Mopar® Touch Up Paint on scratches as
soon as possible. An authorized dealer has
touch up paint to match the color of your
vehicle.
INTERIORS
SEATS AND FABRIC PARTS
Use Mopar® Total Clean to clean fabric upholstery
and carpeting.
Seat Belt Maintenance
Do not bleach, dye or clean the belts with chemical
solvents or abrasive cleaners. This will weaken the
fabric.
If the belts need cleaning, use a mild soap solution
or lukewarm water. Do not remove the belts from
the vehicle to wash them. Dry with a soft cloth.
Sun damage can also weaken the fabric. Replace
the belts if they appear frayed or worn or if the
buckles do not work properly.
PLASTIC AND COATED PARTS
Use Mopar® Total Clean to clean vinyl upholstery.
CAUTION!
Do not use abrasive or strong cleaning mate -
rials such as steel wool or scouring powder
that will scratch metal and painted surfaces.
Use of power washers exceeding 1,200 psi
(8,274 kPa) can result in damage or removal
of paint and decals.
WARNING!
Do not use volatile solvents for cleaning
purposes. Many are potentially flammable, and
if used in closed areas they may cause
respiratory harm.
WARNING!
A frayed or torn seat belt could rip apart in a
collision and leave you with no protection.
Inspect the seat belt system periodically,
checking for cuts, frays, or loose parts.
Damaged parts must be replaced immediately.
Do not disassemble or modify the seat belt
system. If your vehicle is involved in a collision,
or if you have questions regarding seat belt or
retractor conditions, take your vehicle to an
authorized FCA dealer or authorized FCA
Certified Collision Care Program facility for
inspection.
CAUTION!
Direct contact of air fresheners, insect repel -
lents, suntan lotions, or hand sanitizers to the
plastic, painted, or decorated surfaces of the
interior may cause permanent damage. Wipe
away immediately.
Damage caused by these type of products
may not be covered by your New Vehicle
Limited Warranty.
8
22_FD_OM_EN_USC_t.book Page 287
Page 290 of 312
288SERVICING AND MAINTENANCE
Cleaning Plastic Instrument Cluster
Lenses
The lenses in front of the instruments in this
vehicle are molded in clear plastic. When cleaning
the lenses, care must be taken to avoid scratching
the plastic.
Clean with a wet soft cloth. A mild soap solution
may be used, but do not use high alcohol content
or abrasive cleaners. If soap is used, wipe clean
with a clean damp cloth. Dry with a soft cloth.
LEATHER SURFACES
Mopar® Total Clean is specifically recommended
for leather upholstery.
Your leather upholstery can be best preserved by
regular cleaning with a damp soft cloth. Small
particles of dirt can act as an abrasive and damage
the leather upholstery and should be removed
promptly with a damp cloth. Stubborn soils can be
removed easily with a soft cloth and Mopar® Total
Clean. Care should be taken to avoid soaking your
leather upholstery with any liquid. Please do not
use polishes, oils, cleaning fluids, solvents,
detergents, or ammonia-based cleaners to clean
your leather upholstery.
NOTE:If equipped with light colored leather, it tends to
show any foreign material, dirt, and fabric dye
transfer more so than darker colors. The leather is
designed for easy cleaning, and the manufacturer
recommends Mopar® total care leather cleaner
applied on a cloth to clean the leather seats as
needed.GLASS SURFACES
All glass surfaces should be cleaned on a regular
basis with Mopar® Glass Cleaner, or any
commercial household-type glass cleaner. Never
use an abrasive type cleaner. Use caution when
cleaning the inside rear window equipped with
electric defrosters or windows equipped with radio
antennas. Do not use scrapers or other sharp
instruments that may scratch the elements.
When cleaning the rear view mirror, spray cleaner
on the towel or cloth that you are using. Do not
spray cleaner directly on the mirror.
CAUTION!
Do not use Alcohol and Alcohol-based and/or
Ketone based cleaning products to clean leather
upholstery, as damage to the upholstery may
result.
22_FD_OM_EN_USC_t.book Page 288